SERVICE MANUAL for MODEL AirV Rooftop Air Conditioning Systems
SERVICE MANUAL for MODEL AirV Rooftop Air Conditioning Systems
SERVICE MANUAL for MODEL AirV Rooftop Air Conditioning Systems
- No tags were found...

Create successful ePaper yourself
Turn your PDF publications into a flip-book with our unique Google optimized e-Paper software.
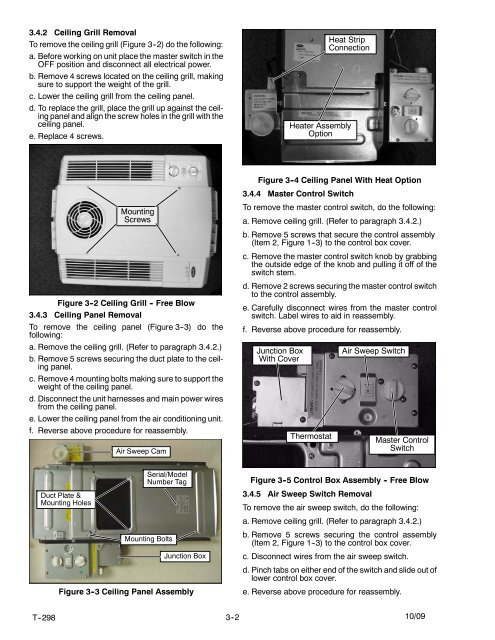
3.4.2 Ceiling Grill RemovalTo remove the ceiling grill (Figure 3--2) do the following:a. Be<strong>for</strong>e working on unit place the master switch in theOFF position and disconnect all electrical power.b. Remove 4 screws located on the ceiling grill, makingsure to support the weight of the grill.c. Lower the ceiling grill from the ceiling panel.d. To replace the grill, place the grill up against the ceilingpanel and align the screw holes in the grill with theceiling panel.e. Replace 4 screws.Heat StripConnectionHeater AssemblyOptionFigure 3 -4 Ceiling Panel With Heat Option3.4.4 Master Control SwitchMountingScrewsFigure 3 -2 Ceiling Grill - Free Blow3.4.3 Ceiling Panel RemovalTo remove the ceiling panel (Figure 3--3) do thefollowing:a. Remove the ceiling grill. (Refer to paragraph 3.4.2.)b. Remove 5 screws securing the duct plate to the ceilingpanel.c. Remove 4 mounting bolts making sure to support theweight of the ceiling panel.d. Disconnect the unit harnesses and main power wiresfrom the ceiling panel.e. Lower the ceiling panel from the air conditioning unit.f. Reverse above procedure <strong>for</strong> reassembly.<strong>Air</strong> Sweep CamTo remove the master control switch, do the following:a. Remove ceiling grill. (Refer to paragraph 3.4.2.)b. Remove 5 screws that secure the control assembly(Item 2, Figure 1--3) to the control box cover.c. Remove the master control switch knob by grabbingthe outside edge of the knob and pulling it off of theswitch stem.d. Remove 2 screws securing the master control switchto the control assembly.e. Carefully disconnect wires from the master controlswitch. Label wires to aid in reassembly.f. Reverse above procedure <strong>for</strong> reassembly.Junction BoxWith CoverThermostat<strong>Air</strong> Sweep SwitchMaster ControlSwitchDuct Plate &Mounting HolesSerial/ModelNumber TagMounting BoltsJunction BoxFigure 3 -3 Ceiling Panel AssemblyFigure 3 -5 Control Box Assembly - Free Blow3.4.5 <strong>Air</strong> Sweep Switch RemovalTo remove the air sweep switch, do the following:a. Remove ceiling grill. (Refer to paragraph 3.4.2.)b. Remove 5 screws securing the control assembly(Item 2, Figure 1--3) to the control box cover.c. Disconnect wires from the air sweep switch.d. Pinch tabs on either end of the switch and slide out oflower control box cover.e. Reverse above procedure <strong>for</strong> reassembly.T--298 3--2 10/09