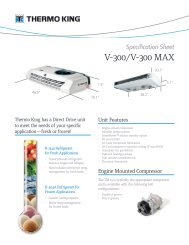
SERVICE MANUAL for MODEL AirV Rooftop Air Conditioning Systems
SERVICE MANUAL for MODEL AirV Rooftop Air Conditioning Systems
SERVICE MANUAL for MODEL AirV Rooftop Air Conditioning Systems
- No tags were found...

You also want an ePaper? Increase the reach of your titles
YUMPU automatically turns print PDFs into web optimized ePapers that Google loves.
115V AC12V DCPCB DisplayHolding ClipsFuse#1PCB MainUpper UnitConnectors#2FurnaceWires (blue)#4Figure 3 -12 Control Box Assembly - Ducted3.5.4 Main PCB Board RemovalTo remove the Main PCB board (Figure 3--13) do thefollowing:a. Remove ceiling grill. Refer to paragraph 3.5.2.b. Remove three screws securing the PCB cover to theducted ceiling unit.c. Carefully turn over the PCB cover exposing the PCBmain and the PCB display assemblies.d. Gently push holding clip away from PCB main assembly.e. Lift PCB main assembly from PCB cover assembly.f. Unplug display wiring plug #4. Figure 3--13g. Unplug thermistor/thermostat wiring plug #3.Figure 3--13h. Unplug power wiring plug #1. Figure 3--12i. Unplug signal wiring plug #2. Figure 3--12j. Reverse above procedures <strong>for</strong> reassembly.Figure 3 -13 Main/Display PCB’s3.5.5 PCB Display RemovalTo remove the PCB display assembly (Figure 3--13) dothe following.a. Remove ceiling grill. Refer to paragraph 3.5.2.b. Push large clip away from PCB display assembly.c. Push center clip towards large clip.d. Pull PCB display assembly from PCB cover.e. Unplug display wiring from PCB main assembly.f. Reverse above procedures of reassembly.3.5.6 Fuse RemovalTo remove the fuse (Figure 3--11) do the following:a. Remove ceiling grill. Refer to paragraph 3.5.2.b. Turn fuse holder in direction of arrow (counter-- clock--wise).c. Pull fuse from fuse holder.d. Test and/or replace.e. Reverse above procedures <strong>for</strong> reassembly.#310/093--5T--298