

QUILTsocial | Issue 07
I'm so excited to share this issue with you, within it there are treasures of quilting know-how that will help you improve your quilting skills. One of my challenges is sewing Y seams, and who doesn't struggle with these at first? Follow the instructions and you'll be well on your way to achieving perfect results. Other essential skills you'll want to hone are achieving perfect points every time using easy foundation piecing, 2 ways to machine quilt a binding, improving your 5 quilt label essentials and the 7 critical questions to ask yourself before quilting your quilt. Plus...expand your creativity using Northcott ColorWorks Concepts fabric, using bright and colorful patterns that engage your quilting senses! Enjoy the patterns in this issue, and Happy Quilting!
I'm so excited to share this issue with you, within it there are treasures of quilting know-how that will help you improve your quilting skills. One of my challenges is sewing Y seams, and who doesn't struggle with these at first? Follow the instructions and you'll be well on your way to achieving perfect results. Other essential skills you'll want to hone are achieving perfect points every time using easy foundation piecing, 2 ways to machine quilt a binding, improving your 5 quilt label essentials and the 7 critical questions to ask yourself before quilting your quilt. Plus...expand your creativity using Northcott ColorWorks Concepts fabric, using bright and colorful patterns that engage your quilting senses! Enjoy the patterns in this issue, and Happy Quilting!

You also want an ePaper? Increase the reach of your titles
YUMPU automatically turns print PDFs into web optimized ePapers that Google loves.
5. Hoop the linen fabric and place the<br />
felt piece on top. The felt is visible<br />
as the embroidery design is felting.<br />
Essentially the felting needle will<br />
push the felt through the linen and<br />
the felted design is occurring on the<br />
underside facing your sewing table.<br />
See the design by removing the<br />
hoop from the machine and turning<br />
the hoop over.<br />
6. There are other ideas that can be<br />
incorporated into these felted pieces.<br />
Wool Roving can be used with or<br />
without the craft felt. It’s always a<br />
great idea to use a water soluble<br />
stabilizer on top of the roving to keep<br />
it in place.<br />
7. Also remember that when working<br />
with felting a great way to remove<br />
the excess felt after the embroidery<br />
is complete is with appliqué scissors.<br />
These allow to get in close to<br />
the roving or felt without cutting<br />
through the main piece, which in<br />
this case is the linen. You can go<br />
through the embroidery felting<br />
process more than once, if you<br />
prefer thicker looking designs.<br />
8. Quilting embroidery designs look<br />
beautiful. And can be repeatedly<br />
felted for a more pronounced<br />
finish. If you felt a hat for example<br />
and two pieces of polar fleece are<br />
felted together, use an invisible<br />
stitch outline around the design if<br />
you use invisible thread. Each style<br />
of project will dictate whether it’s<br />
necessary to do this. Most single<br />
layer of felted embroideries don’t<br />
require this extra stitching.<br />
9. Cut each of the felted embroidery<br />
pieces to desired size and press.<br />
Circular motion stitching using machine<br />
embroidery<br />
1. Select embroidery mode. Select<br />
a decorative stitch in the stitch<br />
menu. This could include quilting,<br />
fun, vintage or a multitude of<br />
other stitches.<br />
2. Choose a hoop size to work with.<br />
Include stabilizer in your hoop and<br />
linen fabric. Select a stitch, and select<br />
the shaping feature, shaping will allow<br />
you to place the stitches in many<br />
shapes. Circular shape was selected<br />
for this technique. Duplicate the<br />
stitch to accommodate the desired<br />
shape size and this will fill in the circle.<br />
Repeat these steps selecting another<br />
decorative stitch. Adjust the next circle<br />
size to correspond to the previous<br />
circle but a bit smaller. Repeat for<br />
each circle that will be larger than the<br />
previous circle.<br />
3. Bring decorative stitches into<br />
embroidery mode. Proceed to<br />
embroider the circles. When this is<br />
complete remove excess stabilizer. Cut<br />
this block to desired size.<br />
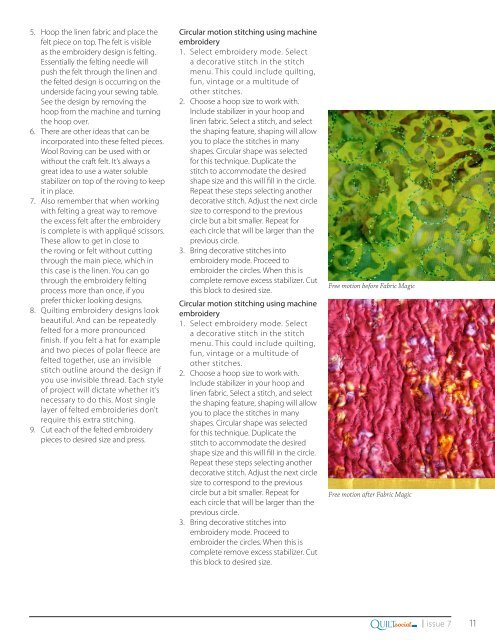
Free motion before Fabric Magic<br />
Free motion after Fabric Magic<br />
Q<br />
.com<br />
UILTsocial<br />
| issue 7 11


