

QUILTsocial | Issue 07
I'm so excited to share this issue with you, within it there are treasures of quilting know-how that will help you improve your quilting skills. One of my challenges is sewing Y seams, and who doesn't struggle with these at first? Follow the instructions and you'll be well on your way to achieving perfect results. Other essential skills you'll want to hone are achieving perfect points every time using easy foundation piecing, 2 ways to machine quilt a binding, improving your 5 quilt label essentials and the 7 critical questions to ask yourself before quilting your quilt. Plus...expand your creativity using Northcott ColorWorks Concepts fabric, using bright and colorful patterns that engage your quilting senses! Enjoy the patterns in this issue, and Happy Quilting!
I'm so excited to share this issue with you, within it there are treasures of quilting know-how that will help you improve your quilting skills. One of my challenges is sewing Y seams, and who doesn't struggle with these at first? Follow the instructions and you'll be well on your way to achieving perfect results. Other essential skills you'll want to hone are achieving perfect points every time using easy foundation piecing, 2 ways to machine quilt a binding, improving your 5 quilt label essentials and the 7 critical questions to ask yourself before quilting your quilt. Plus...expand your creativity using Northcott ColorWorks Concepts fabric, using bright and colorful patterns that engage your quilting senses! Enjoy the patterns in this issue, and Happy Quilting!

Create successful ePaper yourself
Turn your PDF publications into a flip-book with our unique Google optimized e-Paper software.
Depending on how I'm piecing the<br />
backing, I'll only remove ONE selvage<br />
from this first piece as the second<br />
selvage will be along the outside of the<br />
quilt backing.<br />
Then I must remove one selvage from<br />
the second piece of backing and I<br />
usually remove the opposite selvage<br />
from the first one I removed. So if I<br />
removed the selvage with the writing on<br />
the first piece, then I remove the selvage<br />
without the writing on the second piece.<br />
If there's any kind of nap or direction to the<br />
print, you will now have them going in the<br />
same direction when they're sewn together.<br />
Many people don't realize that the<br />
selvages are there for manufacturing<br />
purposes only. The weave on those<br />
selvages is quite a bit tighter and it<br />
doesn't sew or wash the same as the rest<br />
of the fabric. It's best to remove it.<br />
Next up is to put the Interchangeable<br />
Dual Feed Foot on the Sapphire 960Q.<br />
It's easy to put the Dual Feed Foot on,<br />
but I do need my screwdriver as I have<br />
to remove the presser foot ankle. Since<br />
I'm organized and I know where the<br />
screwdriver and the Dual Feed Foot is,<br />
this is an easy task.<br />
TIP Make sure that the U-Shaped arm on<br />
the Dual Feed Foot is around the needle<br />
clamp (the screw that holds the needle<br />
in place). If the U-Shaped arm isn't<br />
properly fitted, you'll have a mess.<br />
Line up the two quilt backing pieces so<br />
the two edges you're sewing together<br />
are the ones that you removed the<br />
selvedges from. I like to sew the quilt<br />
backing with a very generous seam and<br />
I can use the guide on the stitch plate to<br />
keep the seam even.<br />
Is there a reason for making an extra<br />
wide seam? I'm not sure – it's just habit.<br />
And by the way, I press that seam to one<br />
side rather than open. I usually press all<br />
my seams to one side on the top, so why<br />
not on the back as well.<br />
I'm a creature of habit, I like consistency<br />
in what I do. Then I don't have to think as<br />
I'm working. My hands automatically do<br />
the same thing and that makes me happy!<br />
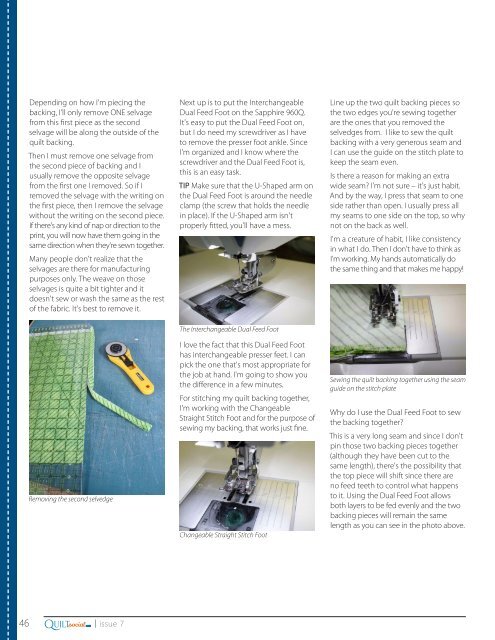
Removing the second selvedge<br />
The Interchangeable Dual Feed Foot<br />
I love the fact that this Dual Feed Foot<br />
has interchangeable presser feet. I can<br />
pick the one that's most appropriate for<br />
the job at hand. I'm going to show you<br />
the difference in a few minutes.<br />
For stitching my quilt backing together,<br />
I'm working with the Changeable<br />
Straight Stitch Foot and for the purpose of<br />
sewing my backing, that works just fine.<br />
Changeable Straight Stitch Foot<br />
Sewing the quilt backing together using the seam<br />
guide on the stitch plate<br />
Why do I use the Dual Feed Foot to sew<br />
the backing together?<br />
This is a very long seam and since I don't<br />
pin those two backing pieces together<br />
(although they have been cut to the<br />
same length), there's the possibility that<br />
the top piece will shift since there are<br />
no feed teeth to control what happens<br />
to it. Using the Dual Feed Foot allows<br />
both layers to be fed evenly and the two<br />
backing pieces will remain the same<br />
length as you can see in the photo above.<br />
Q<br />
46 .com | issue 7<br />
UILTsocial


