

QUILTsocial | Issue 07
I'm so excited to share this issue with you, within it there are treasures of quilting know-how that will help you improve your quilting skills. One of my challenges is sewing Y seams, and who doesn't struggle with these at first? Follow the instructions and you'll be well on your way to achieving perfect results. Other essential skills you'll want to hone are achieving perfect points every time using easy foundation piecing, 2 ways to machine quilt a binding, improving your 5 quilt label essentials and the 7 critical questions to ask yourself before quilting your quilt. Plus...expand your creativity using Northcott ColorWorks Concepts fabric, using bright and colorful patterns that engage your quilting senses! Enjoy the patterns in this issue, and Happy Quilting!
I'm so excited to share this issue with you, within it there are treasures of quilting know-how that will help you improve your quilting skills. One of my challenges is sewing Y seams, and who doesn't struggle with these at first? Follow the instructions and you'll be well on your way to achieving perfect results. Other essential skills you'll want to hone are achieving perfect points every time using easy foundation piecing, 2 ways to machine quilt a binding, improving your 5 quilt label essentials and the 7 critical questions to ask yourself before quilting your quilt. Plus...expand your creativity using Northcott ColorWorks Concepts fabric, using bright and colorful patterns that engage your quilting senses! Enjoy the patterns in this issue, and Happy Quilting!

Create successful ePaper yourself
Turn your PDF publications into a flip-book with our unique Google optimized e-Paper software.
Vintage stitching<br />
Textured pieces next to strip colours<br />
3. Once you have decided what works well, prepare to pin each<br />
of the technique blocks right sides together, and join them<br />
to each other until you have a very long strip. The letters A to<br />
J in the schematic of blocks is simply a guide. You can create<br />
whatever you love. Some of your techniques may vary from<br />
ours, just remember to have fun. It’s all about the learning.<br />
4. Press your seams to one side on each panel.<br />
5. When complete fold the strip of creative blocks in half, right<br />
sides together. Stitch the last block on each of this runner<br />
strip short seams together. Leave an opening of about 4” in<br />
the seam. This is going to be used later to turn the runner<br />
right side out.<br />
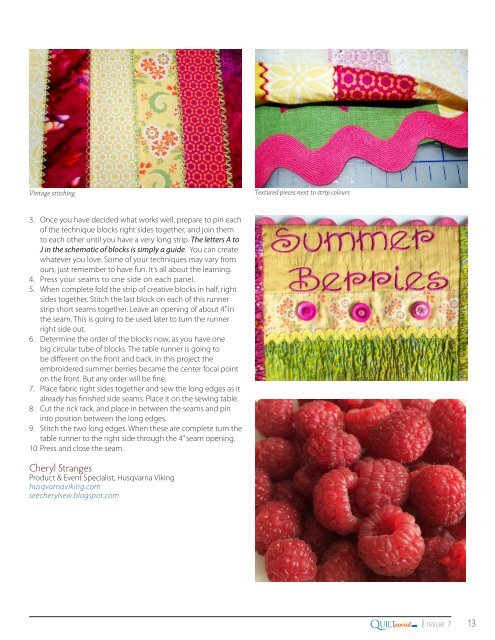
6. Determine the order of the blocks now, as you have one<br />
big circular tube of blocks. The table runner is going to<br />
be different on the front and back. In this project the<br />
embroidered summer berries became the center focal point<br />
on the front. But any order will be fine.<br />
7. Place fabric right sides together and sew the long edges as it<br />
already has finished side seams. Place it on the sewing table.<br />
8. Cut the rick rack, and place in between the seams and pin<br />
into position between the long edges.<br />
9. Stitch the two long edges. When these are complete turn the<br />
table runner to the right side through the 4” seam opening.<br />
10. Press and close the seam.<br />
Cheryl Stranges<br />
Product & Event Specialist, Husqvarna Viking<br />
husqvarnaviking.com<br />
seecherylsew.blogspot.com<br />
Q<br />
.com<br />
UILTsocial<br />
| issue 7 13


