DNS-320 User Manual - D-Link
DNS-320 User Manual - D-Link
DNS-320 User Manual - D-Link

You also want an ePaper? Increase the reach of your titles
YUMPU automatically turns print PDFs into web optimized ePapers that Google loves.
D-<strong>Link</strong> ShareCenter Pulse <strong>User</strong> <strong>Manual</strong><br />
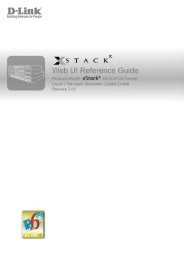
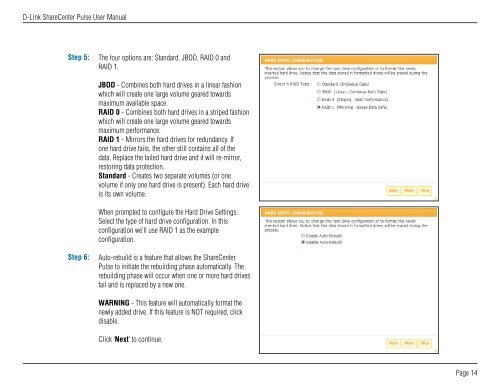
Step 5:<br />
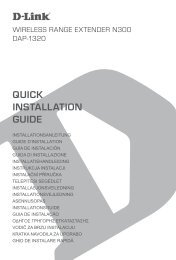
Step 6:<br />
The four options are: Standard, JBOD, RAID 0 and<br />
RAID 1.<br />
JBOD - Combines both hard drives in a linear fashion<br />
which will create one large volume geared towards<br />
maximum available space.<br />
RAID 0 - Combines both hard drives in a striped fashion<br />
which will create one large volume geared towards<br />
maximum performance.<br />
RAID 1 - Mirrors the hard drives for redundancy. If<br />
one hard drive fails, the other still contains all of the<br />
data. Replace the failed hard drive and it will re-mirror,<br />
restoring data protection.<br />
Standard - Creates two separate volumes (or one<br />
volume if only one hard drive is present). Each hard drive<br />
is its own volume.<br />
When prompted to configure the Hard Drive Settings:<br />
Select the type of hard drive configuration. In this<br />
configuration we’ll use RAID 1 as the example<br />
configuration.<br />
Auto-rebuild is a feature that allows the ShareCenter<br />
Pulse to initiate the rebuilding phase automatically. The<br />
rebuilding phase will occur when one or more hard drives<br />
fail and is replaced by a new one.<br />
WARNING - This feature will automatically format the<br />
newly added drive. If this feature is NOT required, click<br />
disable.<br />
Click ‘Next’ to continue.<br />
Page 14