Sony XAV-W1 Car Radio OWNER'S MANUAL Operating Instructions ...
Sony XAV-W1 Car Radio OWNER'S MANUAL Operating Instructions ...
Sony XAV-W1 Car Radio OWNER'S MANUAL Operating Instructions ...

Erfolgreiche ePaper selbst erstellen
Machen Sie aus Ihren PDF Publikationen ein blätterbares Flipbook mit unserer einzigartigen Google optimierten e-Paper Software.
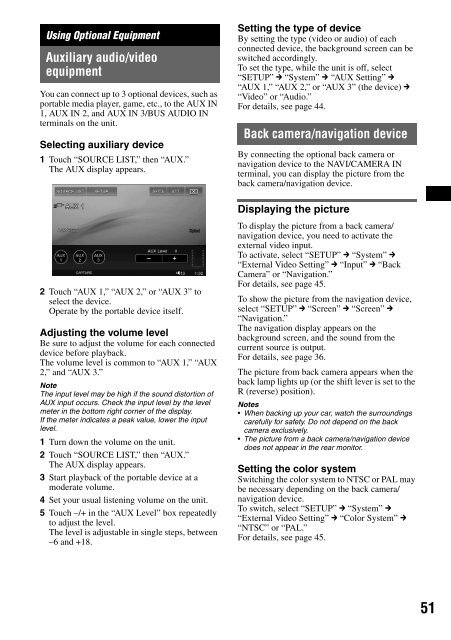
Using Optional Equipment<br />
Auxiliary audio/video<br />
equipment<br />
You can connect up to 3 optional devices, such as<br />
portable media player, game, etc., to the AUX IN<br />
1, AUX IN 2, and AUX IN 3/BUS AUDIO IN<br />
terminals on the unit.<br />
Selecting auxiliary device<br />
1 Touch “SOURCE LIST,” then “AUX.”<br />
The AUX display appears.<br />
2 Touch “AUX 1,” “AUX 2,” or “AUX 3” to<br />
select the device.<br />
Operate by the portable device itself.<br />
Adjusting the volume level<br />
Be sure to adjust the volume for each connected<br />
device before playback.<br />
The volume level is common to “AUX 1,” “AUX<br />
2,” and “AUX 3.”<br />
Note<br />
The input level may be high if the sound distortion of<br />
AUX input occurs. Check the input level by the level<br />
meter in the bottom right corner of the display.<br />
If the meter indicates a peak value, lower the input<br />
level.<br />
1 Turn down the volume on the unit.<br />
2 Touch “SOURCE LIST,” then “AUX.”<br />
The AUX display appears.<br />
3 Start playback of the portable device at a<br />
moderate volume.<br />
4 Set your usual listening volume on the unit.<br />
5 Touch –/+ in the “AUX Level” box repeatedly<br />
to adjust the level.<br />
The level is adjustable in single steps, between<br />
–6 and +18.<br />
Setting the type of device<br />
By setting the type (video or audio) of each<br />
connected device, the background screen can be<br />
switched accordingly.<br />
To set the type, while the unit is off, select<br />
“SETUP” c “System” c “AUX Setting” c<br />
“AUX 1,” “AUX 2,” or “AUX 3” (the device) c<br />
“Video” or “Audio.”<br />
For details, see page 44.<br />
Back camera/navigation device<br />
By connecting the optional back camera or<br />
navigation device to the NAVI/CAMERA IN<br />
terminal, you can display the picture from the<br />
back camera/navigation device.<br />
Displaying the picture<br />
To display the picture from a back camera/<br />
navigation device, you need to activate the<br />
external video input.<br />
To activate, select “SETUP” c “System” c<br />
“External Video Setting” c “Input” c “Back<br />
Camera” or “Navigation.”<br />
For details, see page 45.<br />
To show the picture from the navigation device,<br />
select “SETUP” c “Screen” c “Screen” c<br />
“Navigation.”<br />
The navigation display appears on the<br />
background screen, and the sound from the<br />
current source is output.<br />
For details, see page 36.<br />
The picture from back camera appears when the<br />
back lamp lights up (or the shift lever is set to the<br />
R (reverse) position).<br />
Notes<br />
When backing up your car, watch the surroundings<br />
carefully for safety. Do not depend on the back<br />
camera exclusively.<br />
The picture from a back camera/navigation device<br />
does not appear in the rear monitor.<br />
Setting the color system<br />
Switching the color system to NTSC or PAL may<br />
be necessary depending on the back camera/<br />
navigation device.<br />
To switch, select “SETUP” c “System” c<br />
“External Video Setting” c “Color System” c<br />
“NTSC” or “PAL.”<br />
For details, see page 45.<br />
51