Installation Manual - CertainTeed
Installation Manual - CertainTeed
Installation Manual - CertainTeed

Create successful ePaper yourself
Turn your PDF publications into a flip-book with our unique Google optimized e-Paper software.
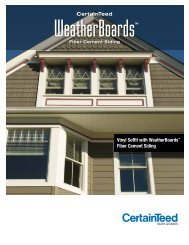
<strong>CertainTeed</strong> WeatherBoards Fiber Cement Siding <strong>Installation</strong> <strong>Manual</strong><br />
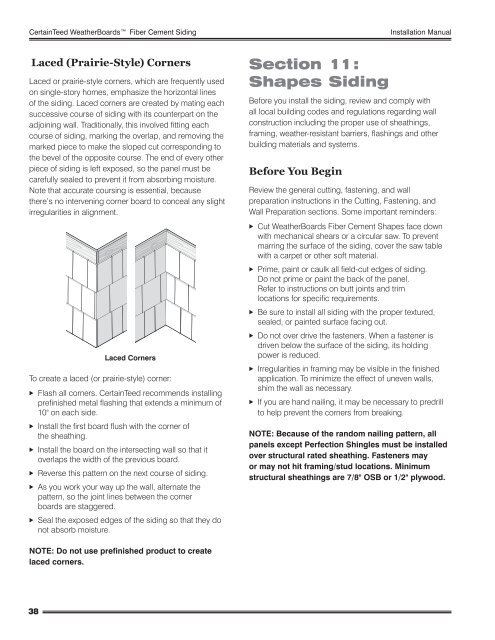
Laced (Prairie-Style) Corners<br />
Laced or prairie-style corners, which are frequently used<br />
on single-story homes, emphasize the horizontal lines<br />
of the siding. Laced corners are created by mating each<br />
successive course of siding with its counterpart on the<br />
adjoining wall. Traditionally, this involved fitting each<br />
course of siding, marking the overlap, and removing the<br />
marked piece to make the sloped cut corresponding to<br />
the bevel of the opposite course. The end of every other<br />
piece of siding is left exposed, so the panel must be<br />
carefully sealed to prevent it from absorbing moisture.<br />
Note that accurate coursing is essential, because<br />
there’s no intervening corner board to conceal any slight<br />
irregularities in alignment.<br />
38<br />
Laced Corners<br />
To create a laced (or prairie-style) corner:<br />
XXFlash all corners. <strong>CertainTeed</strong> recommends installing<br />
prefinished metal flashing that extends a minimum of<br />
10" on each side.<br />
XXInstall the first board flush with the corner of<br />
the sheathing.<br />
XXInstall the board on the intersecting wall so that it<br />
overlaps the width of the previous board.<br />
XXReverse this pattern on the next course of siding.<br />
XXAs you work your way up the wall, alternate the<br />
pattern, so the joint lines between the corner<br />
boards are staggered.<br />
XXSeal the exposed edges of the siding so that they do<br />
not absorb moisture.<br />
NOTE: Do not use prefinished product to create<br />
laced corners.<br />
Section 11 :<br />
Shapes Siding<br />
Before you install the siding, review and comply with<br />
all local building codes and regulations regarding wall<br />
construction including the proper use of sheathings,<br />
framing, weather-resistant barriers, flashings and other<br />
building materials and systems.<br />
Before You Begin<br />
Review the general cutting, fastening, and wall<br />
preparation instructions in the Cutting, Fastening, and<br />
Wall Preparation sections. Some important reminders:<br />
XXCut WeatherBoards Fiber Cement Shapes face down<br />
with mechanical shears or a circular saw. To prevent<br />
marring the surface of the siding, cover the saw table<br />
with a carpet or other soft material.<br />
XXPrime, paint or caulk all field-cut edges of siding.<br />
Do not prime or paint the back of the panel.<br />
Refer to instructions on butt joints and trim<br />
locations for specific requirements.<br />
XXBe sure to install all siding with the proper textured,<br />
sealed, or painted surface facing out.<br />
XXDo not over drive the fasteners. When a fastener is<br />
driven below the surface of the siding, its holding<br />
power is reduced.<br />
XXIrregularities in framing may be visible in the finished<br />
application. To minimize the effect of uneven walls,<br />
shim the wall as necessary.<br />
XXIf you are hand nailing, it may be necessary to predrill<br />
to help prevent the corners from breaking.<br />
NOTE: Because of the random nailing pattern, all<br />
panels except Perfection Shingles must be installed<br />
over structural rated sheathing. Fasteners may<br />
or may not hit framing/stud locations. Minimum<br />
structural sheathings are 7/8" OSB or 1/2" plywood.