

Trre OnIGINAL HONAE WOOOWORKING RruN ... - Wood Tools
Trre OnIGINAL HONAE WOOOWORKING RruN ... - Wood Tools
Trre OnIGINAL HONAE WOOOWORKING RruN ... - Wood Tools

Create successful ePaper yourself
Turn your PDF publications into a flip-book with our unique Google optimized e-Paper software.
I lsefting Fence Posts<br />
3nr<br />
d<br />
Setting posts is one of those jobs where it really<br />
pays to do it right the first time. It's not a com-<br />
plex process, but a few common mistakes can<br />
result in premature post failure and a heap of<br />
extra work. Whether it's a single post for a<br />
mailbox, or a dozen to hold up a long stretch of<br />
fence, follow these simple steps and<br />
you'll set posts that will still be stand-<br />
ing straight and tall years from now.<br />
CAN YOU DIG IT?<br />
Probably the single biggest mistake<br />
people nrake when setting posts is<br />
not sinking them deep enough. If<br />
you don't go below the frost line,<br />
seasonal movement of the soil due to<br />
the freezelthaw cycle can literally<br />
push your posts out ofthe ground.<br />
By going below the frost line,<br />
you ensure that frost won't form<br />
under the end of the post where it<br />
can push the post upward.Typically,<br />
you slrould go down at least 24",but<br />
check with the local building<br />
inspector to find out the proper<br />
depth in your area. Going deeper<br />
also provides greater lateral support<br />
so your posts won't lean under pres-<br />
sure from the wind or other forces.<br />
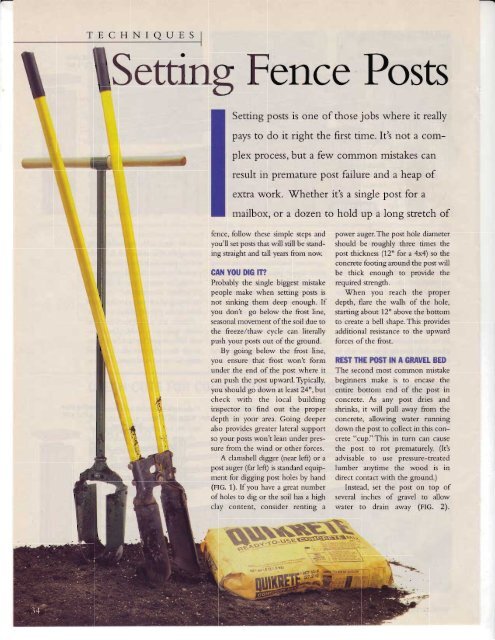
A clamshell digger (near left) or a<br />
post auger (far left) is standard equip-<br />
ment for digging post holes by hand<br />
(FIG. 1). If you have a great number<br />
of holes to dig or the soil has a high<br />
clay content. consider renting a<br />
\$_ bq !e \2t ? \s\<br />
- a;-.'<br />
power auger.The post hole diameter<br />
should be roughly three times the<br />
post thickness (72" for a 4x4) so the<br />
concrete footing around the post will<br />
be thick enough to provide the<br />
required strength.<br />
When you reach the proper<br />
depth, flare the walls of the hole,<br />
starting about 12" above the bottom<br />
to create a bell shape. This provides<br />
additional resistance to the uoward<br />
forces of the frost.<br />
REST THE FOST IN A GRAVET BED<br />
The second most common mistake<br />
beginners make is to encase the<br />
entire bottom end of the post in<br />
concrete. As any post dries and<br />
shrinks, it will pull away from the<br />
concrete, allowing water running<br />
down the post to collect in this concrete<br />
"cup." This in turn can cause<br />
the post to rot prematurely. (lt's<br />
advisable to use pressure-treated<br />
lumber anytime the wood is in<br />
direct contact with the ground.)<br />
Instead, set the post on top of<br />
several inches of gravel to allow<br />
water to drain away (rIG.2).


![Til]tl](https://img.yumpu.com/45878240/1/190x245/tiltl.jpg?quality=85)


