21 TRV Fireplace - Lopi
21 TRV Fireplace - Lopi
21 TRV Fireplace - Lopi

You also want an ePaper? Increase the reach of your titles
YUMPU automatically turns print PDFs into web optimized ePapers that Google loves.
12 Installation (for qualified installers only)<br />
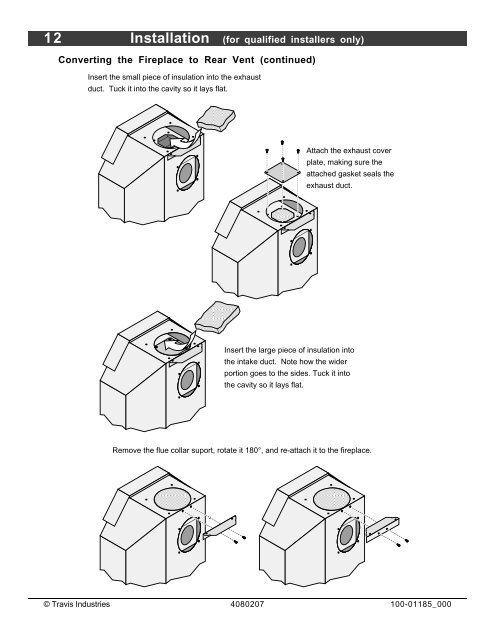
Converting the <strong>Fireplace</strong> to Rear Vent (continued)<br />
Insert the small piece of insulation into the exhaust<br />
duct. Tuck it into the cavity so it lays flat.<br />
<br />
<br />
<br />
<br />
<br />
<br />
<br />
<br />
<br />
<br />
<br />
Attach the exhaust cover<br />
plate, making sure the<br />
attached gasket seals the<br />
exhaust duct.<br />
Insert the large piece of insulation into<br />
the intake duct. Note how the wider<br />
portion goes to the sides. Tuck it into<br />
the cavity so it lays flat.<br />
Remove the flue collar suport, rotate it 180°, and re-attach it to the fireplace.<br />
<br />
<br />
<br />
<br />
<br />
<br />
© Travis Industries 4080207 100-01185_000