![[10] TEST COMMAND, TROUBLE CODES - OlsonBros](https://img.yumpu.com/18824764/26/500x640/10-test-command-trouble-codes-olsonbros.jpg)
[10] TEST COMMAND, TROUBLE CODES - OlsonBros
[10] TEST COMMAND, TROUBLE CODES - OlsonBros
[10] TEST COMMAND, TROUBLE CODES - OlsonBros

You also want an ePaper? Increase the reach of your titles
YUMPU automatically turns print PDFs into web optimized ePapers that Google loves.
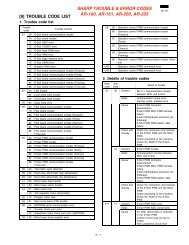
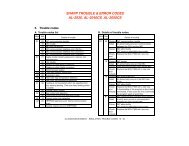
Main Sub<br />
code code<br />
50 01 Lead edge image position<br />
(LEAD EDGE)<br />
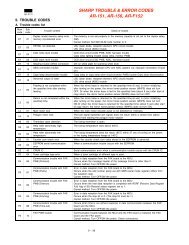
Contents Details of function/operation<br />
[Function]<br />
Used to adjust the copy image position and the lead edge void amount on copy paper. The adjustment<br />
is made by adjusting the image scan start position at <strong>10</strong>0% and the print start position (resist<br />
roller ON timing). When this test command is executed, the current set value is displayed in 2 digits.<br />
(Center value: 50)<br />
When [←/→] key is pressed, the setting mode and the display are changed.<br />
Enter the adjustment value and press [START] key to save the set value and make a copy.<br />
When the adjustment is made by the main cassette paper feed, the adjustment values of all the paper<br />
feed ports become the same. (When the set value is increased by 1, shift is made by 0.1mm.)<br />
Mode Display item Default LED<br />
Print start position (Main cassette TRAY1 50 COPY mode lamp<br />
paper feed)<br />
Main cassette lamp<br />
(*) Print start position (2nd<br />
TRAY2 50 COPY mode lamp<br />
cassette paper feed)<br />
2nd cassette lamp<br />
Print start position (Manual paper MFT 50 COPY mode lamp<br />
feed)<br />
Manual feed lamp<br />
Image lead edge void amount DEN-A 50 PRINT mode lamp<br />
Image scan start position RRC-A 50 SCAN mode lamp<br />
Image rear edge void amount DEN-B 50 COPY mode lamp<br />
PRINT mode lamp<br />
SCAN mode lamp<br />
(*): Support for the installation models. For non-installation models, skip.<br />
[Adjustment procedure]<br />
1) Set the print start position (A: COPY mode lamp ON), the lead edge void amount (B: PRINT mode<br />
lamp ON), the scan start position (C: SCAN mode lamp) to zero, and make a copy of the scale at<br />
<strong>10</strong>0%.<br />
2) Measure the image loss (Rmm) of the scale.<br />
Set C = <strong>10</strong> x R (mm). (Example: Set to 40.)<br />
When the value of C is increased by <strong>10</strong>, the image loss is decreased by 1mm. (Default: 50)<br />
3) Measure the distance (Hmm) from the paper lead edge to the image print start position.<br />
Set A = <strong>10</strong> x H (mm). (Example: Set to 50.)<br />
When the value of A is increased by <strong>10</strong>, the image lead edge is moved to the paper lead edge by<br />
1mm. (Default: 50).<br />
4) Set the lead edge void amount to B = 50 (2.5mm). (Default: 50)<br />
When the value of B is increased by <strong>10</strong>, the void is extended by about 0.1mm. (For 25 or less,<br />
however, the void amount is regarded as 0.)<br />
∗ The SFP adjustment is made by adjusting the SPF image scan start position after OC adjustment.<br />
∗ When paper is discharged, the shifter is operated.<br />
(Example)<br />
5mm<br />
<strong>10</strong>mm<br />
[Operation]<br />
The operation is similar to test command 46-01.<br />
Distance from the paper lead edge<br />
to the image lead edge, H = 5mm<br />
AR-168S/168D <strong>TEST</strong> <strong>COMMAND</strong>, <strong>TROUBLE</strong> <strong>CODES</strong> <strong>10</strong> - 26<br />
Image loss, R = 4mm