KODAK ESP 5200 Series All-in-One Printer - Maplin Electronics
KODAK ESP 5200 Series All-in-One Printer - Maplin Electronics
KODAK ESP 5200 Series All-in-One Printer - Maplin Electronics
Create successful ePaper yourself
Turn your PDF publications into a flip-book with our unique Google optimized e-Paper software.
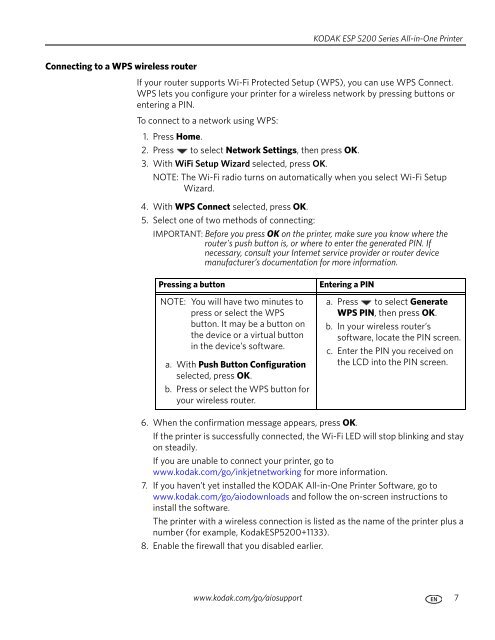
Connect<strong>in</strong>g to a WPS wireless router<br />
<strong>KODAK</strong> <strong>ESP</strong> <strong>5200</strong> <strong>Series</strong> <strong>All</strong>-<strong>in</strong>-<strong>One</strong> Pr<strong>in</strong>ter<br />
If your router supports Wi-Fi Protected Setup (WPS), you can use WPS Connect.<br />
WPS lets you configure your pr<strong>in</strong>ter for a wireless network by press<strong>in</strong>g buttons or<br />
enter<strong>in</strong>g a PIN.<br />
To connect to a network us<strong>in</strong>g WPS:<br />
1. Press Home.<br />
2. Press to select Network Sett<strong>in</strong>gs, then press OK.<br />
3. With WiFi Setup Wizard selected, press OK.<br />
NOTE: The Wi-Fi radio turns on automatically when you select Wi-Fi Setup<br />
Wizard.<br />
4. With WPS Connect selected, press OK.<br />
5. Select one of two methods of connect<strong>in</strong>g:<br />
IMPORTANT: Before you press OK on the pr<strong>in</strong>ter, make sure you know where the<br />
router's push button is, or where to enter the generated PIN. If<br />
necessary, consult your Internet service provider or router device<br />
manufacturer’s documentation for more <strong>in</strong>formation.<br />
Press<strong>in</strong>g a button Enter<strong>in</strong>g a PIN<br />
NOTE: You will have two m<strong>in</strong>utes to<br />
press or select the WPS<br />
button. It may be a button on<br />
the device or a virtual button<br />
<strong>in</strong> the device’s software.<br />
a. With Push Button Configuration<br />
selected, press OK.<br />
b. Press or select the WPS button for<br />
your wireless router.<br />
a. Press to select Generate<br />
WPS PIN, then press OK.<br />
b. In your wireless router’s<br />
software, locate the PIN screen.<br />
c. Enter the PIN you received on<br />
the LCD <strong>in</strong>to the PIN screen.<br />
6. When the confirmation message appears, press OK.<br />
If the pr<strong>in</strong>ter is successfully connected, the Wi-Fi LED will stop bl<strong>in</strong>k<strong>in</strong>g and stay<br />
on steadily.<br />
If you are unable to connect your pr<strong>in</strong>ter, go to<br />
www.kodak.com/go/<strong>in</strong>kjetnetwork<strong>in</strong>g for more <strong>in</strong>formation.<br />
7. If you haven’t yet <strong>in</strong>stalled the <strong>KODAK</strong> <strong>All</strong>-<strong>in</strong>-<strong>One</strong> Pr<strong>in</strong>ter Software, go to<br />
www.kodak.com/go/aiodownloads and follow the on-screen <strong>in</strong>structions to<br />
<strong>in</strong>stall the software.<br />
The pr<strong>in</strong>ter with a wireless connection is listed as the name of the pr<strong>in</strong>ter plus a<br />
number (for example, Kodak<strong>ESP</strong><strong>5200</strong>+1133).<br />
8. Enable the firewall that you disabled earlier.<br />
www.kodak.com/go/aiosupport 7


