

KODAK ESP 5200 Series All-in-One Printer - Maplin Electronics
KODAK ESP 5200 Series All-in-One Printer - Maplin Electronics
KODAK ESP 5200 Series All-in-One Printer - Maplin Electronics

You also want an ePaper? Increase the reach of your titles
YUMPU automatically turns print PDFs into web optimized ePapers that Google loves.
Us<strong>in</strong>g default sett<strong>in</strong>gs to pr<strong>in</strong>t a picture<br />
<strong>KODAK</strong> <strong>ESP</strong> <strong>5200</strong> <strong>Series</strong> <strong>All</strong>-<strong>in</strong>-<strong>One</strong> Pr<strong>in</strong>ter<br />
To pr<strong>in</strong>t a picture from a memory card us<strong>in</strong>g the factory default sett<strong>in</strong>gs:<br />
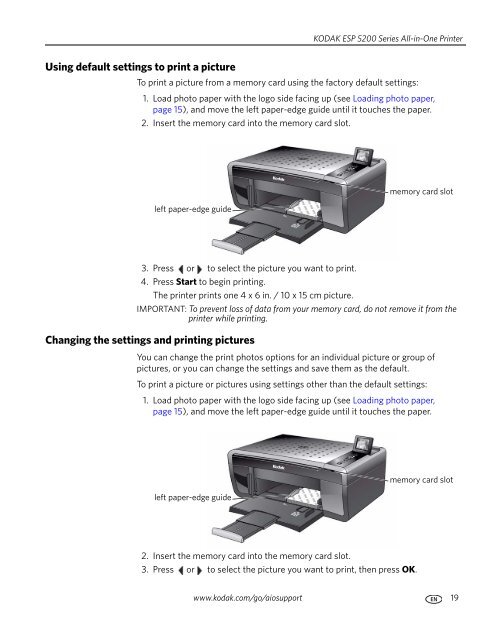
1. Load photo paper with the logo side fac<strong>in</strong>g up (see Load<strong>in</strong>g photo paper,<br />
page 15), and move the left paper-edge guide until it touches the paper.<br />
2. Insert the memory card <strong>in</strong>to the memory card slot.<br />
left paper-edge guide<br />
3. Press or to select the picture you want to pr<strong>in</strong>t.<br />
4. Press Start to beg<strong>in</strong> pr<strong>in</strong>t<strong>in</strong>g.<br />
The pr<strong>in</strong>ter pr<strong>in</strong>ts one 4 x 6 <strong>in</strong>. / 10 x 15 cm picture.<br />
IMPORTANT: To prevent loss of data from your memory card, do not remove it from the<br />
pr<strong>in</strong>ter while pr<strong>in</strong>t<strong>in</strong>g.<br />
Chang<strong>in</strong>g the sett<strong>in</strong>gs and pr<strong>in</strong>t<strong>in</strong>g pictures<br />
You can change the pr<strong>in</strong>t photos options for an <strong>in</strong>dividual picture or group of<br />
pictures, or you can change the sett<strong>in</strong>gs and save them as the default.<br />
To pr<strong>in</strong>t a picture or pictures us<strong>in</strong>g sett<strong>in</strong>gs other than the default sett<strong>in</strong>gs:<br />
1. Load photo paper with the logo side fac<strong>in</strong>g up (see Load<strong>in</strong>g photo paper,<br />
page 15), and move the left paper-edge guide until it touches the paper.<br />
left paper-edge guide<br />
2. Insert the memory card <strong>in</strong>to the memory card slot.<br />
3. Press or to select the picture you want to pr<strong>in</strong>t, then press OK.<br />
memory card slot<br />
memory card slot<br />
www.kodak.com/go/aiosupport 19


