

KODAK ESP 5200 Series All-in-One Printer - Maplin Electronics
KODAK ESP 5200 Series All-in-One Printer - Maplin Electronics
KODAK ESP 5200 Series All-in-One Printer - Maplin Electronics

Create successful ePaper yourself
Turn your PDF publications into a flip-book with our unique Google optimized e-Paper software.
Pr<strong>in</strong>t<strong>in</strong>g tagged pictures<br />
<strong>KODAK</strong> <strong>ESP</strong> <strong>5200</strong> <strong>Series</strong> <strong>All</strong>-<strong>in</strong>-<strong>One</strong> Pr<strong>in</strong>ter<br />
Pr<strong>in</strong>t Photos Option Sett<strong>in</strong>gs Description<br />
Save as Defaults No / Yes To save the sett<strong>in</strong>gs as the new default,<br />
press OK. With Yes selected, press OK.<br />
7. When you have f<strong>in</strong>ished chang<strong>in</strong>g sett<strong>in</strong>gs, press Start to beg<strong>in</strong> pr<strong>in</strong>t<strong>in</strong>g.<br />
IMPORTANT: To prevent loss of data from your memory card, camera, or portable drive,<br />
do not remove it from the pr<strong>in</strong>ter while pr<strong>in</strong>t<strong>in</strong>g.<br />
Some digital cameras let you tag (or “mark”) pictures on the memory card for<br />
pr<strong>in</strong>t<strong>in</strong>g. This creates a tag that is recognized by the pr<strong>in</strong>ter. If you choose to pr<strong>in</strong>t<br />
tagged pictures, they will be pr<strong>in</strong>ted accord<strong>in</strong>g to the default sett<strong>in</strong>gs on your pr<strong>in</strong>ter<br />
(unless otherwise specified by the tag from the camera).<br />
NOTE: Refer to your camera user guide to determ<strong>in</strong>e whether your camera supports<br />
tagged (also “marked” or “DPOF”) functionality.<br />
To pr<strong>in</strong>t tagged pictures:<br />
1. Load photo paper with the logo side fac<strong>in</strong>g up (see Load<strong>in</strong>g photo paper,<br />
page 15), and move the left paper-edge guide until it touches the paper.<br />
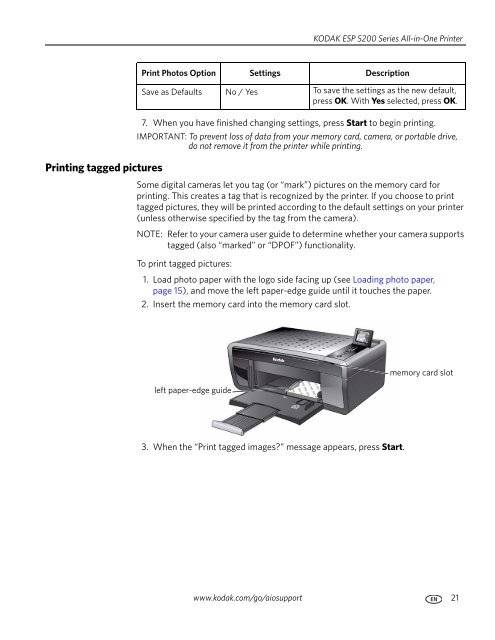
2. Insert the memory card <strong>in</strong>to the memory card slot.<br />
left paper-edge guide<br />
3. When the “Pr<strong>in</strong>t tagged images?” message appears, press Start.<br />
memory card slot<br />
www.kodak.com/go/aiosupport 21


