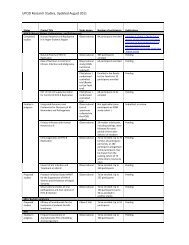
Summer Undergraduate Research Program - Fred Hutchinson ...
Summer Undergraduate Research Program - Fred Hutchinson ...
Summer Undergraduate Research Program - Fred Hutchinson ...

You also want an ePaper? Increase the reach of your titles
YUMPU automatically turns print PDFs into web optimized ePapers that Google loves.
13 . To add a figure legend, create a text box above, below or beside the image, chart, table, or graph,<br />
and write the figure number and a brief title/description of the figure in bold. It is important that<br />
the figure legend placement (whether above, below or beside) is consistent throughout your poster.<br />
14 . When inserting logo(s), make sure the background color is consistent with the poster . To create<br />
a consistent background color, insert the logo image(s) (see instruction #10 above) and a Picture<br />
Toolbar will appear near the logo(s) . Place the mouse over the toolbar and click the image that looks<br />
like a pen and reads “Set Transparent Color .” Next, click the logo background that does not match<br />
the poster background and it will automatically match the background color of your poster .<br />
Poster Design Considerations<br />
A poster should describe interesting aspects<br />
of your project and tell a clear story . Most<br />
people spend three to five minutes (or less)<br />
looking at a poster; therefore the poster needs<br />
to deliver your message quickly. Choose<br />
ONE essential concept to address in your<br />
poster . Before you begin selecting charts, graphs,<br />
and photos to include, ask yourself this question:<br />
If the viewer remembers only one idea<br />
about my work, what do I want that idea<br />
to be?<br />
Your answer will determine the theme of your<br />
poster; therefore everything included on your<br />
poster needs to support this theme .<br />
• Tell your story with graphics as much as possible. An efficient way to structure a poster is to<br />
choose the graphics first and then write the “story” and arrange the spatial flow of the poster around<br />
the graphics .<br />
• Make graphics large enough so that viewers can read them from a distance .<br />
Formatting Basics<br />
Your poster should look simple and uncluttered . Someone standing three feet away should quickly<br />
understand what each component is and why it is there . Illustrations and photographs should be clear<br />
and properly proportioned . Use high-resolution (between 200 – 300 dpi) images – images with a higher<br />
resolution than that will only waste file size and slow down the printing process. TIFF or GIF images are best.<br />
• Use left justification, which has been shown to be the easiest to read .<br />
• Keep text to a minimum .<br />
• Diagrams and a bulleted list are more efficient than words or paragraphs.<br />
• Apply a 1.5 line spacing to everything except the Acknowledgements and References (if included)<br />
sections .<br />
• Viewers cannot read small type from a distance . Use the appropriate font size per section header<br />
(Title fonts should be between 80 - 96 points; section headers should be between 45 - 50 points; text<br />
fonts should be between 24 - 28 points) .<br />
104