Webwasher 6.0.1 Anti-Malware User's Guide - McAfee
Webwasher 6.0.1 Anti-Malware User's Guide - McAfee
Webwasher 6.0.1 Anti-Malware User's Guide - McAfee

Create successful ePaper yourself
Turn your PDF publications into a flip-book with our unique Google optimized e-Paper software.
Home<br />
2–14<br />
• Send interval in . . . minutes<br />
In the input field provided here, enter a time interval (in minutes) to specify<br />
the time that is to elapse between sending e-mails.<br />
The default interval is 240 minutes. Entering 0 here means that no e-mails<br />
will be sent automatically.<br />
E-mails can be sent manually, however, using the Queue Management<br />
page, which is launched after clicking on the See Content of Queue link<br />
next to the drop-down list.<br />
On this page, click on the button labeled Send All to SecureLabs now to<br />
send the e-mails.<br />
• E-mail address<br />
In this input field, enter an e-mail address. All e-mails received by <strong>Webwasher</strong><br />
containing this address will be moved to the queue specified above.<br />
The default address is FalseNegativesFeedback@WillBeCaughtBy-<br />
<strong>Webwasher</strong>.com.<br />
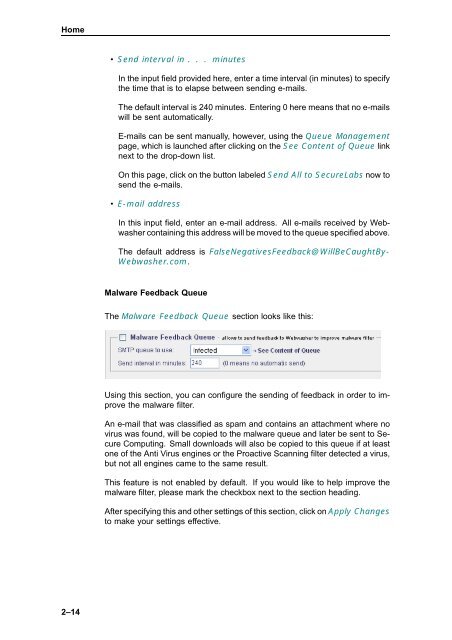
<strong>Malware</strong> Feedback Queue<br />
The <strong>Malware</strong> Feedback Queue section looks like this:<br />
Using this section, you can configure the sending of feedback in order to improve<br />
the malware filter.<br />
An e-mail that was classified as spam and contains an attachment where no<br />
virus was found, will be copied to the malware queue and later be sent to Secure<br />
Computing. Small downloads will also be copied to this queue if at least<br />
one of the <strong>Anti</strong> Virus engines or the Proactive Scanning filter detected a virus,<br />
but not all engines came to the same result.<br />
This feature is not enabled by default. Ifyouwouldliketohelpimprovethe<br />
malware filter, please mark the checkbox next to the section heading.<br />
After specifying this and other settings of this section, click on Apply Changes<br />
to make your settings effective.