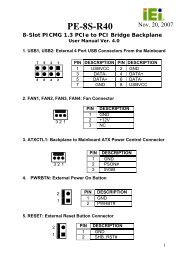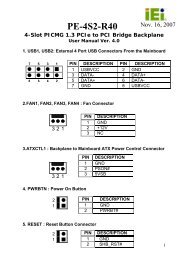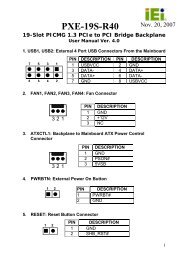
PCIE-G41A2 PICMG 1.3 CPU card - iEi
PCIE-G41A2 PICMG 1.3 CPU card - iEi
PCIE-G41A2 PICMG 1.3 CPU card - iEi

You also want an ePaper? Increase the reach of your titles
YUMPU automatically turns print PDFs into web optimized ePapers that Google loves.
<strong>PCIE</strong>-<strong>G41A2</strong> <strong>PICMG</strong> <strong>1.3</strong> <strong>CPU</strong> <strong>card</strong><br />
Page 45<br />
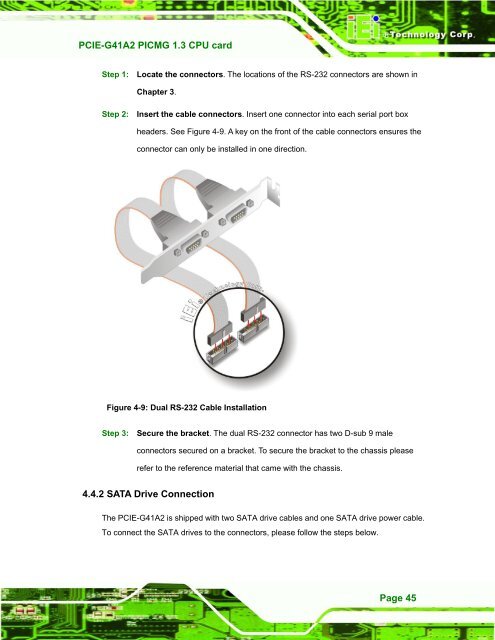
Step 1: Locate the connectors. The locations of the RS-232 connectors are shown in<br />
Chapter 3.<br />
Step 2: Insert the cable connectors. Insert one connector into each serial port box<br />
headers. See Figure 4-9. A key on the front of the cable connectors ensures the<br />
connector can only be installed in one direction.<br />
Figure 4-9: Dual RS-232 Cable Installation<br />
Step 3: Secure the bracket. The dual RS-232 connector has two D-sub 9 male<br />
connectors secured on a bracket. To secure the bracket to the chassis please<br />
refer to the reference material that came with the chassis. Step 0:<br />
4.4.2 SATA Drive Connection<br />
The <strong>PCIE</strong>-<strong>G41A2</strong> is shipped with two SATA drive cables and one SATA drive power cable.<br />
To connect the SATA drives to the connectors, please follow the steps below.