Operating instructions - EWM Hightec Welding GmbH
Operating instructions - EWM Hightec Welding GmbH
Operating instructions - EWM Hightec Welding GmbH

Create successful ePaper yourself
Turn your PDF publications into a flip-book with our unique Google optimized e-Paper software.
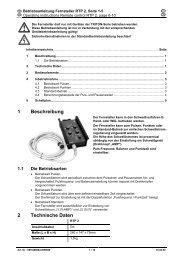
Functional characteristics<br />
<strong>Operating</strong> concepts<br />
5.2.6.3 Latched mode<br />
NOTE<br />
When the foot-operated remote control RTF is connected, the machine switches<br />
automatically to non-latched operation.<br />
The up- and down-slopes are switched off.<br />
1. 2. 3. 4.<br />
I<br />
AMP<br />
AMP%<br />
I start<br />
I end<br />
t Up t Down<br />
t<br />
Figure 5-5<br />
Step 1<br />
• Press torch trigger 1, the gas pre-flow time elapses.<br />
• HF ignition pulses jump from the electrode to the workpiece, the arc ignites.<br />
• <strong>Welding</strong> current flows and immediately assumes the ignition current value set (search arc at minimum<br />
setting). HF is switched off.<br />
Step 2<br />
• Release torch trigger 1.<br />
• The welding current increases with the set up-slope time to the main current AMP.<br />
Switching from main current AMP to secondary current AMP%:<br />
• Press torch trigger 2 or<br />
• Tap torch trigger 1 *<br />
The slope times can be set (see chapter "Advanced settings", section "Setting slope times for<br />
secondary current AMP% or pulse edges".<br />
Step 3<br />
• Press torch trigger 1.<br />
• The main current drops with the set down-slope time to the end-crater current I end<br />
(minimum current).<br />
Step 4<br />
• Release torch trigger 1, the arc extinguishes.<br />
• The set gas post-flow time begins.<br />
Immediate termination of the welding procedure without down-slope and end-crater current:<br />
• Briefly press the 1st torch trigger (3rd and 4th step).<br />
The current drops to zero and the gas post-flow time begins.<br />
Item No.: 099-000097-<strong>EWM</strong>01 27