Manual for the Yealink T20 SIP Phone - PMC Telecom
Manual for the Yealink T20 SIP Phone - PMC Telecom
Manual for the Yealink T20 SIP Phone - PMC Telecom
Create successful ePaper yourself
Turn your PDF publications into a flip-book with our unique Google optimized e-Paper software.
About This Guide<br />
Thank you <strong>for</strong> choosing this Enterprise IP <strong>Phone</strong> which is especially designed <strong>for</strong> power<br />
users in <strong>the</strong> office environment. It features fashion and sleek design, abundant<br />
rd<br />
telephony applications, broad interoperability with <strong>the</strong> popular 3 party VoIP products,<br />
fulfilling <strong>the</strong> VoIP deployment needs from enterprise and ITSP.<br />
In this User Guide, you will find everything you need to quickly use your new phone. Be<br />
sure to verify with your system administrator that your network is prepared <strong>for</strong><br />
configuring your IP phone. As well, be sure to read <strong>the</strong> Packing List section in this guide<br />
be<strong>for</strong>e you set up and use <strong>the</strong> phone.<br />
Declaration of Con<strong>for</strong>mity<br />
Hereby, it’s declared that this phone is in con<strong>for</strong>mity with <strong>the</strong> essential<br />
requirements and o<strong>the</strong>r relevant provisions of <strong>the</strong> CE, FCC.<br />
CE Mark Warning<br />
This is a class B device, in a domestic environment; this product may cause radio<br />
interference, in which case <strong>the</strong> user may be required to take adequate measures.<br />
WEEE Warning<br />
To avoid <strong>the</strong> potential effects on <strong>the</strong> environment and human health as<br />
a result of <strong>the</strong> presence of hazardous substances in electrical and<br />
electronic equipment, end users of electrical and electronic equipment<br />
should understand <strong>the</strong> meaning of <strong>the</strong> crossed-out wheeled bin symbol.<br />
Do not dispose of WEEE as unsorted municipal waste and have to collect<br />
such WEEE separately.
Tables of Contents<br />
Getting Started.................................................................................- 1 -<br />
Packing List ............................................................................................................................... - 1 -<br />
Assembling <strong>the</strong> <strong>Phone</strong>................................................................................................................ - 2 -<br />
Configuration and Registration.................................................................................................. - 4 -<br />
Configuring via Web Page ................................................................................................. - 4 -<br />
Configuring via keypad...................................................................................................... - 5 -<br />
Overview ..........................................................................................- 6 -<br />
Keypad Instruction..................................................................................................................... - 6 -<br />
LED Instruction.......................................................................................................................... - 7 -<br />
Icon Instruction .......................................................................................................................... - 8 -<br />
User Interface............................................................................................................................. - 8 -<br />
Customizing Your <strong>Phone</strong>...............................................................- 10 -<br />
General Settings ....................................................................................................................... - 10 -<br />
<strong>Phone</strong> Status..................................................................................................................... - 10 -<br />
Language.......................................................................................................................... - 10 -<br />
Time and Date ...................................................................................................................- 11 -<br />
Keypad Lock.................................................................................................................... - 12 -<br />
Audio Settings.......................................................................................................................... - 12 -<br />
Volume ............................................................................................................................. - 12 -<br />
Ring Tones ....................................................................................................................... - 13 -<br />
Codec Selection................................................................................................................ - 14 -<br />
Contact Management ............................................................................................................... - 15 -<br />
Edit/Add/Delete Contact .................................................................................................. - 15 -<br />
Import/Export Contact list................................................................................................ - 15 -<br />
O<strong>the</strong>r Settings........................................................................................................................... - 16 -<br />
Dial Plan........................................................................................................................... - 16 -<br />
Dial Now.......................................................................................................................... - 17 -<br />
Block Out ......................................................................................................................... - 18 -<br />
Using <strong>the</strong> Basic Call Functions.....................................................- 19 -<br />
Making a call............................................................................................................................ - 19 -<br />
Call Devices ..................................................................................................................... - 19 -<br />
Call Methods.................................................................................................................... - 19 -<br />
Answering a call....................................................................................................................... - 19 -<br />
Answering an incoming call............................................................................................. - 19 -<br />
Denying an incoming call ................................................................................................ - 20 -
Call Forward .................................................................................................................... - 20 -<br />
During an Active Call .............................................................................................................. - 20 -<br />
Mute ................................................................................................................................. - 20 -<br />
Call Hold.......................................................................................................................... - 20 -<br />
Call Waiting ..................................................................................................................... - 21 -<br />
Call Transfer..................................................................................................................... - 21 -<br />
3-way Conference ............................................................................................................ - 22 -<br />
Voicemail ......................................................................................................................... - 22 -<br />
Using <strong>the</strong> Advanced <strong>Phone</strong> Functions..........................................- 24 -<br />
Account Setting........................................................................................................................ - 24 -<br />
TLS .................................................................................................................................. - 24 -<br />
Network Setting ....................................................................................................................... - 25 -<br />
PC Port Setting................................................................................................................. - 25 -<br />
VLAN Setting .................................................................................................................. - 26 -<br />
HTTPS ............................................................................................................................. - 27 -<br />
Maintenance Tasks................................................................................................................... - 27 -<br />
Administrator Mode......................................................................................................... - 27 -<br />
Administrator/User Password .......................................................................................... - 28 -<br />
Reboot .............................................................................................................................. - 28 -<br />
Reset to Factory ............................................................................................................... - 28 -<br />
Firmware Update.............................................................................................................. - 29 -<br />
Decryption........................................................................................................................ - 30 -<br />
System Log Export........................................................................................................... - 31 -<br />
Tone Settings............................................................................................................................ - 31 -<br />
Trouble Shooting ...........................................................................- 33 -
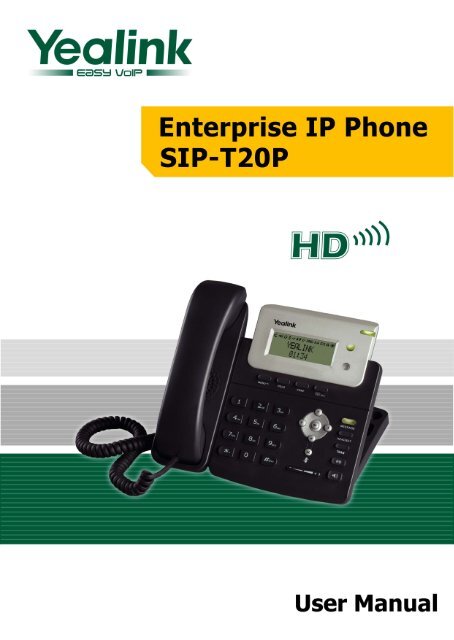
Enterprise IP <strong>Phone</strong><br />
Getting Started<br />
Getting Started<br />
Packing List<br />
The following components are included in your package:<br />
• Enterprise IP <strong>Phone</strong><br />
• <strong>Phone</strong> Stand<br />
• Power Adapter<br />
- 1 -
Enterprise IP <strong>Phone</strong><br />
Getting Started<br />
• Handset & Handset Core<br />
• E<strong>the</strong>rnet Cable<br />
• Quick Installation Guide & Quick Reference<br />
Check this list be<strong>for</strong>e installation to ensure that you have received each item. If you are<br />
missing any items, contact your IP phone reseller.<br />
Assembling <strong>the</strong> <strong>Phone</strong><br />
This section introduce how to assemble <strong>the</strong> phone with <strong>the</strong> components in <strong>the</strong> packing<br />
list:<br />
• Attach <strong>the</strong> stand;<br />
• Connect Handset and Headset;<br />
• Connect Network and Power.<br />
- 2 -
Enterprise IP <strong>Phone</strong><br />
Getting Started<br />
1) Attach <strong>the</strong> Stand, as shown below:<br />
2) Connect Handset and Headset, as shown below:<br />
Note:<br />
Headset is not provided in <strong>the</strong> packing list. Please contact your distributor <strong>for</strong> more<br />
in<strong>for</strong>mation.<br />
3) Connect Network and Power<br />
There are two ways <strong>for</strong> network and power source connections. You can ei<strong>the</strong>r connect<br />
<strong>the</strong> phone to <strong>the</strong> AC Power directly using <strong>the</strong> power adapter or to a PoE compliant<br />
switch or hub. Your system administrator will advise you on which one to use.<br />
- 3 -
Enterprise IP <strong>Phone</strong><br />
Getting Started<br />
Note:<br />
1. If inline power is provided, do not install AC adapter. Make sure <strong>the</strong> E<strong>the</strong>rnet cable<br />
and switch/hub are PoE compliant.<br />
2. The Internet Port can be also connected to Hub/Switch/IP PBX or o<strong>the</strong>r internet<br />
devices.<br />
The phone can also share <strong>the</strong> network connection with o<strong>the</strong>r network devices such as<br />
PC. Connect <strong>the</strong> phone’s PC port and computer’s Network Port toge<strong>the</strong>r using an<br />
E<strong>the</strong>rnet cable, shown as below:<br />
Configuration and Registration<br />
If you are administrator, you need to do some simple configuration to make <strong>the</strong> phone<br />
work. If not, please contact with your internet administrator or service provider <strong>for</strong><br />
more details.<br />
Configuring via Web Page<br />
Press OK button on <strong>the</strong> keypad of <strong>the</strong> phone to enter <strong>the</strong> status page and find out <strong>the</strong><br />
IP address of IP phone. Enter it (<strong>for</strong> example http://192.168.3.28) into <strong>the</strong> address bar<br />
of web browser. The default login name and password are both “admin”.<br />
Note:<br />
Please locate your PC in <strong>the</strong> same network segment of IP phone (192.168.3.X) to<br />
access <strong>the</strong> web configuration page. Please consult your system administrator <strong>for</strong> help.<br />
Network Settings<br />
Choose Network->Internet Port(WAN).<br />
DHCP: By default <strong>the</strong> phone attempts to contact a DHCP Server in your network in<br />
order to obtain its valid network settings, e.g. IP address, sub mask, gateway, DNS<br />
server, etc.<br />
Static IP Address: If your phone cannot contact a DHCP Server <strong>for</strong> any reason, you<br />
need to enter <strong>the</strong> network settings manually via Static IP Address. Please contact your<br />
internet administrator <strong>for</strong> more details.<br />
- 4 -
Enterprise IP <strong>Phone</strong><br />
Getting Started<br />
PPPoE: If you are using <strong>the</strong> xDSL Modem, you can connect your phone to <strong>the</strong> internet<br />
via PPPoE mode. Please contact your ISP <strong>for</strong> <strong>the</strong> User Name and Password <strong>for</strong> internet<br />
access.<br />
Note:<br />
Using <strong>the</strong> wrong network parameters may result in inaccessibility of your phone and<br />
may also have an impact on your network per<strong>for</strong>mance. Please contact your network<br />
administrator.<br />
Account Settings<br />
The phone attempts to register to <strong>the</strong> <strong>SIP</strong> server using <strong>the</strong> account/registrar data<br />
provided by <strong>the</strong> automatic or manual initialization.<br />
Choose Account, you will find <strong>the</strong> following parameters:<br />
Field<br />
Register Status<br />
Line Active<br />
Label<br />
Display Name<br />
Register Name<br />
User Name<br />
Password<br />
<strong>SIP</strong> Server & Port<br />
Description<br />
It shows <strong>the</strong> register status of <strong>the</strong> phone.<br />
You can choose on/off to enable/disable <strong>the</strong> account respectively.<br />
It is showed on <strong>the</strong> LCD <strong>for</strong> users to identify <strong>the</strong> account.<br />
It is showed as Caller ID when making a phone call.<br />
It is au<strong>the</strong>nticated ID <strong>for</strong> au<strong>the</strong>ntication, provided by ISP.<br />
User account in<strong>for</strong>mation, provided by VoIP service provider.<br />
It is provided by ISP <strong>for</strong> registration.<br />
Server <strong>for</strong> registration, provided by ISP.<br />
Note:<br />
Should <strong>the</strong> IP PBX (<strong>SIP</strong> registrar) require an au<strong>the</strong>ntication, you will be prompted to<br />
enter <strong>the</strong> correct password. Make sure you are using <strong>the</strong> appropriate input method or<br />
enter <strong>the</strong> password via <strong>the</strong> web user interface.<br />
Configuring via keypad<br />
Network Settings: Press MENU->Settings->Advanced->Network->WAN Port/PC Port<br />
/VLAN/Web Server to enter <strong>the</strong> internet relating configuration page.<br />
Account Settings: Press MENU->Settings->Advanced->Accounts->OK to configure<br />
<strong>the</strong> account settings.<br />
You can refer to <strong>the</strong> above “Configuring via Web Page” <strong>for</strong> <strong>the</strong> parameter details.<br />
- 5 -
Enterprise IP <strong>Phone</strong><br />
Overview<br />
Overview<br />
Keypad Instruction<br />
You can check <strong>the</strong> following list which introduces <strong>the</strong> IP phone’s keypad in details:<br />
Power Indication LED<br />
It will show <strong>the</strong> power status, it will be on if <strong>the</strong> phone is powered, off if <strong>the</strong> phone is not<br />
powered.<br />
Context-sensitive Softkeys<br />
The screen will display labels <strong>for</strong> <strong>the</strong>se keys, to identify <strong>the</strong>ir context-sensitive<br />
functions.<br />
Account Buttons<br />
This buttons are used to active up to <strong>the</strong> two user accounts.<br />
DTMF Keypad<br />
Use <strong>the</strong> DTMF hard keys to enter numbers, letters and special characters. Depending on<br />
<strong>the</strong> selected input mode, you can enter digits, lower / upper case or special characters.<br />
- 6 -
Enterprise IP <strong>Phone</strong><br />
Overview<br />
Navigation Keys<br />
Use <strong>the</strong> navigation keys to navigate in <strong>the</strong> display menus and confirm/cancel actions.<br />
Audio Device Control Keys<br />
Use <strong>the</strong> audio device control keys to per<strong>for</strong>m <strong>the</strong> following actions depending on your<br />
phone type:<br />
: Adjust <strong>the</strong> volume of <strong>the</strong> handset, headset, speaker and ring tone;<br />
: Allows <strong>for</strong> hands-free communication during calls;<br />
: Place and receive calls through an optionally connected headset;<br />
: Mute audio transmission locally during calls;<br />
Hard Feature Keys<br />
: Allow users to access <strong>the</strong> voicemail directly;<br />
: Forward <strong>the</strong> current call to a third party;<br />
: Dials <strong>the</strong> most recently dialed number;<br />
LED Instruction<br />
Table 1 Account Button LEDs<br />
LED Status<br />
Steady green<br />
Blinking green<br />
Off<br />
Description<br />
The account is active<br />
There is an incoming call to <strong>the</strong> account<br />
The phone is in idle status whatever registered /unregistered<br />
Table 2 Power Indication LED<br />
LED Status<br />
Steady green<br />
Off<br />
Power on<br />
Power off<br />
Description<br />
- 7 -
Enterprise IP <strong>Phone</strong><br />
Overview<br />
Icon Instruction<br />
The IP <strong>Phone</strong> displays different kinds of icons on its LCD, you can refer to <strong>the</strong> following<br />
table <strong>for</strong> <strong>the</strong>ir meanings:<br />
Icon<br />
Description<br />
Flashes when <strong>the</strong> internet is disconnected<br />
Missed calls<br />
Call in<br />
Call out<br />
Input Method: all letters and numbers<br />
Input Method: numbers<br />
Input Method: letters in lower case<br />
Input Method: letters in upper case<br />
Call mute<br />
Call hold<br />
Voicemail<br />
Call <strong>for</strong>ward<br />
Auto answer<br />
In handset mode<br />
In headset mode<br />
User Interface<br />
There are two ways to customize specific options on your phones:<br />
1. Using keypad and display on <strong>the</strong> phone.<br />
2. Using Web user interface in an Internet browser from your PC; please refer to<br />
“Configuration and Registration” to get into <strong>the</strong> Web interface.<br />
In many instances, it is possible to use both <strong>the</strong> user interfaces to operate <strong>the</strong> phone<br />
and change settings; some, however, are only possible via a phone or web user<br />
interface. Please refer to <strong>the</strong> following table <strong>for</strong> differences:<br />
- 8 -
Enterprise IP <strong>Phone</strong><br />
Overview<br />
<strong>Phone</strong> Options <strong>Phone</strong> UI Web UI<br />
Status<br />
--IP Address<br />
--MAC Address<br />
--Firmware<br />
--Network<br />
--<strong>Phone</strong><br />
--Accounts<br />
Call Features<br />
--Forward<br />
--Call Waiting<br />
--Auto Answer<br />
--“#” as send<br />
--Hot Line<br />
--Dial Plan<br />
--Dial Tone<br />
Basic <strong>Phone</strong> Functions<br />
--Language<br />
--Time & Date<br />
--Ring Tone<br />
--<strong>Phone</strong> Volume<br />
Advanced <strong>Phone</strong> Functions<br />
--Accounts<br />
--Networks<br />
--Lock<br />
--Reset To Factory<br />
--Set Admin Password<br />
--Voice<br />
--Codecs<br />
--Echo Cancellation etc<br />
--Update<br />
O<strong>the</strong>r Features<br />
--Message<br />
--History<br />
--Address Book<br />
√<br />
√<br />
√<br />
√<br />
√<br />
√<br />
√<br />
√<br />
√<br />
√<br />
√<br />
√<br />
√<br />
√<br />
√<br />
√<br />
√<br />
√<br />
√<br />
√<br />
√<br />
√<br />
√<br />
√<br />
√<br />
√<br />
Note:<br />
The above table only indicates most of phone functions ra<strong>the</strong>r than all of <strong>the</strong>m. Please<br />
refer to <strong>the</strong> relating parts <strong>for</strong> more details.<br />
User and Administrator Mode<br />
Your phone can be used in user or administrator mode. Administrator mode is <strong>the</strong><br />
default setting with full configuration rights. The default administrator password is<br />
admin.<br />
- 9 -
Enterprise IP <strong>Phone</strong><br />
Customizing Your <strong>Phone</strong><br />
Customizing Your <strong>Phone</strong><br />
General Settings<br />
<strong>Phone</strong> Status<br />
You can view <strong>the</strong> status of your phone using <strong>the</strong> <strong>Phone</strong> interface or <strong>the</strong> Web interface.<br />
This option allows you to review:<br />
• IP address;<br />
• MAC address;<br />
• Firmware;<br />
• Network status: Mac, WAN Type, WAN IP, WAN Mask, LAN Type, LAN IP, LAN Mask,<br />
Gateway, Pri DNS and Sec DNS;<br />
• <strong>Phone</strong>: Product, Hardware, Firmware, Product ID and MAC;<br />
• Accounts: The 2 <strong>SIP</strong> accounts status;<br />
To check <strong>the</strong> <strong>Phone</strong> Status via <strong>Phone</strong> interface:<br />
1) Press OK button directly, choose <strong>the</strong> Status option.<br />
2) Use <strong>the</strong> navigation keys to scroll through <strong>the</strong> list and check <strong>the</strong> specific one.<br />
To view <strong>the</strong> <strong>Phone</strong> Status via Web interface:<br />
Open <strong>the</strong> web browsers and input <strong>the</strong> IP Address http://WAN-ip-address; Enter <strong>the</strong><br />
account and password (default account and password are both “admin”), choose Status<br />
directly to check <strong>the</strong> status.<br />
Language<br />
The default <strong>Phone</strong> interface language is English. The Web interface language depends<br />
on your computer Operation System. It will automatically match <strong>the</strong> language with your<br />
computer.<br />
It also supports French, German, Spanish, Italian, Polish, Turkish, Portuguese, etc. You<br />
can change <strong>the</strong> language <strong>for</strong> <strong>the</strong> phone user interface and <strong>the</strong> web user interface<br />
independently from each o<strong>the</strong>r.<br />
Note:<br />
All languages may not be available <strong>for</strong> selection. The available languages depend on <strong>the</strong><br />
language packs currently loaded to <strong>the</strong> IP phone. Please contact with your system<br />
administrator <strong>for</strong> more in<strong>for</strong>mation about loading language packs.<br />
- 10 -
Enterprise IP <strong>Phone</strong><br />
Customizing Your <strong>Phone</strong><br />
To change <strong>the</strong> language via <strong>Phone</strong> interface:<br />
1) Press MENU->Settings->Basic ->Language.<br />
2) Scroll through <strong>the</strong> list of available languages.<br />
3) Press OK button when <strong>the</strong> desired language is highlighted. The language appears<br />
on <strong>the</strong> graphic display will be changed to <strong>the</strong> one you choose.<br />
4) Press MENU key to return to <strong>the</strong> previous screen.<br />
Time and Date<br />
The time and date appears on <strong>the</strong> idle screen of <strong>the</strong> IP phone. If <strong>the</strong> phone can not<br />
obtain a time and date from <strong>the</strong> call server, please contact your system administrator if<br />
<strong>the</strong> time or date is incorrect. You can set <strong>the</strong> time manually or via <strong>the</strong> SNTP server<br />
which is used to synchronize <strong>the</strong> time.<br />
To change <strong>the</strong> Time and Date via <strong>the</strong> <strong>Phone</strong> interface:<br />
1) Press MENU->Settings->Basic->Time & Date.<br />
2) If SNTP Time is chosen, <strong>the</strong> phone will automatically get <strong>the</strong> time from <strong>the</strong> specific<br />
NTP Server. Use <strong>the</strong> navigation keys to highlight <strong>the</strong> specific options and do <strong>the</strong><br />
relating changes. You can set <strong>the</strong> Time Zone, NTP Server1/Server2, and Daylight<br />
respectively.<br />
3) If <strong>Manual</strong> Setting is chosen, <strong>the</strong> time can be set manually. Use <strong>the</strong> navigation keys<br />
to highlight <strong>the</strong> option and enter <strong>the</strong> specific date and time.<br />
4) Press OK button, <strong>the</strong> time appears on <strong>the</strong> idle screen will be changed. Or press<br />
MENU key to return to <strong>the</strong> previous screen.<br />
To change <strong>the</strong> Time and Date via <strong>the</strong> Web interface:<br />
Choose <strong>Phone</strong>->Preference to do <strong>the</strong> relating changes. You can also change <strong>the</strong> Update<br />
Interval which specifies <strong>the</strong> time frequency that <strong>the</strong> phone refreshes <strong>the</strong> time<br />
automatically. Please refer to <strong>the</strong> instruction above <strong>for</strong> <strong>the</strong> parameters’ detail.<br />
Note:<br />
The default time zone is +8 China, Philippines, Malaysia, Daylight Saving Time is<br />
disabled.<br />
- 11 -
Enterprise IP <strong>Phone</strong><br />
Keypad Lock<br />
Customizing Your <strong>Phone</strong><br />
You can lock <strong>the</strong> keypad of your phone when you are temporarily not using it. This<br />
function helps you to protect your phone from unauthorized use. You can lock <strong>the</strong><br />
following specific keys:<br />
MENU Keys: The MENU softkeys can not be used until unlocked. You can not access<br />
<strong>the</strong> menu of <strong>the</strong> phone.<br />
Function Keys: The hard function keys can not be used until unlocked. You can not<br />
access <strong>the</strong> MESSAGE, HEADSET, CONF, HOLD, TRAN, RD Keys.<br />
Talk Call Only: All of <strong>the</strong> keys can not be used until unlocked. You can only use <strong>the</strong><br />
phone to answer <strong>the</strong> incoming calls.<br />
To enable keypad lock via <strong>Phone</strong> interface:<br />
1) Press MENU->Settings->Advanced, enter <strong>the</strong> password, and <strong>the</strong>n press OK button.<br />
2) Choose Lock->OK.<br />
3) Use <strong>the</strong> navigation key to highlight <strong>the</strong> one you want to lock.<br />
4) Press OK button to active <strong>the</strong> change, or MENU to return to <strong>the</strong> previous screen.<br />
To unlock <strong>the</strong> phone via <strong>Phone</strong> interface:<br />
1) Press MENU key, you are prompted <strong>for</strong> <strong>the</strong> password.<br />
2) Enter <strong>the</strong> password, and <strong>the</strong>n press OK button, <strong>the</strong> phone is unlocked.<br />
To enable keypad lock via Web interface:<br />
Choose <strong>Phone</strong>->Preference to do <strong>the</strong> relating changes. Please refer to <strong>the</strong> instructions<br />
above <strong>for</strong> <strong>the</strong> parameters’ detail.<br />
Note:<br />
1. The default password <strong>for</strong> unlock is admin.<br />
2. Users can make emergency calls when <strong>the</strong> phone is locked.<br />
Audio Settings<br />
Volume<br />
You can adjust <strong>the</strong> volume of handset/speaker/headset.<br />
To adjust <strong>the</strong> volume when you are not in an active call:<br />
1) Press MENU->Settings->Basic.<br />
2) Scroll to <strong>Phone</strong> Volume, and press OK button, highlight <strong>the</strong> one you want to adjust<br />
<strong>the</strong> volume, use <strong>the</strong> Volume Adjustment Bar or navigation keys to adjust <strong>the</strong><br />
volume.<br />
- 12 -
Enterprise IP <strong>Phone</strong><br />
Customizing Your <strong>Phone</strong><br />
3) Press OK button to save <strong>the</strong> contrast change or MENU key to cancel.<br />
To adjust <strong>the</strong> volume when you are in an active call:<br />
When Handset/Headset/Hands-free mode is activated, press <strong>the</strong> Volume Adjustment<br />
Bar to a com<strong>for</strong>table level.<br />
Note:<br />
The volume can only be adjusted via <strong>Phone</strong> interface.<br />
Ring Tones<br />
You can adjust <strong>the</strong> type and volume of <strong>the</strong> ring tone.<br />
To adjust <strong>the</strong> Ring Tone Type via <strong>Phone</strong> interface:<br />
1) Press MENU->Settings->Basic.<br />
2) Scroll to Ring Tone, and press OK button.<br />
3) Use <strong>the</strong> navigation keys to highlight <strong>the</strong> specific one.<br />
4) Press OK button to save <strong>the</strong> contrast change or MENU to cancel.<br />
To adjust <strong>the</strong> volume via <strong>Phone</strong> interface:<br />
1) Press MENU->Settings->Basic->OK.<br />
2) Scroll to <strong>Phone</strong> Volume->Ring Vol, use <strong>the</strong> Volume Adjustment Bar or navigation<br />
keys to adjust <strong>the</strong> volume.<br />
3) Press OK button to save <strong>the</strong> contrast change or MENU key to cancel.<br />
You can also adjust <strong>the</strong> ring tone volume by <strong>the</strong> following way:<br />
When <strong>the</strong> phone is in idle status, press <strong>the</strong> Volume Adjustment Bar to a com<strong>for</strong>table<br />
level.<br />
To change <strong>the</strong> Ring Tone Type via Web interface:<br />
Choose <strong>Phone</strong>->Preference->Ring Type, highlight <strong>the</strong> specific one in <strong>the</strong> scroll-down<br />
menu, click confirm button to update <strong>the</strong> change. You can also delete <strong>the</strong> specific one<br />
by clicking <strong>the</strong> Delete button.<br />
To upload <strong>the</strong> new Ring Tone via Web interface:<br />
1) Click Browse button to choose <strong>the</strong> specific ring tone file.<br />
2) Click Upload button to upload <strong>the</strong> file, and <strong>the</strong>n Confirm to save <strong>the</strong> change.<br />
- 13 -
Enterprise IP <strong>Phone</strong><br />
Customizing Your <strong>Phone</strong><br />
Note:<br />
The ring tone file <strong>for</strong>mat must be in 16bits WAV <strong>for</strong>mat (via Ulaw Compression), 8K<br />
sample rate (monophony). Blank or o<strong>the</strong>r special characters can not be included in <strong>the</strong><br />
file name.<br />
Codec Selection<br />
The IP phone supports <strong>the</strong> following voice codecs:<br />
G.722, G.723_53, G.723_63, G.726-16, G.726-24, G.726-32, G.726-40, G.729, PCMU,<br />
and PCMA.<br />
You can enable/disable <strong>the</strong> desired codecs via Web interface. Please contact your<br />
System Administrator <strong>for</strong> more details about <strong>the</strong> codecs.<br />
To enable/disable <strong>the</strong> codecs:<br />
1) Choose Account-> Codecs.<br />
2) Use <strong>the</strong> navigation keys to highlight <strong>the</strong> desired one in <strong>the</strong> Enabled/Disable Codecs<br />
list, and press <strong>the</strong> / to move to <strong>the</strong> o<strong>the</strong>r list.<br />
3) Click Confirm button to save <strong>the</strong> change.<br />
Note:<br />
Codec Selection can be only set via Web interface.<br />
- 14 -
Enterprise IP <strong>Phone</strong><br />
Customizing Your <strong>Phone</strong><br />
Contact Management<br />
Edit/Add/Delete Contact<br />
You can store a large number of contacts in your phone's directory. You can add, edit,<br />
delete, dial, or search <strong>for</strong> a contact in this directory.<br />
To add a contact via <strong>Phone</strong> interface:<br />
1) Press MENU->Address Book->OK.<br />
2) Press Up/Down navigation key to ADD page, Press OK button to start adding a new<br />
contact, enter Name, phone number of <strong>the</strong> contact by <strong>the</strong> keypad. Use <strong>the</strong> 123 to<br />
select between numeric and upper/lower case alphanumeric modes.<br />
3) Press OK button to add <strong>the</strong> contact, or MENU key to cancel <strong>the</strong> change.<br />
To edit/delete a contact via <strong>Phone</strong> interface:<br />
1) Press MENU->Address Book ->OK.<br />
2) Use <strong>the</strong> Up/Down navigation key to highlight <strong>the</strong> contact you want to edit/delete,<br />
<strong>the</strong>n press left/right navigation keys to EDIT/DEL page.<br />
3) Make <strong>the</strong> desired changes, press OK button, or press MENU return to previous<br />
menu.<br />
To add/delete/edit <strong>the</strong> contact list via <strong>the</strong> Web interfaces:<br />
Choose Contacts and <strong>the</strong>n do <strong>the</strong> relating changes. Please refer to <strong>the</strong> instruction above<br />
<strong>for</strong> <strong>the</strong> parameters’ detail.<br />
Import/Export Contact list<br />
Import/Export Contact List via Web interface:<br />
1) Choose Contacts.<br />
- 15 -
Enterprise IP <strong>Phone</strong><br />
Customizing Your <strong>Phone</strong><br />
2) Browse <strong>the</strong> specific contact list file in .doc <strong>for</strong>mat, and <strong>the</strong>n click Import button. The<br />
imported contact lists will be showed in <strong>the</strong> Address Book.<br />
3) Click <strong>the</strong> Export button to export <strong>the</strong> contact list.<br />
Note:<br />
Import/Export Contact List can be only set via Web interface.<br />
O<strong>the</strong>r Settings<br />
Dial Plan<br />
A dial plan establishes <strong>the</strong> expected number and pattern of digits <strong>for</strong> a telephone<br />
number. This includes country codes, access codes, area codes and all combinations of<br />
digits dialed. For example if you set <strong>the</strong> Prefix as 0 and Replace as 0086 (Chinese<br />
country code), when you dial 05702000 out, <strong>the</strong> number will be replaced by<br />
00865702000 automatically.<br />
To set a Dial Plan via <strong>the</strong> Web interface:<br />
1) Choose <strong>Phone</strong>->Dial Plan->Replace Rule.<br />
- 16 -
Enterprise IP <strong>Phone</strong><br />
Customizing Your <strong>Phone</strong><br />
2) Enter <strong>the</strong> desired Prefix and Replace.<br />
3) Press Add button to save <strong>the</strong> changes.<br />
4) You can also delete a specific one from <strong>the</strong> dial plan list by pressing Del button.<br />
Note:<br />
Please contact with your system administrator <strong>for</strong> <strong>the</strong> country/area code if you want to<br />
set <strong>the</strong> dial plan.<br />
Dial Now<br />
Dial-now enables you to define <strong>the</strong> specific length of any number/letter in advance(<strong>for</strong><br />
example xxx), next time when users dial out <strong>the</strong> 123 whose length matches <strong>the</strong><br />
Dial-now rule, <strong>the</strong> phone will dial out 123 immediately without pressing Send button.<br />
To set a Dial Plan via <strong>the</strong> Web interface:<br />
1) Choose <strong>Phone</strong>-> Dial Plan->Dial Now.<br />
- 17 -
Enterprise IP <strong>Phone</strong><br />
Customizing Your <strong>Phone</strong><br />
2) Enter <strong>the</strong> desired “x/.”<br />
3) Press Add button to save <strong>the</strong> changes.<br />
4) You can also delete a specific one from <strong>the</strong> dial plan list by pressing Del button.<br />
Note:<br />
x represents any numbers; . represents any letters.<br />
Block Out<br />
The specific phone numbers can be <strong>for</strong>bidden to be call out from your IP phone.<br />
1) Choose <strong>Phone</strong>->Dial Plan->Block Out.<br />
2) Enter <strong>the</strong> phone number and click Add button to save <strong>the</strong> changes, or choose <strong>the</strong><br />
specific one in <strong>the</strong> list, click Del button to delete <strong>the</strong> record.<br />
3) You can not dial out <strong>the</strong> number from your IP phone unless it is removed from <strong>the</strong><br />
Forbidden List.<br />
- 18 -
Enterprise IP <strong>Phone</strong><br />
Using <strong>the</strong> Basic <strong>Phone</strong> Functions<br />
Using <strong>the</strong> Basic Call Functions<br />
Making a call<br />
Call Devices<br />
You can make a phone call via <strong>the</strong> following devices:<br />
1) Pick up <strong>the</strong> handset, icon will be showed in <strong>the</strong> idle screen.<br />
2) Press <strong>the</strong> Speaker button, icon will be showed in <strong>the</strong> idle screen.<br />
3) Press <strong>the</strong> Headset button if <strong>the</strong> headset is connected to <strong>the</strong> Headset Port in advance.<br />
The icon will be showed in <strong>the</strong> idle screen.<br />
You can also dial <strong>the</strong> number first, and <strong>the</strong>n choose <strong>the</strong> method you will use to speak to<br />
<strong>the</strong> o<strong>the</strong>r party.<br />
Call Methods<br />
You can press an available line button if <strong>the</strong>re is more than one account, <strong>the</strong>n<br />
1) Dial <strong>the</strong> number you want to call, or<br />
2) Go to Address Book, use <strong>the</strong> navigation button to highlight your choice, or<br />
3) Go to History, use <strong>the</strong> navigation button to highlight your choice (press Left/Right<br />
button to chose All Calls, Missed Calls, Dialed Calls, Received Calls and Forwarded<br />
Calls) or<br />
4) Press <strong>the</strong> RD button to call <strong>the</strong> last number called.<br />
5) Press <strong>the</strong> SEND button to dial out if necessary.<br />
Answering a call<br />
Answering an incoming call<br />
1) If you are not on ano<strong>the</strong>r phone, lift <strong>the</strong> handset using, or press <strong>the</strong> Speaker button<br />
to answer it using <strong>the</strong> speakerphone, or press <strong>the</strong> headset button to answer it using<br />
<strong>the</strong> headset.<br />
2) If you are on ano<strong>the</strong>r call, press <strong>the</strong> LINE X key or OK button to answer it.<br />
During <strong>the</strong> conversation, you can alternate between Headset, Handset and Speaker<br />
phone by pressing <strong>the</strong> corresponding buttons or picking up <strong>the</strong> handset.<br />
- 19 -
Enterprise IP <strong>Phone</strong><br />
Using <strong>the</strong> Basic <strong>Phone</strong> Functions<br />
Denying an incoming call<br />
Press MENU key to deny <strong>the</strong> incoming call directly.<br />
Call Forward<br />
This feature allows you to <strong>for</strong>ward an incoming call to ano<strong>the</strong>r phone number e.g. a cell<br />
phone or voice mailbox. The display showed<br />
icon.<br />
The following call <strong>for</strong>warding events can be configured:<br />
• Off: Call <strong>for</strong>warding is deactivated by default.<br />
• Always: Incoming calls are immediately <strong>for</strong>warded.<br />
• Busy: Incoming calls are immediately <strong>for</strong>warded when <strong>the</strong> phone is busy.<br />
• No Answer: Incoming calls are <strong>for</strong>warded when <strong>the</strong> phone is not answered after a<br />
specific period.<br />
• Busy/No Answer: Incoming calls are <strong>for</strong>warded not matter <strong>the</strong> phone is busy or not<br />
answered.<br />
To configure Call Forward via <strong>Phone</strong> interface:<br />
1) Press <strong>the</strong> following keys: MENU->Features->OK->Call Forward->OK.<br />
2) There are 5 options: Always Forward, Busy Forward, No Answer Forward, Busy/No<br />
Answer Forward, Cancel Forward.<br />
3) If you choose one of <strong>the</strong>m (except Cancel Forward), enter <strong>the</strong> phone number you<br />
want to <strong>for</strong>ward your calls to. Then press OK to save <strong>the</strong> changes.<br />
To configure Call Forward via Web interface:<br />
Choose <strong>Phone</strong>->Features->Forward to do <strong>the</strong> relating changes. Please refer <strong>the</strong> above<br />
configuration in<strong>for</strong>mation.<br />
During an Active Call<br />
Mute<br />
This function allows you to mute <strong>the</strong> microphone of <strong>the</strong> active audio device during a call;<br />
you can not be heard by <strong>the</strong> o<strong>the</strong>r party. You can still hear all o<strong>the</strong>r parties while mute<br />
is enabled.<br />
To mute/resume <strong>the</strong> conversation:<br />
Press button during <strong>the</strong> conversation, <strong>the</strong> icon will be shown on <strong>the</strong> LCD. Press<br />
again to get <strong>the</strong> microphone return to normal conversation.<br />
Call Hold<br />
This call function allows you to place an active call on hold. In this case your IP PBX<br />
- 20 -
Enterprise IP <strong>Phone</strong><br />
Using <strong>the</strong> Basic <strong>Phone</strong> Functions<br />
might play a melody or message to <strong>the</strong> o<strong>the</strong>r party while waiting. O<strong>the</strong>r calls can be<br />
received and made while having a call on hold.<br />
To hold/resume a call:<br />
1) Press <strong>the</strong> HOLD button to put your active call on hold.<br />
2) If <strong>the</strong>re is only one call on hold, press <strong>the</strong> HOLD button again to retrieve <strong>the</strong> call.<br />
3) If <strong>the</strong>re is more than one call on hold, press <strong>the</strong> Up/Down button to highlight <strong>the</strong><br />
call, <strong>the</strong>n press <strong>the</strong> HOLD button again to retrieve <strong>the</strong> call.<br />
Note:<br />
When you are under <strong>the</strong> call hold status, putting down <strong>the</strong> handset, <strong>the</strong> conversation<br />
will go on over <strong>the</strong> speaker instead of hanging up <strong>the</strong> call.<br />
Call Waiting<br />
This call feature allows your phone to accept o<strong>the</strong>r incoming calls to an extension<br />
already in an active call.<br />
To enable/disable Call Waiting via <strong>Phone</strong> interface:<br />
1) Press MENU->Features->Call Waiting->OK button.<br />
2) Use <strong>the</strong> navigation keys to active/inactive call waiting.<br />
3) Press OK button to save <strong>the</strong> changes, or MENU to return to <strong>the</strong> previous menu.<br />
To enable/disable Call Waiting via Web interface:<br />
Choose <strong>Phone</strong>->Function->Call Waiting to do <strong>the</strong> relating changes.<br />
Call Transfer<br />
You can customize your phone so that incoming calls are transferred directly to a third<br />
party such as ano<strong>the</strong>r extension, mobile phone number, etc. There are two ways to<br />
transfer <strong>the</strong> call: Blind Transfer and Attended Transfer.<br />
To Blind Transfer via <strong>Phone</strong> interface:<br />
1) Press TRAN Button during <strong>the</strong> active conversation, <strong>the</strong> call will be on hold, <strong>the</strong>re will<br />
be a dial tone. Dial <strong>the</strong> o<strong>the</strong>r telephone number.<br />
2) Press <strong>the</strong> MENU key to stop <strong>the</strong> call transfer operation be<strong>for</strong>e <strong>the</strong> call is answered.<br />
3) Hang up to complete <strong>the</strong> transfer.<br />
4) You will be disconnected from <strong>the</strong> call.<br />
- 21 -
Enterprise IP <strong>Phone</strong><br />
Using <strong>the</strong> Basic <strong>Phone</strong> Functions<br />
To Attended Transfer via <strong>Phone</strong> interface:<br />
1) Press TRAN button during <strong>the</strong> active conversation, <strong>the</strong> call will be on hold, <strong>the</strong>re will<br />
be a dial tone. Dial <strong>the</strong> second telephone number.<br />
2) When <strong>the</strong> phone is answered, you can have a private conversation without <strong>the</strong> first<br />
person hearing it, <strong>the</strong>n hang up to complete <strong>the</strong> transfer.<br />
3) You will be disconnected from <strong>the</strong> call.<br />
3-way Conference<br />
You can establish a three-party conference, during <strong>the</strong> conversation three phone<br />
parties can communicate with each o<strong>the</strong>r.<br />
To establish a conference:<br />
1) Press <strong>the</strong> CONF button during an active call.<br />
2) The first call is placed on hold. You will hear a dial tone. Dial <strong>the</strong> number to<br />
conference in, <strong>the</strong>n press <strong>the</strong> SEND key.<br />
3) Press <strong>the</strong> MENU key to stop <strong>the</strong> conference in operation be<strong>for</strong>e <strong>the</strong> call is answered.<br />
4) After <strong>the</strong> call is answered, <strong>the</strong> conference call will now include you and <strong>the</strong> o<strong>the</strong>r<br />
two parties.<br />
5) Hang up to disconnect all parties.<br />
Voicemail<br />
Your voice mailbox messages, which are usually stored on a media server of your local<br />
or hosted VoIP telephony system, can be accessed from your phone.<br />
New voice messages can be indicated both acoustically and visually as described below:<br />
• The idle screen will indicate <strong>the</strong> new voice messages coming:<br />
• The MESSAGE button will be lighted.<br />
To configure <strong>the</strong> Voicemail code via <strong>Phone</strong> interface:<br />
1) Press MESSAGE button to Voice Mail.<br />
2) Use <strong>the</strong> navigation keys to highlight <strong>the</strong> Line you want to set, enter <strong>the</strong> code which<br />
<strong>the</strong> phone uses to connect to your system. Press 123 to choose <strong>the</strong> proper input<br />
method.<br />
3) Press OK button to save <strong>the</strong> change, or press MENU to return to <strong>the</strong> previous menu.<br />
- 22 -
Enterprise IP <strong>Phone</strong><br />
Using <strong>the</strong> Basic <strong>Phone</strong> Functions<br />
Note:<br />
Please contact your system administrator <strong>for</strong> <strong>the</strong> connecting code. Different systems<br />
have different codes.<br />
To retrieve <strong>the</strong> new voicemail via <strong>the</strong> <strong>Phone</strong> interface:<br />
1) Press <strong>the</strong> MESSAGE button directly.<br />
2) You may be prompted to enter <strong>the</strong> password which is needed to connect to your<br />
VoIP telephony system. It depends on your system.<br />
3) Your voice mailbox is called and you are able to listen to your new and old<br />
voicemails.<br />
Note:<br />
Be<strong>for</strong>e retrieving <strong>the</strong> new voicemail, please make sure that <strong>the</strong> connecting code has<br />
been set on <strong>the</strong> phone.<br />
- 23 -
Enterprise IP <strong>Phone</strong><br />
Using <strong>the</strong> Advanced <strong>Phone</strong> Functions<br />
Using <strong>the</strong> Advanced <strong>Phone</strong> Functions<br />
Account Setting<br />
Please refer to <strong>the</strong> previous part “Configuration and Registration” <strong>for</strong> <strong>the</strong> basic account<br />
setting in<strong>for</strong>mation. The following table lists <strong>the</strong> instruction of <strong>the</strong> field about <strong>the</strong><br />
advanced Account Setting.<br />
Field Name<br />
Description<br />
UDP<br />
Message<br />
UDP<br />
Interval<br />
Keep-alive<br />
Keep-alive<br />
Defines whe<strong>the</strong>r to active <strong>the</strong> phone UDP Keep-alive<br />
mechanism. The default is Enabled.<br />
This parameter specifies how often <strong>the</strong> phone will send a packet<br />
to <strong>the</strong> <strong>SIP</strong> server. Default is 30 seconds.<br />
Login Expire<br />
This parameter specifies <strong>the</strong> time frequency that phone<br />
refreshes its registration. The default interval is 3600 seconds.<br />
Local <strong>SIP</strong> Port Local <strong>SIP</strong> port. The default value is 5060.<br />
RPort<br />
<strong>SIP</strong> Session Timer<br />
Subscribe<br />
Period<br />
DTMF Type<br />
The parameter allows you configuring <strong>the</strong> proxy to send<br />
responses back to a particular address and port. The default is<br />
disabled.<br />
This document defines an extension to <strong>the</strong> Session Initiation<br />
Protocol (<strong>SIP</strong>). This extension allows <strong>for</strong> a periodic refresh of<br />
<strong>SIP</strong> sessions through a re-INVITE or UPDATE request. The<br />
refresh allows both user agents and proxies to determine if <strong>the</strong><br />
<strong>SIP</strong> session is still active.<br />
This parameter could set <strong>the</strong> period of <strong>the</strong> subscription. The<br />
default value is 3600.<br />
Select <strong>the</strong> DTMF type.<br />
You can only configure <strong>the</strong>se settings via Web interface.<br />
1) Choose Account.<br />
2) Select <strong>the</strong> desired account.<br />
3) Choose Advanced to do <strong>the</strong> relating settings.<br />
You can consult your system administrator <strong>for</strong> more in<strong>for</strong>mation.<br />
TLS<br />
TLS(Transport Layer Security), an IETF standards track protocol(RFC 5246), was based<br />
on <strong>the</strong> earlier SSL specifications developed by Netscape Corporation.<br />
Go to Account->Advanced, choose Transport option, in <strong>the</strong> pull-down menu, you can<br />
choose <strong>the</strong> TLS option, <strong>the</strong>n click <strong>the</strong> Confirm button to save <strong>the</strong> change.<br />
- 24 -
Enterprise IP <strong>Phone</strong><br />
Using <strong>the</strong> Advanced <strong>Phone</strong> Functions<br />
Network Setting<br />
PC Port Setting<br />
Please refer to <strong>the</strong> previous part “Configuration and Registration” <strong>for</strong> <strong>the</strong> basic Network<br />
WAN setting in<strong>for</strong>mation. The following table lists <strong>the</strong> instructions of <strong>the</strong> field about <strong>the</strong><br />
Network PC Port Setting.<br />
Field Name<br />
As Bridge<br />
As Router<br />
IP address<br />
DHCP Server<br />
Starting IP<br />
End IP<br />
Description<br />
If you select <strong>the</strong> Bridge mode, <strong>the</strong>n <strong>the</strong> two Fast E<strong>the</strong>rnet ports<br />
will be transparent.<br />
If you select <strong>the</strong> Router mode, <strong>the</strong> <strong>SIP</strong> phone will work as a<br />
router<br />
User could configure <strong>the</strong> PC port IP address.<br />
If you set <strong>the</strong> DHCP server on, <strong>the</strong> device connected to <strong>the</strong> PC<br />
port will get <strong>the</strong> IP address automatically between <strong>the</strong> start IP<br />
address and <strong>the</strong> end IP address. But if you select <strong>the</strong> bridge<br />
mode, <strong>the</strong> DHCP server can not work.<br />
Indicate <strong>the</strong> range of <strong>the</strong> IP address<br />
Indicate <strong>the</strong> range of <strong>the</strong> IP address<br />
- 25 -
Enterprise IP <strong>Phone</strong><br />
Using <strong>the</strong> Advanced <strong>Phone</strong> Functions<br />
To configure PC Port settings via <strong>Phone</strong> interface:<br />
1) Press Menu->Settings->Advanced.<br />
2) Enter <strong>the</strong> password required, scroll to Network option, press OK button, select PC<br />
port, and press OK button to enter.<br />
3) If you choose Bridge, it will return to <strong>the</strong> previous menu.<br />
4) If you choose Router, you will be prompted to enter <strong>the</strong> IP, Netmask, DHCP Server<br />
Disable/Enable.<br />
5) Press OK button to save <strong>the</strong> changes, or MEBU to return to <strong>the</strong> previous menu.<br />
To configure PC Port via Web interface:<br />
Choose Network->PC Port to do <strong>the</strong> relating configuration, you can set <strong>the</strong> starting and<br />
end IP address only via Web interface. You can consult your system administrator <strong>for</strong><br />
more in<strong>for</strong>mation.<br />
VLAN Setting<br />
VLAN is a group of hosts with a common set of requirements that communicate as if<br />
<strong>the</strong>y were attached to <strong>the</strong> Broadcast domain, regardless of <strong>the</strong>ir physical location. The<br />
following table lists <strong>the</strong> instruction of <strong>the</strong> field about <strong>the</strong> VLAN Setting.<br />
Field Name<br />
QoS<br />
Local RTP Port<br />
WebServer<br />
Description<br />
When <strong>the</strong> network capacity is insufficient, QoS could provide<br />
priority to users by setting <strong>the</strong> value.<br />
Define <strong>the</strong> port <strong>for</strong> voice transmission.<br />
Users can choose <strong>the</strong> WebServer type: Disable, HTTP, HTTPS, or<br />
HTTPS & HTTP.<br />
To configure VLAN settings via <strong>Phone</strong> interface:<br />
1) Press Menu->Settings->Advanced.<br />
2) Enter <strong>the</strong> password required, scroll to Network option, press ok button, select VLAN,<br />
press OK to enter.<br />
3) Choose LAN Port, press OK button.<br />
4) Set <strong>the</strong> VLAN Status, and input <strong>the</strong> VID Number, Priority.<br />
5) Press OK button to save <strong>the</strong> settings, or MENU to return to VLAN menu.<br />
6) Follow <strong>the</strong> same way to set <strong>the</strong> PC Port option.<br />
To configure VLAN settings via Web interface:<br />
Choose Network->Advanced to do <strong>the</strong> relating configuration. You can consult your<br />
system administrator <strong>for</strong> more in<strong>for</strong>mation.<br />
- 26 -
Enterprise IP <strong>Phone</strong><br />
Using <strong>the</strong> Advanced <strong>Phone</strong> Functions<br />
HTTPS<br />
This IP phone can support HTTPS (Hypertext Transfer Protocol over Secure Socket<br />
Layer). Adding SSL layer under HTTP, in short, it is a security version of HTTP. Users can<br />
set this transmission mode via web page.<br />
To configure HTTPS settings via Web interface:<br />
Go to Network->Advanced, choose WebServer option, in <strong>the</strong> pull-down menu of Type<br />
field, choose <strong>the</strong> transmission mode, <strong>the</strong>n click <strong>the</strong> Confirm button to save <strong>the</strong> changes.<br />
Note:<br />
For more details of <strong>the</strong> HTTPS, you can consult with your system administrator.<br />
Maintenance Tasks<br />
Administrator Mode<br />
The phone allows two modes to configure <strong>the</strong> phone:<br />
• User Mode<br />
• Administrator Mode<br />
Administrator mode grants unlimited access to <strong>the</strong> phone configuration on both Web<br />
and <strong>Phone</strong> interface. User Mode is not able to access <strong>the</strong> settings on <strong>the</strong> <strong>Phone</strong> interface<br />
such as: Accounts, Network, Reset to Factory, o<strong>the</strong>r phone settings.<br />
- 27 -
Enterprise IP <strong>Phone</strong><br />
Using <strong>the</strong> Advanced <strong>Phone</strong> Functions<br />
Administrator/User Password<br />
Administrator mode grants unlimited access to <strong>the</strong> phone configuration on both web<br />
and phone user interface. The administrator/user password is used to access:<br />
• Web interface along with user name.<br />
• <strong>the</strong> advance settings of <strong>the</strong> phone such as Network, Account, Reset to Factory<br />
Settings via <strong>the</strong> <strong>Phone</strong> interface.<br />
The default administrator password is admin. Meanwhile <strong>the</strong> user name <strong>for</strong> Web<br />
interface access is admin.<br />
To change <strong>the</strong> administrator password via <strong>Phone</strong> interface:<br />
1) Press MENU->Settings->Advanced->OK->Set Admin PWD->OK.<br />
2) You are prompted to enter <strong>the</strong> old PWD, new PWD and Confirm PWD, Press abc to<br />
change <strong>the</strong> input method.<br />
3) Press OK button to confirm <strong>the</strong> change, or MENU to return to previous menu.<br />
To change <strong>the</strong> administrator password via Web interface:<br />
Choose Security, enter <strong>the</strong> old, new password and Confirm Password, choose Confirm<br />
button to save <strong>the</strong> changes, or Cancel button to cancel <strong>the</strong> changes.<br />
Reboot<br />
You should reboot <strong>the</strong> phone when you are challenged, e.g. after applying changes to<br />
<strong>the</strong> phone configuration.<br />
To reboot via Web interface:<br />
1) Choose Upgrade->Basic.<br />
2) Click Reboot button.<br />
Note:<br />
You can only reboot from Web interface. Please do not power off during reboot, or it will<br />
cause <strong>the</strong> flash memory error.<br />
Reset to Factory<br />
You should reset <strong>the</strong> phone only in this case: <strong>the</strong> phone configuration was changed and<br />
<strong>the</strong> phone is not functioning anymore. To maintain <strong>the</strong> configuration of <strong>the</strong> phone, you<br />
need your system administrator or service provider’s advice.<br />
To reset to factory via phone interface:<br />
1) Press MENU->Settings->Advanced.<br />
2) You are prompted to enter <strong>the</strong> required password, <strong>the</strong> default one is admin.<br />
3) Scroll to Reset Setting, press OK button.<br />
4) You are prompted to confirm <strong>the</strong> change, press OK to reset to factory settings, or<br />
MENU to return to previous menu.<br />
- 28 -
Enterprise IP <strong>Phone</strong><br />
Using <strong>the</strong> Advanced <strong>Phone</strong> Functions<br />
5) It will take a few minutes to reset, please do not power off during resetting, or it will<br />
cause flash memory error.<br />
To reset to factory via Web interface:<br />
1) Choose Upgrade->Basic.<br />
2) Click Reset button.<br />
Note:<br />
If you confirm all current setting changes including contact list, call history, account<br />
settings, etc will be lost, you need to export <strong>the</strong> configuration first if you still want to<br />
import <strong>the</strong> old configurations after reset. Or your phone must be configured a new<br />
manually unless mass provisioning is used!<br />
To Export/Import <strong>the</strong> old configuration file via Web interface:<br />
1) Choose Upgrade->Advanced, select Import/Export Config, click Export button to<br />
export <strong>the</strong> file to your local computer.<br />
2) Choose Upgrade->Advanced, select Import/Export Config, click Browse button,<br />
select <strong>the</strong> specific configuration file in your local computer, click Import button.<br />
3) It will take a few minutes to reset, please do not power off during resetting, or it will<br />
cause flash memory error.<br />
Firmware Update<br />
The phone is delivered with pre-installed firmware which allows operating your phone<br />
flawlessly. If you require updating <strong>the</strong> phone’s firmware please contact your system<br />
administrator. You can only update <strong>the</strong> firmware via Web interface.<br />
To update <strong>the</strong> firmware manually via Web interface:<br />
1) Choose Upgrade->Basic->Browse, select <strong>the</strong> firmware file in your local computer.<br />
2) Click Upgrade button to update <strong>the</strong> new firmware.<br />
3) Please do not power off during <strong>the</strong> updating.<br />
To update <strong>the</strong> firmware automatically via Web interface:<br />
1) Choose Upgrade->Advanced, configure <strong>the</strong> relating settings: Custom Option,<br />
Custom Option Type, URL, Account, Password, Check New Config and ASE Key.<br />
2) Click Confirm button, <strong>the</strong> phone will check <strong>the</strong> server <strong>for</strong> a new firmware in a<br />
specific time, and it updates automatically if <strong>the</strong>re is new firmware.<br />
3) You can also update <strong>the</strong> firmware immediately by pressing Autoprovision button.<br />
- 29 -
Enterprise IP <strong>Phone</strong><br />
Using <strong>the</strong> Advanced <strong>Phone</strong> Functions<br />
The parameters of <strong>the</strong> Autoprovision:<br />
Parameter<br />
Update Protocol<br />
TFTP Server<br />
Check new config<br />
Scheduling<br />
Description<br />
The phone can be updated via TFTP, FTP or HTTP.<br />
If you choose TFTP as protocol TFTP, you need to enter <strong>the</strong> TFTP<br />
server IP address and port.<br />
You can specific <strong>the</strong> period that your phone checks <strong>the</strong> new<br />
firmware from <strong>the</strong> server: Power on, Repeatedly, Weekly, Power<br />
on + Repeatedly, Power on + Weekly and Disabled.<br />
You can specific <strong>the</strong> period in days which <strong>the</strong> phone checks and<br />
updates <strong>the</strong> new firmware, <strong>the</strong> range is 1-30 days.<br />
Note:<br />
1. Any power interruption during <strong>the</strong> following process will most likely lead to a flash<br />
memory error. As a result <strong>the</strong> system cannot boot up anymore. The procedure can<br />
be only conducted in Administrator Mode.<br />
2. If <strong>the</strong> updating is failed, you can re-plug <strong>the</strong> power adaptor, and press <strong>the</strong> Speaker<br />
key <strong>for</strong> 3 seconds, <strong>the</strong> IP phone will enter <strong>the</strong> account configuration interface. Users<br />
can reconfigure <strong>the</strong> IP phone account in<strong>for</strong>mation here, <strong>the</strong>n press <strong>the</strong> OK button to<br />
save <strong>the</strong> changes.<br />
Decryption<br />
This IP phone can support y000000.cfg and mac.cfg files encryption and decryption <strong>for</strong><br />
user au<strong>the</strong>ntication to realize security usage. If <strong>the</strong>re are any encrypted y000000.cfg or<br />
mac.cfg files on <strong>the</strong> server, users can open <strong>the</strong> webpage of your IP phone. Go to<br />
Upgrade->Advanced, choose and fill in <strong>the</strong> Specified AES Key (<strong>for</strong> y000000.cfg) and<br />
Per-phone AES Key (<strong>for</strong> mac.cfg) option, <strong>the</strong>n click <strong>the</strong> Confirm button to decryption<br />
<strong>the</strong> files and upgrade to <strong>the</strong> new version. Shown as below:<br />
- 30 -
Enterprise IP <strong>Phone</strong><br />
Using <strong>the</strong> Advanced <strong>Phone</strong> Functions<br />
Note:<br />
You can ask your system administrator <strong>for</strong> <strong>the</strong> decrypt password.<br />
System Log Export<br />
If <strong>the</strong>re are any errors happened in your phone, you can export <strong>the</strong> system log and send<br />
to your system administrator <strong>for</strong> diagnosis.<br />
To export <strong>the</strong> System Log:<br />
Choose Upgrade->Advanced, select Export System Log, click Export button to export<br />
<strong>the</strong> file to your local computer.<br />
Tone Settings<br />
You can define <strong>the</strong> frequency and time period of all <strong>the</strong> following tones:<br />
• Dial<br />
• Ring Back<br />
• Busy<br />
• Congestion<br />
• Call Waiting<br />
• Dial Recall<br />
• Record<br />
• Info<br />
• Stutter<br />
• Message<br />
• Auto Answer<br />
- 31 -
Enterprise IP <strong>Phone</strong><br />
Using <strong>the</strong> Advanced <strong>Phone</strong> Functions<br />
To edit <strong>the</strong> tone filed via Web interface:<br />
1) Choose <strong>Phone</strong>->Tones.<br />
2) Enter <strong>the</strong> frequency and time period(in ms) as <strong>the</strong> following <strong>for</strong>mat:<br />
Frequency /Time Period (<strong>for</strong> example 400/200).<br />
3) Press Confirm button to save <strong>the</strong> changes, Cancel to cancel <strong>the</strong> changes.<br />
Note:<br />
1. Please contact your system administrator <strong>for</strong> more in<strong>for</strong>mation about <strong>the</strong><br />
frequency and time period parameters. You can enter up to 8 groups <strong>for</strong> each tone.<br />
2. If <strong>the</strong> frequency is set as 0, it means silence.<br />
- 32 -
Enterprise IP <strong>Phone</strong><br />
Trouble Shooting<br />
Trouble Shooting<br />
I can not register to <strong>the</strong> server?<br />
1) Check <strong>the</strong> IP address. If you set your WAN port in DHCP mode, please make sure<br />
that your DHCP server is on.<br />
2) Check your gateway.<br />
3) Check your DNS server.<br />
4) Make sure your account in<strong>for</strong>mation is <strong>the</strong> same as you have got from your ISP.<br />
5) Check whe<strong>the</strong>r <strong>the</strong> <strong>SIP</strong> server is on.<br />
6) Check <strong>the</strong> <strong>SIP</strong> register port, <strong>the</strong> default value is 5060.<br />
I can’t get <strong>the</strong> IP address?<br />
1) Make sure you have plugged <strong>the</strong> E<strong>the</strong>rnet cable into <strong>the</strong> WAN port.<br />
2) Make sure that <strong>the</strong> DHCP server is on, and <strong>the</strong>re are available IP addresses in <strong>the</strong><br />
server.<br />
3) Try to set your WAN port to static IP client mode.<br />
During a call, I can not hear any voice?<br />
1) Make sure your handset is tightly connected with <strong>the</strong> phone.<br />
2) Check whe<strong>the</strong>r you have muted <strong>the</strong> conversation or not.<br />
3) Consult <strong>the</strong> outbound server details with your ISP.<br />
Have DTMF problem?<br />
1) Check which kind of DTMF you are using, and whe<strong>the</strong>r it is compatible with <strong>the</strong><br />
server.<br />
2) Consult <strong>the</strong> payload value with your ISP.<br />
How to change <strong>the</strong> time?<br />
Select <strong>the</strong> time zone or enter <strong>the</strong> time in<strong>for</strong>mation manually on <strong>the</strong> webpage or <strong>the</strong><br />
phone.<br />
How to answer <strong>the</strong> incoming calls during a call?<br />
If a call comes in when you are in a conversation, press <strong>the</strong> Answer key to answer <strong>the</strong><br />
incoming call.<br />
How to refuse incoming calls during a call?<br />
You can turn off <strong>the</strong> function of call waiting, and <strong>the</strong>n our phone will refuse all <strong>the</strong><br />
incoming calls when you are in a conversation.<br />
- 33 -
Enterprise IP <strong>Phone</strong><br />
Trouble Shooting<br />
How to send SMS?<br />
You could edit <strong>the</strong> SMS in <strong>the</strong> MENU-> Messages->Text Messages.<br />
Note:<br />
Make sure that <strong>the</strong> <strong>SIP</strong> server you have registered supports SMS function.<br />
How to update <strong>the</strong> firmware?<br />
1) Enter <strong>the</strong> webpage of your phone, go to Upgrade, <strong>the</strong>n you can find <strong>the</strong> option”<br />
Select and Upgrade Firmware” at <strong>the</strong> bottom of <strong>the</strong> page.<br />
2) Select <strong>the</strong> file to update, <strong>the</strong>n click <strong>the</strong> Upgrade button.<br />
Note:<br />
Make sure <strong>the</strong> firmware you choose is provided by your service provider, or <strong>the</strong> device<br />
will probably crash after <strong>the</strong> update.<br />
How to auto provision?<br />
Consult <strong>the</strong> auto provision server address with your ISP.<br />
- 34 -


