You also want an ePaper? Increase the reach of your titles
YUMPU automatically turns print PDFs into web optimized ePapers that Google loves.
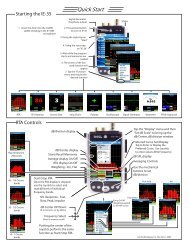
Pref. Curve, LED Display, Weighting<br />
Preferred Curve Overlay<br />
page 14<br />
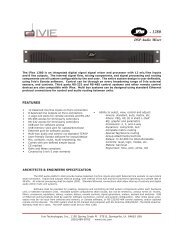
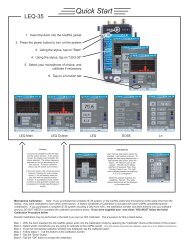
<strong>Ivie</strong> <strong>IE</strong>-<strong>33</strong> & <strong>IE</strong>-<strong>35</strong> <strong>Manual</strong><br />
The Preferred Curve overlay is an <strong>IE</strong>-<strong>33</strong> and <strong>IE</strong>-<strong>35</strong> feature that allows the user to create a target overlay which<br />
can be displayed on the screen. This can be a valuable aid to the equalization process. Users often use a target<br />
curve to contour the frequency response of a system to a desired result.<br />
Creating a Preferred Curve: The preferred, or target curve, is nothing more than a line created by the user<br />
that is overlaid on the screen to help visualize a desired result. To create a Preferred Curve, tap the PE memory<br />
stylus button to the far right of the row of memory stylus buttons. The background on the PE button will change<br />
to white, and the RTA display will move to a special 1/3 octave display with all bars touching the center reference<br />
line. Use the "joystick" rocker button to move the blue 1/3 octave bar right or left to a 1/3 octave you wish<br />
to change. Use the joystick up/down to change the level of the 1/3 octave. Move to the next 1/3 octave and<br />
change that level, and so on. You can create a roll-off target curve or other special spectra targets in this way.<br />
Tap the Preferred Curve stylus button again and the background will turn green, the button text will change to<br />
PT (preferred target), and the preferred target curve overlay will appear on-screen. Tap the button again and the<br />
background will change to buff while the target curve is removed from the display. Tap the button again and it<br />
changes to white as the Preferred Curve entry screen again appears so further editing, if desired, can be done.<br />
Tap the button one more time and it turns green while the Preferred Curve is displayed.<br />
Saving a Preferred Curve: The Preferred Curve you have created can be saved to the analyzer memory very<br />
easily. You can save several Preferred Curves and call them back from memory as needed. To save a<br />
Preferred Curve, tap the main screen Memory button, which will bring up the Memory Management screen.<br />
Note that the default name of the Preferred Curve is "Preferred.ivi." Tap the "Store" button immediately to the<br />
right of the file name and you will see a dialog box that allows you to change the name of the file to something<br />
more descriptive (you can also change the file storage location if you wish). When finished editing, tap "OK" to<br />
store the curve.<br />
Loading a Preferred Curve from Memory: To load a previously stored Preferred Curve from memory, simply<br />
tap the main screen Memory stylus button to bring up the Memory Management screen. Memory slot # 9 is<br />
used for storing and recalling Preferred Curves. Tap the button labeled "Load" for the Preferred Curve memory<br />
location and you will see a dialog that allows you to select the desired preferred curve. Tap "OK" and the curve<br />
will be loaded into the Preferred Curve memory location. Both the <strong>IE</strong>-<strong>33</strong> and <strong>IE</strong>-<strong>35</strong> come with one pre-loaded<br />
Preferred Curve, labeled "Preferred.ivi" that can be loaded into the display. It is a high end roll-off curve used as<br />
a target for large venue sound system EQ.<br />
LED Display: Many users are familiar with the LED display of <strong>Ivie</strong>'s <strong>IE</strong>-30A analyzer. To have the <strong>IE</strong>-<strong>33</strong> or<br />
<strong>IE</strong>-<strong>35</strong> emulate the <strong>IE</strong>-30's LED display, tap the "Function" pop-up menu at the bottom of the main screen and<br />
choose "RTA LEDs." The RTA display changes to "LEDs.” Tip: The LED display can be useful in interpreting<br />
amplitude information on the analyzer screen. By setting the dB scale to 5 dB/division each LED represents one<br />
dB of amplitude. By setting 10 dB/division each LED represents 2 dB of amplitude, and by setting 15 dB/division,<br />
each LED represents 3 dB of amplitude change.<br />
SPL Weighting and the RTA Display: Some users prefer to see the normal weighting filters that are applied to<br />
SPL measurements also applied to the visual spectrum of the on-screen RTA. The <strong>IE</strong>-<strong>33</strong> and <strong>IE</strong>-<strong>35</strong> allow you to<br />
choose whether or not the RTA display will show an unweighted display or a weighted display. To apply weighting<br />
filters to the RTA display, tap on the "Options" pop-up menu at the bottom of the screen and select "RTA<br />
Weighting." Whatever weighting filter is selected for the SPL meter when in RTA mode (the SPL meter is in the<br />
small windows in the lower right of the screen) will then be applied to the RTA display. Unchecking (by again<br />
tapping) this selection will remove weighting from the RTA display.