MET ONE-HHPC-2-Particle-Counter-User-Manual - Particle Counters
MET ONE-HHPC-2-Particle-Counter-User-Manual - Particle Counters
MET ONE-HHPC-2-Particle-Counter-User-Manual - Particle Counters

Create successful ePaper yourself
Turn your PDF publications into a flip-book with our unique Google optimized e-Paper software.
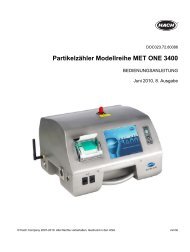
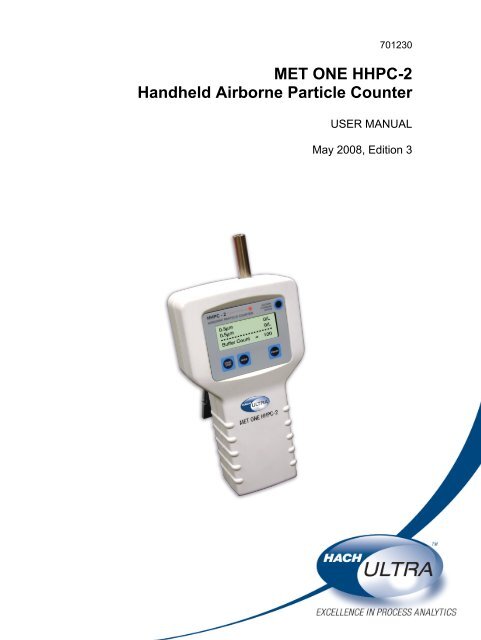
701230<br />
<strong>MET</strong> <strong>ONE</strong> <strong>HHPC</strong>-2<br />
Handheld Airborne <strong>Particle</strong> <strong>Counter</strong><br />
USER MANUAL<br />
May 2008, Edition 3
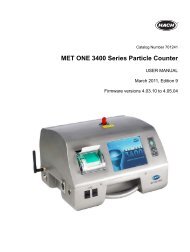
701230<br />
<strong>MET</strong> <strong>ONE</strong> <strong>HHPC</strong>-2<br />
Handheld Airborne <strong>Particle</strong> <strong>Counter</strong><br />
USER MANUAL<br />
May 2008, Edition 3<br />
© Hach Ultra Analytics, Inc., 2008. All rights reserved. Printed in the U.S.A.
Table of Contents<br />
Section 1 Specifications.................................................................................................................... 5<br />
Section 2 General Information......................................................................................................... 7<br />
2.1 Safety information........................................................................................................................ 7<br />
2.1.1 Use of hazard information................................................................................................... 7<br />
2.1.2 Precautionary labels ........................................................................................................... 7<br />
2.1.3 Electrostatic Discharge (ESD) considerations .................................................................... 8<br />
2.1.4 Battery safety information ................................................................................................... 8<br />
2.2 General product information ........................................................................................................ 9<br />
Section 3 Installation........................................................................................................................ 11<br />
3.1 Unpack the instrument............................................................................................................... 11<br />
3.2 Installation guidelines for <strong>MET</strong> <strong>ONE</strong> <strong>HHPC</strong>-2............................................................................ 12<br />
3.3 Mechanical installation............................................................................................................... 12<br />
3.3.1 Install the isokinetic probe................................................................................................. 12<br />
3.3.2 Install the intake hose barb ...............................................................................................12<br />
3.3.3 Install the zero count filter ................................................................................................. 13<br />
3.3.4 Connect the AC/DC power supply .................................................................................... 14<br />
Section 4 Operation.......................................................................................................................... 15<br />
4.1 Install the <strong>MET</strong> <strong>ONE</strong> <strong>HHPC</strong>–2 utility software ........................................................................... 15<br />
4.2 Start up ...................................................................................................................................... 15<br />
4.3 Display and keypad.................................................................................................................... 15<br />
4.3.1 Keypad.............................................................................................................................. 16<br />
4.3.2 Screens............................................................................................................................. 17<br />
4.4 Configuration setup.................................................................................................................... 17<br />
4.5 Select custom settings............................................................................................................... 17<br />
4.5.1 Set the date and time........................................................................................................ 17<br />
4.5.2 Select the count mode ......................................................................................................18<br />
4.5.3 Set the sample units and volume...................................................................................... 19<br />
4.5.3.1 Rate mode................................................................................................................19<br />
4.5.3.2 Concentration or totalize mode ................................................................................ 19<br />
4.5.4 Set the contrast................................................................................................................. 20<br />
4.6 <strong>Counter</strong> operation ...................................................................................................................... 21<br />
4.6.1 Verify the <strong>MET</strong> <strong>ONE</strong> <strong>HHPC</strong>–2 with a zero count filter ...................................................... 21<br />
4.7 Collect samples.......................................................................................................................... 22<br />
4.8 Transfer the sample data to the PC...........................................................................................22<br />
4.9 Print samples ............................................................................................................................. 22<br />
4.10 Storing samples ....................................................................................................................... 23<br />
4.10.1 Determine the number of samples.................................................................................. 23<br />
4.10.2 Display buffer records ..................................................................................................... 23<br />
4.10.3 Clear the buffer ............................................................................................................... 24<br />
Section 5 Maintenance .................................................................................................................... 25<br />
5.1 Battery maintenance.................................................................................................................. 25<br />
5.1.1 Charge a drained battery .................................................................................................. 25<br />
5.2 Calibrate the <strong>MET</strong> <strong>ONE</strong> <strong>HHPC</strong>–2 .............................................................................................. 25<br />
Section 6 Troubleshooting ............................................................................................................. 27<br />
6.1 Problems and recommendations ............................................................................................... 27<br />
Section 7 Replacement Parts and Accessories......................................................................... 29<br />
7.1 Accessories................................................................................................................................ 29<br />
7.2 Optional accessories.................................................................................................................. 29<br />
Section 8 Service Contact Information........................................................................................ 31<br />
3
Table of Contents<br />
Section 9 Limited Warranty.............................................................................................................32<br />
Section 10 Certification....................................................................................................................33<br />
Appendix A Data Communications...............................................................................................35<br />
Index ......................................................................................................................................................37<br />
4
Section 1<br />
Specifications<br />
Specifications are subject to change without notice.<br />
General<br />
Dimensions (W x L x H) 114.30 mm x 209.60 mm x 57.20 mm (4.5" x 8.25" x 2.25")<br />
Weight<br />
1.0 kg (2.2 lb)<br />
Number of size channels 2<br />
Standard<br />
0.3, 0.5 µm<br />
0.3, 1.0 µm<br />
IAQ 0.5, 5.0 µm<br />
Custom<br />
0.3 to 20 µm available<br />
Flow rate<br />
0.1 cfm (2.83 L/min)<br />
Light source<br />
Laser diode; index guided (26,000 MTBF at 25 °C)<br />
Calibration<br />
PSL particles in air (NIST traceable)<br />
Counting efficiency<br />
50% at 0.3 µm; 100% for particles > 0.45 µm (per JIS B9921:1997)<br />
Zero count<br />
1 count/5 minute (per JIS B9921:1997)<br />
Coincidence loss 5% at 2,000,000 particles per ft 3<br />
Relative humidity<br />
20% to 90%, non-condensing<br />
Temperature<br />
± 3 °C, 10 °C to 40 °C (50 °F to 104 °F)<br />
Data storage<br />
100 sample records (rotating buffer)<br />
Data recorded<br />
Counts, calibration error<br />
Display<br />
LCD, 4 x 16 character display<br />
Alarms<br />
Low battery, calibration error<br />
Count modes<br />
Concentration, totalize, audio<br />
Delay time<br />
0 to 24 hours<br />
Sample inlet<br />
Isokinetic probe<br />
Interface<br />
RS232 through RJ45<br />
Vacuum source<br />
Internal pump, flow controlled<br />
Housing<br />
Injection molded plastic<br />
Power<br />
AC Adapter, 12 VDC at 2.5 A, 90 to 250 VAC, 50 to 60 Hz<br />
Rechargeable battery<br />
NiMH, 4.8 V at 4.5 Ah; replaceable<br />
Recharge time<br />
2 hours<br />
Continuous Operating Time<br />
8 hours<br />
Standards CE, JIS B9921: 1997<br />
Environment<br />
Operating temperature<br />
Operating relative humidity<br />
Storage temperature<br />
Storage relative humidity<br />
Compliance<br />
Standards<br />
10 °C to 40 °C (50 °F to 104 °F)<br />
20% to 90%, non-condensing<br />
–10 °C to 50 °C (14 °F to 122 °F)<br />
Up to 90%, non-condensing<br />
JIS B 9921–1997—Light Scattering Automatic <strong>Particle</strong> <strong>Counter</strong><br />
Federal Standard 209E—Standard Practice for Defining Size Calibration,<br />
Resolution and Counting Accuracy of an Air-Borne <strong>Particle</strong> <strong>Counter</strong> Using<br />
Near-Monodispersed Spherical Particulate Material.<br />
5
Specifications<br />
6
Section 2<br />
General Information<br />
2.1 Safety information<br />
2.1.1 Use of hazard information<br />
2.1.2 Precautionary labels<br />
Read this entire manual before unpacking, setting up or operating this equipment. Pay<br />
attention to all danger and caution statements. Failure to do so could result in serious<br />
injury to the operator or damage to the equipment.<br />
To make sure that the protection provided by this equipment is not impaired, do not use<br />
or install this equipment in any manner other than that specified in this manual.<br />
DANGER<br />
Indicates a potentially or imminently hazardous situation which, if not avoided, will<br />
result in death or serious injury.<br />
WARNING<br />
Indicates a potentially or imminently hazardous situation which, if not avoided,<br />
could result in death or serious injury.<br />
CAUTION<br />
Indicates a potentially hazardous situation that can result in minor or<br />
moderate injury.<br />
Important Note: Indicates a situation which, if not avoided, can cause damage to the<br />
instrument. Information that requires special emphasis.<br />
Note: Information that supplements points in the main text.<br />
Read all labels and tags attached to the instrument. Personal injury or damage to the<br />
instrument could occur if not observed. A symbol, if noted on the instrument, will be<br />
included with a danger or caution statement in the manual.<br />
This symbol, if noted on the instrument, references the instruction manual for operation and/or safety information.<br />
Electrical equipment marked with this symbol cannot be disposed of in European public disposal systems after<br />
12 August of 2005. In conformity with European local and national regulations (EU Directive 2002/96/EC),<br />
European electrical equipment users must now return old or end-of life equipment to the Producer for disposal at no<br />
charge to the user.<br />
Note: To return for recycling, contact the equipment producer or supplier for instructions on how to return end-of-life<br />
equipment, producer-supplied electrical accessories and all auxiliary items for proper disposal.<br />
This symbol, when noted on a product enclosure or barrier, indicates that a risk of electrical shock and/or<br />
electrocution exists.<br />
This symbol, if noted on the product, indicates the need for protective eye wear.<br />
This symbol, when noted on the product, identifies the location of a fuse or current limiting device.<br />
This symbol indicates a laser device is used in the equipment.<br />
This symbol, when noted on the product, indicated the presence of devices sensitive to Electro-static Discharge<br />
(ESD) and indicated that care must be taken to prevent damage with the equipment.<br />
7
General Information<br />
2.1.3 Electrostatic Discharge (ESD) considerations<br />
2.1.4 Battery safety information<br />
Important Note: To minimize hazards and ESD risks, maintenance procedures not<br />
requiring power to the analyzer should be performed with power removed.<br />
Delicate internal electronic components can be damaged by static electricity, resulting in<br />
degraded instrument performance or eventual failure.<br />
The manufacturer recommends taking the following steps to prevent ESD damage to<br />
the instrument:<br />
• Before touching any instrument electronic components (such as printed circuit cards<br />
and the components on them) discharge static electricity. This can be accomplished<br />
by touching an earth-grounded metal surface such as the chassis of an instrument,<br />
or a metal conduit or pipe.<br />
• To reduce static build-up, avoid excessive movement. Transport static-sensitive<br />
components in anti-static containers or packaging.<br />
• To discharge static electricity from the body and keep it discharged, wear a wrist<br />
strap connected by a wire to earth ground.<br />
Handle all static-sensitive components in a static-safe area. If possible, use anti-static<br />
floor pads and work bench pads.<br />
WARNING<br />
An explosion can occur if the internal battery is replaced incorrectly.<br />
Figure 1 shows the label that is displayed on the battery for the safety of the user.<br />
Figure 1 Battery safety label<br />
8
2.2 General product information<br />
General Information<br />
The <strong>MET</strong> <strong>ONE</strong> Handheld Airborne <strong>Particle</strong> <strong>Counter</strong>–2 (<strong>HHPC</strong>–2) (refer to Figure 2) is a<br />
portable instrument that measures, counts, stores and reports airborne particulates. The<br />
standard <strong>MET</strong> <strong>ONE</strong> <strong>HHPC</strong>–2 holds 100 samples in the memory. The data records<br />
include date, time, counts, sample labels, volume, alarm flags, temperature and relative<br />
humidity. The user can download the data to a personal computer (PC) using the<br />
included interface cable and software. The internal battery powers up the <strong>MET</strong> <strong>ONE</strong><br />
<strong>HHPC</strong>–2 when mobile or when connected to the AC power adapter.<br />
Note: The AC power adapter provided with the unit is used for extended or stationary sampling.<br />
The <strong>MET</strong> <strong>ONE</strong> <strong>HHPC</strong>–2 is used:<br />
• To monitor the air quality in clean-rooms<br />
• To monitor the air quality in manufacturing processes<br />
• To monitor the air quality in pharmaceutical production<br />
Figure 2 <strong>MET</strong> <strong>ONE</strong> <strong>HHPC</strong>–2<br />
1 Front view of the <strong>MET</strong> <strong>ONE</strong> <strong>HHPC</strong>–2 2 Back view of the <strong>MET</strong> <strong>ONE</strong> <strong>HHPC</strong>–2<br />
1 Bottom view of the <strong>MET</strong> <strong>ONE</strong> <strong>HHPC</strong>–2<br />
9
Section 3<br />
Installation<br />
3.1 Unpack the instrument<br />
DANGER<br />
Only qualified personnel should conduct the tasks described in this section of<br />
the manual.<br />
Remove the components from the shipping container and inspect for damage. Verify that<br />
all the items listed in Figure 3 are included. If any items are missing or damaged, contact<br />
the manufacturer or sales representative.<br />
Retain the original packaging materials. Use the original packaging material to store or<br />
ship the instrument to protect against damage during storage or transportation.<br />
Figure 3 List of packaged items<br />
1 <strong>MET</strong> <strong>ONE</strong> <strong>HHPC</strong>–2 6 6¼”–OD high purity tubing (VP792002)<br />
2 Zero count filter 7 <strong>MET</strong> <strong>ONE</strong> <strong>HHPC</strong>–2 Utility software (CS200025)<br />
3 Intake nozzle, 1/8” hose barb (MP000026–01) 8 RS232 modular cable (VP894408)<br />
4 Black cap/Intake nozzle cover 9 RJ45 to DB9 adaptor (SA000070–01)<br />
5 US power cord (CS200025) 10 AC/DC power supply (VP624005)<br />
11
Installation<br />
3.2 Installation guidelines for <strong>MET</strong> <strong>ONE</strong> <strong>HHPC</strong>-2<br />
3.3 Mechanical installation<br />
3.3.1 Install the isokinetic probe<br />
3.3.2 Install the intake hose barb<br />
The <strong>MET</strong> <strong>ONE</strong> <strong>HHPC</strong>–2 is ready to use when shipped and has default configuration<br />
settings. Refer to the following general guidelines during installation.<br />
1. Lift the <strong>MET</strong> <strong>ONE</strong> <strong>HHPC</strong>–2 from the shipping container or the carrying case and<br />
place it on a flat surface.<br />
2. Remove the layer of protective plastic from the LCD screen.<br />
3. Remove the isokinetic probe cover (black plastic cap) before the startup of the <strong>MET</strong><br />
<strong>ONE</strong> <strong>HHPC</strong>–2.<br />
Note: The pump and other internal electrical components will be damaged if the cap is left on.<br />
Note: The battery is charged before shipping, but may need to be charged before operation (refer to<br />
section 6.1 on page 27 for more information).<br />
The <strong>MET</strong> <strong>ONE</strong> <strong>HHPC</strong>–2 is shipped with two different intake devices:<br />
• Isokinetic probe<br />
• Intake hose barb<br />
Important Note: Do not use a wrench to connect or disconnect the intake nozzle or<br />
isokinetic probe. Only finger-tighten the connection.<br />
The isokinetic probe (refer to Figure 4 on page 13) is used to sample ambient air<br />
samples. The isokinetic probe is pre-installed and ready for use as soon as the <strong>MET</strong> <strong>ONE</strong><br />
<strong>HHPC</strong>–2 is unpacked. To install the isokinetic probe:<br />
1. Attach the isokinetic probe to the intake nozzle on the <strong>MET</strong> <strong>ONE</strong> <strong>HHPC</strong>–2 by turning<br />
the isokinetic probe to the right.<br />
2. Remove the black plastic cap attached to the isokinetic probe.<br />
Note: Make sure that the cap is attached to the isokinetic probe when the probe is not in use.<br />
The cap protects the <strong>MET</strong> <strong>ONE</strong> <strong>HHPC</strong>–2 from debris and contamination.<br />
To sample areas that are difficult to reach, connect longer tubing to the isokinetic probe<br />
with a hose barb end.<br />
Note: Use a maximum of four feet of high purity or approved tubing only. Incorrect size or type of<br />
tubing will affect the sample accuracy.<br />
The intake hose barb (refer to Figure 4 on page 13) is connected to the <strong>MET</strong> <strong>ONE</strong><br />
<strong>HHPC</strong>–2 for zero counting and purging or to sample areas that are difficult to reach.<br />
To install the intake hose barb:<br />
1. Unscrew the isokinetic probe from the <strong>MET</strong> <strong>ONE</strong> <strong>HHPC</strong>–2.<br />
2. Attach the hose barb.<br />
3. Remove the protective cap from the intake hose barb.<br />
12
Installation<br />
Figure 4 Isokinetic probe with tubing and zero count filter<br />
1 Hose barb fitting 3 Tubing<br />
2 Isokinetic probe 4 <strong>MET</strong> <strong>ONE</strong> <strong>HHPC</strong>–2<br />
3.3.3 Install the zero count filter<br />
In a clean-room application, the zero count filter (refer to Figure 3 on page 11, item 2)<br />
verifies if the <strong>MET</strong> <strong>ONE</strong> <strong>HHPC</strong>–2 is not counting electrical noise signals from internal<br />
components and is not subject to external interference. In indoor air quality and other<br />
applications, the zero count filter cleans out the sensor immediately after a high<br />
concentration sampling.<br />
To connect the zero count filter:<br />
1. Remove the isokinetic probe from the <strong>MET</strong> <strong>ONE</strong> <strong>HHPC</strong>–2.<br />
2. Attach the intake hose barb (MP000026–01).<br />
3. Secure the high purity tubing (VP792002) to the hose barb.<br />
4. Secure the opposite end of the tubing to the zero count filter (VP212808).<br />
Note: Make sure that the arrow of airflow direction or the indicator on the zero count filter points<br />
towards the tubing.<br />
13
Installation<br />
3.3.4 Connect the AC/DC power supply<br />
Important Note: Do not use a power supply unit that does not supply the required voltage<br />
and charging current (polarity) to operate the <strong>MET</strong> <strong>ONE</strong> <strong>HHPC</strong>–2.<br />
To connect the external power supply:<br />
1. Turn off power to the <strong>MET</strong> <strong>ONE</strong> <strong>HHPC</strong>–2 unit.<br />
2. Plug one end of the power cord into the external power supply and the other end into<br />
an electrical wall receptacle.<br />
3. Plug the external power supply jack into the <strong>MET</strong> <strong>ONE</strong> <strong>HHPC</strong>–2 power port (refer to<br />
Figure 5, item 1).<br />
Figure 5 Location of power port<br />
1 I/O port 2 Power port<br />
14
Section 4<br />
Operation<br />
4.1 Install the <strong>MET</strong> <strong>ONE</strong> <strong>HHPC</strong>–2 utility software<br />
To install the <strong>MET</strong> <strong>ONE</strong> <strong>HHPC</strong>–2 utility software:<br />
1. Connect the <strong>MET</strong> <strong>ONE</strong> <strong>HHPC</strong>–2 to the communications port on the PC using the<br />
RS232 modular cable (VP894408).<br />
2. Connect the DB9 to the RJ45 converter (SA000070–01).<br />
3. Insert the <strong>MET</strong> <strong>ONE</strong> <strong>HHPC</strong>–2 utility software (CSVDownloadUtility) diskette into the<br />
drive.<br />
4. Copy CSVDownloadUtility.exe and CSVDownloadUtility.ini from the diskette to a<br />
working directory on the PC. If the communications port to be used is other than<br />
Com1, open CSVDownloadUtility.ini and change Port=Com1 to Port=ComX (where X<br />
represents the number of the port to use.)<br />
5. To open the utility software, double-click the CSVDownloadUtility.exe file. The<br />
CSVDownloadUtility window is displayed (refer to Figure 6 on page 15).<br />
6. Follow the instructions in the Readme.txt file on the diskette to install the software.<br />
Figure 6 <strong>MET</strong> <strong>ONE</strong> <strong>HHPC</strong>-2 Utility (CSVDownloadUtility) window<br />
4.2 Start up<br />
Press and hold the POWER button on the right of the display of the <strong>MET</strong> <strong>ONE</strong> <strong>HHPC</strong>–2 to<br />
turn on the unit. When the <strong>MET</strong> <strong>ONE</strong> <strong>HHPC</strong>–2 is powered on, the <strong>MET</strong> <strong>ONE</strong> Opening<br />
screen is displayed briefly followed by the Main screen.<br />
4.3 Display and keypad<br />
The <strong>MET</strong> <strong>ONE</strong> <strong>HHPC</strong>–2 features a Liquid Crystal Display (LCD) with a keypad at the<br />
bottom. Power on the unit and the <strong>MET</strong> <strong>ONE</strong> Opening screen displays briefly, followed by<br />
the Main screen.<br />
Note: If the <strong>MET</strong> <strong>ONE</strong> <strong>HHPC</strong>–2 does not power up, double-check the AC connection or the battery<br />
power. To charge the battery, refer to section 5.1 on page 25.<br />
15
Operation<br />
4.3.1 Keypad<br />
Figure 7 shows the display of the Main screen of <strong>MET</strong> <strong>ONE</strong> <strong>HHPC</strong>–2. Table 1 on page<br />
16 provides information about the keypad available at the bottom of the screen and the<br />
various function keys.<br />
Figure 7 <strong>MET</strong> <strong>ONE</strong> <strong>HHPC</strong>–2 Main screen display<br />
1 Display screen 3 MODE key<br />
2 POWER key 4 START/STOP key<br />
Key Name Description<br />
Table 1 Indicators and key features or functions<br />
START/STOP<br />
Starts and stops a sample<br />
MODE<br />
Selects modes and saves data when the unit is counting<br />
POWER<br />
Toggles the power on and off<br />
16
Operation<br />
4.3.2 Screens<br />
Press the corresponding button from the keypad at the bottom of the LCD to invoke the<br />
following screens:<br />
• Main screen—The main screen displays:<br />
• Channel sizes<br />
• <strong>Particle</strong> counts (only displayed when counting or in Buffer mode)<br />
• Status of the counting process (Run or Wait)<br />
• Battery charge indicator (amount of charge remaining in the battery, refer to Table<br />
4 on page 25)<br />
• Select mode screen<br />
• Select volume screen<br />
• Buffer count and Buffer options screen<br />
• Display buffer screen<br />
• Contrast screen<br />
• Date and Clock setup screen<br />
4.4 Configuration setup<br />
4.5 Select custom settings<br />
4.5.1 Set the date and time<br />
Once the <strong>MET</strong> <strong>ONE</strong> <strong>HHPC</strong>–2 is unpacked and connected to the appropriate intake<br />
device, use the default settings to conduct a 1-minute count cycle. Download the data to<br />
a PC and print the results.<br />
To perform a 1-minute count cycle:<br />
1. Remove the isokinetic probe cover (black plastic cap).<br />
2. Press and hold the POWER key until the <strong>MET</strong> <strong>ONE</strong> <strong>HHPC</strong>–2 sounds two beeps and<br />
turns on.<br />
3. Press START/STOP on the Main screen to start counting. The count cycle begins and<br />
the bottom line of display changes from “Wait” to “Run”. After one minute, the count<br />
cycle ends and the display clears.<br />
Note: The results are saved automatically in the print buffer.<br />
Refer to section 4.8 on page 22 to transfer the data to a PC and print the results.<br />
To choose a setting, select an option that is displayed at the bottom of the Main screen<br />
when the MODE key is pressed, then use the START/STOP and MODE keys to scroll<br />
through the options or save selections.<br />
To set the date and time:<br />
1. Press the MODE key six times on the Main screen. The bottom line displays the time<br />
and date.<br />
2. Press and hold the MODE key for one second until two beeps are heard. The Date<br />
and Time screen is displayed with the date selected.<br />
3. Use the MODE key to select the digit. The cursor moves to the next digit.<br />
17
Operation<br />
4.5.2 Select the count mode<br />
4. When the date, month, year or time is set, press the START/STOP key to change the<br />
numbers for that field.<br />
5. To select another unit of time, press the MODE key to select the next field. Press the<br />
START/STOP key to change the numbers.<br />
6. When the date and time are set, press and hold the MODE key for one second to<br />
save the new setting and return to the Main screen.<br />
To select the count mode:<br />
1. Press the MODE key once on the Main screen. Refer to Table 2 on page 18 for the<br />
different modes available. The bottom line displays the current mode (refer to<br />
Figure 8 on page 18).<br />
2. Press the START/STOP or the MODE key.<br />
3. When the required mode is displayed on the screen, press and hold the MODE key<br />
for one second to save the new setting and return to the Main screen.<br />
Figure 8 Select mode screen<br />
Table 2 Count modes<br />
Mode Description Sample unit<br />
Concentration<br />
Rate<br />
Totalize<br />
The Concentration mode is useful for taking a quick snapshot of<br />
airborne particulate samples, especially in areas where<br />
particulate levels are unknown and may exceed the operating<br />
levels of the counter. The <strong>MET</strong> <strong>ONE</strong> <strong>HHPC</strong>–2 estimates count<br />
per cubic foot or liter depending on the volume selected. The unit<br />
updates the results by calculating completed sample counts and<br />
volume compared to the balance of volume remaining.<br />
In the Rate mode, counting is continuous. The sliding average of<br />
ten samples is displayed.<br />
In the Totalize mode, number of counts are displayed as they<br />
accumulate, until the end of the sample. When the sample is<br />
completed, the record is stored and the value is displayed on the<br />
screen until the next sample is started.<br />
Volume size<br />
Volume unit<br />
Volume size<br />
18
4.5.3 Set the sample units and volume<br />
Operation<br />
Sample volume may be measured in either liters or cubic feet. The volume size can<br />
range from 0.01 cubic foot or 1 liter up to 1 cubic foot or 28.3 liters.<br />
4.5.3.1 Rate mode<br />
In the Rate mode, the unit of the sample volume is selected.<br />
To select the unit of sample volume:<br />
1. Make sure the unit is set to Rate mode as described in section 4.5.2 on page 18.<br />
2. Press the MODE key twice on the Main screen. The bottom line displays the current<br />
unit settings as shown in Figure 9.<br />
3. Press and hold the MODE key for one second, until two beeps are heard. The Select<br />
Units screen displays the selected units.<br />
4. To select the units, press either the START/STOP key for cubic feet or the MODE key<br />
for liters.<br />
5. Press and hold the MODE key for one second to save the new setting and return to<br />
the Main screen. The units selected appear on the right column of the Main screen.<br />
Figure 9 Select Units screen<br />
4.5.3.2 Concentration or totalize mode<br />
In the Totalize or Concentration modes, the volume size is selected.<br />
To select the volume size in concentration or totalize mode:<br />
1. Make sure the unit is set to Concentration or Totalize mode as described in<br />
section 4.5.2 on page 18.<br />
2. Press the MODE key twice on the Main screen. The bottom line displays the current<br />
volume setting.<br />
3. Press and hold the MODE key for one second, until two beeps are heard. The Select<br />
Volume screen displays the selected volume as shown in Figure 10 on page 20.<br />
4. To review the sample volume settings available, press either the START/STOP key or<br />
the MODE key. Refer to Table 3 for sample volume choices.<br />
19
Operation<br />
Table 3 Sample volume settings<br />
Volume<br />
Time for sample (MM:SS)<br />
0.01 cubic feet 00:06<br />
28.3 cubic liters 10:00<br />
10.0 cubic liters 03:53<br />
2.83 cubic liters 01:00<br />
1.0 cubic liter 00:21<br />
1.0 cubic foot 10:00<br />
0.10 cubic foot 01:00<br />
5. Once the required volume choice is displayed, press and hold the MODE key for one<br />
second to save the new setting and return to the Main screen. The volume selected<br />
is displayed in the right column of the Main screen.<br />
Figure 10 Select volume screen<br />
4.5.4 Set the contrast<br />
To set the contrast:<br />
1. Press the MODE key five times on the Main screen.<br />
2. The bottom line displays the current contrast.<br />
3. Press and hold the MODE key for one second, until two beeps are heard. The<br />
Program Contrast screen is displayed (refer to Figure 11).<br />
4. Press the START/STOP key to increase the contrast. Press and hold the MODE key to<br />
decrease the contrast.<br />
5. Once the required contrast is achieved, press and hold the MODE key for one second<br />
to save the new setting and return to the Main screen.<br />
20
Operation<br />
Figure 11 Program contrast screen<br />
4.6 <strong>Counter</strong> operation<br />
Once the <strong>MET</strong> <strong>ONE</strong> <strong>HHPC</strong>–2 unit configuration is set:<br />
• Use the zero count to verify the operation of the filter.<br />
• Collect air samples, transfer them to a computer for further analysis and print them.<br />
• Review the number of samples in the print buffer and, if needed, clear the print buffer.<br />
4.6.1 Verify the <strong>MET</strong> <strong>ONE</strong> <strong>HHPC</strong>–2 with a zero count filter<br />
Make sure that the instrument is not falsely counting due to sensor leakage, internal or<br />
external electrical interference or any other reason before the unit is used for monitoring<br />
or verifying clean-room condition.<br />
Clean the <strong>MET</strong> <strong>ONE</strong> <strong>HHPC</strong>–2 using the zero count filter before storage or shipment.<br />
Purge the <strong>MET</strong> <strong>ONE</strong> <strong>HHPC</strong>–2 with a zero count filter before using it in a clean-room or a<br />
clean manufacturing environment. This process meets the Japanese Industrial Standard<br />
B9221-1997 (JIS).<br />
To verify the unit with a zero count filter:<br />
1. Remove the isokinetic probe from the unit.<br />
2. Attach the intake hose barb (MP000026-01).<br />
3. Secure the high purity tubing (VP 792002) to the hose barb.<br />
4. Secure the opposite end of the tubing to the zero count filter (VP212808). Make sure<br />
the arrow on the filter is pointing away from the tubing. Now the unit is ready to purge<br />
and zero count.<br />
5. Operate the unit for approximately 15 minutes.<br />
6. Verify that the data on the display is:<br />
• Not more than one particle greater than 0.3 µm in five minutes on average, or<br />
• Not more than one particle per 0.5 cubic foot.<br />
Note: Initial counts are typically from particles shedding from components used for zero<br />
counting. The zero count process or guidelines set forth by applicable industry standard(s) is<br />
continued.<br />
7. Remove the zero count filter and attach the isokinetic probe to resume normal<br />
operations.<br />
21
Operation<br />
4.7 Collect samples<br />
To collect samples:<br />
1. Place the <strong>MET</strong> <strong>ONE</strong> <strong>HHPC</strong>–2 unit upright and remove the intake valve cover (the<br />
black plastic cap) from the intake barb or the isokinetic probe.<br />
2. Press the POWER key to turn on the unit.<br />
3. To review each setting, press the MODE key to display the current setting on the<br />
bottom line of the Main screen. Continue to press the MODE key until all the settings<br />
are reviewed.<br />
4. Press the START/STOP key to start sampling on the Main screen.<br />
4.8 Transfer the sample data to the PC<br />
4.9 Print samples<br />
Refer to section 3. on page 14 to install the <strong>MET</strong> <strong>ONE</strong> <strong>HHPC</strong>–2 Utility software.<br />
To transfer sample data from <strong>MET</strong> <strong>ONE</strong> <strong>HHPC</strong>–2 to a PC:<br />
1. Use the <strong>MET</strong> <strong>ONE</strong> <strong>HHPC</strong>–2 Utility software to download particle count data to a PC<br />
in comma separated variable (CSV) file format. The particle count data can be<br />
viewed in Microsoft ® Excel ® and other spreadsheet software applications.<br />
2. All parameters required by the download utility are stored in the initialization file that<br />
is also on the diskette.<br />
3. Double click the CSV_Download_Utility.exe to start the application.<br />
Print samples at the end of each run or print each sample as it is taken.<br />
Note: Not all printers are compatible with the <strong>MET</strong> <strong>ONE</strong> <strong>HHPC</strong>–2. Make sure that the portable<br />
printer is configured correctly to function with the <strong>MET</strong> <strong>ONE</strong> <strong>HHPC</strong>–2.<br />
To print the downloaded data from the PC:<br />
1. Connect the <strong>MET</strong> <strong>ONE</strong> <strong>HHPC</strong>–2 to a serial printer using the RS232 cable (Catalog<br />
No. VP894408) and the DB9 to the RJ45 convertor (Catalog No. SA000091-01)<br />
supplied with the printer (Catalog No. SA000094-01).<br />
2. Press MODE three times on the Main screen of the particle counter. The bottom line<br />
displays the number of records in the buffer.<br />
3. Press and hold the MODE key for one second until two beeps are heard. The Buffer<br />
Options screen displays the buffer count.<br />
4. To download the buffer records, press the MODE key. The second Buffer Options<br />
screen displays the download options.<br />
5. Select one of the following options:<br />
• MODE key—prints formatted data<br />
• START/STOP key—prints unformatted data<br />
The Print Buffer screen is displayed.<br />
6. Press START/STOP to print the records. The data from the sample run is printed.<br />
22
4.10 Storing samples<br />
Operation<br />
The <strong>MET</strong> <strong>ONE</strong> <strong>HHPC</strong>–2 stores each measurement in a 100-record rotating buffer. Data<br />
is stored in a ‘first in first out’ order. Thus, when record 101 is saved, the first record is<br />
automatically deleted, leaving a total of 100 records.<br />
4.10.1 Determine the number of samples<br />
Press the MODE key three times on the Main screen. The bottom line displays the<br />
number of records in the Buff Count field (refer to Figure 12).<br />
4.10.2 Display buffer records<br />
Figure 12 Buffer count screen<br />
To display the buffer records:<br />
1. Press the MODE key four times on the Main screen.<br />
2. Press and hold the MODE key for one second until two beeps are heard. The most<br />
recent record in the buffer is displayed (refer to Figure 13).<br />
3. To review the buffer records, press either the MODE key or the START/STOP key:<br />
• MODE key—displays the first record<br />
• START/STOP key—scrolls backwards through the records from the most recent to<br />
the oldest record<br />
4. Press and hold the MODE key for one second to exit the Stored Buffer Record screen<br />
and return to the Main screen.<br />
Figure 13 Stored buffer record screen<br />
23
Operation<br />
4.10.3 Clear the buffer<br />
To clear the buffer:<br />
1. Press the MODE key three times on the Main screen. The bottom line displays the<br />
number of records in the Buff Count field (refer to Figure 14).<br />
2. Press and hold the MODE key for one second, until two beeps are heard.The Buffer<br />
count will be displayed on the Buffer Options screen.<br />
3. Press the START/STOP key to delete the buffer records. The Delete Buffer screen is<br />
displayed (refer to Figure 15 on page 24).<br />
4. Press the START/STOP key to confirm the deletion. The Main screen displays with the<br />
buffer count shown at the bottom line.<br />
Note: The buffer count should be equal to zero.<br />
Figure 14 Buffer options screen<br />
Figure 15 Delete Buffer screen<br />
24
Section 5<br />
Maintenance<br />
5.1 Battery maintenance<br />
DANGER<br />
Only qualified personnel should conduct the tasks described in this section of the<br />
manual. <strong>MET</strong> <strong>ONE</strong><br />
The battery status light indicates the relative battery charge status, described in Table 4.<br />
The power supply provided with the instrument serves as battery charger and a direct<br />
power source. Connect the power supply for continuous and long-term sampling.<br />
Table 4 Battery status indicator<br />
Light<br />
Steady green<br />
Flashing green<br />
Red<br />
No light<br />
Charge mode<br />
Fast charge<br />
Maintenance charging mode<br />
Battery is defective and needs to be replaced<br />
Battery is fully charged<br />
5.1.1 Charge a drained battery<br />
To charge the battery:<br />
1. Connect the external power supply (refer to section 3.3.4 on page 14).<br />
2. Turn on the <strong>MET</strong> <strong>ONE</strong> <strong>HHPC</strong>–2.<br />
3. Remove the power supply when no light is seen.<br />
To charge a drained battery:<br />
1. Attach the external power supply to the <strong>MET</strong> <strong>ONE</strong> <strong>HHPC</strong>–2 unit.<br />
2. Wait for five minutes. Turn on the <strong>MET</strong> <strong>ONE</strong> <strong>HHPC</strong>–2.<br />
3. Leave the unit attached to the power supply until the battery charging indicator light<br />
turns off.<br />
5.2 Calibrate the <strong>MET</strong> <strong>ONE</strong> <strong>HHPC</strong>–2<br />
Return the <strong>MET</strong> <strong>ONE</strong> <strong>HHPC</strong>–2 to the manufacturer annually for recalibration to comply<br />
with JIS B9921–1989 standards. The calibration date is displayed on the manufacturer<br />
decal on the back of the <strong>MET</strong> <strong>ONE</strong> <strong>HHPC</strong>–2. Refer to Section 8 on page 31 for <strong>MET</strong><br />
<strong>ONE</strong> <strong>HHPC</strong>–2 return procedures.<br />
25
Maintenance<br />
26
Section 6<br />
Troubleshooting<br />
6.1 Problems and recommendations<br />
Table 5 lists the problems, reasons and the recommended actions that occur while using<br />
<strong>MET</strong> <strong>ONE</strong> <strong>HHPC</strong>–2.<br />
Table 5 Troubleshooting procedures<br />
Symptom Cause Solution<br />
<strong>MET</strong> <strong>ONE</strong> <strong>HHPC</strong>–2 does not<br />
zero count.<br />
The <strong>MET</strong> <strong>ONE</strong> <strong>HHPC</strong>–2 does not<br />
turn on when the POWER key is<br />
pressed.<br />
<strong>MET</strong> <strong>ONE</strong> <strong>HHPC</strong>–2 unit does not<br />
charge.<br />
Unable to download data in the<br />
buffer.<br />
Unable to print data in the buffer.<br />
<strong>MET</strong> <strong>ONE</strong> <strong>HHPC</strong>–2 display<br />
shows the message, “CAL ALM.”<br />
Zero count filter or<br />
hose barb is not<br />
properly attached to<br />
the unit.<br />
Internal air leak.<br />
Cell contamination by<br />
excessive dust<br />
exposure.<br />
The battery voltage too<br />
low.<br />
Connections to <strong>MET</strong><br />
<strong>ONE</strong> <strong>HHPC</strong>–2 unit is<br />
proper.<br />
No records in buffer<br />
Communication<br />
parameter are not set.<br />
The connections are<br />
not proper<br />
No records in buffer<br />
Communication<br />
parameter are not set<br />
The connections are<br />
not proper<br />
The cell is<br />
contaminated.<br />
Attach the filter or hose barb.<br />
Contact the customer service center for repair.<br />
Return the unit to a factory authorized service center.<br />
Connect external power supply to <strong>MET</strong> <strong>ONE</strong> <strong>HHPC</strong>–2 for<br />
operation and charging. Then, turn on the power again.<br />
Disconnect the power jack from the unit and the power cord<br />
from the AC power source (wall receptacle). Disconnect the<br />
cord/plug from the power supply and reconnect the cord/plug to<br />
the power supply firmly. Restore all connections to the unit and<br />
power source. If the problem persists, contact the customer<br />
service center for repair.<br />
Make sure there are records in the buffer.<br />
Make sure that the communication parameters of the computer<br />
are set to 9600 baud, 8 data bits, no parity, 1 stop bit.<br />
Check the connections between the <strong>MET</strong> <strong>ONE</strong> <strong>HHPC</strong>–2 and<br />
the computer.<br />
Make sure that there are records in the buffer.<br />
Make sure that the communication parameters of the printer are<br />
set to 9600 baud, 8 data bits, no parity, 1 stop bit.<br />
Make sure that the connections between the <strong>MET</strong> <strong>ONE</strong><br />
<strong>HHPC</strong>–2 and the printer.<br />
Connect the zero count filter and program the <strong>MET</strong> <strong>ONE</strong><br />
<strong>HHPC</strong>–2 to run for at least five minutes.<br />
If the problem persists, contact the customer service center for<br />
repair.<br />
27
Troubleshooting<br />
28
Section 7<br />
Replacement Parts and Accessories<br />
7.1 Accessories<br />
Description Quantity Catalog no.<br />
Intake nozzle, 1 /8” hose barb 1 MP000026–01<br />
AC/DC power supply 1 VP624005<br />
US power cord 1 VP23501<br />
RJ45 to DB9 adapter 1 SA000070–01<br />
RS232 modular cable 1 VP894408<br />
<strong>MET</strong> <strong>ONE</strong> <strong>HHPC</strong>–2 Utility software 1 CS00025<br />
6¼” high purity tubing 1 VP792002<br />
7.2 Optional accessories<br />
Figure 16 Optional accessories<br />
1 Carrying case (SA000089–01) 4 Isokinetic probe, hose barb (MP000120–01)<br />
2 Vinyl carrying case (SA000249–01) 5 Serial thermal printer (SA000094–01)<br />
3 RS232 serial interface extension cable (EP096010) 6 European power cord (VP625300)<br />
29
Replacement Parts and Accessories<br />
30
Section 8<br />
Service Contact Information<br />
U.S.A. customers<br />
By Telephone:<br />
(541) 472-6500<br />
6:30 a.m. to 5:00 p.m. PST<br />
Monday through Friday<br />
By Fax:<br />
(541) 474-7414<br />
By Mail:<br />
Hach Ultra<br />
481 California Avenue<br />
Grants Pass, Oregon 97526<br />
Email:<br />
TechSupportGP@hachultra.com<br />
Website:<br />
www.hachultra.com<br />
International customers<br />
By Telephone:<br />
41 22 594 64 00<br />
Information required<br />
By Fax:<br />
41 22 594 64 99<br />
By Mail:<br />
Hach Ultra<br />
Service Department<br />
6, route de Compois, C.P. 212,<br />
CH-1222 Vésenaz, Geneva, Switzerland<br />
Website:<br />
www.hachultra.com<br />
• Your name • Model number<br />
• Your phone number • Serial number<br />
• Your company name • Comment or question<br />
• Your fax number<br />
31
Section 9<br />
Limited Warranty<br />
Hach Ultra warrants this instrument to be free of defects in materials and workmanship for a period of<br />
one year from the shipping date. If any instrument covered under this warranty proves defective during<br />
this period, Hach Ultra will, at its option either repair the defective part without charge for extra parts and<br />
labor or provide an equivalent replacement in exchange for the defective product.<br />
If any diode covered under this warranty proves defective during this period, Hach Ultra will, at its option,<br />
either repair the defective diode without charge for parts and labor or provide an equivalent replacement<br />
in exchange for the defective product.<br />
To obtain service under this warranty, the customer must notify the nearest Hach Ultra service support<br />
center on or before the expiration of the warranty period and follow their instructions for return of the<br />
defective instrument. The customer is responsible for all costs associated with packaging and<br />
transporting the defective unit to the service support center and must prepay all shipping charges. Hach<br />
Ultra will pay for return shipping if the shipment is to a location within the same country as the service<br />
support center.<br />
This warranty shall not apply to any defect, failure or damage caused by improper use or maintenance or<br />
by inadequate maintenance or care. This warranty shall not apply to damage resulting from attempts by<br />
personnel other than Hach Ultra representatives or factory authorized and trained personnel, to install,<br />
repair or service the instrument; to damage resulting from improper use or connection to incompatible<br />
equipment; or to instruments that have been modified or integrated with other products when the effect<br />
of such modification or integration materially increases the time or difficulty of servicing the instrument.<br />
THIS WARRANTY IS GIVEN BY HACH ULTRA ANALYTICS WITH RESPECT TO THIS INSTRUMENT<br />
IN LIEU OF ANY OTHER WARRANTIES, EXPRESSED OR IMPLIED. HACH ULTRA ANALYTICS<br />
AND ITS VENDORS DISCLAIM ANY IMPLIED WARRANTIES OF MERCHANTABILITY OR FITNESS<br />
FOR A PARTICULAR NON-CONTRACTUAL PURPOSE. HACH ULTRA ANALYTICS’<br />
RESPONSIBILITY TO REPAIR OR REPLACE DEFECTIVE PRODUCTS IS THE SOLE AND<br />
EXCLUSIVE REMEDY PROVIDED TO THE CUSTOMER FOR BREACH OF THIS WARRANTY.<br />
HACH ULTRA ANALYTICS AND ITS VENDORS WILL NOT BE LIABLE FOR ANY INDIRECT,<br />
SPECIAL, INCIDENTAL OR CONSEQUENTIAL DAMAGES EVEN IF HACH ULTRA ANALYTICS OR<br />
ITS VENDORS HAS BEEN GIVEN ADVANCED NOTICE OF THE POSSIBILITY OF SUCH<br />
DAMAGES.<br />
32
Section 10<br />
Certification<br />
33
Certification<br />
34
Appendix A Data Communications<br />
A.1 Remote serial interface (I/O Port)<br />
A.1.1 DB9 serial connection<br />
The <strong>MET</strong> <strong>ONE</strong> <strong>HHPC</strong>–2 comes with an RS232 communications port, an RS232 cable<br />
and an RJ45 connector. The RS232 communications port is used to communicate with a<br />
computer to download data and for remote operation.<br />
The specifications and wire pin-outs for the I/O port are:<br />
• Baud rate: 9600 baud<br />
• Data bits: 8 bits<br />
• Parity: None<br />
• Stop bits: 1 bit<br />
If the computer or terminal has a 9-pin serial port with a female connector, use the<br />
modular RJ45 to DB9 connector provided along with the RS232 cable. The <strong>MET</strong> <strong>ONE</strong><br />
<strong>HHPC</strong>–2 is configured as a Data Communication Equipment (DCE), so the use of a<br />
null-modem cable is not required. The cable pin assignments are shown in Figure 17.<br />
Figure 17 Pin layout for the RJ45 to DB9 connector cable<br />
35
Index<br />
A<br />
accessories, included .............................................. 29<br />
B<br />
battery safety ............................................................. 8<br />
C<br />
Certification .............................................................. 33<br />
connections, adjustments .................................. 12, 15<br />
D<br />
Data Communication Equipment (DCE) .................. 35<br />
DB9 serial connection .............................................. 35<br />
H<br />
hazard information ..................................................... 7<br />
hose barb ................................................................. 12<br />
P<br />
procedures, troubleshooting .................................... 27<br />
R<br />
Replacement Parts .................................................. 29<br />
RJ45 connector ........................................................ 35<br />
S<br />
Safety information ...................................................... 7<br />
specifications, environment ........................................ 5<br />
specifications, general ............................................... 5<br />
U<br />
Unpack, instrument .................................................. 11<br />
Z<br />
zero count filter ........................................................ 13<br />
I<br />
isokinetic probe ........................................................ 12<br />
37
Electrical equipment marked with this symbol may not be disposed of in European<br />
public disposal systems after 12 August of 2005. In conformity with European local<br />
and national regulations (EU Directive 2002/96/EC), European electrical equipment<br />
users must now return old or end-of life equipment to the Producer for disposal at no<br />
charge to the user. Note: For return for recycling, please contact the equipment<br />
producer or supplier for instructions on how to return end-of-life equipment for proper<br />
disposal. Important document. Retain with product records.<br />
GERMAN Elektrogeräte, die mit diesem Symbol gekennzeichnet sind, dürfen in Europa nach<br />
dem 12. August 2005 nicht mehr über die öffentliche Abfallentsorgung entsorgt werden. In<br />
Übereinstimmung mit lokalen und nationalen europäischen Bestimmungen (EU-Richtlinie<br />
2002/96/EC), müssen Benutzer von Elektrogeräten in Europa ab diesem Zeitpunkt alte bzw. zu<br />
verschrottende Geräte zur Entsorgung kostenfrei an den Hersteller zurückgeben. Hinweis:<br />
Bitte wenden Sie sich an den Hersteller bzw. an den Händler, von dem Sie das Gerät bezogen<br />
haben, um Informationen zur Rückgabe des Altgeräts zur ordnungsgemäßen Entsorgung zu<br />
erhalten. Wichtige Informationen. Bitte zusammen mit den Produktinformationen aufbewahren.<br />
FRENCH A partir du 12 août 2005, il est interdit de mettre au rebut le matériel électrique<br />
marqué de ce symbole par les voies habituelles de déchetterie publique. Conformément à la<br />
réglementation européenne (directive UE 2002/96/EC), les utilisateurs de matériel électrique<br />
en Europe doivent désormais retourner le matériel usé ou périmé au fabricant pour élimination,<br />
sans frais pour l’utilisateur. Remarque : Veuillez vous adresser au fabricant ou au fournisseur<br />
du matériel pour les instructions de retour du matériel usé ou périmé aux fins d’élimination<br />
conforme. Ce document est important. Conservez-le dans le dossier du produit.<br />
ITALIAN Le apparecchiature elettriche con apposto questo simbolo non possono essere<br />
smaltite nelle discariche pubbliche europee successivamente al 12 agosto 2005. In conformità<br />
alle normative europee locali e nazionali (Direttiva UE 2002/96/EC), gli utilizzatori europei di<br />
apparecchiature elettriche devono restituire al produttore le apparecchiature vecchie o a fine<br />
vita per lo smaltimento senza alcun costo a carico dell’utilizzatore. Nota: Per conoscere le<br />
modalità di restituzione delle apparecchiature a fine vita da riciclare, contattare il produttore o il<br />
fornitore dell’apparecchiatura per un corretto smaltimento. Documento importante. Conservare<br />
con la documentazione del prodotto.<br />
DANISH Elektriske apparater, der er mærket med dette symbol, må ikke bortskaffes i<br />
europæiske offentlige affaldssystemer efter den 12. august 2005. I henhold til europæiske<br />
lokale og nationale regler (EU-direktiv 2002/96/EF) skal europæiske brugere af elektriske<br />
apparater nu returnere gamle eller udtjente apparater til producenten med henblik på<br />
bortskaffelse uden omkostninger for brugeren. Bemærk: I forbindelse med returnering til<br />
genbrug skal du kontakte producenten eller leverandøren af apparatet for at få instruktioner<br />
om, hvordan udtjente apparater bortskaffes korrekt. Vigtigt dokument. Opbevares sammen<br />
med produktdokumenterne.<br />
Form No 011229
SWEDISH Elektronikutrustning som är märkt med denna symbol kanske inte kan lämnas in på<br />
europeiska offentliga sopstationer efter 2005-08-12. Enligt europeiska lokala och nationella<br />
föreskrifter (EU-direktiv 2002/96/EC) måste användare av elektronikutrustning i Europa nu<br />
återlämna gammal eller utrangerad utrustning till tillverkaren för kassering utan kostnad för<br />
användaren. Obs! Om du ska återlämna utrustning för återvinning ska du kontakta tillverkaren<br />
av utrustningen eller återförsäljaren för att få anvisningar om hur du återlämnar kasserad<br />
utrustning för att den ska bortskaffas på rätt sätt. Viktigt dokument. Spara tillsammans med<br />
dina produktbeskrivningar.<br />
SPANISH A partir del 12 de agosto de 2005, los equipos eléctricos que lleven este símbolo no<br />
deberán ser desechados en los puntos limpios europeos. De conformidad con las normativas<br />
europeas locales y nacionales (Directiva de la UE 2002/96/EC), a partir de esa fecha, los<br />
usuarios europeos de equipos eléctricos deberán devolver los equipos usados u obsoletos al<br />
fabricante de los mismos para su reciclado, sin coste alguno para el usuario. Nota: Sírvase<br />
ponerse en contacto con el fabricante o proveedor de los equipos para solicitar instrucciones<br />
sobre cómo devolver los equipos obsoletos para su correcto reciclado. Documento importante.<br />
Guardar junto con los registros de los equipos.<br />
DUTCH Elektrische apparatuur die is voorzien van dit symbool mag na 12 augustus 2005 niet<br />
meer worden afgevoerd naar Europese openbare afvalsystemen. Conform Europese lokale en<br />
nationale wetgegeving (EU-richtlijn 2002/96/EC) dienen gebruikers van elektrische apparaten<br />
voortaan hun oude of afgedankte apparatuur kosteloos voor recycling of vernietiging naar de<br />
producent terug te brengen. Nota: Als u apparatuur voor recycling terugbrengt, moet u contact<br />
opnemen met de producent of leverancier voor instructies voor het terugbrengen van de<br />
afgedankte apparatuur voor een juiste verwerking. Belangrijk document. Bewaar het bij de<br />
productpapieren.<br />
POLISH Sprzęt elektryczny oznaczony takim symbolem nie może byćlikwidowany w<br />
europejskich systemach utylizacji po dniu 12 sierpnia 2005. Zgodnie z europejskimi, lokalnymi i<br />
państwowymi przepisami prawa (Dyrektywa Unii Europejskiej 2002/96/EC), użytkownicy<br />
sprzętu elektrycznego w Europie muszą obecnie przekazywać Producentowi stary sprzęt lub<br />
sprzęt po okresie użytkowania do bezpłatnej utylizacji. Uwaga: Aby przekazać sprzęt do<br />
recyklingu, należy zwrócić siędo producenta lub dostawcy sprzętu w celu uzyskania instrukcji<br />
dotyczących procedur przekazywania do utylizacji sprzętu po okresie użytkowania. Ważny<br />
dokument. Zachować z dokumentacją produktu.<br />
PORTUGESE Qualquer equipamento eléctrico que ostente este símbolo não poderá ser<br />
eliminado através dos sistemas públicos europeus de tratamento de resíduos sólidos a partir<br />
de 12 de Agosto de 2005. De acordo com as normas locais e europeias (Directiva Europeia<br />
2002/96/EC), os utilizadores europeus de equipamentos eléctricos deverão agora devolver os<br />
seus equipamentos velhos ou em fim de vida ao produtor para o respectivo tratamento sem<br />
quaisquer custos para o utilizador. Nota: No que toca à devolução para reciclagem, por favor,<br />
contacte o produtor ou fornecedor do equipamento para instruções de devolução de<br />
equipamento em fim de vida para a sua correcta eliminação. Documento importante.<br />
Mantenha junto dos registos do produto.<br />
Form No 011229
Dieses Informationsblatt enthält Angaben, die ausschließlich für den Export dieses Gerätes in die Volksrepublik China<br />
erforderlich sind.<br />
This document contains information which is only required for the export of this instrument into the People’s Republic of China.<br />
Ce document contient les informations nécessaires pour l'exportation d'instruments vers la République Populaire de Chine.<br />
本 手 册 只 包 含 出 口 到 中 华 人 民 共 和 国 的 ・ 器 的 必 要 信 息 。<br />
名 称 :<br />
Optical <strong>Particle</strong> <strong>Counter</strong> with Display<br />
部 件 名 称 ・<br />
Pb<br />
汞<br />
Hg<br />
・<br />
Cd<br />
有 毒 有 害 物 ・ 或 元 素<br />
六 价 ・<br />
Cr6+<br />
多 溴 联 ・<br />
PBB<br />
多 溴 二 ・ ・<br />
PBDE<br />
金 属 ( 底 盘 \ 面 板 \ 部 件 \・ 罩 ) X O X X O O<br />
印 刷 电 路 板 (PCBA) X O X O X X<br />
电 ・ & 电 ・ & 接 ・ (Wire/Conn) X O X O X X<br />
・ / 电 机 / 励 磁 器 (Pump or Fan) X O X X X X<br />
光 学 元 件 (Optical Comps) X O O O O O<br />
玻 璃 (Glass Fuses) X O O O O O<br />
显 示 器 件 (Display) X X O O O O<br />
○: 表 示 ・ 有 毒 有 害 物 ・ 在 ・ 部 件 所 有 均 ・ 材 料 中 的 含 量 均 在 SJ/T11363-2006 ・ 准 ・ 定 的 限 量 要 求 以 下<br />
X: 表 示 ・ 有 毒 有 害 物 ・ 至 少 在 ・ 部 件 的 某 一 均 ・ 材 料 中 的 含 量 超 出 SJ/T11363-2006 ・ 准 ・ 定 的 限 量 要 求<br />
至 出 售 之 日 , 本 表 格 已 显 示 上 述 电 子 信 息 产 品 中 哪 些 零 部 件 可 能 存 在 有 害 物 ・ 。<br />
除 非 另 外 特 别 的 ・ 注 , 此 ・ 志 为 ・ 对 所 涉 及 产 品 的 ・ 保 使 用 期 ・ 志 . 某 些 可 更 ・ 的 零 部 件 会 有 一 个 不 同 的 ・ 保 使 用 期 ( 例<br />
如 , 电 池 单 元 模 ・ )・ 在 其 产 品 上 .<br />
此 ・ 保 使 用 期 限 只 适 用 于 产 品 是 在 产 品 手 册 中 所 ・ 定 的 条 件 下 工 作 .<br />
15<br />
Form 011360<br />
EUROPE: HACH LANGE<br />
HACH LANGE GMBH – Willstätterstraße 11 – 40549 Düsseldorf – Germany – Phone +49(0)211-5288-143 – info@hach-lange.de<br />
USA AND REST OF WORLD:<br />
Hach Company – P.O. Box 389 – Loveland – Colorado – 80539-0389 – USA – Phone 800-227-4224 – Fax: 970-669-2932 – techhelp@hach.com
Trademarks are property of their respective owners.<br />
Specifications subject to change without notice.