H.264 4/8/16-Channel DVR User Manual - Security Cameras Direct
H.264 4/8/16-Channel DVR User Manual - Security Cameras Direct
H.264 4/8/16-Channel DVR User Manual - Security Cameras Direct

Create successful ePaper yourself
Turn your PDF publications into a flip-book with our unique Google optimized e-Paper software.
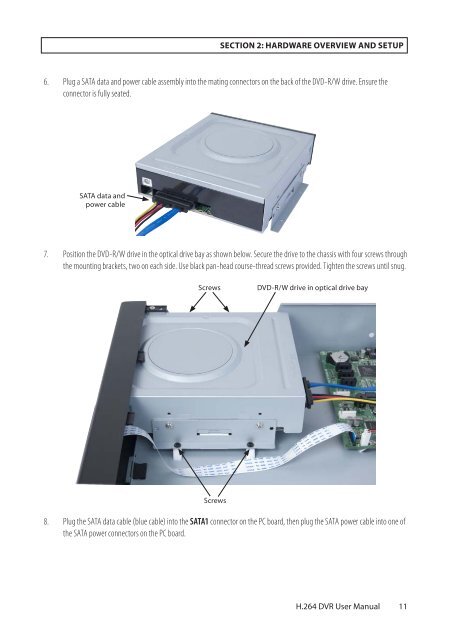
SECTION 2: HARDWARE OVERVIEW AND SETUP<br />
6. Plug a SATA data and power cable assembly into the mating connectors on the back of the DVD-R/W drive. Ensure the<br />
connector is fully seated.<br />
SATA data and<br />
power cable<br />
7. Position the DVD-R/W drive in the optical drive bay as shown below. Secure the drive to the chassis with four screws through<br />
the mounting brackets, two on each side. Use black pan-head course-thread screws provided. Tighten the screws until snug.<br />
Screws<br />
DVD-R/W drive in optical drive bay<br />
Screws<br />
8. Plug the SATA data cable (blue cable) into the SATA1 connector on the PC board, then plug the SATA power cable into one of<br />
the SATA power connectors on the PC board.<br />
<strong>H.264</strong> <strong>DVR</strong> <strong>User</strong> <strong>Manual</strong><br />
11