
You also want an ePaper? Increase the reach of your titles
YUMPU automatically turns print PDFs into web optimized ePapers that Google loves.
Using iParts—Intelligent Family of Parts<br />
Inserting the Fastener<br />
As an example of how iParts automate the design process, you will now place a fastener into the hole of the<br />
sheet metal part. This fastener was designed as an iPart with a variety of lengths and diameters.<br />
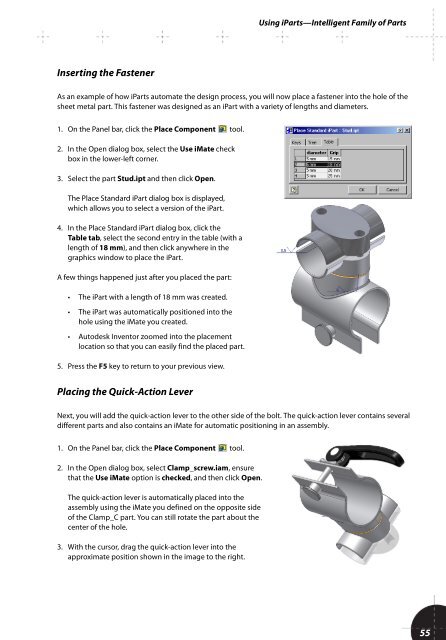
1. On the Panel bar, click the Place Component tool.<br />
2. In the Open dialog box, select the Use iMate check<br />
box in the lower-left corner.<br />
3. Select the part Stud.ipt and then click Open.<br />
The Place Standard iPart dialog box is displayed,<br />
which allows you to select a version of the iPart.<br />
4. In the Place Standard iPart dialog box, click the<br />
Table tab, select the second entry in the table (with a<br />
length of 18 mm), and then click anywhere in the<br />
graphics window to place the iPart.<br />
A few things happened just after you placed the part:<br />
• The iPart with a length of 18 mm was created.<br />
• The iPart was automatically positioned into the<br />
hole using the iMate you created.<br />
• <strong>Autodesk</strong> Inventor zoomed into the placement<br />
location so that you can easily find the placed part.<br />
5. Press the F5 key to return to your previous view.<br />
Placing the Quick-Action Lever<br />
Next, you will add the quick-action lever to the other side of the bolt. The quick-action lever contains several<br />
different parts and also contains an iMate for automatic positioning in an assembly.<br />
1. On the Panel bar, click the Place Component tool.<br />
2. In the Open dialog box, select Clamp_screw.iam, ensure<br />
that the Use iMate option is checked, and then click Open.<br />
The quick-action lever is automatically placed into the<br />
assembly using the iMate you defined on the opposite side<br />
of the Clamp_C part. You can still rotate the part about the<br />
center of the hole.<br />
3. With the cursor, drag the quick-action lever into the<br />
approximate position shown in the image to the right.<br />
55