DDK-1800D - IPX
DDK-1800D - IPX
DDK-1800D - IPX
You also want an ePaper? Increase the reach of your titles
YUMPU automatically turns print PDFs into web optimized ePapers that Google loves.
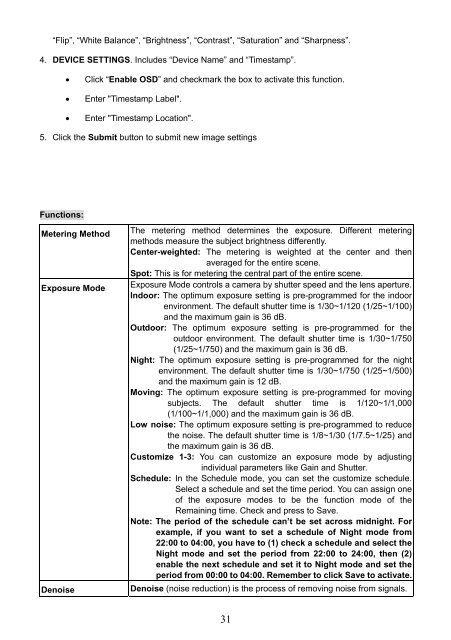
“Flip”, “White Balance”, “Brightness”, “Contrast”, “Saturation” and “Sharpness”.<br />
4. DEVICE SETTINGS. Includes “Device Name” and “Timestamp”.<br />
• Click “Enable OSD” and checkmark the box to activate this function.<br />
• Enter "Timestamp Label".<br />
• Enter "Timestamp Location".<br />
5. Click the Submit button to submit new image settings<br />
Functions:<br />
Metering Method<br />
Exposure Mode<br />
Denoise<br />
The metering method determines the exposure. Different metering<br />
methods measure the subject brightness differently.<br />
Center-weighted: The metering is weighted at the center and then<br />
averaged for the entire scene.<br />
Spot: This is for metering the central part of the entire scene.<br />
Exposure Mode controls a camera by shutter speed and the lens aperture.<br />
Indoor: The optimum exposure setting is pre-programmed for the indoor<br />
environment. The default shutter time is 1/30~1/120 (1/25~1/100)<br />
and the maximum gain is 36 dB.<br />
Outdoor: The optimum exposure setting is pre-programmed for the<br />
outdoor environment. The default shutter time is 1/30~1/750<br />
(1/25~1/750) and the maximum gain is 36 dB.<br />
Night: The optimum exposure setting is pre-programmed for the night<br />
environment. The default shutter time is 1/30~1/750 (1/25~1/500)<br />
and the maximum gain is 12 dB.<br />
Moving: The optimum exposure setting is pre-programmed for moving<br />
subjects. The default shutter time is 1/120~1/1,000<br />
(1/100~1/1,000) and the maximum gain is 36 dB.<br />
Low noise: The optimum exposure setting is pre-programmed to reduce<br />
the noise. The default shutter time is 1/8~1/30 (1/7.5~1/25) and<br />
the maximum gain is 36 dB.<br />
Customize 1-3: You can customize an exposure mode by adjusting<br />
individual parameters like Gain and Shutter.<br />
Schedule: In the Schedule mode, you can set the customize schedule.<br />
Select a schedule and set the time period. You can assign one<br />
of the exposure modes to be the function mode of the<br />
Remaining time. Check and press to Save.<br />
Note: The period of the schedule can’t be set across midnight. For<br />
example, if you want to set a schedule of Night mode from<br />
22:00 to 04:00, you have to (1) check a schedule and select the<br />
Night mode and set the period from 22:00 to 24:00, then (2)<br />
enable the next schedule and set it to Night mode and set the<br />
period from 00:00 to 04:00. Remember to click Save to activate.<br />
Denoise (noise reduction) is the process of removing noise from signals.<br />
31


