Red Giant Grain Stir-Ator - David Manufacturing Co.
Red Giant Grain Stir-Ator - David Manufacturing Co.
Red Giant Grain Stir-Ator - David Manufacturing Co.
- No tags were found...

Create successful ePaper yourself
Turn your PDF publications into a flip-book with our unique Google optimized e-Paper software.
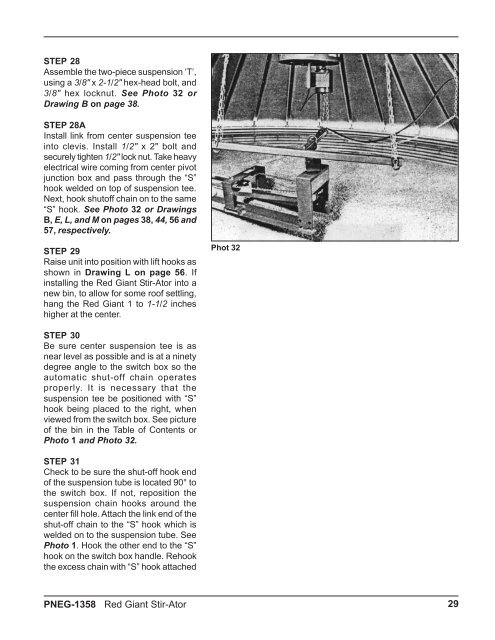
STEP 28<br />
Assemble the two-piece suspension ‘T’,<br />
using a 3/8" x 2-1/2" hex-head bolt, and<br />
3/8" hex locknut. See Photo 32 or<br />
Drawing B on page 38.<br />
STEP 28A<br />
Install link from center suspension tee<br />
into clevis. Install 1/2" x 2" bolt and<br />
securely tighten 1/2" lock nut. Take heavy<br />
electrical wire coming from center pivot<br />
junction box and pass through the “S”<br />
hook welded on top of suspension tee.<br />
Next, hook shutoff chain on to the same<br />
“S” hook. See Photo 32 or Drawings<br />
B, E, L, and M on pages 38, 44, 56 and<br />
57, respectively.<br />
STEP 29<br />
Raise unit into position with lift hooks as<br />
shown in Drawing L on page 56. If<br />
installing the <strong>Red</strong> <strong>Giant</strong> <strong>Stir</strong>-<strong>Ator</strong> into a<br />
new bin, to allow for some roof settling,<br />
hang the <strong>Red</strong> <strong>Giant</strong> 1 to 1-1/2 inches<br />
higher at the center.<br />
Phot 32<br />
STEP 30<br />
Be sure center suspension tee is as<br />
near level as possible and is at a ninety<br />
degree angle to the switch box so the<br />
automatic shut-off chain operates<br />
properly. It is necessary that the<br />
suspension tee be positioned with “S”<br />
hook being placed to the right, when<br />
viewed from the switch box. See picture<br />
of the bin in the Table of <strong>Co</strong>ntents or<br />
Photo 1 and Photo 32.<br />
STEP 31<br />
Check to be sure the shut-off hook end<br />
of the suspension tube is located 90° to<br />
the switch box. If not, reposition the<br />
suspension chain hooks around the<br />
center fill hole. Attach the link end of the<br />
shut-off chain to the “S” hook which is<br />
welded on to the suspension tube. See<br />
Photo 1. Hook the other end to the “S”<br />
hook on the switch box handle. Rehook<br />
the excess chain with “S” hook attached<br />
PNEG-1358 <strong>Red</strong> <strong>Giant</strong> <strong>Stir</strong>-<strong>Ator</strong><br />
29