QCapture PRO 7 User Manual - QImaging
QCapture PRO 7 User Manual - QImaging
QCapture PRO 7 User Manual - QImaging

You also want an ePaper? Increase the reach of your titles
YUMPU automatically turns print PDFs into web optimized ePapers that Google loves.
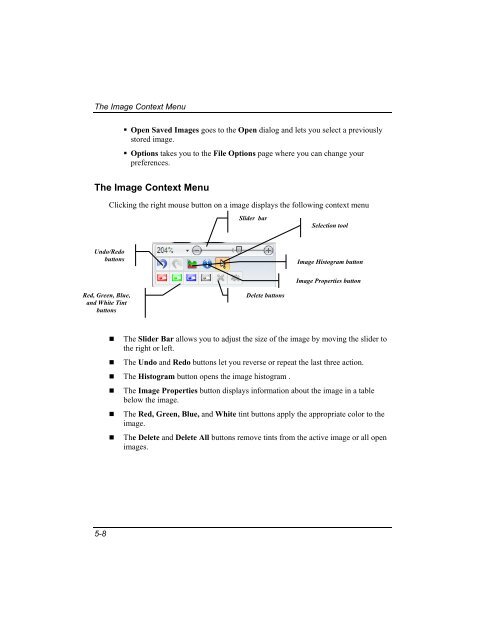
The Image Context Menu<br />
• Open Saved Images goes to the Open dialog and lets you select a previously<br />
stored image.<br />
• Options takes you to the File Options page where you can change your<br />
preferences.<br />
The Image Context Menu<br />
Clicking the right mouse button on a image displays the following context menu<br />
Slider bar<br />
Selection tool<br />
Undo/Redo<br />
buttons<br />
Image Histogram button<br />
Image Properties button<br />
Red, Green, Blue,<br />
and White Tint<br />
buttons<br />
Delete buttons<br />
• The Slider Bar allows you to adjust the size of the image by moving the slider to<br />
the right or left.<br />
• The Undo and Redo buttons let you reverse or repeat the last three action.<br />
• The Histogram button opens the image histogram .<br />
• The Image Properties button displays information about the image in a table<br />
below the image.<br />
• The Red, Green, Blue, and White tint buttons apply the appropriate color to the<br />
image.<br />
• The Delete and Delete All buttons remove tints from the active image or all open<br />
images.<br />
5-8