Broadband Troubleshooting Guide - XLN Telecom
Broadband Troubleshooting Guide - XLN Telecom
Broadband Troubleshooting Guide - XLN Telecom

You also want an ePaper? Increase the reach of your titles
YUMPU automatically turns print PDFs into web optimized ePapers that Google loves.
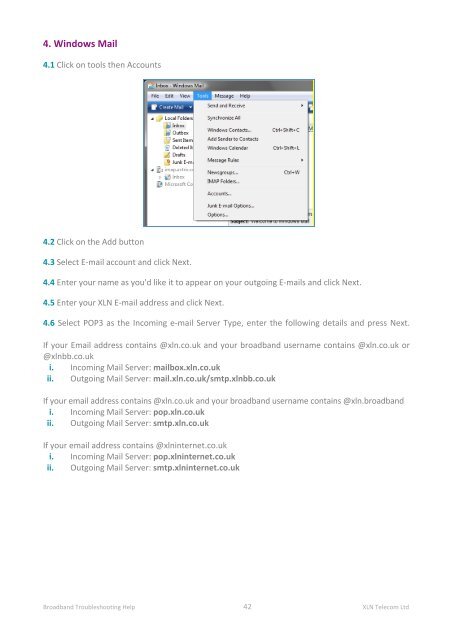
4. Windows Mail<br />
4.1 Click on tools then Accounts<br />
4.2 Click on the Add button<br />
4.3 Select E‐mail account and click Next.<br />
4.4 Enter your name as you'd like it to appear on your outgoing E‐mails and click Next.<br />
4.5 Enter your <strong>XLN</strong> E‐mail address and click Next.<br />
4.6 Select POP3 as the Incoming e‐mail Server Type, enter the following details and press Next.<br />
If your Email address contains @xln.co.uk and your broadband username contains @xln.co.uk or<br />
@xlnbb.co.uk<br />
i. Incoming Mail Server: mailbox.xln.co.uk<br />
ii. Outgoing Mail Server: mail.xln.co.uk/smtp.xlnbb.co.uk<br />
If your email address contains @xln.co.uk and your broadband username contains @xln.broadband<br />
i. Incoming Mail Server: pop.xln.co.uk<br />
ii. Outgoing Mail Server: smtp.xln.co.uk<br />
If your email address contains @xlninternet.co.uk<br />
i. Incoming Mail Server: pop.xlninternet.co.uk<br />
ii. Outgoing Mail Server: smtp.xlninternet.co.uk<br />
<strong>Broadband</strong> <strong>Troubleshooting</strong> Help 42 <strong>XLN</strong> <strong>Telecom</strong> Ltd