10 table saw - Grizzly Industrial Inc.
10 table saw - Grizzly Industrial Inc.
10 table saw - Grizzly Industrial Inc.

You also want an ePaper? Increase the reach of your titles
YUMPU automatically turns print PDFs into web optimized ePapers that Google loves.
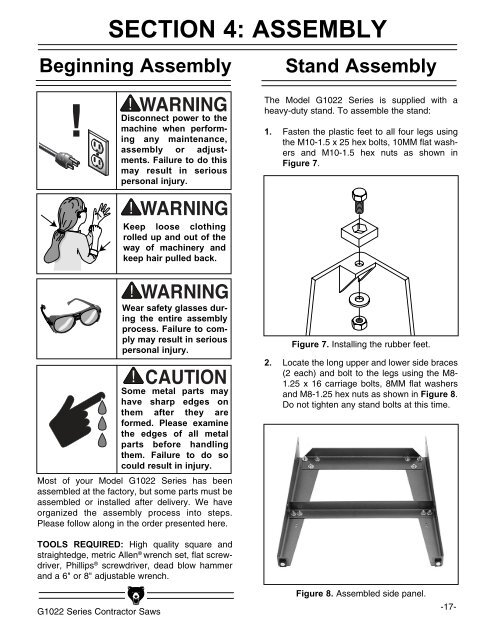
SECTION 4: ASSEMBLYBeginning AssemblyStand Assembly!Disconnect power to themachine when performingany maintenance,assembly or adjustments.Failure to do thismay result in seriouspersonal injury.The Model G<strong>10</strong>22 Series is supplied with aheavy-duty stand. To assemble the stand:1. Fasten the plastic feet to all four legs usingthe M<strong>10</strong>-1.5 x 25 hex bolts, <strong>10</strong>MM flat washersand M<strong>10</strong>-1.5 hex nuts as shown inFigure 7.Keep loose clothingrolled up and out of theway of machinery andkeep hair pulled back.Wear safety glasses duringthe entire assemblyprocess. Failure to complymay result in seriouspersonal injury.Some metal parts mayhave sharp edges onthem after they areformed. Please examinethe edges of all metalparts before handlingthem. Failure to do socould result in injury.Most of your Model G<strong>10</strong>22 Series has beenassembled at the factory, but some parts must beassembled or installed after delivery. We haveorganized the assembly process into steps.Please follow along in the order presented here.Figure 7. Installing the rubber feet.2. Locate the long upper and lower side braces(2 each) and bolt to the legs using the M8-1.25 x 16 carriage bolts, 8MM flat washersand M8-1.25 hex nuts as shown in Figure 8.Do not tighten any stand bolts at this time.TOOLS REQUIRED: High quality square andstraightedge, metric Allen ® wrench set, flat screwdriver,Phillips ® screwdriver, dead blow hammerand a 6" or 8" adjus<strong>table</strong> wrench.G<strong>10</strong>22 Series Contractor SawsFigure 8. Assembled side panel.-17-