10 table saw - Grizzly Industrial Inc.
10 table saw - Grizzly Industrial Inc.
10 table saw - Grizzly Industrial Inc.

Create successful ePaper yourself
Turn your PDF publications into a flip-book with our unique Google optimized e-Paper software.
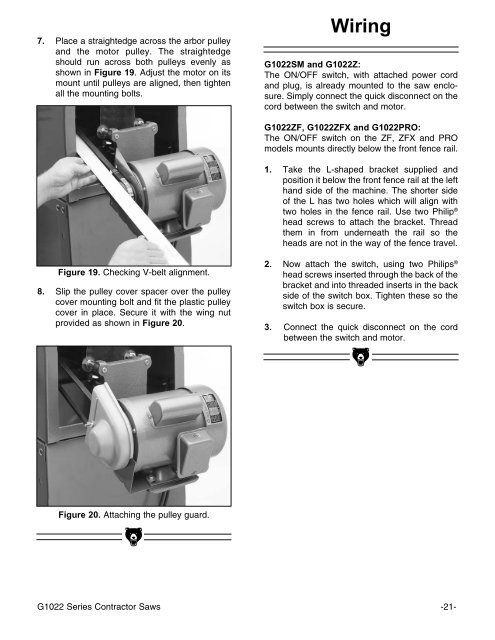
7. Place a straightedge across the arbor pulleyand the motor pulley. The straightedgeshould run across both pulleys evenly asshown in Figure 19. Adjust the motor on itsmount until pulleys are aligned, then tightenall the mounting bolts.WiringG<strong>10</strong>22SM and G<strong>10</strong>22Z:The ON/OFF switch, with attached power cordand plug, is already mounted to the <strong>saw</strong> enclosure.Simply connect the quick disconnect on thecord between the switch and motor.G<strong>10</strong>22ZF, G<strong>10</strong>22ZFX and G<strong>10</strong>22PRO:The ON/OFF switch on the ZF, ZFX and PROmodels mounts directly below the front fence rail.1. Take the L-shaped bracket supplied andposition it below the front fence rail at the lefthand side of the machine. The shorter sideof the L has two holes which will align withtwo holes in the fence rail. Use two Philip ®head screws to attach the bracket. Threadthem in from underneath the rail so theheads are not in the way of the fence travel.Figure 19. Checking V-belt alignment.8. Slip the pulley cover spacer over the pulleycover mounting bolt and fit the plastic pulleycover in place. Secure it with the wing nutprovided as shown in Figure 20.2. Now attach the switch, using two Philips ®head screws inserted through the back of thebracket and into threaded inserts in the backside of the switch box. Tighten these so theswitch box is secure.3. Connect the quick disconnect on the cordbetween the switch and motor.Figure 20. Attaching the pulley guard.G<strong>10</strong>22 Series Contractor Saws -21-