SERVICE MANUAL - Appliance Blog
SERVICE MANUAL - Appliance Blog
SERVICE MANUAL - Appliance Blog

Create successful ePaper yourself
Turn your PDF publications into a flip-book with our unique Google optimized e-Paper software.
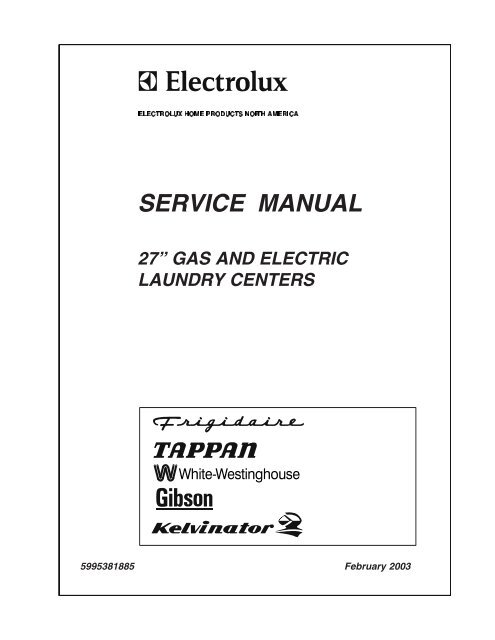
(/(&752/8;Ã+20(Ã352'8&76Ã1257+Ã$0(5,&$<strong>SERVICE</strong> <strong>MANUAL</strong>27” GAS AND ELECTRICLAUNDRY CENTERS:KLWH:HVWLQJKRXVH5995381885 February 20031
SAFE SERVICING PRACTICES - ALL APPLIANCESTo avoid personal injury and/or property damage, it is important that SafeServicing Practices be observed. The following are some limited examples ofsafe practices:1. DO NOT attempt a product repair if you have any doubts as to your ability tocomplete it in a safe and satisfactory manner.2. Before servicing or moving an appliance:• Remove the power cord from the electrical outlet, trip the circuit breaker tothe OFF position, or remove the fuse.• Turn off the gas supply.• Turn off the water supply.3. Never interfere with the proper operation of any safety device.4. USE ONLY REPLACEMENT PARTS CATALOGED FOR THIS APPLIANCE.SUBSTITUTIONS MAY DEFEAT COMPLIANCE WITH SAFETYSTANDARDS SET FOR HOME APPLIANCES.5. GROUNDING: The standard color coding for safety ground wires is GREEN,or GREEN with YELLOW STRIPES. Ground leads are not to be used as currentcarrying conductors. It is EXTREMELY important that the service technicianreestablish all safety grounds prior to completion of service. Failure to do sowill create a hazard.6. Prior to returning the product to service, ensure that:• All electrical connections are correct and secure• All electrical leads are properly dressed and secured away from sharpedges, high-temperature components, and moving parts• All non-insulated electrical terminals, connectors, heaters, etc. areadequately spaced away from all metal parts and panels• All safety grounds (both internal and external) are correctly and securelyconnected• All panels are properly and securely reassembledATTENTION!!!This service manual is intended for use by persons having electrical and mechanicaltraining and a level of knowledge of these subjects generally considered acceptable inthe appliance repair trade. Electrolux Home Products cannot be responsible, nor assumeany liability, for injury or damage of any kind arising from the use of this manual.© 2001 White Consolidated Industries2
SAFE SERVICING PRACTICES 2QUICK REFERENCE SHEET 8Serial nameplate location 8Serial number breakdown 8Tech sheet location 8Specifications 9 - 10Connecting drive motor for bench check 11SAMPLE WASHER SECTION WIRING DIAGRAM 12SAMPLE GAS DRYER SECTION WIRING DIAGRAM 13SAMPLE ELECTRIC DRYER SECTION WIRING DIAGRAM 14SAMPLE WASHER TIMER CYCLE CHART 15SAMPLE DRYER TIMER CYCLE CHART 15SECTION A - OPERATING INSTRUCTIONS 16 - 19Dryer section 16 - 17Before operating your laundry center 16Operating steps 16Cycle selection 16Automatic perm press/delicates cycle 16Automatic regular cycle 17Timed dry cycle 17Washer section 18 - 19Before operating your laundry center 18Operating steps 18Cycle selection 18Regular/whites cycle 18Perm press/colors cycle 18Knits/delicates cycle 18Soak/prewash cycle 18Controls 19Wash/rinse temperature 19Load size/water level 19Control settings chart 19SECTION B OWNER GUIDE 20 - 38What to do if you smell gas 20Product registration 20Record your model and serial numbers 20Important safety instructions 20 - 22Prevent fire 20Protect children 21Prevent injury 22Washing Procedures 23 - 25Sort laundry into loads that can be washed together 23Prepare items for washing 23Pretreat stains and heavy soil 23Add a measured amount of detergent to the wash tubbefore adding the laundry load 23If desired, add liquid bleach to bleach dispenser 24Add laundry load to washer 24If desired, add liquid fabric softener tofabric softener dispenser 24Remove items when the cycle is completed 25Stain removal 25 - 27Safe stain removal procedures 25For successful stain removal 26Stain removal chart 26 - 27Common washing problems 28 - 29Drying Procedure 30 - 313
Prepare items for drying 30Check that lint screen is clean and in place 30Load the dryer 30Close the dryer door and set dryer controls 31Turn cycle selector clockwise to the desired setting 31Start the dryer 31When the cycle ends, remove items immediately and hang or fold 31Features 31Cycle signal control 31Drum light 31Drying rack 31Common drying problems 32Inside the washer 33Inside the Dryer 33Outside 33Before moving the laundry center 34Winterizing instructions 34Avoid service checklist 35 - 37Sample warranty 38SECTION C INSTALLATION INSTRUCTIONS 39 - 48What to do if you smell gas 39Pre-installation requirements 39Tools and materials required for installation 39Electrical requirements 39Electric laundry center 39Circuit 39Power supply 39Power supply cord kit 39Gas laundry center 40Circuit 40Power supply 40Power supply cord 40Water supply requirements 40Drain requirements 40Exhaust system requirements 40Exhaust lengths 41Gas supply requirements 42Location of your laundry center 42Do not install your laundry center 42Installation in recess or closet 42Mobile home installation 43Rough-in dimensions 44Unpacking 44Electrical installation 45 - 46All electric laundry centers 45Grounding requirements 45Canadian electric laundry center 45All gas laundry centers 45Electrical connections for a 3-wire system 46Electrical connections for a 4-wire system 46Installation 46 - 47Gas connection 47Replacement parts 48SECTION D - DRYER SECTION OPERATION 49 - 56Airflow electric dryers 49Airflow gas dryers 50Airflow problems 50Restrictions 51Air leaks 514
Short unrestricted vents 51Electrical operation electric dryer 51 - 53Automatic regular cycle 51Drive motor circuit 52The timer motor circuit 52The heat circuit 52The air fluff circuit 53The cycle signal circuit 53Automatic perm press 53Timed dry cycle 53Electrical operation gas dryer 54 - 56Auto dry cycle 54Drive motor circuit 54The timer motor circuit 55The heat circuit 55The air fluff circuit 56Automatic perm press 56The cycle signal circuit 56Timed dry cycle 56SECTION E - WASHER SECTION OPERATION 57 - 71Timer 57Pressure switch assembly 57Wash/rinse temperature switch 58Lid lock assembly 58Softener dispenser 59Agitator 59Bleach dispenser 59Water inlet valve 59Valve operation 60Drain pump 61The motor 61Transmission 62Spin basket or inner tub 62Splash tub cover 63Outer tub 63Leg and dome assembly 63Snubber 64Base 64Electrical operation 65 - 71Fill circuit 65Spray rinse during the first pump cycle with the temp switch set to 65All settings 65During the rinse cycle with temp switch set to 66All settings other than warm 66Warm 66Timer motor circuit 67Drain pump 68Drive motor 68 - 71High speed agitation 68Low speed agitation 69High speed spin 70Low speed spin 71SECTION F - TROUBLESHOOTING FLOW CHARTS 73 - 91Dryer section 73 - 80Electric dryer completely inoperative 74Gas dryer completely inoperative 75Electric dryers, blower motor runs but timer does notadvance in auto or timed dry 76Electric dryers, timer advances in timed dry but not in auto dry 765
Electric dryers, timer advances in auto dry but not in timed dry 77Electric and Gas dryers blower motor runs but drum does not turn 77Electric and Gas dryers longer than normal drying times 77Electric dryers blower motor runs but dryer does not heat 78Gas dryers blower motor runs but dryer does not heat 79Electric and Gas dryers dryer over heating 80Washer section 81 - 91Washer completely inoperative 82Timer does not advance 82Washer does not drain 83Drive motor operates in spin but not in agitation 84Drive motor does not turn 85Drive motor operates in agitation but not in spin 86Drive motor cycles off and on rapidly in the delicate cycle 86Slow water fill 87Water fill does not turn off 88Incorrect water level 88Washer will not fill in any setting of the temperature selector switch 89Washer will Not Fill in Wash Cycle, but Will Fill in Rinse with theTemp Switch Set to Cold/Cold 90Washer will not fill in wash cycle, but does fill in rinsewith the temp switch set to hot/cold 90Water temperature is too hot or too cold in the wash cyclewith the temp sw. set to warm/warm 91Washer will only fill with hot water in the wash cycle, with thetemp switch set to warm/cold but does fill with cold waterin the rinse cycle 91SECTION G - TEARDOWN 92 - 120Removing the knobs 92All knobs except the washer timer knob 92Washer timer knob92Removing the washer timer skirt 92Removing the access panel 93Opening the console 93Removing the dryer timer 93Removing the buzzer 94Removing the console end caps 94Removing the console front panel 94Removing the start switch 94Removing the fabric selector switch 95Removing the water temperature switch 95Removing the pressure switch assembly 95Removing the washer timer 95Removing the dryer door 96Separating the dryer door panel 96Removing the dryer door seal 96Removing the dryer door heat shield 97Removing the dryer door handle 97Removing the dryer door strike 97Removing the dryer door hinge 97Removing the dryer door switch 97Removing the heat shield 98Removing the dryer front panel 98Replacing the felt seal 98Replacing the front duct 99Removing the door catch 99Replacing the foam seal 99Removing the dryer section rear access panel 99Releasing the dryer belt 100Removing the idler pulley 100Removing the idler pulley assembly 100Removing the belt 1006
Removing the control thermostat 101Removing the sensor Gas dryers 101Removing combustion chamber shield Gas dryers 101Removing burner/ignitor assembly Gas dryers 101Removing the ignitor Gas dryers 102Removing the gas valve coils Gas dryers 102Removing the burner and combustion chamber assembly, manualshut off and the internal gas pipe Gas dryers 102Removing manual shut off and internal gas pipe Gas dryers 102Removing pressure regulator valve assembly Gas dryers 102Removing the combustion chamber Gas dryers 103Removing the dryer section top panel 103Removing the vane from the dryer drum 103Removing the dryer drum 103Removing the ball hitch from the drum 103Removing the teflon glides 104Removing the drum heat shield Electric dryers 104Removing the hitch 104Removing the high limit thermostat 105Removing the thermal limiter Electric dryer 105Removing the heating element assembly Electric dryers 105Removing the duct and heat shield Gas dryers 105Removing the blower and motor assembly 106Disassembling the blower and motor assembly 106Removing the internal vent duct 107Removing the motor and blower assembly base 108Removing the burner assembly base Gas dryers 108Removing the dryer section side panels 108Removing the bleach dispenser 110Removing the softener dispenser assembly 110Removing the agitator 110Removing the drive hub110Removing the washer front panel 111Removing the washer top 111Removing the lid lock assembly 111Disconnecting the lid springs 111Removing the lid hinges 111Removing the lid 112Removing the lid strike 112Removing the water inlet nozzle 113Removing the water inlet valve 113Alternate water valve attachment 113Removing the drain pump 114Disassembling the drain pump 114Removing the drive motor shield 114Removing the start capacitor 114Removing the drive belt 115Removing the transmission pulley 115Removing the idler pulley assembly 115Removing the snubber 116Reinstalling the snubber 116Removing the drive motor 116Removing the tub, leg and dome assembly and base 117Removing the splash tub cover 118Removing the spin basket 118Removing the trunnion 119Removing the top half of the tub seal 119Removing the bottom half of the tub seal 119Removing the outer tub119Removing the tub bearing 120Removing the transmission 120Replacing the vertical springs 120Removing the washer cabinet 1217
QUICK REFERENCE SHEET1. Serial nameplate location:Dryer door edge2. Serial number breakdown.X E 2 3 0 0 1 3 6 7Incremented unit numberProduction weekLast digit of production yearProduct identificationManufacturing facility3. Tech sheet locationBack of access panel8
SpecificationsLAUNDRY CENTER WASHER SECTION ELECTRIC GASTransmissionAgitate Speed Oscillations Per Minute (High) 71 - 77 71 - 77Agitate Speed Oscillations Per Minute (Low) 47 - 51 47 - 51Spin Speed R.P.M. (High Speed) 600 - 640 600 - 640Spin Speed R.P.M. (Low Speed) 390 - 420 390 - 420Oil Capacity (Ounces) 32 32MotorMotor HP @ 120V, 60Hz. (Min OP - 100V Internal Thermal 1/2 & 3/4 1/2 & 3/4Overload Protection, Capacitor Start (189 - 210 Mfd., 135 Volt)One Speed (RPM) 1725 1725Two Speed (RPM) 1150/1725 1150/1725AgitateAgitate Wattage - Full Load (High Speed) Max. 750 950Agitate Wattage - Full Load (Low Speed) Max. 450 475SpinFull Spin Wattage - No Load (High Speed) 300 - 660 300 - 660Full Spin Wattage - No Load (Low Speed) 250 - 575 250 - 575Spin Wattage - No Load (High Speed) Max. After 10 Sec. 800 800Spin Wattage - No Load (High Speed) Max. After 10 Sec. 700 700Full Spin Wattage - Full Load (High Speed) 300 - 660 300 - 660Full Spin Wattage - Full Load (Low Speed) 250 - 575 250 - 575Spin Wattage - Full Load (High Speed) Max. After 10 Sec. 900 900Spin Wattage - Full Load (High Speed) Max. After 10 Sec. 700 700Tub Capacity / Water UsageCapacity (Cu. Ft.) 3.0 2.7Water Level (Inches) Measured from tub bottomLarge 13.5 - 15.2 10.8 - 13.0Small 5.5 - 7.8 4.3 - 6.6Water SupplyPressure (P.S.I.) Minimum/Maximum 30/120 30/120Water Flow Rate (G.P.M.) 3 - 14.6 3 - 14.6Drain PumpoutG.P.M. @ 36” (Min.) 12 12G.P.M. @ 96” (Min.) 7 7Agitator ClearanceAgitator Bottom to Tub .050 - .300 .050 - .300Component resistance - Ohms +/- 10% @ 77°FMotor4 Pole Main Winding (High Speed) 2.4 2.46 Pole Main Winding (Low Speed) If 2 Speed Motor 1.5 1.5Fill ValveHot Water Solenoid 880 880Cold Water Solenoid 880 880Timer Motor 2322 2322Pump Motor - Ohms +/- 7% @ 68°F 12 129
QUICK REFERENCE SHEETDRYER SECTIONSPECIFICATIONElectricalVolts 120/208 or 120/240Amps (circuit)Motor wattageHeat input (Watts @ 240VAC)Heat input (BTU/Hr.)Auto. Elec. IgnitionDrumSize (Cu. Ft.)FinishR.P.M.Airflow CFMDRUM TEMPERATURES (Max.opening on 1st cycle)HighMediumLowDimension (Inches)HeightWidthDepthVent CapabilityELECTRIC MODELS120/208 or 120/24030160-350 Watts3200/4500------5.7Power Paint Epoxy48 - 54180155° - 225°150° - 210°145° - 205°75 1/2”27”30 13/16”4-WayGAS MODELS12015160-350 Watts---20,000Yes5.7Power Paint Epoxy48 - 54180150° - 220°140° - 215°135° - 195°75 1/2”27”30 13/16”4-WayComponent Resistances*Electric ModelsGas ModelsDrive motor (120 volt, 60 Hz, 1/4 h.p. 1725 rpm)Motor Start WindingMotor Run WindingTimer MotorTimer Dropping Resistor (located in the harness)Heating ElementBias Heater on Thermostat4.5 Ohms3.8 Ohms2280-2300 Ohms4,400 Ohms12.8 Ohms28,000 Ohms4.5 Ohms3.8 Ohms2280-2300 Ohms7,000 OhmsBurner AssemblyIgnitorSecondary CoilBooster Coil* +/- 10% @ 77° F---------50 - 400 Ohms1200 Ohms1320 Ohms10
Connecting Drive Motor for Bench CheckOne SpeedTwo SpeedROTATION GIVEN VIEWING LEADENDROTATION SPEED L1 L2 7CCW HI 3 6,1 5CCW LO 3 2,1 5CW HI 3 6,5 1CW LO 3 2,5 111
SAMPLE WASHER SECTION WIRING DIAGRAMT20T17TAN/BLKT7BLKLID SWITCHTAN/BLK31PRESSURESWITCHFULLEMPTY2WHTWHTTO DRYER NEUTRALCONNECTOR4T9T22RED/WHTWHT/RED2PUMPMOTOR1BLK/REDWHTBLKTO DRYER L1CONNECTOR02TIMERMOTORT2T4T5T3T6WHT/BLKPINKWHT/PURPBLUEBLUETEMP SWITCHFHFFCYELHCWATERVALVELID LOCKBLK/RED24 2123 2022 1918171615 1214 1113 10TIMER PLUG-MALE(END VIEW)9 6 38 5 27 4 1BLK/RED6T15T11BLK/REDPURPTEMPERATURE SWITCH CIRCUITWASH/RINSEF-H FF-HHOT/COLDX OFF-CO812T14T21ORGREDCAPACITORORGM5M6STARTHIGHM1M3WARM/WARM (OPT)COLD/COLDWARM/COLDO X XO O XX O XX=SWITCH CLOSED O=SWITCH OPEN14T24GRAYM2M7CIRCLED NUMBERSINDICATE CAMWASHER TIMERLOWMOTOR12
SAMPLE GAS DRYER SECTION WIRING DIAGRAML1120 VACTO NEUTRALCONNECTORWHTNRED/BLKTO L1CONNECTORWHTBLKBLKDRUMLIGHTWHTNCWHTCNOGRAYSTARTSWITCHBUZZERDOORSWITCHGRAYCBRNSTARTM6M1BTIMERMOTORM4RUNMOTOR M5TANM2GRNMOTORCRADLETMXTANYELHTDTANADPURPDRYER TIMERNOTE:DASHED LINES INDICATECIRCUITS THAT ARE NOTIN ALL MODELS.AYELTAN14FABRICSELECTORSWITCH2 ORG33K5BLUE1CONTROLTHERMOSTATTHERMOSTATHEATER2K3BLKHIGH LIMITTHERMOSTATTANORG 2ORG4ORGSENSORGAS CONTROL VALVESECONDARYCOILWHTHOLDING COILBOOSTERCOIL5 WHT 3WHTIGNITER1WHTPOSITIONNO HEATLOW HEATMEDIUM HEATHIGH HEATFABRIC SELECTOR SWITCH1-23-4 4-5OXXXO OX= CLOSED 0= OPENOXOXOO13
SAMPLE ELECTRIC DRYER SECTION WIRING DIAGRAM14
SAMPLE WASHER TIMER CYCLE CHARTCAM0246 11TERM. CA FOC INT X T CIRCUITI EAVEDCT1 T WATER TEMP.23 B SI SPRAY4 T WASH FILL56 B RINSE FILL7 T LID SW BYPASS89 B PUMP1012TBSPIN DIRAGITATE DIR13 T AGITATE DIR8 1415 B SPIN DIR16 T10 1718 B19 T P.S. BYPASS12 2021 B HIGH SPEED MOTOR22 T P.S. BYPASS14 2324 B LOW SPEED MOTORWASH(16 MIN)PREGULARPUMP(6 MIN)SPIN PARINSE(4 MIN)PPUMP(10 MIN)SPINOFFWASH(12 MIN)PERM. PRESSPUMP(6 MIN)P SPINPRINSE(4 MIN)PPUMP(6 MIN)SPINOFFWASH(6 MIN)PDELICATEPUMP RINSE(6 MIN) (4 MIN)SPIN P PAPUMP(6 MIN)SPINOFF0°60°82.5°97.5°121°142.5°185°207.5°220°236°263.5°286°308.5°321°338.5°360°15SUBINTERVAL SPRAY DETAIL120 SECSPRAY TO OCCUR DURINGTHE INDICATED INTERVAL10±2 SEC30±2 SECSAMPLE DRYER TIMER CYCLE CHARTCIRCUITTIMERTIMERHEATERMOTORBUZZERTM-TDTM-ADB-AB-CX-HOFFAUTO DRYOFFCYCLESTIMED DRY (MIN)32 20 10 0 75 60 40 20 0 47.5OFFAUTO DRYWRINKLE RID30 15 0AAB
SECTION A - OPERATING INSTRUCTIONSDryer SectionBefore Operating Your DryerRead your Owner's Guide. It has important safety andwarranty information. It also has many suggestions forbest drying results.To reduce the risk of fire, electric shock,or injury to persons, read the IMPORTANT SAFETYINSTRUCTIONS in your owner's guide before operatingthis appliance.Operating StepsRead Drying Procedures in your Owner's Guide. Itexplains these operating steps in detail.1. Prepare items for drying.2. Check that lint screen is clean and in place.3. Load the dryer. If desired, add a dryer fabricsoftener sheet.4. Close the dryer door.5. Set Temperature controls.6. Turn cycle selector clockwise to desired setting.7. Start dryer. Turn Start control clockwise to ON.Hold for 1-2 seconds and release.8. A signal will sound when the cycle ends.9. Remove items immediately and hang or fold.10.Clean lint screen after every load.Temperature SelectionAlways follow directions on fabric care labels.To avoid fire hazard, do not use heat todry items containing feathers or down, foam rubber,plastics, or similarly textured, rubber-like materials.Use Air Fluff-No Heat setting only.The REGULAR-HIGH HEAT, PERM PRESS-MEDIUMHEAT, and KNITS/DELICATES-LOW HEAT temperaturesettings may be used with any cycle setting. TheAIR FLUFF-NO HEAT setting can be used only in theTimed Dry cycle.AIR FLUFF-NO HEAT setting tumbles the load withoutheat. Use Air Fluff to freshen clothing, pillows orblankets, or to dust draperies.Cycle SelectionTurn cycle selector clockwise to desired cycle andsetting.Each cycle ends with a cool down period. The heatautomatically turns off and the load continues to tumblefor 5-10 minutes. This reduces wrinkling and makesitems easier to handle during unloading.Drying time varies depending on size and dampness ofload, weight and fabric type. Room temperature andhumidity, type of installation and electrical voltage orgas pressure can also affect drying time.Automatic Perm Press/Delicates CycleThis cycle is best for permanent press, knit and delicateitems. Drying time is determined automatically at thetemperature selection of your choice.• Medium heat is suggested for permanent press items.• Low heat is suggested for knit and delicate items.If the dried load cannot be removed promptly, the cycleselector will advance to the Press Saver/Fabric Sentrysetting. Unheated tumbling continues during PressSaver/Fabric Sentry for approximately 30 minutes tohelp reduce wrinkling.16
The cycle signal will sound briefly every 5 minutes as areminder to remove the load.Automatic Regular CycleThis cycle is best for cotton items that can be tumbledried.Drying time is determined automatically at thetemperature selection of your choice. This cycle is bestfor items of similar fabric, weight and construction.• For items requiring more drying time, set cycle selectoron MORE DRY.• For items requiring less drying time, set cycle selectoron LESS DRY.Timed Dry CycleThis cycle provides up to 70 minutes of drying time atthe temperature selection of your choice.17
Washer SectionBefore Operating Your Laundry CenterRead your laundry center Owner's Guide. It hasimportant safety and warranty information. It also hasmany suggestions for obtaining the best washing results.To reduce the risk of fire, electric shock,or injury to persons, read the IMPORTANT SAFETYINSTRUCTIONS in your laundry center Owner's Guidebefore operating this appliance.Operating Steps1. Sort laundry into loads that can be washedtogether.2. Prepare items for washing.3. Pretreat stains and heavy soil.4. Add the measured amount of detergent to thewasher before adding the laundry load.5. If desired, add liquid bleach to the BleachDispenser.6. Add the laundry load to the wash tub.7. If desired, add liquid fabric softener to the FabricSoftener Dispenser on some models or duringthe final rinse.8. Set washer controls according to type, size, andsoil level of the load:• Wash/Rinse Temperature• Load Size/Water Level9. Push in the cycle selector knob and turn itclockwise to the desired wash cycle. See CycleSelection for cycle descriptions and ControlSettings Chart for suggested cycle settings.10. Start the washer by closing the lid and pulling outthe cycle selector knob. The washer will operatewith the lid open; however, the tub will not spinunless the lid is closed. To stop the washer, pushin the cycle selector knob. To change a cycle,push in the cycle selector knob and turn itclockwise to the desired setting. Pull out theknob to restart the washer.11. Remove items when the cycle is completed.As a safety measure, the lid will AUTOMA-TICALLY LOCK during the spin portion of eachcycle. The lid will automatically unlockapproximately 1 minute after the end of the spincycle.Cycle SelectionFor best results, follow the fabric care label directionson items to be washed. Check the Control SettingsChart (reverse side) if the care label is not available.The Regular, Perm Press and Knits / Delicatescycles provide a spray rinse during the first spin,followed by a deep rinse and a final spin.Regular/Whites CycleUp to 15 minutes of normal agitation followed by a fast spinfor most fabrics.Perm Press/Colors CycleUp to 12 minutes of normal agitation followed by a fastspin for cottons and blends with a no-iron finish.Knits/Delicates CycleSix minutes of gentle agitation followed by a slow spinfor knit and delicate items.Soak/Prewash Cycle• Soak - The Soak setting can be used to treat heavilysoiled or stained items. It provides 2 minutes ofagitation and 12 minutes of soaking time, thenadvances to the Prewash portion of the cycle. Usethe amount of detergent recommended for a normalwash cycle. For colorfast items, bleach or a soakingagent may also be used. Follow manufacturer'sdirections on the product label.18
• Prewash - When soaking is not necessary, thePrewash setting can be used alone to help removeprotein-based stains such as milk, grass and bloodand to help loosen soils before washing. DuringPrewash, the washer will agitate the load for 2minutes, then drain, spin and shut off. Use theamount of detergent and other laundry productsrecommended for a normal wash cycle.Note:• The Soak water temperature is the same as therinse water temperature selected; the Prewashwater temperature is the same as the wash watertemperature selected. To avoid setting proteinstains, select cold water.ControlsSelect the desired control settings according to loadsize, fabric type and degree of soiling. See ControlSettings Chart below for detailed information onchoosing control settings.WASH/RINSE TEMPERATURE determines watertemperatures for washing and rinsing.LOAD SIZE/WATER LEVEL determines the amountof wash and rinse water used for the wash load. Toincrease the water level after the wash cycle begins,turn the Load Size control to "Reset" and hold. Whenwater begins to enter the tub, turn the control to thedesired setting.• These cycle settings should always be followed bya complete wash cycle using the recommendedamount of detergent.Control Settings ChartLocate fabric type and read across guide for suggested wash and rinse temperatures, wash cycle andcycle setting.This is only a general guide. For best results, follow label directions on specific items to bewashed.Fabric TypeTemperature (Wash / Rinse)Wash CycleCycle SettingREGULAR/WHITESHeavily SoiledColorfast & WhiteCotton & LinenHotColdRegular15Lightly SoiledColorfast & WhiteCotton & LinenWarmColdRegular8 to 12NoncolorfastBright ColorsAll FabricsColdColdRegular4 to 8PERM PRESS/COLORSWhite orHeavily SoiledHot orWarmColdPerm Press8 to 12Colored orLightly SoiledWarm orColdColdPerm Press4 to 8KNITS/DELICATESKnitted FabricsDelicatesColdColdColdColdKnits/DelicatesKnits/Delicates66Washable WoolensWarmWarm or ColdKnits/Delicates619
SECTION B OWNER GUIDEFor your safety, the information in this manual must be followed to minimize the risk of fire orexplosion or to prevent property damage, personal injury or loss of life.- Do not store or use gasoline or other flammable vapors and liquids in the vicinity of this or any other appliance.- WHAT TO DO IF YOU SMELL GAS:• Do not try to light any appliance.• Do not touch any electrical switch; do not use any phone in your building.• Clear the room, building or area of all occupants.• Immediately call your gas supplier from a neighbor's phone. Follow the gas supplier's instructions.• If you cannot reach your gas supplier, call the fire department.Installation and service must be performed by a qualified installer, service agency or the gas supplier.Versión en españolSi desea obtener una copia en español de esteManual del Usuario, sírvase escribir a la direcciónque se incluye a continuación. Solicite la P/N 131878600.Spanish Owner's GuidesFrigidaire Home ProductsP.O. Box 212378Augusta, GA 30917Product RegistrationThank you for choosing this dryer. This owner'sguide will explain proper operation and care.Record Your Model and Serial NumbersRecord below the model and serial numbers found onthe dryer serial plate located on the left side of thedoor opening. Keep these numbers for futurereference.Model Number ________________Serial Number _________________Date of Purchase ______________Register Your ProductThe self-addressed PRODUCT REGISTRATIONCARD should be filled in completely, signed andreturned.Important Safety InstructionsRead all instructions before using this dryer.To reduce the risk of fire, electricalshock, or injury to persons when using this dryer,comply with the basic warnings listed below.Failure to comply with these warnings could resultin serious personal injuries.Prevent FireDo not wash or dry items that have beenpreviously cleaned in, soaked in, or spotted with gasoline,cleaning solvents, kerosene, waxes, etc. Do not storethese items on or near the dryer. These substancesgive off vapors that could ignite or explode.Do not put oily or greasy rags or clothingon top of the laundry center. These substances give offvapors that could ignite the materials.Do not add gasoline, cleaning solvents,or other flammable or explosive substances to thewash water. These substances give off vapors thatcould ignite or explode.Under certain conditions, hydrogengas may be produced in a hot water system that has notbeen used for 2 weeks or more. HYDROGEN GAS ISEXPLOSIVE. If the hot water system has not beenused for such a period, before using the washer, turn onall hot water faucets and let the water flow from eachfor several minutes. This will release any accumulated20
hydrogen gas. Hydrogen gas is flammable; do notsmoke or use an open flame during this time.To prevent fire, do not use heat to dryitems containing plastic, foam rubber or similarly texturedrubber-like materials, or items containing feathers ordown. Use Air Fluff (No Heat) only.Clean the lint screen before or aftereach load. The interior of the dryer, lint screen housingand exhaust duct should be cleaned approximatelyevery 18 months by qualified service personnel. Anexcessive amount of lint build-up in these areas couldresult in inefficient drying and possible fire.Do not operate the dryer if the lint screenis blocked, damaged or missing. Fire hazard,overheating and damage to fabrics can occur. If yourdryer has a drying rack, always replace the lint screenwhen finished using the drying rack.Keep area around the exhaust openingand surrounding areas free from the accumulation oflint, dust and dirt.Do not operate the dryer if the lintscreen is blocked, damaged or missing. Fire hazard,overheating and damage to fabrics can occur. If yourdryer has a drying rack, always replace the lint screenwhen finished using the drying rack.Keep area around the exhaust openingand surrounding areas free from the accumulation oflint, dust and dirt.Do not obstruct the flow of ventilatingair. Do not stack or place laundry or throw rugs againstthe front or back of the laundry center.Do not spray any type of aerosol into,on or near laundry center at any time.Do not use fabric softeners or productsto eliminate static unless recommended by themanufacturer of the fabric softener or product.Failure to comply with these warnings could resultin fire, explosion, serious bodily injury and/or damageto the rubber or plastic parts of the laundry center.This Owner's Guide provides general operatinginstructions for your laundry center. It also containsinformation about features for several other models.Your laundry center may not have every feature included.Use the laundry center only as instructed in this Owner'sGuide.Avoid fire hazard or electrical shock. Donot use an adaptor plug or extension cord or removegrounding prong from electrical power cord. Failure tofollow this warning can cause serious injury, fire ordeath.ELECTRIC LAUNDRY CENTER:14-30RFUSED 30 AMP120/240 V OR120/208 VWALLRECEPTACLENote: The instructions appearing in this Owner's Guideare not meant to cover every possible condition andsituation that may occur. Common sense and cautionmust be practiced when installing, operating andmaintaining any appliance.Protect ChildrenCORRECTUse this way ONLYDRYERDRYER<strong>SERVICE</strong> CORDGAS LAUNDRY CENTER:Grounding typewall receptacleDo not underany circumstancescut, remove,or bypassthe grounding prongfrom this plug.Power supplycord with 3-pronggrounding plugCORRECTUse this way ONLYDo not allow children to play on or in thelaundry center. Close supervision of children isnecessary when the laundry center is used near children.As children grow, teach them the proper, safe use of allappliances.21
WASHING PROCEDURES• Follow the guidelines below for preparing the washload.• Read the Washer Operating Instructions foroperating your specific model.• Always read and follow fabric care and laundryproduct labels.To reduce the risk of fire, electricalshock, or injury to persons, read Important SafetyInstructions, before operating this washer.1. Sort laundry into loads that can be washedtogether.Sort items by recommended water temperatures,wash time, and agitate/spin speeds.• Separate white, light, and colorfast items fromdark and noncolorfast items.• Separate items which shed lint from itemswhich attract lint. Permanent press, synthetic,knit and corduroy items will pick up lint fromtowels, rugs and chenille bedspreads.• Separate heavily soiled items from lightlysoiled items.• Separate lacy, sheer and loosely knit itemsfrom sturdy items.• Brush off lint and dirt. Shake out rugs andbeach towels.• Close zippers, fasten hooks, tie strings andsashes, and remove nonwashable trims andornaments.• Remove pins, decorative buttons, belt buckles,and other objects which could be damaged.This also helps protect other items in the washload.• Mend rips and tears to prevent further damageduring washing.• Place delicate items such as bras, shoulderpads, hosiery, and belts in a mesh bag toprevent tangling during the wash cycle.• Turn knit items inside out to prevent pilling.Sort laundry into loads that can be washed together.2. Prepare items for washing.• Empty pockets.3. Pretreat stains and heavy soil.See Stain Removal for details.4. Add a measured amount of detergent to thewash tub before adding the laundry load.Follow detergent manufacturer's directions. Theamount required depends on type of detergent,load size and soil level, and water hardness.23
5. If desired, add liquid bleach to Bleach Dispenser(some models).• Before adding the wash load, add liquid bleachto bleach dispenser located in left front cornerunder the lid:• 3/4 cup (180 ml) for small loads• 1 cup (240 ml) for large loads• 1-1/4 cups (300 ml) for extra-large loads.• Then add 1 cup (240 ml) water to flush thedispenser.• Do not use powdered bleach in the bleachdispenser.• Do not put items on top of agitator or wrap themaround it. Load items evenly.• Combine large and small items in a load. Loadlarge items first. Large items should not bemore than half the total wash load.• When washing a single heavy item, add 1 or 2towels to balance the load.7. If desired, add liquid fabric softener to FabricSoftener Dispenser (some models).For models with a built-in dispenser:For models without a bleach dispenser, dilutethe recommended amount of liquid chlorine bleachin 1 quart (.95 L) water. Add it to wash water aftera few minutes of agitation. Do not pour bleachdirectly on wash load.Built-In Fabric Softener Dispenser(some models)1. Add liquid softener to the dispenser, followingfabric softener label directions.2. Add water to bring liquid level to fill line ondispenser cap.Bleach Dispenser (some models)6. Add laundry load to washer.3. Remove the dispenser from the agitator aftereach use. Rinse both cap and cup with warmwater. Replace dispenser in the agitator.• Dry load level should not be higher than top rowof holes in wash tub.Do not overload washer.Built-In Fabric Softener Dispenser(some models)Do not load items abovetop row of holes in wash tub.NOTE: To separate cap from cup, put thumb intodispenser and push against side of cup (see pictureto the left). After cleaning, push cap and cup firmlytogether. Replace dispenser by lining up the ribsand grooves and snapping it into position.24
Fabric softener will be flushed from area under thebuilt-in fabric softener dispenser when Large LoadWater Level is selected. If a build-up of fabricsoftener occurs, clean with hot water. DO NOTREMOVE <strong>SERVICE</strong> CAP.For models with a removable dispenser1. Attach fabric softener dispenser to top of agitatorby pressing down gently.2. Add softener to the dispenser, following fabricsoftener label directions.• To stop the washer, push in the cycle selectorknob.• To change a cycle, push in the cycle selectorknob. Turn it clockwise to the desired setting.Pull out the knob to restart the washer.Removable Fabric Softener Dispenser(some models)3. Add water to bring liquid level to top of the pegin the center of the cup.4. Remove the dispenser from the agitator aftereach use. Rinse both lid and bowl thoroughlywith warm water. Reassemble and placedispenser on agitator or store it nearby.For models without a fabric softener dispenser,follow fabric softener label directions. Add dilutedfabric softener to the final rinse. Do not pour fabricsoftener directly on the wash load.8. Set cycle selector knob and washer controlsaccording to type, size, and soil level of eachload, and detergent used.See Operating Instructions for your specific modelcontrols.9. Start the washer.Close the washer lid and pull out the cycle selectorknob. Washer will fill with the lid open. The tub willnot agitate or spin unless the lid is closed.10. Remove items when the cycle is completed.For your safety, the lid locks when the tub isspinning. It will remain locked for about 1 minuteafter the tub stops spinning.• To open the lid during a spin, push in the cycleselector knob and wait about 1 minute for the lidlock to release. Do not force open the lockedlid.Place washed items in automatic dryer, line dry, ordry flat as directed by fabric care label. Excesswrinkling, color transfer or odors may develop initems left in the washer after the cycle has ended.To avoid serious personal injury, do notoperate washer if safety lid lock is missing or damaged.STAIN REMOVALSafe Stain Removal ProceduresTo reduce the risk of fire or seriousinjury to persons or property, comply with the basicwarnings listed below:• Read and comply with all instructions on stainremoval products.• Keep products in their original labeled containersand out of children's reach.• Thoroughly wash any utensil used.25
• Do not combine stain removal products,especially ammonia and chlorine bleach.Dangerous fumes may result.• Determine the kind of stain, then followrecommended treatment in the stain removalchart on the next page.• To pretreat stains, use a prewash product, liquiddetergent, or a paste made from granulardetergent and water.• Use cold water on unknown stains because hotwater can set stains.• Check care label instructions for treatments toavoid on specific fabrics.Do not combine stain removal products.• Never wash items which have been previouslycleaned in, washed in, soaked in or spotted withgasoline, dry cleaning solvents or otherflammable or explosive substances because theygive off vapors that could ignite or explode.• Never use highly flammable solvents, such asgasoline, inside the home. Vapors can explodeon contact with flames or sparks.For successful stain removal:• Remove stains promptly.Follow fabric care label instructions.• Check for colorfastness by testing stain removeron an inside seam.• Rinse and wash items after stain removal.Stain RemovalSTAINAdhesive tape, chewinggum, rubber cement.Baby formula, dairyproducts, egg.Beverages (coffee, tea,soda,juice, alcoholicbeverages).Blood.Candle wax, crayon.Chocolate.Collar or cuff soil,cosmetics.TREATMENTApply ice. Scrape off excess. Place stain face down on paper towels. Saturatewith prewash stain remover or nonflammable dry cleaning fluid.Use product containing enzymes to pretreat or soak stains. Soak for 30minutes or more. Wash.Pretreat stain. Wash using cold water and bleach safe for fabric.Rinse with cold water. Rub with bar soap. Or, pretreat or soak with productcontaining enzymes. Wash using bleach safe for fabric.Scrape off surface wax. Place stain face down between paper towels. Presswith warm iron until wax is absorbed. Replace paper towels frequently. Treatremaining stain with prewash stain remover or nonflammable dry cleaningfluid. Hand wash to remove solvent. Wash using bleach safe for fabric.Pretreat or soak in warm water using product containing enzymes. Wash usingbleach safe for fabric.Pretreat with prewash stain remover or rub with bar soap.26
STAINDye transfer on whitefabric.Grass.Grease, oil, tar (butter,fats,salad dressing,cooking oils, cargrease, motor oils).Ink.Mildew, scorch.Mud.Mustard, tomato.Nail polish.Paint, varnish.Perspiration.Rust, brown or yellowdiscoloration.Shoe polish.Urine, vomit, mucus,feces.TREATMENTUse packaged color remover. Wash using bleach safe for fabric.Pretreat or soak in warm water using product containing enzymes. Wash usingbleach safe for fabric.Scrape residue from fabric. Pretreat. Wash using hottest water safe for fabric. Forheavy stains and tar, apply nonflammable dry cleaning fluid to back of stain.Replace towels under stain frequently. Rinse thoroughly. Wash using hottestwater safe for fabric.Some inks may be impossible to remove. Washing may set some inks. Useprewash stain remover, denatured alcohol or nonflammable dry cleaning fluid.Wash with chlorine bleach if safe for fabric. Or, soak in oxygen bleach and hotwater before washing. Badly mildewed fabrics may be permanently damaged.Brush off dry mud. Pretreat or soak with product containing enzymes.Pretreat with prewash stain remover. Wash using bleach safe for fabric.May be impossible to remove. Place stain face down on paper towels. Apply nailpolish remover to back of stain. Repeat, replacing paper towels frequently. Do notuse on acetate fabrics.WATER BASED: Rinse fabric in cool water while stain is wet. Wash. Once paintis dry, it cannot be removed. OIL BASED AND VARNISH: Use solventrecommended on can label. Rinse thoroughly before washing.Use prewash stain remover or rub with bar soap. Rinse. Wash using nonchlorinebleach in hottest water safe for fabric.For spots, use rust remover safe for fabric. For discoloration of an entire load, usenonchlorine bleach. Do not use chlorine bleach because it may intensifydiscoloration.LIQUID: Pretreat with a paste of granular detergent and water. PASTE: Scraperesidue from fabric. Pretreat with prewash stain remover or nonflammable drycleaning fluid. Rinse. Rub detergent into dampened area. Wash using bleach safefor fabric.Pretreat or soak in product containing enzymes. Wash using bleach safe forfabric.27
Common Washing ProblemsMany washing problems involve poor soil and stain removal, residues of lint and scum, and fabric damage. Forsatisfactory washing results, follow these suggestions provided by The Soap and Detergent Association.PROBLEM POSSIBLE CAUSES SOLUTIONS PREVENTIVE MEASURESBlue stains•Detergent or liquidfabric softener did notdissolve or disperse.•If caused by detergent, mix 1cup (240 ml) white vinegarwith 1 quart (.95 L) water in aplastic container. Soak item 1hour. Rinse.•If caused by fabric softener,rub stains with bar soap.Wash.•Add detergent before washload. Then start washer.•Dilute fabric softener withwater.Discoloration,graying•Not enough detergent.•Wash watertemperature too low.•Incorrect sorting.•Rewash with correct amountof detergent and hottest watersafe for fabric. Add bleachsafe for fabric.•Sort items by soil leveland color.•Use correct amount ofdetergent, hottest waterand bleach safe for fabric.Greasy, oilystains•Not enough detergent.•Undiluted liquid fabricsoftener poureddirectly on fabric.•Treat with prewash stainremover or liquid detergent.•Increase detergent and watertemperature. Rewash.•Rub fabric softener stains withbar soap.•Use correct amount ofdetergent and hottestwater safe for fabric.•Do not pour liquid fabricsoftener directly onfabric. See packagedirections or WashingProcedures for properdiluting.Holes, tears, orsnags•Incorrect use ofchlorine bleach.•Unfastened zippers,hooks, buckles.•Rips, tears andbroken threads.•Overloading thewasher.•Degradation of fabric.•May be irreversible if rips,tears and seams cannot bemended.•Never pour chlorine bleachdirectly on fabric.•Check condition of itemsbefore washing. SeeWashing Procedures forpreparingand loading the wash load.Lint•Incorrect sorting.•Tissues left in pocket.•Overloading thewasher.•Not enoughdetergent.•Undissolved detergenthas left residue.•Static cling isattracting lint.•Load washed too long.•Reduce load size. Rewashusing correct watertemperature, water level, andamount of detergent.•Add nonprecipitating waterconditioner to wash water.•Add liquid fabric softener tofinal rinse.•Dry load in dryer.•Remove lint with lint brush orroller.•See WashingProcedures for sortingand preparing the washload.•Do not overload washer.•Use correct amount ofdetergent, watertemperature and waterlevel.28
Common Washing ProblemsMany washing problems involve poor soil and stain removal, residues of lint and scum, and fabric damage. Forsatisfactory washing results, follow these suggestions provided by The Soap and Detergent Association.PROBLEM POSSIBLE CAUSES SOLUTIONS PREVENTIVE MEASURESPilling(Fibers break off,ball up and cling tofabric)•Pilling is normal withsynthetic and permanentpress fabrics. This is dueto abrasion from normal•Use a lint brush or shaverto remove pills.•Use fabric softener in thewasher to lubricate fibers.•When ironing, use spraystarch or fabric finish onwear.collars and cuffs.•Turn items inside out toreduce abrasion.Residue orpowder on darkitems;Stiff, harshfabrics.•Undissolved detergent.•Some nonphosphategranular detergents cancombine with hard waterminerals to form aresidue.•Reduce load size.•Add dissolved detergentto tub . Rewash load.•Mix 1 cup (240 ml) whitevinegar to 1 gallon (3.8 L)warm water in plasticcontainer. Soak item.Rinse and rewash.•Increase water temperatureusing hottest water safe forfabric.•Do not overload washer.•Use liquid detergent or usenonprecipitating waterconditioner withnonphosphate granulardetergent.Wrinkling•Overloading the washer.•Reduce load size.•Rinse in cold water withliquid fabric softener.•Do not overload washer.•Remove items from washeras soon as cycle iscompleted.•Use liquid fabric softener.Yellow buildup ofbody soil onsynthetic fabrics•Agitation time too short.•Wash water temperaturetoo low.•Not enough detergent.•Soak in detergent boosteror product containingenzymes.•Wash in hot water (120°F/49°C) using fullpermanent press cycle.Increase detergent.Add bleach safe forfabric.•Or, treat with colorremover.•Wash synthetics frequentlyusing water at least 100°F(37°C ) and correct waterlevel.Yellow or brownrust stains•Iron or manganese inwater supply, water pipes,or water heater.•To restore discolored loadof whites, use rustremover safe for fabric.Do not use chlorinebleach to remove ruststains. It may intensifydiscoloration.•Use nonprecipitating watersoftener.•Before washing, run hotwater for a few minutes toclear lines.•Drain water heateroccasionally.•For an ongoing problem,install an iron filter in yourwater supply system.29
4. Close the dryer door and set dryer controls(some models).See Dryer Operating Instructions card for yourspecific model controls.5. Turn cycle selector clockwise to the desiredsetting.6. Start the dryer.• Turn Start control clockwise to ON. Hold for 1-2 seconds and release.• To add or remove items when the dryer isrunning, open the door. The dryer will alwaysstop when the door is opened.• Allow the drum to come to a complete stopbefore reaching inside.7. When the cycle ends, remove items immediatelyand hang or fold. If load is removed before thecycle ends, turn cycle selector to OFF.Drying Rack (some models)Use the drying rack to dry items which should not betumble dried.1. Open the dryer door and remove the lint screen.2. Insert drying rack into the dryer drum. Place thefront bar under the lip of the lint screen opening.3. Place items to be dried on top of rack. Weightshould not exceed 10 lbs. Leave space betweenitems, but do not let items hang over the sides orthrough the grids. Do not tumble other items whenusing the drying rack.4. Select a timed dry setting best suited for itemsbeing dried. Use only the Air Fluff (no heat)temperature setting for items containing plastic,foam rubber, rubber-like materials, feathers ordown.5. When items are dry, remove the rack and replacethe lint screen. If lint screen is not in place, tumblingitems could enter the exhaust system and causedamage to the dryer.FeaturesCycle Signal Control (some models)When the Cycle Signal Control is ON, a signal willsound at the end of each cycle and during the PressSaver setting (some models). The volume is adjustableon some models.Drum Light (some models)A drum light will come on whenever the door is openedto illuminate the dryer drum during loading andunloading. Closing the door turns off the light.Use the drying rack to dry items whichshould not be tumbled.31
Common Drying ProblemsMany drying problems involve poor cleaning results, poor soil and stain removal, residues of lint and scum, andfabric damage. For satisfactory drying results, follow these suggestions provided by The Soap and DetergentAssociation.PROBLEMPOSSIBLE CAUSESSOLUTIONSPREVENTIVE MEASURESGreasy, oilystains• Fabric softener sheet.• Rub fabric softener stainswith bar soap. Rinse andrewash.• Add a few bath towels to smallloads for proper tumbling.• Some "silk-like" fabrics shouldbe air dried.• Use proper drying temperature.• Place fabric softener sheet ontop of load before starting thedryer.Lint• Overloading.• Overdrying causesstatic electricity.• Lint screen not cleanwhen cycle began.• Lint is attached to"pills."• Reduce load size andrewash using liquid fabricsoftener in the final rinse.• Or, add a fabric softenersheet and tumble withoutheat.• Use lint brush or roller toremove lint.• Do not overload dryer.• Use fabric softener in washer ordryer to reduce static electricity.• Remove items when they areslightly damp to avoidoverdrying.• Check that lint screen is cleanand in place.Pilling(Fibers breakoff, ball upand cling tofabric.)• Pilling is normal withsynthetic andpermanent pressfabrics. This is due toabrasion from normalwear.• Use a lint brush or shaverto remove pills.• Use fabric softener to lubricatefibers.• When ironing, use spray starchor fabric finish on collars andcuffs.• Turn items inside out to reduceabrasion.Shrinking• Overdrying.• Irreversible condition.• Follow fabric care labeldirections.• If shrinking is a concern, checkload often.• Remove items while slightlydamp and hang or lay flat tocomplete drying.• Block knits into shape.Wrinkling• Overloading.• Leaving items in dryerafter cycle ends.• Reduce load size andtumble at medium or lowheat for 5-10 minutes.• Remove itemsimmediately. Hang or fold.• Do not overload dryer.• Remove items as soon as cycleends.32
To reduce risk of fire or serious injury topersons or property, comply with the basic warningslisted in Important Safety Instructions and thoselisted below.• Before cleaning the washer or dryer interior, unplugthe electrical power cord to avoid electrical shockhazards.• Do not use any type spray cleanser when cleaningdryer interior. Hazardous fumes or electrical shockcould occur.at the bottom of the door opening. Remove bypulling straight up. Remove the lint and replace thescreen.• Occasionally a waxy build-up may form on the lintscreen from using dryer-added fabric softenersheets. To remove this build-up, wash the lintscreen in warm, soapy water. Dry thoroughly andreplace. Do not operate the dryer without the lintscreen in place.Inside the Washer• Remove items from the washer as soon as thecycle ends. Excess wrinkling, color transfer, andodors may develop in items left in the washer.• Dry the washer top, the area around the lid opening,and the underside of the lid. These areas shouldalways be dry before the lid is closed.• Before cleaning the washer interior, unplug theelectrical power cord to avoid electrical shockhazards.• When extremely soiled items have been washed,a dirty residue may remain on the tub. Remove thisby wiping the tub with a nonabrasive householdcleanser. Rinse thoroughly with water.• The agitator or tub may become stained from fabricdye. Clean these parts with a nonabrasive householdcleanser. This prevents dye transfer to future loads.Inside the Dryer• Clean the dryer lint screen after every load. Lintbuild-up in the screen restricts air flow, whichcauses longer drying times. The screen is located• If the dryer drum becomes stained from noncolorfastfabrics, clean the drum with a damp cloth and a mildliquid household cleanser. Remove cleanser residuebefore drying the next load.• Every 18 months an authorized servicer shouldclean the dryer cabinet interior and exhaust duct.These areas can collect lint and dust over time. Anexcessive amount of lint build-up could result ininefficient drying and possible fire hazard.OutsideWash lint screen occasionally.• When laundering is completed, wipe cabinet with adamp cloth. Turn water faucets off to preventpressure build-up in the hoses.• Clean the cabinet with mild soap and water. Neveruse harsh, gritty or abrasive cleansers. If thecabinet becomes stained, clean with diluted chlorinebleach [1/2 cup (120 ml) in 1 quart (.95 L) water].Rinse several times with clear water.Clean lint screen after every load.33
Use care with laundryproducts. They can damage finish on thelaundry center.3. Plug electrical cord into a properly groundedelectrical outlet.4. Add 1 gallon nontoxic recreational vehicle (RV)antifreeze to empty wash tub. Close lid.5. Set cycle selector knob at a spin setting. Pull outknob and let washer spin for 1 minute to drain outall water. Not all of the RV antifreeze will beexpelled.6. Push in knob, unplug electrical power cord, dry tubinterior, and close lid.7. Store washer in an upright position.8. To remove antifreeze from washer after storage,run empty washer through a complete cycle usingdetergent. Do not add wash load.• Remove glue residue from tape or labels with amixture of warm water and mild detergent. Or,touch residue with the sticky side of the tape orlabel.• Before moving the laundry center, place a stripof cardboard or thin fiberboard under the frontleveling legs to prevent floor damage.Follow WinterizingInstructions for coldweather care.Winterizing InstructionsIf the laundry center is stored in an area where freezingcan occur or moved in freezing temperatures, followthese winterizing instructions to prevent damage to thelaundry center:1. Turn off water supply faucets.2. Disconnect hoses from water supply and drainwater from hoses.34
Avoid Service ChecklistBefore calling for service, review this list. It may save both time and expense. The list includes common concernsthat are not the result of defective workmanship or materials in this laundry center.OCCURRENCEWASHER - NOISE"Clunking" or gearsounds.Rattling and clankingnoise.Squealing sound or hotrubber odor.Thumping sound.Vibrating noise.WASHEROPERATINGWasher does not start.POSSIBLE CAUSEA certain amount of "clunking" or gearsounds are normal in a heavy-dutywasher.Foreign objects such as coins or safetypins may be in tub or pump.Belt buckles and metal fasteners arehitting wash tub.Washer is overloaded.Heavy wash loads may produce athumping sound.Laundry center is not resting on asolid, firm floor.Shipping bolt and block have not beenremoved during installation.Wash load unevenly distributed in tub.Electrical power cord may not beplugged in or connection may be loose.House fuse blown, circuit breakertripped, or a power outage hasoccurred.Water supply faucets are not turnedon.Cycle selector is not in correct position.Motor is overheated.SOLUTIONThis is normal.Stop washer and check tub. If noisecontinues after washer is restarted, objectsmay be in pump. Call your authorizedservicer.To prevent unnecessary noise anddamage to tub, fasten fasteners and turnitems inside out.Do not overload washer. Stop washer andreduce load.This is usually normal. If sound continues,washer is probably out of balance. Stopwasher and redistribute wash load.Move laundry center so it rests firmly onsolid floor. Additional floor bracing may beneeded. Adjust leveling legs. SeeINSTALLATION INSTRUCTIONS fordetails.See INSTALLATION INSTRUCTIONS forremoving shipping bolt and block.Stop washer and rearrange wash load.Make sure plug fits tightly in wall outlet.Reset circuit breaker or replace fuse. Donot increase fuse capacity. If problem is acircuit overload, have it corrected by aqualified electrician. If problem is a poweroutage, call local electric company.Turn on water supply faucets.Move indicator clockwise slightly. Pull outknob.Washer motor will stop if it becomesoverheated. It will automatically restartafter a cool down period of up to 30minutes (if washer has not been manuallyturned off).35
OCCURRENCE POSSIBLE CAUSE SOLUTIONWasher won't spin. Lid is not completely closed. Close lid completely. Safety lid lock must not bebroken.Residue left in tub.WASHER - WATERWash load too wetafter spin.Water does not enterwasher or it entersslowly.Water level does notcover load.Warm or hot water isnot hot enough.Water in washerdoes not drain ordrains slowly.Water leaks.Incorrect wash andrinse temperatures.Water is enteringwasher but tub doesnot fill.Heavily soiled items.Washer is overloaded.Load is out of balance.Drain hose is kinked.Water supply is not adequate inarea.Water supply faucets are notcompletely open.Water is being used elsewhere inthe house.Water inlet hoses are kinked.Improper water level selection (formodels with water level/load sizecontrol).Washer is overloaded.Hot water heater is set too low or isa distance from laundry center.Hot water is being used elsewherein the house.Drain hose is kinked or clogged.Fill hose connection at faucet orwasher.House drain pipes are clogged.Oversudsing.Hot and cold water hoses areconnected to wrong supply faucets.Drain hose standpipe is incorrectheight.Wipe tub with a nonabrasive household cleanser,then rinse. Shake or brush excess dirt and sandfrom items before washing.Do not overload washer. See WashingProcedures.Rearrange load to allow proper spinning.Straighten drain hose.Check another faucet in the house. Wait untilwater supply and pressure increase.Fully open hot and cold faucets.Water pressure must be at least 30 psi (260 kPa).Avoid running water elsewhere while washer isfilling.Straighten hoses.Select higher water level/load size.Do not overload washer. When control is set athighest fill level, dry load level should not behigher than top row of circular holes in wash tub.Measure hot water temperature at nearby faucetwith candy or meat thermometer. Watertemperature should be at least 130°F (70°C).Adjust water heater as necessary.Avoid using hot water elsewhere before or duringwasher use. There may not be enough hot wateravailable for proper cleaning. If problem persists,your hot water system may be unable to supportmore than 1 use at a time.Clean and straighten the drain hose.Check and tighten hose connections. Install rubbersealing washers provided.Unclog drain pipes. Contact plumber if necessary.Use less detergent.Connect hot water hose to hot water faucet andcold water hose to cold water faucet.Standpipe must be a minimum of 33" (83.82 cm)high to prevent siphoning. See INSTALLATIONINSTRUCTIONS.36
OCCURRENCEDRYERDryer does not start.Dryer runs but won't heat.POSSIBLE CAUSEElectrical power cord is not securelyplugged in or plug may be loose.House fuse blown or circuit breakertripped.Thermal limiter tripped.There are 2 house fuses in the dryercircuit. If 1 of the 2 fuses is blown, thedrum may turn but the heater will notoperate.Gas supply valve is not open (gasmodels).Dryer does not have enough air supplyto support the burner flame (gasmodels).LP gas supply tank is empty or therehas been a utility interruption of naturalgas (gas models).SOLUTIONMake sure the plug fits tightly in wall outlet.Reset circuit breaker or replace fuse.Make sure electrical line is not overloaded and thedryer is on a separate circuit.Call authorized service person for replacement.Replace fuse.Check to make sure supply valve is open. SeeINSTALLATION INSTRUCTIONS for procedure.See INSTALLATION INSTRUCTIONS.Refill or replace tank.Dryer should heat when utility service is restored.Drying cycle takes too long, Lint screen is clogged with lint.outside of the dryer feelstoo hot or smells hot.Exhaust duct requirements have notbeen met.Make sure all lint has been removed from the dryerlint screen before starting each cycle.Exhaust duct must be at least 4 inches in diameterand made of rigid or flexible metal.When in place, the duct must have no more than two90° bends and must not exceed length listed inINSTALLATION INSTRUCTIONS.Excessive wrinkling.Electric dryer is connected to a 208 voltcircuit.Drying procedures have not beenfollowed.Outside exhaust hood or exhaust ductmay be clogged or restricted.High humidity.Dryer is overloaded.Items left in dryer too long.Insufficient sorting of items.Drying temperature too high.Drying time will be 20% longer than drying on a 240volt circuit.See Drying Procedures, page 4.Clean out any obstruction.Use a dehumidifier near the dryer.Do not overload. See Drying Procedures.Remove items as soon as cycle ends.See Drying Procedures.Follow fabric care label instructions.37
FRIGIDAIRE LAUNDRY CENTER WARRANTYYour Frigidaire product is protected by this warrantySample warranty always check warrranty with productFULL ONE-YEARWARRANTYWARRANTYPERIODOne year from originalpurchase date.FRIGIDAIRE, THROUGH ITS AUTHORIZED<strong>SERVICE</strong>RS, WILL:Pay all costs for repairing or replacing any parts of thisappliance which prove to be defective in materials orworkmanship.THE CONSUMER WILL BERESPONSIBLE FOR:Costs of service calls that are listed under NORMALRESPONSIBILITIES OF THE CONSUMER.*LIMITED 2ND - 5THYEAR WARRANTYSecond through fifthyears from originalpurchase date.Provide a replacement for a defective or malfunctioningpart found in the washer transmission.Costs for labor and replacement parts other thandefective transmission parts.FULL 25-YEARINNER WASHBASKETWARRANTY(Excluding Alaska)25 years from originalpurchase date.Provide a replacement and in-home service labor,without charge, for an inner wash basket that breaksdue to defective materials or workmanship.Costs of service calls that are listed under NORMALRESPONSIBILITIES OF THE CONSUMER.*LIMITEDWARRANTY(Applicable to theState of Alaska)Time periods listedabove.All of the provisions of the full and limited warrantiesabove and the exclusions listed below apply.Costs of the technician's travel to the home and anycosts for pick up and delivery of the appliancerequired because of service.Your appliance is warranted by Frigidaire Home Products, a division of White Consolidated Industries, Inc. We authorizeno person to change or add to any of our obligations under this warranty. Any obligations for service and parts under thiswarranty must be performed by Frigidaire or an authorized Frigidaire servicer.*NORMALRESPONSIBILITIESOF THE CONSUMEREXCLUSIONSIF YOU NEED<strong>SERVICE</strong>This warranty applies only to products in ordinary household use, and the consumer isresponsible for the items listed below:1. Proper use of the appliance in accordance with instructions provided with the product.2. Proper installation by an authorized servicer in accordance with instructions provided with theappliance and in accordance with all local plumbing, electrical and/or gas codes.3. Proper connection to a grounded power supply of sufficient voltage, replacement of blownfuses, repair of loose connections or defects in house wiring.4. Expenses for making the appliance accessible for servicing, such as removal of trim,cupboards, shelves, etc., which are not a part of the appliance when it was shipped from thefactory.5. Damages to finish after installation.6. Replacement of light bulbs and/or fluorescent tubes (on models with these features).This warranty does not cover the following:1. CONSEQUENTIAL OR INCIDENTAL DAMAGES SUCH AS PROPERTY DAMAGE ANDINCIDENTAL EXPENSES RESULTING FROM ANY BREACH OF THIS WRITTEN OR ANYIMPLIED WARRANTY.Note: Some states do not allow the exclusion or limitation of incidental or consequentialdamages, so this limitation or exclusion may not apply to you.2. Service calls which do not involve malfunction or defects in workmanship or material, or forappliances not in ordinary household use. The consumer shall pay for such service calls.3. Damages caused by services performed by servicers other than Frigidaire or its authorizedservicers; use of parts other than genuine Frigidaire Home Products parts; obtained frompersons other than such servicers; or external causes such as abuse, misuse, inadequatepower supply or acts of God.4. Products with original serial numbers that have been removed or altered and cannot be readilydetermined.800 • 944 • 9044Frigidaire Home ProductsP.O. Box 212378Augusta, GA 30917Keep your bill of sale, delivery slip, or some other appropriate payment record. The date on thebill establishes the warranty period should service be required. If service is performed, it is in yourbest interest to obtain and keep all receipts. This written warranty gives you specific legal rights.You may also have other rights that vary from state to state. Service under this warranty must beobtained by contacting Frigidaire Home Products:38
SECTION C INSTALLATION INSTRUCTIONSBefore beginning installation, carefully read theseinstructions. This will simplify the installationand ensure the laundry center is installed correctlyand safely. Leave these instructions near thelaundry center after installation for future reference.NOTE: The electrical service to the laundry centermust conform with local codes and ordinancesand the latest edition of the National ElectricalCode, ANSI/NFPA 70, or in Canada, the CanadianElectrical Code, CSA C22.1NOTE: The gas service to the laundry center mustconform with local codes and ordinances and thelatest edition of the National Fuel Gas Code ANSIZ223.1/NFPA 54, or in Canada, the Canadian NaturalGas and Propane Installation Code, CSA B149.1.NOTE: The laundry center is designed under ANSIZ21.5.1 or ANSI/UL 2158- CAN/CSA C22.2 (latestedition) for HOME USE only. This laundry centeris not recommended for commercial applicationssuch as restaurants or beauty salons, etc.For your safety the information inthis manual must be followed to minimize the riskof fire or explosion or to prevent property damage,personal injury or loss of life.- Do not store or use gasoline or other flammablevapors and liquid in the vicinity of this or anyother appliance.- WHAT TO DO IF YOU SMELL GASDo not try to light any appliance.Do not touch any electrical switch; do not useany phone in your building.Clear the room, building or area of alloccupants.Immediately call your gas supplier from aneighbor’s phone. Follow the gas supplier’sinstructions.If you cannot reach your gas supplier, call thefire department.Installation and service must be preformed by aqualified installer, service agency or the gassupplier.PRE-INSTALLATION REQUIREMENTSTools and Materials Required for Installation:1. Phillips head screwdriver.2. Channel-Iock adjustable pliers.3. Carpenter’s level.4. Flat or straight blade screwdriver.5. Duct tape.6. Rigid or flexible metal 4 inch (10.16 cm) duct.7. Vent hood.8. Pipe thread sealer (Gas).9. Ratchet with 3/8 inch (0.96 cm) socket.ELECTRICAL REQUIREMENTSELECTRIC Laundry CenterCircuit - Individual 30 amp branch circuit fused with30 amp minimum time delay fuses or circuit breakers.POWER SUPPLY - 3-wire or 4-wire , 240 volt singlephase, 60 Hz, Alternating Current.POWER SUPPLY CORD KIT- The laundry centerMUST employ a 3-condutor power supply cord NEMA10-30 type SRDT rated at 240 volt AC minimum, 30amp, with 3 open end spade lug connectors withupturned ends or closed loop connector OR a 4-condutor power supply cord NEMA 14-30 type SRDTor ST (as required) rated at 240 volt AC minimum, 30amp, with 4 open end spade lug connectors withupturned ends or closed loop connectors and markedfor use with clothes dryers. If being installed in amanufactured (mobile) home, the laundry centerMUST employ a 4-condutor power supply cord NEMA14- 30 type SRDT or ST (as required) rated at 240volt AC minimum, 30 amp, with 4 open end spade lugconnectors with upturned ends or closed loopconnectors and marked for use with clothes dryers.See ELECTRICAL CONNECTIONS. (Canada - 4-wirepower supply cord is installed on laundry center.)39
OUTLET RECEPTACLE - NEMA 10-30R (3-wire)receptacle or NEMA 14- 30R (4-wire) receptacle to belocated so the power supply cord is accessible whenthe laundry center is in an installed position.3. The standpipe height above the floor should be:Minimum height: 33 inches (83.82 cm)Maximum height: 96 inches (244 cm)96" (244cm)MaximumNEMA 10-30R NEMA 14-30R33"(83.82cm)MinimumGAS Laundry CenterCIRCUIT - Individual 15 amp branch circuit fused witha 15 amp maximum time delay fuse or circuit breaker.POWER SUPPLY - 3 wire, 120 volt single phase, 60Hz, Alternating Current.POWER SUPPLY CORD -The gas laundry center isequipped with a 120 volt 3-wire power cord.NOTE:Do notunderany circumstancesrem ove groundingprong from plug.WATER SUPPLY REQUIREMENTSHot and cold water faucets MUST be installed within42 inches (106.68 cm) of your laundry center’s waterinlet. The faucets MUST be 3/4 inch (1.9 cm) gardenhose type so inlet hoses can be connected. Waterpressure MUST be between 10 and 120 pounds persquare inch (maximum unbalance pressure, hot vs.cold, 10 psi). Your water department can advise youof your water pressure. The hot water temperatureshould be about 140 degrees F.DRAIN REQUIREMENTSGrounding Prong1. Drain capable of eliminating 17 gals. per minute.2. A standpipe diameter of 1¼ inches (3.18 cm)minimum.Note: For installations requiring a longer drain hose,have a qualified technician install a longer hose,PN 131461201, available from an authorizedparts distributor. For drain systems in the floor,install a siphon break kit, available from your localhardware store.EXHAUST SYSTEM REQUIREMENTSUse only 4 inch (10.16 cm) diameter (minimum) rigidor flexible metal duct and approved vent hood whichhas a swing-out damper(s) that opens when the dryeris in operation. When the dryer stops, the damper(s)automatically closes to prevent drafts and the entranceof insects and rodents. To avoid restricting the outlet,maintain a minimum of 12 inches (38.5 cm) clearancebetween the vent hood and the ground or any otherobstruction.:$51,1* The following are specificrequirements for proper and safe operation of yourlaundry center. Failure to follow these instructionscan create excessive drying times and fire hazards.:$51,1* Do not use plastic flexible duct toexhaustthe dryer. Excessive lint can build up insidethe exhaust system and create a fire hazard and restrictair flow. Restricted air flow will increase drying times.If your present system is made up of plastic duct ormetal foil duct, replace it with a rigid or flexible metalduct. Ensure the present duct is free of any lintprior to installing laundry center dryer duct.:$51,1* If the dryer is not exhausted outdoors,some fine lint will be expelled into the laundry area.An accumulation of lint in any area of the home cancreate a health and fire hazard. The dryer exhaustsystem MUST be exhausted to the outside of thedwelling!40
:$51,1* Do not allow combustible materials(for example: clothing,draperies/curtains, paper) tocome in contact with the exhaust system. The dryerMUST NOT be exhausted into a chimney, a wall, aceiling, or any concealed space of a building whichcan accumulate lint, resulting in a fire hazard.:$51,1* Do not exceed the length of duct pipeor number of elbows allowed in the” EXHAUST DUCTLENGTHS” chart. Lint can accumulate in the system,plugging the system and creating a fire hazard, as wellas increasing drying times.:$51,1* Do not screen the exhaust ends of thevent system, nor use any screws or rivets to assemblethe exhaust system. Lint can become caught in thescreen, on the screws or rivets, clogging the exhaustsystem and creating a fire hazard as well as increasingdrying times. Use an approved vent hood to terminatethe duct outdoors, and seal all joints with duct tape.All male duct pipe fittings MUST be installeddownstream with the flow of air.EXHAUST LENGTHSThe maximum length of the exhaust system dependsupon the type of duct used, number of elbows andtype of exhaust hood.The following chart wasdeveloped to illustrate typical systems that could meetthe maximum system back pressure for laundry centerinstallations.In installations where the exhaust system is notdescribed in the chart, the following method must beused to determine if the exhaust system is acceptable.1. Connect an inclined or digital manometer betweenthe drye and the point the exhaust connects to thedryer.2. Set the dryer timer to air fluff or cool down andstart the dryer.3. Read the system back pressure measurement onthe manometer.4. The system back pressure MUST NOT be higherthe 0.75 inches of water column. If the system backpressure is more than 0.75 inches of water colum,the system is too restrictive and the installation isunacceptable.Although vertical orientation of the exhaust system isacceptable, certain extenuating circumstances couldaffect the performance of the dryer:• Only rigid metal ductwork should be used.Venting vertical through a roof may expose theexhaust system to downdrafts causing anincrease in vent restriction.€ Running the exhaust system through anuninsulated area may cause condensation.€ Compression of the exhaust system will cause anincrease in vent restriction.The exhaust system should be inspected and cleaneda minimum of every two years with normal usage. Themore the dryer is used, the more often you shouldcheck the exhaust system and vent hood for properoperation.Numberof 90°Turns01230123The laundry center may be exhausted four (4) wayswith rear flush installation:1. Straight backEXHAUST DUCT LENGTHSEXHAUST HOOD TYPE4”(10.2 CM)LouveredMAXIMUM LENGTH OF 4-INCH (10.2 CM)DIAMETER RIGID METAL DUCT56 ft. (17.07 m)46 ft. (14.02 m)34 ft. (10.36 m)32 ft. (9.75 m)MAXIMUM LENGTH OF 4-INCH (10.2 CM)DIAMETER FLEXIBLE METAL DUCT30 ft. (9.14 m)22 ft. (6.7 m)16 ft. (4.88 m)10 ft. (3.05 m)2.5”(6.35 CM)42 ft. (12.8 m)36 ft. (10.97 m)28 ft. (8.53 m)18 ft. (5.48 m)22 ft. (6.7 m)14 ft. (4.27 m)10 ft. (3.05 m)5 ft. (1.5 m)2. Down (add an 8 inch (20.32 cm) length of 4 inch(10.16 cm)rigid duct and 1 elbow down)3. Left (add an 8 inch (20.32 cm) length of 4 inch(10.16 cm) rigid duct, 1 elbow down and 1 elbowleft)4. Right (add an 8 inch (20.32 cm) length of 4 inch(10.16 cm) rigid duct, 1 elbow down and 1 elbowright)To exhaust up, add an 11 inch (27.94 cm) length ofstandard 4 inch (10.16 cm) diameter duct and a 90°elbow. The unit will be positioned about 4½ inches(11.43 cm) away from the wall (flush to wall upexhausting may be done by going below the dryer thensideways).41
curtains, drapes or anthing that will obstruct theflow of combustion and ventilation air.3. On carpet. Floor MUST be solid with a maximumslope of 1 inch (2.54 cm).INSTALLATION IN RECESS OR CLOSET1. A laundry center installed in a bedroom, bathroom,recess or closet, MUST be exhausted outdoors.2. No other fuel burning appliance shall be installedin the same closet as the Gas laundry center.GAS SUPPLY REQUIREMENTS1. Installation MUST conform with local codes, or inthe absence of local codes, with the National FuelGas Code, ANSI Z223.1 (latest edition) or inCanada, the current AN/CGA B149.2. The gas supply line should be of 1/2 inch (1.27cm) pipe.3. If codes allow, flexible metal tubing may be usedto connect your dryer to the gas supply line. Thetubing MUST be constructed of stainless steel orplastic-coated brass.4. The gas supply line MUST have an individualshutoff valve. 5. A 1/8 inch (0.32 cm) N. P. T.plugged tapping, accessible for test gageconnection, MUST be installed immediatelyupstream of the gas supply connection to the dryer.6. The dryer and its individual shutoff valve MUSTbe disconnected from the gas supply piping systemduring any pressure testing of the gas supply pipingsystem at test pressures equal to or less than 1/2psig (3.45 kPa).7. The dryer MUST be isolated from the gas supplypiping system by closing its individual manualshutoff valve during any pressure testing of thegas supply piping system at test pressures equalto or less than 1/2 psig (3.45 kPa).LOCATION OF YOUR LAUNDRY CENTERDO NOT INSTALL YOUR LAUNDRY CENTER:1. In an area exposed to dripping water or outsideweather conditions.3. Your laundry center needs the space around it forproper ventilation.DO NOT INSTALL YOUR LAUNDRY CENTERIN A CLOSET WITH A SOLID DOOR.4. A minimum of 120 square inches (774.2 squarecm) of opening, equally divided at the top andbottom of the door, is required. Air openings arerequired to be unobstructed when a door isinstalled. A louvered door with equivalent airopenings for the full length of the door isacceptable.ClosetDoor60 SQ.IN.(387.1 SQ.CM )60 SQ.IN.(387.1 SQ.CM ):$51,1* Explosion hazard Do not install thelaundry center where gasoline or other flammables arekept or stored.If the laundry center is installed in agarage, it must be a minimum of 18 inches (45.7 cm)above the floor. Failure to do so can result in death,explosion, fire or burns.5. The following illustrations show minimumclearance dimensions and air openings for properoperation in a recess or closet installation.2. In an area where it will come in contact with42
0 IN.(0 CM )0 IN.(0 CM )1 IN.(2.54 CM )0 IN.(0 CM )DRYER60 SQ.IN.(387.1 SQ.CM )WASHER60 SQ.IN.(387.1 SQ.CM )MOBILE HOME INSTALLATION1. Dryer MUST be exhausted outside (outdoors, notbeneath the mobile home) using metal ducting thatwill not support combustion. Metal ducting mustbe 4 inches (10.16 cm) in diameter with noobstructions. Rigid metal duct is preferred.2. If dryer is exhausted through the floor and areabeneath the mobile home is enclosed, the exhaustsystem MUST terminate outside the enclosure withthe termination securely fastened to the mobilehome structure.4. When installing a gas dryer into a mobile home, aprovision must be made for outside make up air.This provision is to be not less than twice the areaof the dryer exhaust outlet.5. Installation MUST conform to currentManufactured Home Construction & SafetyStandard (which is a Federal Regulation Title 24CFR-Part 32-80) or when such standard is notapplicable, with American National Standard forMobile Homes. In Canada, the CSA Z is applicable.:$51,1* The laundry center is designed underANSI Z 21.5.1 for HOME USE only.43
ROUGH-IN DIMENSIONS25 ¼ IN.(64.13 CM )2 ½ IN.(6.35 CM )16 ¼ IN.(41.27 CM )47“75 ½ IN.(191.77 CM )54 5/16 IN.(137.95 CM )43 IN.(109.22 CM )12 ½ IN.(31.75 CM )VENTELECTRICALCONNECTIONW ATER INLETS(REAR)3 ¾ IN.(9.52 CM )9 3/8 IN.(23.81 CM )DRAIN OUTLET(REAR)5 ¼ IN.(13.33 CM )29 7/16 IN(74.77 CM )GAS SUPPLYPIPE (REAR)43 IN.(109.22 CM )41 ¼ IN(104.77 CM )36 1/16IN.(91.60 CM )1 7/8 IN.(4.76 CM )4 13/16 IN.(12.22 CM )11 7/16 IN.(29.5 CM )UNPACKING27 IN.(68.58CM)1. Using the four shipping carton corner posts (twoon each side), carefully lay the laundry center onits left side and remove foam shipping base.2. Using ratchet with 3/8 inch (0.96 cm) socket,remove mechanism shipping bolt and plasticspacer block from center of base.NOTE: If the laundry center is to be transportedat a later date, the tub blocking pad,shipping bolt, and plastic spacer blockshould be retained.3. Return laundry center to an upright position.PLASTIC SPACERBLOCK30 13/16 IN.(78.26 CM )4. Remove:(a) foam tub blocking pad.(b) foam shipping blocks from rear of unit.(c) tape from dryer door.(d) foam dryer support pads.(e) inlet hoses.(f) enclosure package.5. From the back of the washer, remove the wireshipping clips securing the drain hose and powercord (if equipped). Plastic clamps secure the drainhose to the right side of the washer backsheet.These clamps form a standpipe to prevent watersyphoning.DO NOT REMOVE THESE CLAMPS.6. Carefully move the laundry center to within 4 feet(1.22 m) of the final location to begin theinstallation.M ECHANISMSHIPPINGBOLTSHIPPING CARTON CORNER POSTSFOAMSHIPPINGPADDRAIN HOSEPOW ER CORD(IF EQUIPPED)44
ELECTRICAL INSTALLATIONALL ELECTRIC Laundry CentersWARNING The following are specificrequirements for proper and safe electricalinstallation of your laundry center. Failure to followthese instructions can create electrical shock and/or a fire hazardWARNING This laundry center MUST beproperly grounded. Electrical shock can result if thelaundry center is not properly grounded. Follow theinstructions in this manual for proper grounding.WARNING Do not use an extension cord withthis laundry center. Some extension cords are notdesigned to withstand the amounts of electrical currentthis laundry center utilizes and can melt, creatingelectrical shock and/or fire hazard. Locate the laundrycenter within reach of the receptacle for the lengthpower cord to be purchased, allowing some slack inthe cord. Refer to the pre-installation requirements inthis manual for the proper power cord to be purchased.WARNING A U.L. approved strain relief mustbe installed onto the power cord. If the strain relief isnot attached, the cord can be pulled out of the laundrycenter and can be cut by any movement of the cord,resulting in electrical shock.WARNING Do not use an aluminum wiredreceptacle with a copper Wired power cord and plug(or vice versa). A chemical reaction occurs betweencopper and aluminum and can cause electrical shorts.The proper wiring and receptacle is a copper wiredpower cord with a copper wired receptacle ORaluminum wired power cord with an aluminumwired receptacle.NOTE: Laundry centers operating on a 208 volt powersupply will have longer drying times than laundrycenters operating on a 240 volt power supply.GROUNDING REQUIREMENTSWARNINGNon-Canadian ELECTRIC LaundryCenter Improper connection of the equipmentgrounding conductor can result in a risk of electricalshock. Check with a licensed electrician if you are indoubt as to whether the appliance is properly grounded.For a grounded, cord-connected laundry center:1. The laundry center MUST be grounded. In theevent of malfunction or breakdown, grounding willreduce the risk of electrical shock by a path ofleast resistance for electrical current.2. If your laundry center is equipped with a powersupply cord having an equipment-groundingconductor and a grounding plug, the plug MUSTbe plugged into an appropriate, copper wiredreceptacle that is properly installed and groundedin accordance with all local codes and ordinances.If in doubt, call a licensed electrician.For a permanently connected laundry center:The laundry center MUST be connected to a groundedmetal, permanent wiring system; or an equipmentgrounding conductor MUST be run with the circuitconductors and connected to the equipment-groundingterminal or lead on the appliance.Canadian ELECTRIC Laundry CenterWARNING Improper connection of theequipment grounding conductor can result in a risk ofelectrical shock. Check with a licensed electrician ifyou are in doubt as to whether the appliance is properlygrounded.For a grounded cord connected laundry center:1. The laundry center MUST be grounded. In theevent of malfunction or breakdown, grounding willreduce the risk of electrical shock by providing apath of least resistance for the electrical current.2. Since your laundry center is equipped with a powersupply cord having an equipment-groundingconductor and a grounding plug, the plug MUSTbe plugged into an appropriate outlet that isproperly installed and grounded accordance withall codes and ordinances. If in doubt, call a licensedelectrician.ALL GAS Laundry Centers1. The laundry center, when installed, MUST beelectrically grounded in accordance with localcodes, or in the absence of local codes, with theNational Electrical Codes, ANSI/NFPA (latestedition) or in Canada, CSA C22.1 CanadianElectrical Code Part 1.2. The laundry center is equipped with a three-prong(grounding) plug for your protection against shockhazard and should be plugged directly into aproperly grounded three-prong receptacle. Do notcut or remove the grounding prong from the plug.45
ELECTRICAL CONNECTIONS FOR A 3-WIRESYSTEMELECTRIC Laundry Center1. Remove the screw securing the terminal blockaccess cover to the rear panel and remove cover.2. Install a U.L. approved strain relief connector inthe entry hole on the back panel.3. Remove the green neutral ground wire from thegreen ground screw located above the termialblock.4. Insert a NEMA 14-30 Type ST or SRDT, U.L.approved power cord through the strain relief.5. Attach the green power cord ground wire to thecabinet with the green ground screw6. Attach the white (neutral) wire from the power cordand the green ground wire from the applianceharness to the silver-colored center terminal onthe terminal block. Tighten the screw securely.3. Insert a NEMA 10-30 Type SRDT U.L. approvedpower cord through the strain relief.4. Attach the power cord neutral (central wire)conductor to the silver colored center terminal onthe terminal block. Tighten the screw securely.Green GroundScrewGreenConductor(Cord)<strong>Appliance</strong>Green GroundWireRedWhiteBlackSilver Term inalTerminalBlock7. Attach the red and black wires from the power cordto the outer brass-colored terminals on the terminalblock. Tighten both screws securely.8. Tighten the screws securing the cord restraintfirmly against the power cord.5. Attach the remaining two power cord outerconductors to the outer brass colored terminalson the terminal block. Tighten both screw securely.6. Tighten the screws securing the cord restraintagainst the power cord.7. Reinstall the terminal access cover.ELECTRICAL CONNECTIONS FOR A 4-WIRESYSTEMELECTRIC Laundry Center1. Remove the screw securing theterminal block access coverto the rear panel andremove cover.2. Install a U.L. approvedstrain relief connector in theentry hole on theback panel.9. Reinstall the terminal block access cover.INSTALLATION1. Run some water from the hot and cold faucets toflush the water lines and remove particles thatmight clog up the water valve screens.2. Check inlet hoses to ensure the rubber washersare installed in each end.3. Carefully connect the inlet hoses to the water valve(on the left side of the washer cabinet), tighten byhand, then tighten another 2/3 turn with pliers.&$87,21DO NOT CROSS THREAD OROVERTIGHTEN THESE CONNECTIONS.4. Determine which water faucet is the HOT waterfaucet and carefully connect the bottom inlet hoseto the HOT water faucet, tighten by hand, thentighten another 2/3 turn with pliers. Carefullyconnect the top inlet hose to the COLD waterfaucet, tighten by hand, then tighten another 2/3turn with pliers.46
&$87,21DO NOT CROSS THREAD OROVERTIGHTEN THESE CONNECTIONS.Turn the water on and check for leaks at bothconnections.5. Carefully move the laundry center to its finallocation.6. To ensure the laundry center is level and solid onall four legs, tilt the laundry center forward so therear legs are off the ground. Gently set the laundrycenter back down to allow the rear legs to selfadjust. Place a level on top of the washer. Checkit side to side, then front to back. Screw the frontleveling legs up or down to ensure the laundrycenter is resting solid on all four legs (no rockingof the laundry center should exist).NOTE: Keep the leg extension at a minimum toprevent excessive vibration.CableTie9. Remove the two (2) screws securing the dryer frontaccess panel to the dryer cabinet. Lift the paneluntil the tabs can be disengaged from the cabinet.Remove the panel and set aside.7. GAS CONNECTION (Gas laundry centers only)a. Remove the shipping cap from gas pipe at therear of the dryer.NOTE: DO NOT connect the laundry center to L.P.gas service without converting the gas valve.An L.P. conversion kit (P/N5303937053) must be installed by a qualifiedgas technician.b. Connect a 1/2 inch (1.27 cm) I.D. semi-rigid orapproved pipe from the gas supply line to the 3/8inch (0.96 cm) pipe located on the back of the dryer.Use a 1/2 inch (1.27 cm) to 3/8 inch (0.96 cm)reducer for the connection. Apply an approvedthread sealer that is resistant to the corrosiveaction of liquefied gases on all pipe connections.c. Open the shutoff valve in the gas supply line.d. Test all connections by brushing on a soapy watersolution. NEVER TEST FOR GAS LEAKS WITHAN OPEN FLAME.8. Form a “ U “ shape on the end of the drain hosewith the hose pointed toward the drain. Place theformed end in a laundry tub or a standpipe andsecure with a cable tie provided in the enclosurepackage.WATER WILL SYPHON FROM THE WASHER IF THEABOVE INSTRUCTIONS ARE NOT FOLLOWED.AccessPanelScrews10. Connect the exhaust duct to outside duct work. Useduct tape to seal all joints.11. Plug the power cord into a grounded outlet.NOTE: Check to ensure the power is off at a circuitbreaker/fuse box before plugging the power cordinto an outlet.12.Turn on the power at a circuit breaker/fuse box.Before operating the dryer, makesure the dryer area is clear and free from combustiblematerials, gasoline, and other flammable vapors. Alsosee that nothing (such as boxes, clothing, etc.) obstructsthe flow of combustion and ventilation air.13. Reinstall the dryer front access panel.14. Run the washer and dryer though a cycle. Checkfor proper operation.47
NOTE: On gas dryers, before the burner will light, itis necessary for the gas line to be bled of air.If the burner does not light within 45 secondsthe first time the dryer is turned on, thesafety switch will shut the burner off. If thishappens, turn the timer to “OFF” and wait 5minutes before making another attempt tolight.15. If your laundry center does not operate, pleasereview the“Avoid Service Checklist” located in yourOwner’s Guide before calling for service.16. Place these instructions in a location near thelaundry center for future reference.NOTE: A wiring diagram is located behind the dryerfront access panel.REPLACEMENT PARTSIf replacement parts are needed for your laundry center,contact the source where you purchased your laundrycenter.WARNING Destroy the carton, plastic bags, andmetal band after the laundry center is unpacked.Children might use them for play. Cartons covered withrugs, bedspreads, or plastic sheets can become airtightchambers causing suffocation. Place all materials in agarbage container or make materials inaccessible tochildren.Label all wires prior to disconnectionwhen servicing controls. Wiring errors can causeimproper and dangerous operation. Verify properoperation after servicing.WARNING The instructions in this manual andall other literature included with this laundry center arenot meant to cover every possible condition andsituation that may occur. Good safe practice and cautionMUST be applied when installing, operating andmaintaining any appliance.Maximum benefits and enjoyment are achieved whenall the Safety and Operating instructions are understoodand practiced as a routine with your laundry tasks.48
SECTION D - DRYER SECTION OPERA-TIONThe air then is drawn into the drum through the holesin the rear of the drum.Airflow Electric Dryers:Room air enters the dryer section through a louveredpanel in the rear of the laundry center.The air passes through the drum picking up moistureand is drawn into the air duct in the door though thelint filter into the ductwork at the front of the dryer.Once inside the dryer cavity the air is drawn betweenthe rear wall of the dryer and the plenum. The holes inthe plenum allow the air to be drawn across heatingelement. In any cycle, other than Air Fluff, the heatingelement heats the air as it passes through.49
The air enters the fan housing and is pushed out theexhaust vent to the outside of the house.Airflow Gas Dryers:The airflow in gas dryers is the same electric dryer asexcept for the heat source and the rear of the drum.The air enters the cavity through the louvered openingin the rear of the laundry center. The air is then pulledacross the gas burner, through the burner chamber andis ducted to the rear of the drum.The drum is the same as in the electric dryer except itdoes not have the heat baffle on it.Airflow Problems:Airflow problems are usually caused by restrictions,leaks or short unrestricted vents resulting in longer dry-50
ing times, hotter dryer surfaces and in extreme casescausing the thermal limiter to open on electric dryers.Restrictions:Note:With short direct vent runs; such as you havewhen the dryer is installed against an outsidewall, use a 2 1/2” vent cap rather than a 4”vent cap.Restrictions can occur any place in the airflow system,but the most common are:1. Installing the laundry center in a small inclosed area;such as a closet without a louvered door, thatreduces the intake air.2. Fan problems caused by either a slow runningmotor, a broken or deformed fan blade or adeformed fan housing.3. A lint restriction in the lint screen area. Operatormay not be cleaning the lint screen before using.4. A restriction in the exhaust system in the housecaused by the design of the vent, such as; thediameter of the vent pipe being to small, to long orto many right angles, a collapsed or lint restrictedvent pipe.Electrical Operation: (Electric Dryer)Note:L1REDSIGNALSWITCHBAlways refer to the wiring diagram orschematic with the product.120 VACCYCLE SIGNALXRCTMWHTTMNGRN4.4KCABINETTHERMALLIMITER240 VACYELBLUENCCWHT 4DOORSWITCHNOMOTOR120 VACSTARTRUNTANGRAY6521YELGRNHEATER4500 WATTSCABINETBASESTARTSWITCHBLKL2BLKNote:Air Leaks:Problems caused by the vent pipe in the houseare not cover under the product warranty.TIMERAORG4152FABRICSELECTORSWITCHBLUEREDBLK28KCONTROLTHERMOSTATORG/BLKHIGH LIMITTHERMOSTATTwo types of air leaks may occur:1. Air being drawn in, usually around the dooropening, between the drum and the front panel, oraround the foam seal between the front duct andthe blower housing, replaces some of the air beingdrawn through the drum and lower the efficiency ofthe dryer.Note:An air leak that occurs around the dooropening or between the drum and the frontpanel usually will cause lint to build up onthe inner panel of the door.Automatic Regular Cycle:When the laundry center is connected to electricalpower, line 1 is connected to terminal B of the timerand the input terminal of the cycle signal switch. Whenthe timer is set to the Automatic Regular cycle, contactsB to C and B to A in the timer are closed. Thisprovides power to four circuits; the drive motor circuit,timer motor circuit, heating circuit and cycle signal circuit.2. Air being pushed out, usually in the blower housingor vent pipe inside the dryer, allows some of themoisture that has been removed from the clothesto be recirculate.Short Unrestricted Vents:The venting system in the dryer is designed to operateunder some back pressure. This back pressure isneeded to slow the airflow and allow the air to be heatedbefore it passes through the clothes.51
Drive Motor Circuit:When contacts B to C are closed, line 1 is appliedthrough the thermal limiter (a non-resettable fusemounted on the rear wall of the laundry center)to terminal M4 of the drive motor. Terminal M4 is connectedinside the motor to one side of the thermal overload.(The thermal overload protects the motor frombeing damaged by overheating). The other side of thethermal overload is connected to one end of both therun winding and the start winding of the drive motor.When the motor is not turning the other end of the startwinding is connected, internally to terminal M5 of themotor, through the NC contact of the motor centrifugalswitch. The other end of the run winding is also connected,internally to terminal M5.When the motor is not turning, the start winding andthe run winding are connected in parallel. TerminalM5 of the motor is connected to the start switch, whichis connected to neutral through the door switch. Whenthe start switch is activated, with the dryer door closed,line 1 to neutral voltage is applied across both the startand run windings of the drive motor. With power appliedto both the start and run windings, the motor startsto turn.When the speed of the motor reaches about 80% ofit’s normal run speed the contacts of the centrifugalswitch change from NC to NO, opening the circuit tothe start winding and connecting the run winding tomotor terminal M6. Terminal M6 is connected to neutralthrough the door switch. The start winding is nowout of the circuit and the run winding circuit is bypassingthe start switch, so the switch can be released withoutinterrupting power to the run winding.The drive motor preforms two tasks in the dryer. Apulley attached to one end of the motor shaft uses abelt to drive the dryer drum. The blower wheel is attachedto the other end of the motor shaft to pull the airthrough the clothes and force the air out the exhaustvent.The Timer Motor Circuit:When timer contacts B to C close, line 1 is applied toone end of the timer motor winding. The other end ofthe timer motor winding is connected through a 4400Ohm dropping resistor, that allows the timer motor tooperate in a 240 volt circuit without burning up, to oneend of the heater. The other end of the heater is connected,by a centrifugal switch in the motor, to line 2,whenever the motor is turning. The circuit formed bycontacts B and C of the timer, the timer motor and thedropping resistor are in parallel with a circuit form bycontacts B and A of the timer, contacts 1 and 2 of thefabric selector switch, the contacts of the control thermostatand the contacts of the high limit thermostat.This circuit has either zero resistance when the contactsof the control thermostat are closed or infinityresistance when the contacts of the control thermostatare open. Since electrical current follows the path ofleast resistance, when the contacts of the control thermostatare closed, all the current flow is through thecircuit formed by contacts B and A of the timer, contacts1 and 2 of fabric selector switch, the contacts ofthe control thermostat and the contacts of the high limitthermostat. With no current flowing through the timermotor winding, the timer motor does not turn. Whenthe heat in the dryer opens the contacts of the controlthermostat, the only path for current flow is throughthe circuit formed by the timer motor winding and thedropping resistor. With current flowing through the timermotor winding, the motor turns advancing the timer.At the start of the cycle the amount of heat energyneeded to drive the moisture from the clothes slowsthe temperature rise in the dryer and the contacts ofthe control thermostat remain closed preventing thetimer from advancing. As the clothes dry, it takes lessheat energy to maintain the temperature in the drum.This causes the contacts of the control thermostat tobe open a higher percentage of the time allowing thetimer motor to run more.The Heat Circuit:Timer contacts B to A connect line 1 to terminal 1 ofthe fabric selector switch. The fabric selector switchallows the dryer to be set to operate at High temperature,Medium temperature, Low temperature and AirFluff. (In the Air Fluff setting the drum turns but theheater does not operate). Whenever the fabric selectorswitch is set to either High, Medium or Low contact1 is closed to contact 2 and line 1 is applied to thecontrol thermostat. When the fabric selector switch isset to either Medium or Low, power is applied to a smallheater in the control thermostat, and the contacts of52
the control thermostat are cycled by a combination ofheat from the heater and the heat in the drum. Whenthe fabric selector switch is set to Medium, contacts 3to 4 of the switch are closed connecting the series circuitformed by a 3000 Ohm resister and the small heaterin the control thermostat to neutral. When the fabricselector switch is set to Low, contacts 4 to 5 of theswitch are closed connecting the small heater in thecontrol thermostat to neutral. Since more current flowsthrough the thermostat heater in the Low setting, thecontacts cycle at a lower drum temperature than Medium.The control thermostat senses the temperature of theair in the blower housing and controls the temperaturein the dryer by opening and closing the heater circuit.When the temperature in the drum is below the cycletemperature the contacts are closed, connecting line 1to the high limit thermostat. The high limit thermostatis a safety device that prevents the dryer from overheatingif the contacts of the control thermostat failclosed. The contacts of the high limit thermostat arenormally closed and are set to open at a temperatureabove the cycling temperature of the control thermostat.From the output terminal of the high limit thermostatline 1 is connected to one side of the element.The other side of the heating element is connected toline 2 through the contacts of the second centrifugalswitch in the drive motor. This switch prevents powerfrom being applied to the element if the motor is notrunning.The Air Fluff Circuit:When the fabric selector switch is set to air fluff contacts1 to 2 are opened, removing power from the element.The drum turns but the element does not heat.The Cycle Signal Circuit:The cycle signal circuit is made up of the cycle signal(buzzer) and contacts X and H that connect the circuitto neutral. When contacts B to C of the timer are closed,line 1 is connected to one side of the cycle signal. Theother side of the cycle signal is connected to terminalH of the timer.A Pulsar cam, located next to the cycle signal camand rotating at 12 revolutions per hour, allows contactsH to X to close for 5 seconds +/-3 seconds.PULSAR CAMWhen Timer contacts H to X are closed the cycle signalis connect to neutral through the motor centrifugalswitch and the door switch.Automatic Perm Press:The Automatic Prem Press Cycle operates the sameas the Automatic Regular cycle for the first 15 minutesof timer run time. Then contacts B to A open removingpower from the heat circuit and causing the timermotor to run continuously for the last 30 minutes. Duringthe last 30 minutes the buzzer will sound 5 or 6times.Timed Dry Cycle:DRIVECAMThe time dry cycle operates the same as the auto drycycle except for the operation of the timer motor. Whenthe dial is turned to the timed dry section, contacts TMto X in the timer close, connecting the timer motor toneutral through the centrifugal switch in the motor. Thetimer motor then runs continuously until contacts B toC of the timer opens and the motor stops.53
Electrical Operation (Gas Dryer)Note:Sample wiring diagram. Always refer to the wiring diagram or schematic with the product.L1120 VACTO NEUTRALCONNECTORWHTNRED/BLKTO L1CONNECTORWHTBLKBLKDRUMLIGHTWHTNCWHTCNOGRAYSTARTSWITCHBUZZERDOORSWITCHGRAYCBRNSTARTM6M1BTIMERMOTORM4RUNMOTOR M5TANM2GRNMOTORCRADLETMXTANYELHTDTANADPURPDRYER TIMERNOTE:DASHED LINES INDICATECIRCUITS THAT ARE NOTIN ALL MODELS.AYELTAN14FABRICSELECTORSWITCH2 ORG33K5BLUE1CONTROLTHERMOSTATTHERMOSTATHEATER2K3BLKHIGH LIMITTHERMOSTATTANORG 2ORG4ORGSENSORGAS CONTROL VALVESECONDARYCOILWHTHOLDING COILBOOSTERCOIL5 WHT 3WHTIGNITER1WHTAuto Dry Cycle:When the laundry center is connected to electricalpower, line 1 is connected to terminal B of the timerand the input terminal of the signal switch. When thetimer is set to the Auto Dry cycle, contacts B to C andB to A are closed. This provides power to four circuits;the drive motor circuit, timer motor circuit, heating circuitand cycle signal circuit.Drive Motor Circuit:When contacts B to C are closed line 1 is applied toterminal M4 of the drive motor. Terminal M4 is connectedin the motor to one side of the thermal overload.(The thermal overload protect the motor from beingdamaged by overheating). The other side of thethermal overload is connected to both the run windingand the start winding of the drive motor. When themotor is not turning the other end of the start windingis connected, internally to terminal M5 of the motor,through the NC contact of the motor centrifugal switch.The other end of the run winding is also connected,internally to terminal M5.When the motor is not turning, the start winding andthe run winding are connected in parallel. TerminalM5 of the motor is connected to the start switch, whichis connected to neutral through the door switch. Whenthe start switch is activated, with the dryer door closed,line 1 to neutral voltage is applied across both the startand run windings of the drive motor. With power appliedto both the start and run windings, the motor startsto turn.When the speed of the motor reaches about 80% of itsnormal run speed, the contacts of the centrifugal switchchange from NC to NO, opening the circuit to the startwinding and connecting the run winding to motor terminalM6. Terminal M6 is connected to neutral throughthe door switch. The start winding is now out of thecircuit and the run winding circuit is bypassing the start54
switch, so the switch can be released without interruptingpower to the run winding.The drive motor performs two tasks in the dryer. Apulley attached to one end of the motor shaft uses abelt to drive the dryer drum. The blower wheel is attachedto the other end of the motor shaft to pull the airthrough the clothes and force it out the exhaust vent.The Timer Motor Circuit:When timer contacts B to C close line 1 is applied toone end of the timer motor winding. The other end ofthe timer motor is connected to terminal TM of the timer.Terminal TM is connected by an internal contact in thetimer to terminal AD of the timer. Terminal AD is connectedto the input side of the high limit thermostat.The high limit thermostat is connected to neutralthrough the coils of the gas valve and the centrifugalswitches of the motor, whenever the motor is turning.The circuit formed by contacts B and C of the timer,the timer motor and contacts TM and AD are in parallelwith a circuit form by contacts B and A of the timer,contacts 1 and 2 of the fabric selector switch, and thecontacts of the control thermostat. This circuit has eitherzero resistance when the contacts of the controlthermostat are closed or infinity resistance when thecontacts of the control thermostat are open. Since electricalcurrent follows the path of least resistance, allthe current flow is through the circuit formed by contactsB and A of the timer, contacts 1 and 2 of fabricselector switch, and the contacts of the control thermostat,when the contacts of the control thermostatare closed. With no current flowing through the timermotor, the timer motor does not turn. When the heatin drum opens the contacts of the control thermostatthe only path for current flow is through the circuitformed by contacts B and C and contacts TM and ADof the timer and the timer motor winding. With currentflow through the motor winding the timer motor turnsadvancing the timer. At the start of the cycle the amountof heat energy needed to drive the moisture from theclothes slows the temperature rise in the dryer and thecontacts of the control thermostat remain closed preventingthe timer from advancing. As the clothes dry,it takes less heat energy to maintain the temperaturein the drum. This causes the contacts of the controlthermostat to be open a higher percentage of the timeallowing the timer motor to run more.The Heat Circuit:Timer contacts B to A connect line 1 to terminal 1 ofthe fabric selector switch. The fabric selector switchallows the dryer to be set to operate at High temperature,Medium temperature, Low temperature and AirFluff. (In the Air Fluff setting the drum turns but theheater does not operate). Whenever the fabric selectorswitch is set to either High, Medium or Low contact1 is closed to contact 2 and line 1 is applied to thecontrol thermostat. When the fabric selector switch isset to either Medium or Low, power is applied to a smallheater in the control thermostat, and the contacts ofthe control thermostat are cycled by a combination ofheat from the heater and the heat in the drum. Whenthe fabric selector switch is set to Medium, contacts 3to 4 of the switch are closed connecting the series circuitformed by a 3000 Ohm resister and the smallheater in the control thermostat to neutral. When thefabric selector switch is set to Low, contacts 4 to 5 ofthe switch are closed connecting the small heater inthe control thermostat to neutral. Since more currentflows through the thermostat heater in the Low settingthe contacts cycle at a lower drum temperature thanMedium.The control thermostat senses the temperature of theair in the blower housing and controls the temperaturein the drum by opening and closing the heater circuit.When the temperature in the drum is below the cycletemperature, the contacts are closed, connecting line1 to the high limit thermostat. The high limit thermostatis a safety device that prevents the dryer fromoverheating, if the contacts of the control thermostatfail closed. The contacts of the high limit thermostatare normally closed and are set to open at a temperatureabove the cycling temperature of the control thermostat.From the output terminal of the high limit thermostat,line 1 is connected to one side of, the holdingcoil of the gas valve, the secondary coil of the gasvalve and the sensor that is mounted on the combustionchamber.The holding coil, secondary coil, booster coil, sensorand igniter circuits interact with one another to assuresafe operation of the dryer gasburSecondaryHoldingBoosterThe gas valve has two chamber in series, both must55
e opened before gas will flow into the burner. Thesolenoid that controls the gas flow through the firstchamber has two coils: the booster coil and the holdingcoil. The solenoid that controls the second chamberhas one coil: the secondary coil.Nopening the second chamber allowing gas to the burner,which is ignited by the heat of the igniter. When thecontacts of the sensor are open, the parallel circuitformed by the igniter and the booster coil are in serieswith secondary coil which lowers the current flowthrough the igniter and booster coil. Since it takes lessmagnetic force to hold a solenoid open than it does toopen it, the first solenoid remains open when the currentthrough the booster coil is reduced. The reductionof current flow through the igniter reduces heatfrom the igniter but the sensor contacts are held openby the heat of the burner flame.The Air Fluff Circuit:The other side of the holding coil, booster coil and igniterare connected to neutral through the two centrifugalswitches in the motor, that are closed when themotor is running, and the door switch. When power ispalled across these circuits, current flows through theholding coil, but the holding coil does not have enoughmagnet force to open the solenoid by itself. At thesame time current flows through sensor contacts providingpower to the booster coil and the igniter. Whencurrent flows through both the holding and booster coils,the first solenoid opens. The contacts of the sensorare in parallel with the secondary coil. As long as thecontacts of the sensor remain closed, current flow bypassesthe secondary coil, and gas is prevented fromflowing through the second chamber to the burner.SensorL1IgniterWhen the fabric selector switch is set to air fluff contacts1 to 2 are opened removing power from the valvecircuit. The drum turns but the burner does not heat.Automatic Perm Press:The Automatic Prem Press Cycle operates the sameas the Automatic Regular cycle for the first 15 minutesof timer run time. Then contacts B to A open removingpower from the heat circuit and causing the timermotor to run continuously for the last 30 minutes. Duringthe last 30 minutes, the buzzer will sound 5 or 6times.The Cycle Signal Circuit:The end of cycle signal circuit is made up of the cyclesignal (buzzer). The cycle signal are connected in parallelwith terminals B and C of the timer. Terminal Band one side of the cycle signal are connect to line 1.Terminal C and other side of the cycle signal is connectedthrough the motor centrifugal switch to neutral.When the dryer is operating terminal B is connected toterminal C by contacts B and C of the timer and thecycle signal circuit is shorted out. At the end of thecycle contacts B and C open and current flows throughcycle signal (about 5 seconds) until the motor stopsand the centrifugal switch opens.Timed Dry Cycle:It is necessary to raise temperature above 1100° F toignite gas. As current flows through the igniter, thetemperature of igniter is raise from room temperatureto around 1800° F within 30 seconds. The contacts ofthe sensor are heat sensitive and set to open abovethe ignition temperature of gas. When the sensor contactsopen, current flows through the secondary coilThe time dry cycle operates the same as the auto drycycle except for the operation of the timer motor. Whenthe dial is turned to the timed dry section, contacts TMto X in the timer close connecting the timer motor toneutral through the centrifugal switch in the motor. Thetimer motor then runs continuously until contacts B toC of the timer opens and the motor stops.56
SECTION E - WASHER SECTION OPERA-TIONTimer:The timer is located in the console and controlselectrical power to the components of the washer.terminals connected to the components that power isbeing applied to. The next column is titled CONTACTand identified as T for the top contacts of the fixedterminals and B for the bottom contacts of the fixedterminals. The next column is titled CIRCUIT andindicates the circuit controlled by the cam, terminalsand contacts. For example, CAM 4, ACTIVE terminal8, FIXED terminal 9, and CONTACT B controls thedrain pump circuit at specific times. Each circuit has ahorizontal line extending across the timer chart. Theremaining columns make up the wash cycles and areconnected by vertical lines below to the step time inminutes and the step number. When the boxes formedby the horizontal lines from the circuit and the verticallines step time are filled in, this indicates that electricalpower is applied to that circuit at that time in the cycle.IMPORTANT NOTE: Only the cam numbers shown incircles and terminal numbers shown as T and thenumber are called out on the schematic and wiringdiagram.Pressure Switch Assembly:The timer is made up of a motor driven spool thatadvances one increment a minute whenever electricalpower is applied to the motor.The pressure switch is located in the console.The spool has 14 cams that open and close the 24contacts that supply electric power to components atthe correct time in the cycle.To help determine when each set of contacts are closed,a timer cycle chart is provided with each washer. (Asample timer cycle chart is shown on the followingpage.) The first column of the chart is titled CAM. Inthis column are numbers 0, 2, 4, 6, 8, 10, 12 and 14that equate to the number of cams starting at the rearof the timer. The next two columns are titled TERM forterminals and are identified as ACTIVE and FIXED.The active terminals are the terminals that are movedby the cams, the fixed terminals are the ones that thedo not move. The active terminals are usually theterminals that have power applied to them with the fixedIt is made up of a knob and gear assembly that allowsthe user to adjust the water level in the tub, anadjustable pressure switch and plastic tubing thatconnects the pressure switch to the outer tub. Whenthe tub does not have water in it, the air in the plastictubing is at atmospheric pressure and the spring in thepressure switch holds contacts 1 to 2 closed, completingthe circuit to the water valves. As water enter the tubthe air in the tube is compressed. When pressure inthe tube exceeds the pressure of the spring in thepressure switch, the contacts of the pressure switchchange from 1 to 2 to 2 to 3, turning off the watervalves and suppling power to the motor circuit.57
II360°Wash/Rinse Temperature Switch:OFFPUMP(6 MIN)SPIN338.5°The wash/rinse temperature switch is located in theconsole.8121410 172014 231315 B161819212224TBTBBTCIRCUITWATER TEMP.SI SPRAYWASH FILLRINSE FILLLID SW BYPASSPUMPSPIN DIRAGITATE DIRAGITATE DIRSPIN DIRP.S. BYPASSHIGH SPEED MOTORP.S. BYPASSLOW SPEED MOTORWASH(16 MIN)0°236°263.5°286°308.5°321°RINSE(4 MIN)P PPERM. PRESSPUMP(6 MIN)P SPIN220°207.5°185°142.5°121°97.5°82.5°60°CAM024586 11ACTVE2TERM.F13 B9 B1012467TCONTACTTXEDTBTBTPUMP(6 MIN)SPINOFFWASH(6 MIN)PUMP(6 MIN)DELICATEP SPIN PRINSE(4 MIN)PAThe wash/rinse temperature switch allows the user toselect the water temperature in the wash and rinsecycles. The switch controls the water temperature bysupplying power to the hot and cold solenoids of thewater valve.WASH(12 MIN)The switch has 2 input terminals that receive powerfrom the timer. Two output terminals that are connectedto the hot and cold solenoids of the water valve.TEMPERATURE SWITCH CIRCUITOFFWASH/RINSEF-HFF-HFF-CHOT/COLDXOOWARM/WARM (OPT)OXXCOLD/COLDOOXPUMP(10 MIN)SPINWARM/COLDX=SWITCH CLOSEDX O XO=SWITCH OPENREGULARRINSE(4 MIN)P PPUMP(6 MIN)P SPINALid Lock Assembly:The lid lock assembly is a safety device that removespower from the motor circuits when the lid is lifted duringagitation and locks the lid to prevent it from beingopened during the spin cycle. The lid lock assembly ismounted to the bottom of the top panel and locks thelid by moving a locking arm through the lid strike.58
Softener Dispenser:The softener dispenser is mounted on the top of theagitator on 2.7 cu. ft. models and in the agitator on 3.0cu. ft. models.Bleach Dispenser:The bleach dispenser has two parts. One part ismounted in the top panel where liquid bleach is added.The liquid fabric softener remains in the dispenserduring the wash cycle. During the first spin cycle, thesoftener moves from the dispenser to the outer cavityof the dispenser or agitator and is held in place bycentrifugal force until the end of the spin cycle.The second part is molded into the tub cover anddispenses the bleach between the tub and the spinbasket. The spin basket prevents the bleach fromgetting on the clothes until the bleach is mixed with thefill water.The softener is then dispensed into the tub during therinse fill portion of the wash cycle.Agitator:The agitator is located in the center of the inner tubWater Inlet Valve:The water valve is mounted to the rear panel underthe main top in the right-hand side.The agitator is driven by the shaft of the transmissionand rotates back and forth to moves the clothes throughthe water.The water inlet valve is actually two solenoid operatingvalves in one body - a hot water valve and a cold59
water valve that discharge into a common mixingchamber. The flow of water out of the chamber iscontrolled by a molded in flow washer capable ofmaintaining a flow rate of 3.0 - 14.6 gallons per minute,with incoming water pressure of 30 to 120 P.S.I. Theinlet valve is controlled by the timer and watertemperature selector switch, individually or together,to provide hot, cold, or warm water for washing andcold or warm water for rinsing. The temperature of thewarm mixture will be dependent upon the temperatureand pressure of the hot and cold water supply lines.Valve Operation:Both inlet solenoid valves are identical in constructionand operation. The valve body provides an air passagewith a large orifice and seat where the water can bestopped. The outlet of the valve body empties into themixing chamber. A moveable rubber diaphragmoperates against the valve seat to start and stop theflow of water. The diaphragm is operated by waterpressure. It has a small bleed orifice outside the seatcontact area, and a large main orifice at its center. Thearmature of the solenoid serves to open and close themain orifice. The armature operates within a closedmetal tube (valve guide) which is sealed by the outeredge of the diaphragm to the valve body. A coil springholds the armature down against the diaphragm mainorifice when the solenoid is not energized.The following line drawings and text explains basicvalve operation.When the valve is in a closed position, the solenoid isnot energized. Water has bled through the diaphragmbleed orifice placing incoming line pressure on top ofthe diaphragm. The bottom of the diaphragm isessentially at atmospheric pressure (open to the outlet)and the pressure differential holds the valve shut.magnetic field pulls the armature up into the valveguide. The armature spring is compressed by thisaction. When the armature moves up, it allows thewater on the top of the diaphragm to drain through themain orifice.The diaphragm bleed orifice is much smaller than themain orifice and will not admit enough water tomaintain pressure on the top side of the diaphragm.Thus, as the pressure on the top of the diaphragm isreduced to almost zero, the pressure on the bottom liftsthe diaphragm off the valve seat, allowing a full flow ofwater.Solenoid ActivatedWhen the valve is in a closed position, the solenoid isnot energized. Water has bled through the diaphragmbleed orifice placing incoming line pressure on top ofthe diaphragm. The bottom of the diaphragm isessentially at atmospheric pressure (open to the outlet)and the pressure differential holds the valve shut.Water Valve ClosedWater Valve ClosedWhen the solenoid is energized, the resultingWhen the solenoid is energized, the resulting60
magnetic field pulls the armature up into the valveguide. The armature spring is compressed by thisaction. When the armature moves up, it allows thewater on the top of the diaphragm to drain through themain orifice.The diaphragm bleed orifice is much smaller than themain orifice and will not admit enough water tomaintain pressure on the top side of the diaphragm.Thus, as the pressure on the top of the diaphragm isreduced to almost zero, the pressure on the bottom liftsthe diaphragm off the valve seat, allowing a full flow ofwater.Water Valve ClosingDrain Pump:The drain pump is mounted in the left front corner of thewasher base.Solenoid ActivatedIt operates on 120 VAC and is controlled by the timer.The pump out specifications of the drain pump varyfrom 12 G.P.M with a 3 foot standpipe height to 7G.P.M. with a 8 foot standpipe height.The Motor:The motor is mounted to transmission mounting plate,which is part of the leg and dome assembly, and islocated at the right front under the tub.Water Valve Open and Diaphragm UpWhen the solenoid is de-energized, the armaturedrops down, closing the diaphragm main orifice. Watercontinues to flow through the diaphragm bleed orifice,equalizing the pressure and allowing the spring to pushthe diaphragm down against the valve seat.61
The motor is a capacitor start, bi-directional motor.Depending on the model, it is either 1/2 or 3/4 HP with1 or 2 speeds. The motor drives the transmission bya belt. When the motor turns clockwise thetransmission agitates. When the motor turnscounterclockwise the transmission spins.Transmission:The spin basket is fastened to the spin shaft of thetransmission. When the pulley on the transmission isturned counterclockwise, a small spring inside thetransmission tightens around the input shaft causingthe transmission and spin basket to turn.Simultaneously, the one-way bearing located at thebase of the transmission slips to allow turning of thetransmission and the spin basket.The top of the transmission is centered in the outer tubby a bearing and seal assembly. The bottom of thetransmission mounts to the transmission mountingplate by bolts through the bearing block.Spin Basket or Inner Tub:The spin basket is mounted to the top of thetransmission.The agitator shaft of the transmission is connected tothe agitator. When the pulley on the transmission isturned clockwise the gears inside the transmissioncause the shaft to oscillate back and forth.Simultaneously, the one-way bearing located at thebase of the transmission locks to prevent turning of thetransmission and spin basket.The spin basket holds the clothes. During the washcycle the movement of the agitator draws water upthrough the lint screen filter in the bottom of the spinbasket and forces it out the holes in the side and thebottom. As the water circulates lint is trapped on theunder side of the filter screen. During the drain cyclethe water is drawn down through the filter screen62
flushing the lint out the drain. Because of the one waybearing at the bottom of the transmission and themovement of the agitator, the spin basket rotates orindexes during the agitation cycle. Molded into the topof the spin basket is a liquid filled ring that works as acounter balance during the spin cycle to reducevibration.Outer Tub:The outer tub holds the water and is mounted to thethree legs of the leg and dome assembly.Leg and Dome Assembly:Splash Tub Cover:The splash tub cover snaps to the top of the outer tuband prevents water from splashing out over the outertub.The leg and dome assembly rests on the snubber andis held down and centered by six springs.The leg and dome assembly supports the outer tub,transmission and drive motor.63
Snubber:The snubber is located between the leg and domeassembly and the base.The snubber allows the leg and dome assembly tomove while the base remains stationary.Base:The base is made of heavy metal that is embossed forstrength.The base supports the complete weight of the laundrycenter, clothes and water.64
ELECTRICAL OPERATIONIn the washer section all power passes through the thermo fuse in the drive motor.Fill circuitAt the start of the Wash Cycle, power passes through terminals M3 and M7 of the drive motor (the thermo fuse).During the fill cycle power from M7 is applied to one side of the hot and cold solenoids of the water inlet valve.The other side of the hot solenoid is connected to terminal H of the temp switch. The other side of the coldsolenoid is connected to terminal T6 of the timer. Terminal T6 is connected internally in the timer to terminalT3, which in turn is connected to terminal C of the temp switch.During the wash cycle when temp switch is set to:Hot /ColdWarm / ColdCold / ColdContacts H to F of the temp switch are closed and power is applied to terminal T4 of thetimer. T4 is closed T5 and T5 is connected to internal contact IC1 inside the timer.Internal contact IC1 is closed to T2 connecting the circuit to terminal 1 of the pressureswitch. When the tub does not have water in it, terminal 1 of the pressure switch isclosed to terminal 2 of the pressure switch completing the circuit to neutral.Contacts H to F and C to FF of the temp switch are closed and power is applied toterminals T4 and T5 of the timer. T4 is closed T5 and T5 is connected to internalcontact IC1 inside the timer. Internal contact IC1 is closed to T2 connecting the circuitto terminal 1 of the pressure switch. When the tub does not have water in it terminal 1of the pressure switch is closed to terminal 2 of the pressure switch completing thecircuit to neutral.Contacts C to FF of the temp switch are closed and power is applied to terminal T5 ofthe timer. T5 is connected to internal contact IC1 in the timer. Internal contact IC1 isclosed to T2 connecting the circuit to terminal 1 of the pressure switch. When the tubdoes not have water in it terminal 1 of the pressure switch is closed to terminal 2 of thepressure switch completing the circuit to neutral.Warm / WarmContacts H to F and C to FF of the temp switch are closed and power is applied toterminals T4 and T5 of the timer. T4 is closed T5 and T5 is connected to internalcontact IC1 inside the timer. Internal contact IC1 is closed to T2 connecting the circuitto terminal 1 of the pressure switch. When the tub does not have water in it terminal 1of the pressure switch is closed to terminal 2 of the pressure switch completing thecircuit to neutral.DRIVEMOTORIC 1IC = INTERNAL CONTACTIC 365
Spray Rinse During the First Pump Cycle with the Temp Switch Set To:All SettingsTimer terminal T2 swings from internal contact IC1 to internal contact IC3. Connectingthe cold water solenoid to neutral.DRIVEMOTORIC 1IC = INTERNAL CONTACTIC 3During the Rinse Cycle with Temp Switch Set To:All Settings otherthan WarmWarm / WarmTimer terminal T2 closes to IC 1 and timer terminal T5 closes to T6 connecting Warm/the cold water solenoid to neutral.When the temp switch is set to Warm/Warm contacts H to FF and contacts C to FF areclosed. This provides two path that connect the cold water solenoid to neutral. Onefrom terminal T6 to terminal T5 which is connected internally to internal contact IC1 inthe timer. Internal contact IC1 is closed to T2 which is connected to neutral through thepressure switch. The other path for current flow for the cold water solenoid is throughC to FF of the temp switch. Terminal FF of the temp switch which is connected toterminal T5 of the timer. Terminal T5 is connected to internal contact IC1, which isclosed to terminal T2 of the timer. Terminal T2 is connected to neutral through thepressure switch. With the contact H closed to FF in the temp switch the hot watersolenoid is connected through the same path providing a warm water rinse.DRIVEMOTORIC 1IC = INTERNAL CONTACTIC 366
Timer Motor CircuitPower is not supplied to the timer motor during the fill cycle.During the wash and rinse cycles power is applied through the thermo fuse in the drive motor to terminal T15 ofthe timer. One side of the timer motor is connected to timer terminal T15 with the other side connected to timerterminal T17. Terminal T17 is connected to timer terminal T20 by a jumper wire. Terminal T20 is connected tointernal contact IC 8 of the timer. During the wash and rinse cycles IC8 is closed to terminal T9 of the timer.Terminal T9 is connected to one side of the lid switch. When the lid is closed power is applied terminal 3 of thepressure switch. When the tub fills with water and the pressure switch swing from terminals 1 to 2 to terminal 3and 2 the timer motor is connected to neutral.DRIVEMOTORTIMERMOTORT15TIMERTIMERT17 T20IC = INTERNAL CONTACTTIMERIC 8T7LID SWITCHIn regular wash during the pump and spin cycles and the last spin cycle of perm press, power is applied throughthe thermo fuse in the drive motor to terminal T15 of the timer. One side of the timer motor is connected toterminal T1of the timer with the other side connected to terminal T17 of the timer. Terminal T17 is connected totimer terminal T20 by a jumper wire. Terminal T20 is connected to internal contact IC 23 of the timer. Duringthe pump and spin cycles IC 23 is closed to terminal T22 of the timer. Terminal T22 is connected to neutralthrough the lid lock assembly.DRIVEMOTORTIMERMOTORT15TIMERT17 T20TIMERT22LID LOCKTIMERIC 23IC = INTERNAL CONTACTIn delicate during the pump and spin cycles and the first spin cycle of perm press, power is applied through thethermo fuse in the drive motor to terminal T15 of the timer. One side of the timer motor is connected to terminalT15 of the timer with the other side connected to terminal T17 of the timer. Terminal T17 is connected toterminal T20 of the timer by a jumper wire. Terminal T20 is connected to internal contact IC20 of the timer.During the pump and spin cycles IC20 is closed to terminal T22 of the timer. Terminal T22 is connected toneutral through the lid lock assembly.DRIVEMOTORTIMERMOTORT15TIMERT17 T20TIMERT22LID LOCKTIMERIC 20IC = INTERNAL CONTACT67
Drain PumpIn regular wash during the pump and spin cycles and the last spin cycle of perm press, power is applied throughthe thermo fuse in the drive motor to terminal T15 of the timer. One side of the pump motor is connected toterminal T15 with the other side connected to terminal T9 of the timer. Terminal T9 is connected to internalcontact IC8 of the timer. Internal contact IC8 is connected to internal contact IC23 of the timer. During thepump and spin cycles IC23 is closed to terminal T22 of the timer. Terminal T22 is connected to neutral throughthe lid lock.DRIVEMOTORPUMPMOTORT15 T9TIMERT22LID LOCKTIMERIC 8IC = INTERNAL CONTACTIC 23In delicate during the pump and spin cycles and the first spin cycle of perm press, power is applied through thethermo fuse in the drive motor to terminal T15 of the timer. One side of the pump motor is connected to terminalT15 with the other side connected to terminal T9 of the timer. Terminal T9 is connected to internal contact IC8of the timer. Internal contact IC8 is connected to timer internal contact IC20. During the pump and spin cyclesIC 20 is closed to terminal T22 of the timer. Terminal T22 is connected to neutral through the lid lock.DRIVEMOTORPUMPMOTORT15 T9TIMERT22LID LOCKDrive MotorTIMERIC 8IC = INTERNAL CONTACTIC 20High Speed AgitationLine 1 is connected to terminal M3 of the motor. Terminal M3 is connected through the thermo fuse to one endof the high and low speed windings and terminal M7 of the motor. The other end of high speed winding isconnected to terminal M6 of the motor and terminal M6 is connected to terminal T21 of the timer. Terminal T21is connected to internal contact IC21 of the timer that is closed to internal contact IC20 of the timer. Internalcontact IC20 is connected to internal contact IC8 of the timer, which is closed to terminal T7 of the timerTerminal T7 is connected to neutral through the lid switch and terminal 3 and 2 of the pressure switch when thewater fill is completed.T15T11IC 12L1CAPACITORT14T21IC 10IC 13IC 15IC 21IC 20IC 19IC 8T7T9T22LID SWITCHLID LOCKIC 22T24TIMER68
Terminal M7 supplies power to the start winding through timer terminal T15 that is connected in the timer totimer internal contact IC12. Internal contact IC12 is closed to timer terminal T11 that is connected to terminalM1 of the motor. Terminal M1 is connected to one end of the start winding. The other end of the start windingis connected to motor terminal M5 through the start winding centrifugal switch. From terminal M5 power isapplied to one end of the start capacitor. The other end of the capacitor is connected to timer terminal T14.Terminal T14 is closed to timer internal contact IC13. Internal contact IC13 is connected to timer internalcontact IC21 whic is closed to timer internal contact IC20. Internal contact IC20 is connected to timer internalcontact IC8. Internal contact IC8 is closed to timer terminal T7. Terminal T7 is connected to neutral throughthe lid switch and contacts 3 to 2 of the pressure switch.T15T11IC 12L1CAPACITORT14T21IC 10IC 13IC 15IC 21IC 20IC 19IC 8T7T9T22LID SWITCHLID LOCKIC 22T24IC 23TIMERWith current flowing through both the high speed run winding and the start winding, the motor start to turn in aclockwise direction and the transmission operates in the agitation mode. When the speed of the motor reachesapproximately 80 percent of it normal run speed the start winding centrifugal switch opens, removing powerfrom the start winding.Low Speed AgitationWhen the motor starts current flows through the high speed winding until the speed of the motor reachesapproximately 80 percent of it normal run speed. During this time the run winding centrifugal switch connectsthe high speed winding to terminal M2 of the motor. Terminal M2 is connected to terminal T24 of the timer.Terminal T24 is closed to internal contact IC23 of the timer which is connected to internal contact IC8 of thetimer. Internal contact IC8 is closed to terminal T7 of the timer. Terminal T7 is connected to neutral through thelid switch and terminal 3 and 2 of the pressure switch when the water fill is completed.T15T11IC 12L1CAPACITORT14T21IC 10IC 13IC 15IC 21IC 20IC 19IC 8T7T9T22LID SWITCHLID LOCKIC 22T24IC 23TIMER69
When the speed of motor reaches above 80 percent of it normal run speed, the run winding centrifugal switchswing from the high speed winding to the low speed winding. This removes the high speed winding from thecircuit and connecting the low speed winding into the circuit.T15T11IC 12L1CAPACITORT14T21IC 10IC 13IC 15IC 21IC 20IC 19IC 8T7T9T22LID SWITCHLID LOCKIC 22T24IC 23TIMERHigh Speed SpinLine 1 is connected to terminal M3 of the motor. Terminal M3 is connected through the thermo fuse to one endof the high and low speed windings and terminal M7 of the motor. The other end of high speed winding isconnected to terminal M6 of the motor and terminal M6 is connected to terminal T21 of the timer. Terminal T21is connected to internal contact IC21of the timer that is closed to internal contact IC20 of the timer. Internalcontact IC20 is connected to timer internal contact IC23 that is closed to internal contact IC22 of the timer.Internal contact IC22 is connected to timer terminal T22 which is connected to neutral through the lid lockassembly.T15T11IC 12L1CAPACITORT14T21IC 10IC 13IC 15IC 21IC 20IC 19IC 8T7T9T22LID SWITCHLID LOCKIC 22T24TIMER70
Terminal M7 supplies power to the start winding through timer terminal T15. Terminal T15 is connected in thetimer to internal contact IC15. Internal contact IC15 is closed to terminal T14 of the timer which is connectedto one end of the start capacitor. The other end of the capacitor is connected to terminal M5 of the motor.Terminal M5 is connected to one end of the start winding through the centrifugal switch. The other end of thestart winding is connected to motor terminal M1 which is connected to terminal T11 of the timer. Terminal T11is connected to internal contact IC10 of the timer. Internal contact IC10 is connected to internal contact IC21that is closed to internal contact IC20. Internal contact IC20 is connected to timer internal contact IC23 whichis closed to internal contact IC22 of the timer. Internal contact IC22 is connect to terminal T22 of the timer,which is connected to neutral through the lid lock assembly.T15T11IC 12L1CAPACITORT14T21IC 10IC 13IC 15IC 21IC 20IC 19IC 8T7T9T22LID SWITCHLID LOCKIC 22T24TIMERWith current flowing through both the high speed run winding and the start winding the motor start to turn in acounter clockwise direction and the transmission operates in the spin mode. When the speed of the motorreaches approximately 80 percent of it normal run speed the start winding centrifugal switch opens, removingpower from the start winding.Low Speed SpinWhen the motor starts current flows through the high speed winding until reaches approximately 80 percent ofit normal run speed. During this time the run winding centrifugal switch connects the high speed winding toterminal M2 of the motor. Terminal M2 is connected to terminal T24 of the timer, which is closed to internalcontact IC23 of the timer. Internal contact IC23 is connected to internal contact IC20 of the timer, which isclosed to internal contact IC19 of the timer. Internal contact IC19 is connected to terminal T22 of the timer thatis connected to neutral through the lid lock assembly.T15T11IC 12L1CAPACITORT14T21IC 10IC 13IC 21IC 19IC 15IC 20IC 8T7T9T22LID SWITCHLID LOCKIC 22T24IC 23TIMER71
When the speed of motor reaches above 80 percent of it normal run speed, the run winding centrifugal switchswing from the high speed winding to the low speed winding. This removes the high speed winding from thecircuit and connecting the low speed winding into the circuit.T15T11IC 12L1CAPACITORT14T21IC 10IC 13IC 21IC 19IC 15IC 20IC 8T7T9T22LID SWITCHLID LOCKIC 22T24IC 23TIMER72
SECTION F - TROUBLESHOOTING FLOW CHARTSDryer sectionNOTE: Always check the wiring and pin/plug connectors before replacing any component.Electric Dryer Completely Inoperative. Page 74Gas Dryer Completely Inoperative. Page 75Electric Dryers, Blower Motor Runs but Timer does notAdvance in Auto or Timed Dry. Page 76Electric Dryers, Timer Advances in Timed Dry but not in Auto Dry. Page 76Electric Dryers, Timer Advances in Auto Dry but not in Timed Dry. Page 77Electric and Gas Dryers Blower Motor Runs but Drum does not Turn. Page 77Electric and Gas Dryers Longer than Normal Drying Times. Page 77Electric Dryers Blower Motor Runs but Dryer does not Heat. Page 78Gas Dryers Blower Motor Runs but Dryer does not Heat. Page 79Electric and Gas Dryers Dryer Over Heating. Page 8073
Electric Dryer Completely Inoperative.Note: Always check wiring to the components.Dryer completelyinoperative.0.Measure the voltage dropbetween terminal B of thetimer and neutral.Defective household powersupply or broken wire betweendryer terminal blockand terminal B of the timer.120 VAC.Turn the timer dial to 40minutes of Timed Dry, close thedoor & measure the voltage dropbetween terminal C of the timerand neutral120 VAC.0.Defectivetimer.0. Measure the voltage dropbetween terminal X of the120 VAC.timer and neutral.Measure the voltage dropbetween terminal M4 of themotor and neutral.Measure the voltage dropbetween terminal of the startsw. with two wires toit and neutral.0.120VAC.0.120 VAC.Defectivethermallimiter.Defectivedrive motor.Defectivestart sw.Defective Defectivedoor door sw. sw.74
Gas Dryer Completely Inoperative.Note: Always check wiring to the components.Dryer completelyinoperative.No.Does the washer sectionof the laundry centeroperate.Defective household powersupply or power cord.Yes.Turn the timer dial to 40minutes of Timed Dry, close thedoor & measure the voltage dropbetween terminal C of the timerand neutral120 VAC.0.Defectivetimer.0.Set the fabric selector sw.to Air Fluff & measure the voltage120 VAC.drop between terminal TD ofthe timer and neutral.Defectivedrive motor.Measure the voltage dropbetween terminal of the startsw. with two wires toit and neutral.0120 VACDefectivestart sw.Defective Defectivedoor door sw. sw.75
Electric Dryers Blower Motor Runs but Timer does not Advance in Auto or Timeddry.Note: Always check wiring to the components.Blower motor runs buttimer does not advancein Auto or Timed dry.0.Turn the timer dial to 40minutes of Timed Dry, close thedoor & measure the voltage dropbetween terminal X of the timerand neutral.120 VAC.Defectivetimer.Open wirebetween terminal Xand terminal M5 ofthe motor.Electric Dryers Timer Advances in Timed Dry but not in Auto Dry.Note: Always check wiring to the components.Timer advances inTimed Dry but not inAuto Dry.0.Set the fabric selector switchto Regular. Turn the timer dial toAuto & measure the voltage dropbetween terminals TM andR of the timer.240 VAC.Does the dry heat?Open 4.4K Ohmresistor.Yes.Open wirebetween terminalR and the highlimit thermostat.No.Defective heateror motor.76
Electric Dryers Timer Advances in Auto Dry but not in Timed Dry.Note: Always check wiring to the components.Timer advances in AutoDry but not in TimedDry.Defectivetimer.Electric and Gas Dryers Blower Motor Runs but Drum does not Turn.Note: Always check wiring to the components.Blower motor runs butdrum does not turn.Belt broken oroff pulley.Electric and Gas dryers longer than normal drying times.Note: Always check wiring to the components.Longer than normaldrying times.Yes.Check washerspin cycle.Are the clothes wetter thannormal when removed from fromthe washer?No.Is the vent restructed?Yes.Clear vent.No.Replace thecontrol thermostat.77
Electric Dryers Blower Motor Runs but Dryer does not Heat.Note: Always check wiring to the components.Blower motor runs butdryer does not heat.0.Defective timer.With the timer set to Timed Dry,the fabric selector sw. set toRegular, and the motor notrunning, measure the voltagedrop between terminal 1 of thefabric selector sw. and neutral.120 VAC.0.Defective fabricselector sw.With the timer set to Timed Dry,the fabric selector sw. set toRegular, and the motor notrunning, measure the voltagedrop between terminal 2 of thefabric selector sw. and neutral.120 VAC.0.Defective controlthermostat.0.Defective motor.With the timer set to Timed Dry,the fabric selector sw. set toRegular, and the motor notrunning, measure the voltagedrop between terminal 5 of thefabric selector sw. and neutral.120 VAC.With the timer set to Timed Dry,the fabric selector sw. set to AirFluff, and the motor running,measure the voltage dropbetween terminal 4 of the fabricselector sw. and neutral.120 VAC.0.Defective highlimit thermostat.Remove the drum, set the timerto Timed Dry, set the fabric selector sw.to Regular, and with the motor running,measure the voltage drop across theterminals of the heating element.240 VACDefectiveheating element.78
Gas Dryers Blower Motor Runs but Dryer does not Heat.Note: Always check wiring to the components.Blower motor runs butdryer does not heat.Igniter glows fullbrilliance or glows dim thefull minute.Defectivesensor.0.Defective timer.0.Defectivefabicselector sw.0.Turn the gas off to the dryer andremove the drum. Set the timerto Timed Dry, set the fabricselector sw. to Regular. Start themotor and observe the igniterfor 1 minute.Igniter doesnot glow.Measure the voltage drop betweenterminals 1 & 4 of thefabric selector sw.120 VAC.Measure the voltage dropbetween terminals 2 & 4 of thefabric selector sw.120 VAC.Measure the voltage dropbetween terminals 4 & 5 of thefabric selector sw.Igniter glows fullbrilliance then dims.Defectivegas valveor gas supply.Defective controlthermostat.0.120 VAC.Measure the voltage drop fromthe terminal on the sensor withthe orange wire to neutral.Defective highlimit thermostat.120 VAC.Infinity.Defective igniter.Remove power, unplug theigniter and measure the resistanceof the igniter.50 to 400 OHMS.Defectivemotor.79
Electric and Gas Dryers Dryer Over Heating.Note: Always check wiring to the components.Dryer overheats.Is the vent restructed?Yes.No.Clear ventsystem.Replace thecontrol thermostat.80
Washer SectionNOTE: Always check the wiring and pin/plug connectors before replacing any component.Washer Completely Inoperative. Page 82Timer Does Not Advance. Page 82Washer Does Not Drain. Page 83Drive Motor Operates in Spin but not in Agitation. Page 84Drive Motor does not Turn. Page 85Drive Motor Operates in Agitation but not in Spin. Page 86Drive Motor Cycles Off and On Rapidly in the Delicate Cycle. Page 86Slow Water Fill. Page 87Water Fill Does not Turn Off. Page 88Incorrect Water Level. Page 88Washer Will not Fill in Any Setting of the Temperature Selector Switch. Page 89Washer Will Not Fill in Wash Cycle, but Will Fill in Rinse with the TempSwitch Set to Cold/Cold. Page 90Washer will not Fill in Wash Cycle, but does Fill in Rinsewith the Temp Switch Set to Hot/Cold. Page 90Water Temperature is too Hot or too Cold in the Wash Cyclewith the Temp Sw. Set to Warm/Warm. Page 91Washer Will Only Fill with Hot Water in the Wash Cycle, with theTemp Switch Set to Warm/Cold but does Fill with Cold Water in the Rinse Cycle. Page 9181
Washer Completely Inoperative.Note: Always check wiring to the components.Washer completelyinoperative.Washer operatesin one of thecyclesTest failure of thecycles that did notoperate.120VAC.Try to operate the washer in fill,wash and spin.Washer does not operates inany of the cycles.Remove the front panelfrom the washer. Remove theshield and unplug the harness from thedrive motor. Set the timer to fill and measurevoltage drop in the harness betweenpins 4 and 8 .Zero.Defectivedrive motorDefective timeror wiring.Timer Does Not Advance.Note: Always check wiring to thecomponents.Timer does notadvance.Defectivetimer.82
Washer Does Not Drain.Note: Always check wiring to the components.Washer does notdrain.120 VAC.Yes.Restricteddrain hose.Disconnect power from thelaundry center, remove the washer frontpanel, reconnect power and set thetimer to the drain position. Is thepump running?No.Unplug the connectorfrom the drain pump andmeasure the voltage dropbetween the twopins in the plug.Defective orrestricteddrain pump.120 VAC.Zero.Reconnect the drainpump and measure voltagedrop between terminal of the lidlock assembly with the WHI/RED wire and neutral.Zero.Defective lidlock.Defective timer.83
Drive Motor Operates in Spin but Not in Agitation.Note: Always check wiringto the components.Drive motor operates inspin but not in agitation.No.Transmission islocked.Disconnect power from thelaundry center, remove the washer frontpanel. Can the motor pulley be turnedin the agitation direction?Yes.Zero.Measure the voltage dropbetween the terminal of the lid switchwith the TAN/BLK wire and neutral.Defectivetimer.Zero.120 VAC.Measure the voltage dropbetween the terminal 3 of thepressure switch and neutral.120 VAC.Defectivelid switch.Defectivepressureswitch.84
Drive Motor Does Not Turn.Note: Always check wiring to the components.Drive motor doesnot turn.No.Disconnect power from thelaundry center, remove the washer frontpanel. Can the motor pulley be turned?Remove the belt andsee if the motor ortransmission islocked.No.Defectivestart capacitor.Yes.Disconnect the wires from thestart capacitor and check it with anOhmmeter. Does the capacitorcharge and recharge whenthe meter leads are reversed?Yes.Infinity.Unplug the connectorfrom the drive motor and measurethe resistance betweenterminals M3 and M6 of themotor.Defectivedrive motor.2.4 Ohms.Infinity.Measure the resistancebetween terminals M1 and M5of the motor.8 Ohms.Defectivedrive motor.Defective timeror wiring.85
Drive Motor Operatesin Agitation but Not inSpin.Note: Always check wiringto the components.No.Defective tubbearing.Drive motor operates inagitation but not in spin.Disconnect power from thelaundry center, remove the front panelfrom the washer. Can the motor pulleybe turned?Yes.No.Reconnect power, setthe timer to spin. Does the lid lock latchthe lid?Defective lid lock.Yes.120 VAC. Measure the voltage dropbetween the two terminals ofthe lid lock.Defective lid lock.Around1 VAC.Defective timeror wiring.Drive Motor Cycles Off and OnRapidly in the Delicate CycleNote: Always check wiringto the components.Drive motor cycles off andon rapidly in the delicatecycle.Defectivedrive motor.86
Slow Water Fill.Note: Always check wiringto the components.Slow water fill.Hoses are kinked orfaucets not turned oncompletely.Straighten hose andturn the faucetscompletely on.Check the water hose for kinks andthat the faucets are turned completelyon.Hoses are not kinked and thefaucets are turned on completely.Water pressure isbelow 10 psi.Disconnect the water hosesat the faucets and check thewater pressure.Water pressure isabove 10 psi.Have homeownercorrect pressureproblem.Disconnect the water hosesat the washer, clean the valvescreens and check the hoses for anyrestrictions.87
Water Fill does Not Turn Off.Note: Always check wiringto the components.Water fill does not turn off.Disconnect electrical power.Does the water stop coming in?No.Defective waterinlet valveYes.Visually inspect the air bell andpressure switch hose for any holes orair leaks.Air leakor holes.Tighten orreplacedefect part.No air leaksor holes.Defective pressureswitch.Incorrect Water Level.Note: Always check wiringto the components.Incorrect water level.Visually inspect thepressure switch hose for kinks orrestrictions.Kinked orrestricted.Straighten orreplacedefective part.Defective pressureswitch.88
Washer will Not Fill in AnySetting of the Temp Switch.Note: Always check wiringto the components.Washer will not fill in any settingof the temperature selector sw.No.Are the faucets turned completelyon?Turn the faucetson.Yes.120 VAC.Defectivepressureswitch.120 VAC.Set the timer to the fill increment inthe rinse cycle and measure thevoltage drop between pin 1 of thepressure sw. and neutral.Zero.Disconnect the harness fromthe timer and measure the voltagedrop between pin 6 in the plugand neutral.Defective timer.Zero.Defectivewater valve.89
Washer will Not Fill in Wash Cycle, but Will Fill inRinse with the Temp Switch Set to Cold/Cold.Note: Always check wiringto the components.Washer will not fill in wash cycle,but will fill in rinse with thetemp switch set to cold/cold.Measure the voltage drop betweenterminal FF of the temp switch andneutral.120 VAC.Defective timer.Zero.Defective tempswitch.Washer does Not Fill in the Wash Cycle,but does Fill in the Rinse Cycle with theTemp Switch Set to Hot/Cold.Note: Always check wiringto the components.Washer will not fill in the washcycle, but does fill in the rinsecycle with the temp switch set tohot/cold.Zero.Measure the voltage drop betweenterminal H of the temp switchand neutral.Defective watervalve.120 VAC.ZeroDefective tempswitch.Measure the voltage drop betweenpin F of the temp switch and neutral.120 VAC.Defective timer.90
Water Temperature is too Hot or too Cold in the WashCycle with the Temp Switch Set to Warm/Warm.Note: Always check wiringto the components.Water temperature is too hot ortoo cold in the wash cycle withthe temp sw. set to warm/warm.Incorrectflow.Check that thefaucets are turnedcompletely on andclean screens inwater valve.Set the temp switch to hot and thento cold and compare the flows. Thehot water flow should be about 20%less than the cold water flow.Correctflow.Defective tempswitch.Washer Will only Fill with Hot Water in the WashCycle, with the Temp Switch Set to Warm/Cold,but does Fill with Cold in the Rinse Cycle.Note: Always check wiringto the components.Washer will only fill with hot water inthe wash cycle, with the temp switchset to warm/cold but does fill withcold in the rinse cycle.Measure the voltage drop betweenpin FF of the temp switch andneutral.120 VAC.Zero.Defective timer.Defective tempswitch.91
SECTION G - TEARDOWNThis section will describe how to remove componentsfrom both gas and electric laundry center. Unlessstated, the procedure will be the same on all laundrycenters. Unless stated, reverse the procedure to reinstallthe component.Washer timer knob:1. The timer knob is held on the shaft by a lockingrod that extends to the rear of the timer. To removethe knob, disconnect power, open the consolepanel and using a small screwdriver pull thelocking rod backward to release the knob.Always remove electrical power fromthe laundry center when working in an area where electricalpower is present.Always turn the gas off to the laundrycenter before opening any gas piping.Removing the knobs.All knobs except the washer timer knob:1. The shafts of the knobs are D shaped and pullstraight off.2. Then pull the knob straight off.Removing the washer timer skirt:1. Remove the timer knobs and pull the skirt straightoff.92
Removing the access panel:1. The access panel is held to the upper sidepanels by two screws and two tabs. Remove thetwo screws and pull up and out to remove the panel.3. Pull down and out on the console to release thetaps from the side panels. The console will nowhang on the wires and pressure switch hose.Removing the dryer timer:1. Disconnect the laundry center from the electricalsupply.2. Remove the timer knob and open the console.3. Mark and disconnect the wires from the timer.Opening the console:1. Disconnect power from the laundry center andremove the access panel.2. Remove the four screws, two on each side,holding the console to the dryer section sidepanels.4. Remove the two screws holding timer to the consolepanel.93
Removing the buzzer:1. Disconnect the laundry center from the electricalsupply.2. Open the console panel and disconnect the twowires for the buzzer at the timer2. Open the console and remove the console endcaps.3. Remove the two screws, one at each end, holdingthe console front panel to the control mountingpanel and lift the front panel off.3. Remove the screw holding the buzzer to thecontrol mounting panel.Removing the console end caps:1. Disconnect the laundry center from the electricalsupply and open the console.2. Remove the two screws holding the end cap to thecontrol mounting panel and the screw in the topholding the end cap to the front panel. Then slidethe end cap out.Removing the start switch:1. Disconnect the laundry center from the electricalsupply, open the console and remove the consolefront panel.2. Disconnect the wire from the start switch, removethe two screws holding the start switch to thecontrol mounting panel and pull the switch out theback.Removing the console front panel:1. Disconnect the laundry center from the electricalsupply, remove the knobs and the washer timerskirt.94
Removing the fabric selector switch:1. Disconnect the laundry center from the electricalsupply, open the console and remove the consolefront panel.2. Disconnect the wire from the start switch, removethe two screws holding the temperatures switch tothe control mounting panel and pull the switch outthe back.Removing the pressure switch assembly:1. Disconnect the laundry center from the electricalsupply, open the console and remove the consolefront panel.2. Disconnect the wires and the hose from the pressureswitch.3. Remove the screw holding assembly to the controlmounting panel and pull back and up on theassembly.Removing the water temperature switch:1. Disconnect the laundry center from the electricalsupply, open the console and remove the consolefront panel.2. Disconnect the wire from the water temperatureswitch, release the locking tab, turn the switchabout 1/8 of a turn clockwise and pull the switch outthe back.Removing the washer timer:1. Disconnect the laundry center from the electricalsupply, open the console and remove the consolefront panel.2. Unplug the harness from the timer and remove thelocking screw.95
3. From the rear of the console, lift timer locking taband slide the timer to the right to release it from thecontrol mounting plate and pull back on the timer.2. Remove the two screws from the end and twoscrews from the bottom.Locking TabRemoving the dryer door:1. Open the door and remove the four screws holdingthe door to the hinges.3. Lift the inner panel off the outer panel.Removing the dryer door seal:1. The door seal is fastened to the inner door liner byexpandable tabs pushed through slots in the liner.2. If the seal is to be replaced open the door and pullthe seal from the liner. If the seal is to be reused,separate the panels and use a small screwdriver topush the tabs through the liner.Separating the dryer door panel:1. Remove the door.96
Removing the dryer door heat shield:1. Separate the door panels and lift the heat shieldout of the outer panel.Removing the dryer door strike:1. Separate the panel, squeeze the ends of the strikeand push it through the inner panel.Removing the dryer door handle:1. Separate the panel and release the tabs holdingthe handle in outer panel.Removing the dryer door hinge:1. Hold the weight of the door and remove the fourscrews from the hingeRemoving the dryer door switch:1. Disconnect the laundry center from the electricalsupply and open the console.97
2. Reach behind the dryer front panel, squeeze thespring load tabs on the sides of the switch and pushthe switch out the front.3. Unplug the dryer door switch harness.Removing the heat shield:1. Disconnect the laundry center from the electricalsupply and remove the access panel.4. Remove the four screws holding the front panel tothe top and carefully pull the front panel forward.2. Remove the six screws, four holding the heatshield to the side panels and two holding the heatshield to the dryer section base.Replacing the felt seals:Removing the dryer front panel:1. Disconnect the laundry center from the electricalsupply, remove the access panel and heat shield.2. Open the console and remove the two screwsholding the front panel to the side panels.1. Disconnect the laundry center from electrical supplyand remove the dryer front panel.2. The felt seals are two seals that are glued to frontpanel rim that the drum rides on.3. To replace either seal, pull the seals off and gluethe replacements to the rim.98
Replacing the front duct:1. Disconnect the laundry center from electrical supplyand remove the dryer front panel.3. To replace the seal, pull the seal off and glue thereplacement to the duct.2. Lift the filter out and remove the two plastic rivetsholding the duct to the front panel.Removing the door catch:1. Disconnect the laundry center from electrical supplyand remove the dryer front panel.2. Push up and forward and down and forward on therear of the catch moving the catch forward until themetal tabs hit the front panel.3. Release the metal tabs with a small screwdriverand push the catch out the front.Removing the dryer section rear access panel:1. Remove the two screws holding the access panelto the rear panel and swing the right side of thepanel out to disengage the tabs.Replacing the foam seal:1. Disconnect the laundry center from electrical supplyand remove the dryer front panel.2. The foam seal is glued to the blower assemblyduct, it provides a seal between the front panelduct and the blower housing assembly.99
Releasing the dryer belt:1. Remove the access panel.3. Release the idler spring from the dryer sectionbase and lift the assembly off the shoulder pin.2. Push the idler pulley to the left and slip the belt offthe motor pulley.Removing the belt:Removing the idler pulley:1. Disconnect the laundry center from electrical supplyand remove the rear access panel.2. Release the belt from the motor pulley and slidethe idler pulley off.1. Disconnect the laundry center from electrical supplyand release the belt from the motor.2. Remove the front panel.3. From the front, slightly raise the front of the drumand slide the belt off.Removing the idler pulley assembly:1. Disconnect the laundry center from electrical supplyand remove the rear access panel.2. Release the belt from the motor pulley.100
Removing the control thermostat and thermostatheater:1. Disconnect the laundry center from electrical supply,remove the access panel and heat shield.2. Remove the two screws holding the shield to thecombustion chamber, the screw holding the shieldto the burner bracket and lift the shield off.2. The control thermostat andthermost heater ismounted to the base plate of the dryer section.3. Disconnect the wires from the thermostat andheater remove the two screws holding the thermostatand heater to the base plate of the dryer.Removing the sensor: (Gas dryers)1. Disconnect the laundry center from electrical supply,remove the access panel and heat shield.2. Open the console and disconnect the two wiresfrom the sensor.3. Remove the one screw holding the sensor to thecombustion chamber.Removing burner/ignitor assembly: (Gas dryers)1. Disconnect the laundry center from electrical supply,remove the access panel and heat shield.2. Remove the combustion chamber shield and unplugthe ignitor harness.3. Remove the two screws holding the burner to thecombustion assembly mounting bracket, push theburner forward to release it from the valve, thenslide the burner and ignitor out the back.Removing combustion chamber shield: (Gas dryers)1. Disconnect the laundry center from electrical supply,remove the access panel and heat shield.101
Removing the ignitor: (Gas dryers)1. Disconnect the laundry center from electricalsupply and remove the burner.4. Remove the six screws holding the burner assemblyand internal gas pipe to the dryer section baseplate.2. Using a screwdriver, release the spring clip holdingthe ignitor to the burner.5. Slide the assembly out the front.Removing the gas valve coils: (Gas dryers)1. Disconnect the laundry center from electrical supply,remove the access panel and heat shield.2. Disconnect the wires from the coils, remove thetwo screws holding the coil bracket to the valvebase and lift the coils off.Removing manual shut off and internal gas pipe:(Gas dryers)1. Disconnect the laundry center from electrical supply,turn the gas supply off and remove the burnercombustion chamber assembly.2. Using a 15/16 inch wrench disconnect the manualshut off from the pressure regulator valve assembly.Removing the burner and combustion chamberassembly, manual shut off and the internal gaspipe: (Gas dryers)1. Disconnect the laundry center from electrical supplyand turn the gas supply off.2. Open the console, remove the access panel andheat shield.3. Disconnect the gas line to the laundry center.Removing pressure regulator valve assembly:(Gas dryers)1. Disconnect the laundry center from electrical supply,turn the gas supply off and remove the burnercombustion chamber assembly.102
2. Disconnect the manual shut off, remove the threescrews holding the assembly to the mountingbracket and pull the assembly back and out.Removing the vane from the dryer drum:1. Remove dryer top panel from the laundry center,and open the dryer door.2. Rotate the drum until the vain is at the top, removethe two screws holding the vane to the drum anddrop the vane into the drum.Removing the combustion chamber: (Gas dryers)1. Disconnect the laundry center from electrical supply,turn the gas supply off and remove the burnercombustion chamber assembly.2. Remove the combustion chamber shield and the 1screw holding the combustion chamber to themounting bracket.Removing the dryer drum:1. Disconnect the laundry center from electrical supplyand remove the dryer top panel.2. Disconnect the dryer drive belt from the motor andremove the dryer front panel.3. Raise drum to disengage the ball from the hitchand slid the drum out the front.Removing the dryer top panel:1. Remove the ten screws holding the top panel tothe front, back and sides.Removing the ball hitch from the drum:1. Disconnect the laundry center from electrical supplyand remove the drum.103
2. Remove the three screws from inside the drumholding the ball hitch to the drum.2. Remove the three screws holding the shield to therear of the drum.Removing the teflon glides:1. Disconnect the laundry center from electrical supplyand remove the drum.2. Squeeze the tabs to release the glides.Removing the hitch:1. Disconnect the laundry center from electrical supplyand remove the drum.2. Using a 5/16” nut driver remove the two screwsholding the hitch to the rear panel while holding thelarge tinnerman clip from the rear of the laundrycenter.Removing the drum heat shield: (Electric dryers)1. Disconnect the laundry center from electrical supplyand remove the drum.Note: Do not lose the grounding ball or the tinnermanmounting clip from the rear of the dryer.104
Removing the high limit thermostat:1. Disconnect the laundry center from electrical supplyand remove the drum.2. Disconnect the two wires from the heating element.3. Remove the high limit thermostat.2. Disconnect the two wires and remove the twoscrews holding thermostat to the rear heat shield.Removing the thermal limiter: (Electric dryers)4. Remove the four screws securing the heatingelement assembly to the rear of the cabinet.1. Disconnect the laundry center from electrical supplyand remove the drum.2. Disconnect the two wires and remove the twoscrews holding limiter to the rear panel.Removing the heating element assembly: (Electricdryers)1. Disconnect the laundry center from electrical supplyand remove the drum.Removing the duct and heat shield: (Gas dryers)1. Disconnect the laundry center from electricalsupply and remove the drum.2. Remove the burner combustion chamberassembly.105
3. Disconnect the wires from the high limit thermostatand remove the three screws holding the heatshield to the rear panel of the laundry center.3. Unplug the harness from the motor, remove theidler pulley assembly and disconnect the groundwire from the motor.4. Remove the two screws holding the motormounting plate to the dryer base.4. Lift the shield and duct out of the laundry centerand remove the three screws holding the duct tothe heat shield.5. Lift the front of the assembly and slide it backwardto release the motor mounting plate from the dryerbase.Disassembling the blower and motor assembly:1. To remove the front half of the blower assemblyremove the six screws holding the front half to therear half of the blower assembly.Removing the blower and motor assembly:1. Disconnect the laundry center from electricalsupply and remove the drum.2. Remove the control thermostat and heater unsnapthe pressure switch hose and the screw holding theblower housing to the vent pipe.106
2. The blower wheel can be removed by removingthe clamp holding the blade to the motor shaft.6. With the fan blade removed, the motor can beremoved from the motor mounting bracket byreleasing the two hold-down brackets, one at thefront and one at the rear.3. Using two small common screwdrivers, releasethe blower wheel from the notch in the motor shaftand pull the blower wheel off.Removing the internal vent duct:1. Disconnect the laundry center from electricalsupply and remove the drum.2. Remove the screw holding the duct to the blowerassembly and the screw holding duct to the baseplate.4. With the blower wheel removed, the rear half of theblower housing and the motor can be removed.5. To remove the rear half of the blower assemblyremove the three screws holding the housing tothe motor mounting bracket.107
Removing the motor and blower assembly base:1. Disconnect the laundry center from electricalsupply, remove the motor and blower assemblyand disconnect the internal vent duct.2. Remove the screw holding the base to the sidepanel.Removing the burner assembly base: (Gas dryers)1. Disconnect the laundry center from electricalsupply and remove the burner assembly.2. Remove the screw holding the base to the sidepanel.3. Remove the two screws holding the base to therear panel.3. Remove the two screws holding the base to therear panel and the three screws holding the base tothe motor and blower assembly base.3. Remove the three screws holding the base to theburner base.Removing the bleach dispenser:Removing the dryer section side panels:1. Disconnect electrical power and remove the frontaccess panel, heat shield, dryer front panel andwasher top.2. When removing the lefthand side panel, removethe drum and blower assembly.108
3. Remove the three screw in the front holding theside panel to the dryer section base.5. Remove the bolt from the rear bracket holding thedryer section to the washer section.4. Remove the two bolts holding the side brace to thewasher panel.6. Remove the seven screws from the rear, the tworemaining screws from the top and lift the panel off.109
Removing the bleach dispenser:Alternate softener dispenser assembly:1. The bleach dispenser is snapped into the top.Place a screwdriver underneath the front cornerand pop the dispenser out.Removing the softener dispenser assembly:1. Raise the lid and pull up on the dispenser cap.Removing the agitator:1. Raise the top, remove the softener dispenser.2. Using a 1/2” socket remove the bolt from the centerof the agitator shaft and lift the agitator off.2. With the cap removed lift out the cup.Removing the drive hub:1. The drive hub is forced on the transmission shaftby the bolt that holds the agitator to the transmissionshaft.110
2. Place a screwdriver between transmission shaftand the drive hub and force the drive hub off.Removing the lid lock assembly:1. Disconnect the laundry center from electricalsupply and remove the washer top.2. Remove the two screws holding the assembly tothe top and lift the lid lock assembly off.Removing the washer front panel:1. Disconnect the laundry center from electricalsupply.2. Remove the two screws at the bottom of the panel,one on each side, and pull down on the panel torelease the tabs.Disconnecting the lid springs:1. Disconnect the laundry center from electricalsupply and remove the washer top.2. Open the lid and disengage the spring from the top,then turn the spring out of the hinge.Removing the washer top:1. Disconnect the laundry center from electricalsupply and remove the washer front panel.2. Disconnect the wiring from the lid lock assemblyand remove the two screws, one in each frontcorner. Lift the top to release the locator pins andpull the top forward.Removing the lid hinges:1. Disconnect the laundry center from electricalsupply, remove the washer top and the hingespring.111
2. Remove the two screws holding the hinge to thelid.Removing the lid:1. Disconnect the laundry center from electrical supplyand remove the top.2. Remove the hinges and lift the lid off.3. Pull the hinge in and rotate the end of the hingecounter clockwise while pulling.Removing the lid strike:1. Lift lid and remove the two screws holding thestrike to the lid.112
Removing the water inlet nozzle:2. Disconnect the wiring harness from the valve.1. Disconnect the laundry center from electrical supplyand remove the washer section top.2. Remove the screw holding the nozzle to the dryersection base.3. Gain access to the rear of the washer, disconnectthe inlet hoses and remove the two screws holdingthe valve to the rear panel.3. Using a flat blade screwdriver, pry down on theright side of the nozzle to release the plastic rivet.Alternate water valve attachment:4. Turn the nozzle clockwise to disengage the tab onthe left side and pull nozzle forward.3. Gain access to the rear of the washer and removeone screw holding the valve to the rear panel.Removing the water inlet valve:1. Disconnect the laundry center from electrical supply,turn the water off and remove the washersection top.4. Pull the valve up past the tub and disconnect theoutlet hose.113
Removing the drain pump:Note:There will be water in the pump so have apan or towels to catch it beforedisconnecting the pump.3. The check valve is located in the outputconnection of the pump. To remove the checkvalve lift it off its tab.1. Disconnect the laundry center from electrical supplyand remove the front panel.2. Unplug the wiring from the pump, release the tabshown and pull the shield back.4. To remove the rear pump housing, remove threescrews locking the housings together and pull thehousings apart. (Do not twist.)3. Disconnect the hoses and remove the two screwssecuring the pump to the washer base.Removing the drive motor shield:1. Disconnect the laundry center from electricalsupply and remove the front panel.2. Remove the two screws holding the shield to thetub and rotate the shield down and out.Disassembling the drain pump:1. Disconnect the laundry center from electricalsupply.2. Remove the drain pump from the laundry center.114
3. Disconnect the wires from the capacitor.3. Push in on the idler pulley and turn the belt off.Removing the transmission pulley:Removing the start capacitor:1. Disconnect the laundry center from electricalsupply and remove the washer drive motor shield.1. Disconnect the laundry center from electricalsupply, remove the front panel and the drive belt.2. Using a 3/8” socket, loosen the locking screw of thetransmission pulley and drop the pulley off theshaft.2. Disconnect the wires from the capacitor, peal backthe tape and snap the capacitor out of the bracket.Removing the drive belt:1. Disconnect the laundry center from electricalsupply and remove the front panel.2. Check the setting of idler pulley spring.Removing the idler pulley assembly:1. Disconnect the laundry center from electricalsupply, remove the front panel and the drive belt.2. Release the front vertical and horizontal springs.115
3. Release the small “C” clip from the transmissionstud and allow the assembly to drop down.5. Pull the snubber out with the wire hook.Reinstalling the snubber:Note:The “C” clip is very small and hard to find ifdropped.Removing the snubber:1. Disconnect the laundry center from electricalsupply and remove the front panel.2. Make a wire hook to pull the snubber out with.Before reinstalling the snubber, the base must be wipedout whether the snubber is replaced or not. A clothwetted with denatured (camp stove) alcohol or rubbingalcohol will clean any residue, such as soap, or fabricsoftener off of the base. An old cloth work glove wouldwork well also. Make sure that the snubber area in thedome area is wiped out well.Note : Never oil the base to stop snubber noise.Inspect the teflon strips on upper and lower edges ofthe snubber as they must be perfectly smooth and undamagedin any way.Caution: Never place your hands or fingers underthe leg and dome assembly while it israised.Note:The arrow on the side of the snubber. Whenreinstalling or replacing the part, the arrowmust be pointing upward.3. Release the front vertical and horizontal springs.4. Place a 2” by 4” between the bottom rim of the legand dome assembly and the base and raise the legand dome assembly.Removing the drive motor:1. Disconnect the laundry center from electricalsupply and remove the front panel.Note:It is a good idea to be prepared with some sortof supports (like 3/4 inch pieces of wood) toslide between the lower edge of the assemblyand the base to help support it if it were to slideoff of your pry-bar.2. Remove the front vertical and horizontal springs,disconnect the wires from the capacitor andremove the drive motor shield.116
3. Remove the bolt from the front leg, raise the tub,reinsert the bolt so the bottom of the tub rests onthe bolt.Removing the tub, leg and dome assembly andbase:Note:To gain access to the tubs, transmission,leg and dome assembly and the base, of thewasher section, it is necessary to side theassembly with these components out the frontof the washer section.1. Disconnect the laundry center from electricalsupply, remove the washer section front panel, topand inlet nozzle.2. Remove the seven screws, three from each side,holding the bottom of the side panels to the baseand one from the rear holding the rear panel to thebase.4. Remove the drive belt and disconnect the wiringharness from the drive motor.5. Using a 3/8” wrench, remove the four nuts from themotor studs, lift the motor up, tip it back and pull themotor out the front.3. Release the two plastic rivets holding the wireharness ties to the rear panel and the pressureswitch hose from the outer tub.4. Disconnect the drain hose from the drain pumpand allow it to side back through the tie holding itto the base.117
Removing the splash tub cover:1. Disconnect electrical power and pull the tub, legand dome and base assembly forward.2. Unsnap the pressure hose from the cover.5. Pull the assembly forward as far as the harnessand hose will allow.3. Using a flatblade screwdriver, unsnap the coverfrom the tub and lift it off.Removing the spin basket:1. Disconnect electrical power and pull the tub, legand dome and base assembly.2. Remove the agitator and the splash tub cover.118
3. Using a 1/2” socket remove the five bolts holdingthe spin basket to the trunnion.3. Push down on the brass ring to release the rubberseal and pull the seal and brass ring off the shaft.Removing the bottom half of the tub seal:Removing the trunnion:1. Disconnect electrical power and pull the tub, legand dome and base assembly.2. Remove the agitator, splash tub cover and spinbasket.3. Using a 1/2” socket loosen the two bolts holding thelockplate to the agitator shaft and lift the trunnionoff the shaft.1. Disconnect electrical power and pull the tub, legand dome and base assembly.2. Remove the agitator, spin basket, trunnion and tophalf of the tub seal3. Place your thumbs on the bottom seal towards youand your fingers on the other side. Push down andin with your thumbs and pull in and up with yourfingers to pop the seal out.Removing the top half of the tub seal:1. Disconnect electrical power and pull the tub, legand dome and base assembly.2. Remove the agitator, spin basket and trunnion.Removing the outer tub:1. Disconnect electrical power and pull the tub, legand dome and base assembly.2. Remove the agitator, spin basket, trunnion and tophalf of the tub seal.3. Disconnect the drain hose, drive motor shield andthe pressure switch hose.119
4. Using a 1/2” socket remove the three bolts holdingthe tub to the leg and dome assembly, and lift thetub over the transmission shaft.3. Using a 3/8” socket, remove the two bolts holdingthe transmission bearing block to the transmissionmounting plate and remove transmission.Removing the tub bearing:1. Disconnect electrical power and pull the tub, legand dome and base assembly.2. Remove the agitator, spin basket, trunnion, tophalf of the tub seal and tub.3. Turn the tub over and remove two screws holdingthe bearing to the tub.Replacing the vertical springs:1. Disconnect the laundry center from electricalsupply and remove the front panel.2. The three vertical springs are not the same. Thesprings are identified by two them being painted.The spring without the paint goes in the left rearacross from the motor.WITHOUT PAINTRemoving the transmission:1. Disconnect electrical power and pull the tub, legand dome and base assembly.2. Remove the agitator, spin basket, trunnion, tub,drive belt, and transmission pulley.120
Removing the washer cabinet:1. Disconnect electrical power, turn gas off, if gasdryer, and the hot and cold water.5. Remove the front panel and top from the washer.6. Disconnect the harness from the drain pump, drivemotor and start capacitor.2. Gain access to the rear of the laundry center anddisconnect the hoses from the water inlet valveand the dryer vent. Remove the screw or screwsholding the water valve to the back panel andrelease the two plastic rivets holding the wireharness to the rear panel of the washer.7. Release the plastic rivet wire ties from the drainpump shield, front and rightside dome legs and thewire tie on the motor.3. Remove the two rear bracket that holding dryer tothe washer by removing three screws from eachbracket.8. Remove the drain hose, the water inlet nozzle,water inlet valve and disconnect the pressureswitch hose from the tub.9. With the wiring harness released remove the sixscrews holding the bodysides to the base and thescrew holding rear panel to the base and slide thetub, leg and dome and base assembly out the front.4. Remove the access panel, heat shield, front panel,top, drum and blower assembly from the dryer.121
10. Release the wiring harness ties from the rightsidebrace and the ledge of the rear panel.11. Remove the two screws from each side holding thedryer side panels to the washer side panels.12. Carefully lift the dryer off the washer side and rearpanels.13. Remove the side braces from the washer sidepanels.122
NOTES123
124