
Create successful ePaper yourself
Turn your PDF publications into a flip-book with our unique Google optimized e-Paper software.
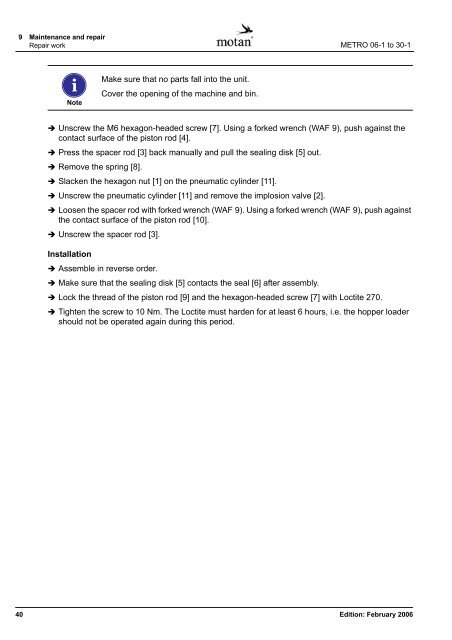
9 Maintenance and repairRepair work METRO 06-1 to 30-1NoteMake sure that no parts fall into the unit.Cover the opening of the machine and bin. Unscrew the M6 hexagon-headed screw [7]. Using a forked wrench (WAF 9), push against thecontact surface of the piston rod [4]. Press the spacer rod [3] back manually and pull the sealing disk [5] out. Remove the spring [8]. Slacken the hexagon nut [1] on the pneumatic cylinder [11]. Unscrew the pneumatic cylinder [11] and remove the implosion valve [2]. Loosen the spacer rod with forked wrench (WAF 9). Using a forked wrench (WAF 9), push againstthe contact surface of the piston rod [10]. Unscrew the spacer rod [3].Installation Assemble in reverse order. Make sure that the sealing disk [5] contacts the seal [6] after assembly. Lock the thread of the piston rod [9] and the hexagon-headed screw [7] with Loctite 270. Tighten the screw to 10 Nm. The Loctite must harden for at least 6 hours, i.e. the hopper <strong>loader</strong>should not be operated again during this period.40 Edition: February 2006