

Assembly Instructions - Swing-N-Slide
Assembly Instructions - Swing-N-Slide
Assembly Instructions - Swing-N-Slide
- No tags were found...

Create successful ePaper yourself
Turn your PDF publications into a flip-book with our unique Google optimized e-Paper software.
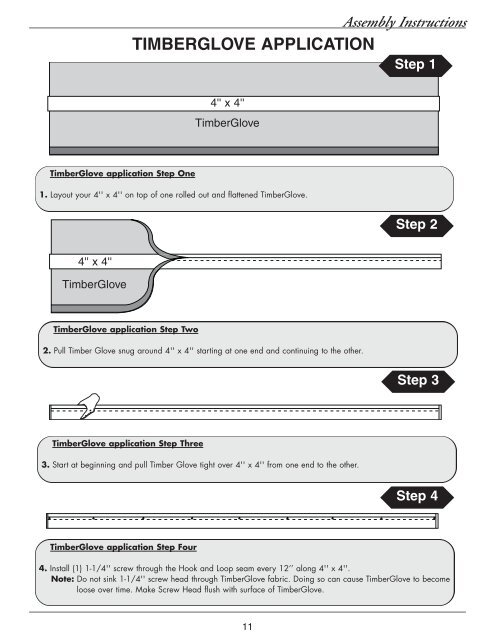
<strong>Assembly</strong> <strong>Instructions</strong>TIMBERGLOVE APPLICATIONStep 14'' x 4''TimberGloveTimberGlove application Step One1. Layout your 4'' x 4'' on top of one rolled out and flattened TimberGlove.Step 24'' x 4''TimberGloveTimberGlove application Step Two2. Pull Timber Glove snug around 4'' x 4'' starting at one end and continuing to the other.Step 3TimberGlove application Step Three3. Start at beginning and pull Timber Glove tight over 4'' x 4'' from one end to the other.Step 4TimberGlove application Step Four4. Install (1) 1-1/4'' screw through the Hook and Loop seam every 12’’ along 4'' x 4''.Note: Do not sink 1-1/4'' screw head through TimberGlove fabric. Doing so can cause TimberGlove to becomeloose over time. Make Screw Head flush with surface of TimberGlove.11


