

Assembly Instructions - Swing-N-Slide
Assembly Instructions - Swing-N-Slide
Assembly Instructions - Swing-N-Slide
- No tags were found...

You also want an ePaper? Increase the reach of your titles
YUMPU automatically turns print PDFs into web optimized ePapers that Google loves.
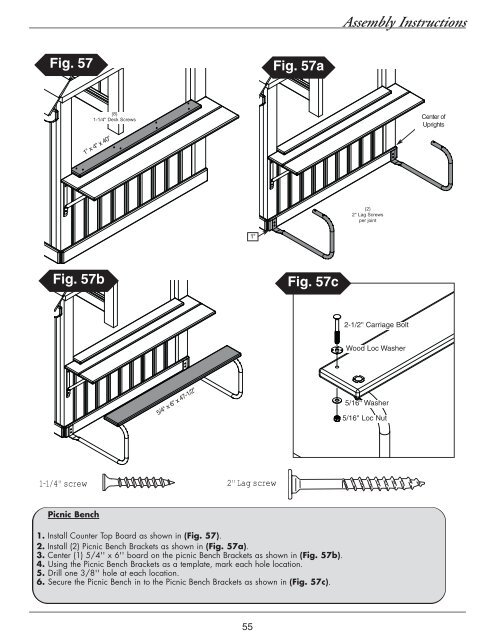
<strong>Assembly</strong> <strong>Instructions</strong>Fig. 57Fig. 57a(8)1-1/4'' Deck ScrewsCenter ofUprights1'' x 4'' x 40''(2)2'' Lag Screwsper joint1''Fig. 57bFig. 57c2-1/2'' Carriage BoltWood Loc Washer5/4'' x 6'' x 47-1/2''5/16'' Washer5/16'' Loc Nut1-1/4'' screw2'' Lag screwPicnic Bench1. Install Counter Top Board as shown in (Fig. 57).2. Install (2) Picnic Bench Brackets as shown in (Fig. 57a).3. Center (1) 5/4'' x 6'' board on the picnic Bench Brackets as shown in (Fig. 57b).4. Using the Picnic Bench Brackets as a template, mark each hole location.5. Drill one 3/8'' hole at each location.6. Secure the Picnic Bench in to the Picnic Bench Brackets as shown in (Fig. 57c).55


