

Assembly Instructions - Swing-N-Slide
Assembly Instructions - Swing-N-Slide
Assembly Instructions - Swing-N-Slide
- No tags were found...

Create successful ePaper yourself
Turn your PDF publications into a flip-book with our unique Google optimized e-Paper software.
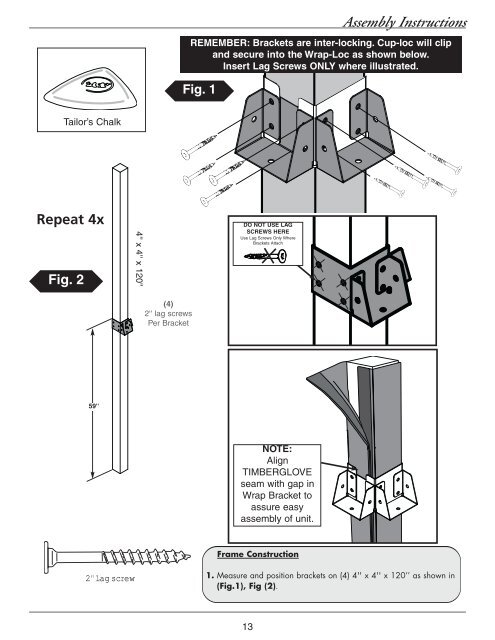
4'' x 4'' x 120''<strong>Assembly</strong> <strong>Instructions</strong>REMEMBER: Brackets are inter-locking. Cup-loc will clipand secure into the Wrap-Loc as shown below.Insert Lag Screws ONLY where illustrated.Fig. 1Tailor’s ChalkRepeat 4xDO NOT USE LAGSCREWS HEREUse Lag Screws Only WhereBrackets AttachFig. 2(4)2'' lag screwsPer Bracket59''NOTE:AlignTIMBERGLOVEseam with gap inWrap Bracket toassure easyassembly of unit.Frame Construction2'' Lag screw1. Measure and position brackets on (4) 4'' x 4'' x 120’’ as shown in(Fig.1), Fig (2).13


