

Assembly Instructions - Swing-N-Slide
Assembly Instructions - Swing-N-Slide
Assembly Instructions - Swing-N-Slide
- No tags were found...

You also want an ePaper? Increase the reach of your titles
YUMPU automatically turns print PDFs into web optimized ePapers that Google loves.
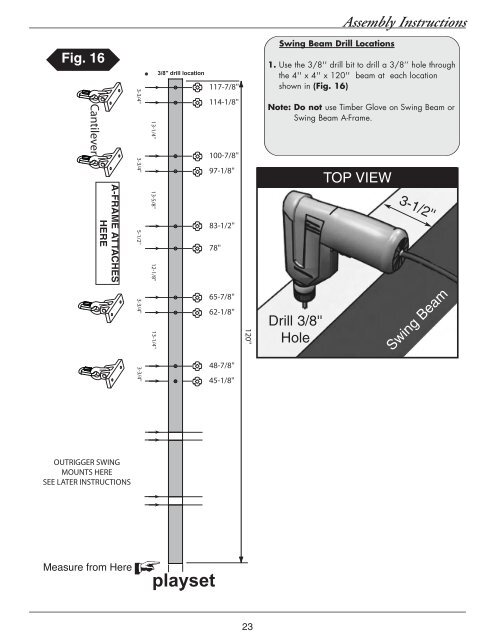
<strong>Assembly</strong> <strong>Instructions</strong>Fig. 163-3/4''13-1/4''117-7/8''114-1/8''<strong>Swing</strong> Beam Drill Locations1. Use the 3/8'' drill bit to drill a 3/8’’ hole throughthe 4'' x 4'' x 120'' beam at each locationshown in (Fig. 16)Note: Do not use Timber Glove on <strong>Swing</strong> Beam or<strong>Swing</strong> Beam A-Frame.A-FRAME ATTACHESHERE3-3/4''5-1/2''13-5/8''12-1/8''100-7/8''97-1/8''83-1/2''78''TOP VIEW3-1/2''3-3/4''13-1/4''65-7/8''62-1/8''120''Drill 3/8''Hole<strong>Swing</strong> Beam3-3/4''48-7/8''45-1/8''NO HOOK AND LOOP HEREOUTRIGGER SWINGMOUNTS HERESEE LATER INSTRUCTIONSNO HOOK AND LOOP HERE23


