

Assembly Instructions - Swing-N-Slide
Assembly Instructions - Swing-N-Slide
Assembly Instructions - Swing-N-Slide
- No tags were found...

You also want an ePaper? Increase the reach of your titles
YUMPU automatically turns print PDFs into web optimized ePapers that Google loves.
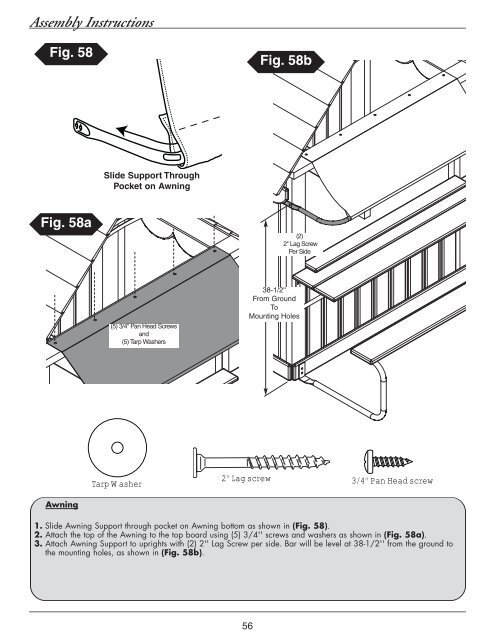
<strong>Assembly</strong> <strong>Instructions</strong>Fig. 58Fig. 58b<strong>Slide</strong> Support ThroughPocket on AwningFig. 58a(2)2'' Lag ScrewPer Side(5) 3/4'' Pan Head Screwsand(5) Tarp Washers38-1/2''From GroundToMounting HolesTarp Washer2'' Lag screw3/4'' Pan Head screwAwning1. <strong>Slide</strong> Awning Support through pocket on Awning bottom as shown in (Fig. 58).2. Attach the top of the Awning to the top board using (5) 3/4'' screws and washers as shown in (Fig. 58a).3. Attach Awning Support to uprights with (2) 2'' Lag Screw per side. Bar will be level at 38-1/2'' from the ground tothe mounting holes, as shown in (Fig. 58b).56


