

Assembly Instructions - Swing-N-Slide
Assembly Instructions - Swing-N-Slide
Assembly Instructions - Swing-N-Slide
- No tags were found...

Create successful ePaper yourself
Turn your PDF publications into a flip-book with our unique Google optimized e-Paper software.
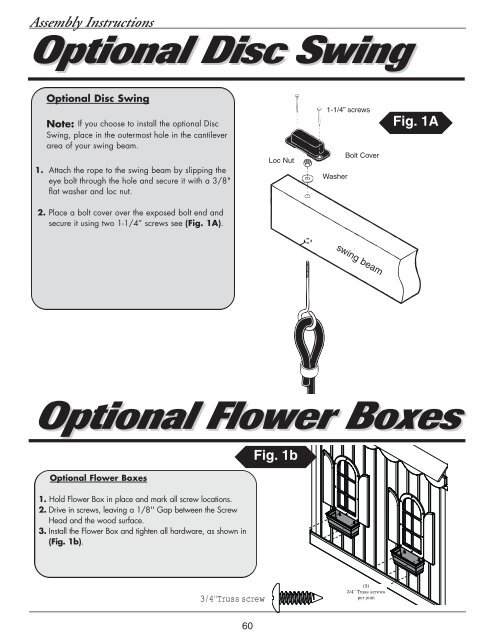
<strong>Assembly</strong> <strong>Instructions</strong>Optional Disc <strong>Swing</strong>Optional Disc <strong>Swing</strong>Note: If you choose to install the optional Disc<strong>Swing</strong>, place in the outermost hole in the cantileverarea of your swing beam.1. Attach the rope to the swing beam by slipping theeye bolt through the hole and secure it with a 3/8"flat washer and loc nut.Loc Nut1-1/4” screwsWasherBolt CoverFig. 1A2. Place a bolt cover over the exposed bolt end andsecure it using two 1-1/4” screws see (Fig. 1A).swing beamOptional Flower BoxesOptional Flower Boxes1. Hold Flower Box in place and mark all screw locations.2. Drive in screws, leaving a 1/8'' Gap between the ScrewHead and the wood surface.3. Install the Flower Box and tighten all hardware, as shown in(Fig. 1b).Fig. 1b3/4''Truss screw(3)3/4'' Truss screwsper joint60


