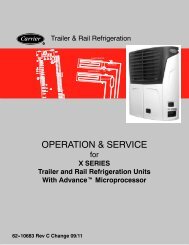
Truck/Trailer Refrigeration Unit - Sunbelt Transport Refrigeration
Truck/Trailer Refrigeration Unit - Sunbelt Transport Refrigeration
Truck/Trailer Refrigeration Unit - Sunbelt Transport Refrigeration
- No tags were found...

You also want an ePaper? Increase the reach of your titles
YUMPU automatically turns print PDFs into web optimized ePapers that Google loves.
a. Remove switch as outlined in Section 4.16.1.b. Connect ohmmeter or continuity light across switchterminals. Ohmmeter will indicate resistance andcontinuity light will be lighted if switch closed afterrelieving pressure.c. Connect switch to a cylinder of dry nitrogen. (SeeFigure 4-16)d. Set nitrogen pressure regulator higher than cutoutpoint on switch being tested. Pressure switch cutout andcut-in points are shown in Section 1.3.e. Close valve on cylinder and open bleed-off valve.f. Open cylinder valve. Slowly close bleed-off valve andincrease pressure until the switch opens. If light is used,light will go out. If an ohmmeter is used, the meter willindicate open. Open pressure on gauge. Slowly openbleed-off valve (to decrease pressure) until switch closes(light will light or ohmmeter will move).4.17 REPLACING RECEIVER SIGHT GLASSASSEMBLYNOTEThere are two types of receiver sight glasses; thefloating ball type, and the prism type; both areinterchangeable.a. Store the refrigerant in an evacuated container.(Refer to Section 4.7.b)b. Unscrew the sight glass assembly. Spread somesealing compound on pipe threads of new sight glassassembly and install.c. Leak check receiver sight glass per Section 4.8.d. After leak checking unit, evacuate and dehydrate asoutlined in section 4.9.e. Add refrigerant charge. (Refer to Section 4.10)f. Check for noncondensibles.4.18 SERVICING SOLENOID VALVES4.18.1 Solenoid Valves -- AlcoCAUTIONDo not damage or overtighten the enclosingtube assembly. Torque to 200-inch pounds(2.3 mkg). Also make sure all parts areplaced on the enclosing tube in propersequence to avoid premature coil burnout.a. Replacing the CoilNOTEThe coil may be replaced without removing therefrigerant or pumping the unit down.1. Disconnect leads. Remove coil retainer and coilassembly.2. Verify coil type, voltage and frequency. Thisinformation appears on the coil housing.3. Place new coil over enclosing tube. Add retainerand connect wiring.b. Replacing Solenoid Valve Internal Parts(See Figure 4-17)Theliquidlinesolenoidvalvemaybeservicedbypumping the unit down. (Refer to section 4.7.a.)Remove and store the refrigerant charge in anevacuated container to service hot gas solenoid valve.(Refer to Section 4.7.b.)1. Remove coil retainer and coil assembly fromvalve. Remove enclosing tube assembly and relateditems.2. Check for foreign material in valve body.3. Install new parts.4. Tighten enclosing tube assembly to a torquevalue of 200 inch pounds (2.3 mkg) and leak check thevalve. (Refer to Section 4.8.)5. Install coil assembly and retainer.6. Start unit and check refrigerant charge perSection 4.10.17. Check refrigeration cycles. (Refer to Section 2.)24681. Retainer2. Coil Assembly3. Enclosing TubeAssembly4. Plunger Assembly13575. Gasket6. Piston Assembly7. Body8. Bracket AdapterFigure 4-17. Solenoid Valve -- Alco4-17 62-02884