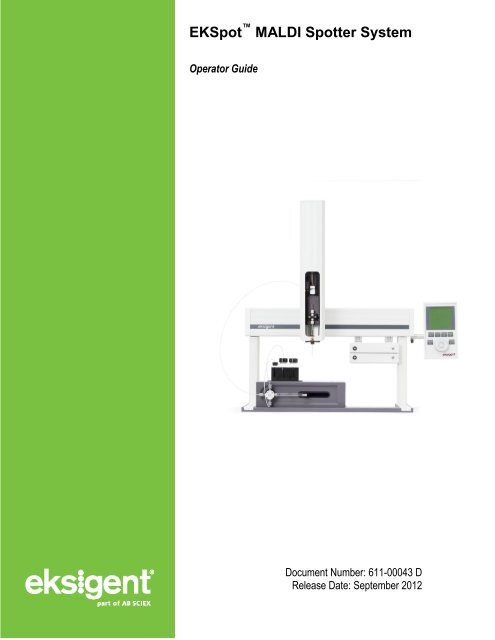
EKSpot MALDI Spotter System Operator Guide - Eksigent
EKSpot MALDI Spotter System Operator Guide - Eksigent
EKSpot MALDI Spotter System Operator Guide - Eksigent
- No tags were found...
Create successful ePaper yourself
Turn your PDF publications into a flip-book with our unique Google optimized e-Paper software.
<strong>EKSpot</strong> <strong>MALDI</strong> <strong>Spotter</strong> <strong>System</strong><strong>Operator</strong> <strong>Guide</strong>Document Number: 611-00043 DRelease Date: September 2012
This document is provided to customers who have purchased AB Sciexequipment to use in the operation of such AB Sciex equipment. Thisdocument is copyright protected and any reproduction of this documentor any part of this document is strictly prohibited, except as AB Sciexmay authorize in writing.Software that may be described in this document is furnished under alicense agreement. It is against the law to copy, modify, or distribute thesoftware on any medium, except as specifically allowed in the licenseagreement. Furthermore, the license agreement may prohibit thesoftware from being disassembled, reverse engineered, or decompiledfor any purpose.Portions of this document may make reference to other manufacturersand/or their products, which may contain parts whose names areregistered as trademarks and/or function as trademarks of theirrespective owners. Any such use is intended only to designate thosemanufacturers' products as supplied by AB Sciex for incorporation intoits equipment and does not imply any right and/or license to use orpermit others to use such manufacturers' and/or their product names astrademarks.AB Sciex makes no warranties or representations as to the fitness ofthis equipment for any particular purpose and assumes noresponsibility or contingent liability, including indirect or consequentialdamages, for any use to which the purchaser may put the equipmentdescribed herein, or for any adverse circumstances arising therefrom.For research use only. Not for use in diagnostic procedures.The trademarks mentioned herein are the property of AB Sciex PTE.Ltd. or their respective owners. <strong>Eksigent</strong> is a division of AB Sciex L.L.C.AB SCIEX is being used under license.<strong>Eksigent</strong>5875 Arnold Road, Dublin, CA 94568© 2012 AB SCIEX.Printed in the USA.
ContentsChapter 1. Safety and Site Requirements .......................................................................... 5About this <strong>Guide</strong>..................................................................................................................... 5Symbols and Conventions ...................................................................................................... 5<strong>EKSpot</strong> <strong>MALDI</strong> <strong>Spotter</strong> <strong>System</strong> Safety Practices ................................................................... 6Site Requirements .................................................................................................................. 7<strong>EKSpot</strong> <strong>MALDI</strong> <strong>Spotter</strong> <strong>System</strong> Power Requirements ........................................................ 7Bench Space Requirement ................................................................................................. 7Environmental Requirements ............................................................................................. 7Chapter 2. Introduction ....................................................................................................... 9Overview ................................................................................................................................ 9Chapter 3. Installation ........................................................................................................11Install the NanoLC <strong>System</strong> ....................................................................................................11Install the NanoLC AS-1 Autosampler ...................................................................................11Install the <strong>EKSpot</strong> <strong>MALDI</strong> <strong>Spotter</strong> <strong>System</strong> .........................................................................12Install the Spotting Tip ...........................................................................................................13Install the Matrix Addition Syringe Pump ...............................................................................14Chapter 4. Configure the Software and Initialize the <strong>System</strong> ..........................................15<strong>Eksigent</strong> Control Software .....................................................................................................15Configure the <strong>EKSpot</strong> <strong>MALDI</strong> <strong>Spotter</strong> <strong>System</strong> .......................................................................15Chapter 5. Operate the <strong>EKSpot</strong> <strong>MALDI</strong> <strong>Spotter</strong> <strong>System</strong> ................................................23Purge the Syringe .................................................................................................................23Set the PreFlush Option ........................................................................................................24Set the Fraction Collector Option ..........................................................................................25Calibrate the <strong>EKSpot</strong> <strong>MALDI</strong> <strong>Spotter</strong> .....................................................................................25Calibrate the Home Position ..............................................................................................25Calibrate the Tray Holder ..................................................................................................26Calibrate the Spotting Tip for the <strong>MALDI</strong> Option (3-position Calibration) ...........................27Calibrate the Spotting Tip for Fraction Collection (1-position Calibration) ..........................28Create a New Tray Type (Optional) .......................................................................................29Change the Spotting Tip ........................................................................................................29Chapter 6.Set up the Run Manager Window....................................................................31Index ........................................................................................................................................37<strong>Operator</strong> <strong>Guide</strong><strong>EKSpot</strong> <strong>MALDI</strong> <strong>Spotter</strong> <strong>System</strong>September 2012 3 of 38
Contents<strong>EKSpot</strong> <strong>MALDI</strong> <strong>Spotter</strong> <strong>System</strong><strong>Operator</strong> <strong>Guide</strong>4 of 38 September 2012
Chapter 1.Safety and Site RequirementsThis chapter describes safety conventions, safety procedures and site requirements necessaryfor proper operation of the <strong>Eksigent</strong> <strong>EKSpot</strong> <strong>MALDI</strong> spotter system. Topics covered in thischapter include:• <strong>EKSpot</strong> <strong>MALDI</strong> <strong>Spotter</strong> <strong>System</strong> Safety Practices• Site RequirementsAbout this <strong>Guide</strong>This guide is intended for laboratory technicians who are responsible for control and day-to-daymaintenance of the <strong>EKSpot</strong> <strong>MALDI</strong> spotter system. It is assumed that the user of this guide isfamiliar with standard laboratory terminology.WARNING! Read the safety instructions and the rest of this guide before usingthe <strong>EKSpot</strong> <strong>MALDI</strong> spotter system.Symbols and ConventionsThe following conventions are used throughout the guide.Table 1-1PictorialSymbols and DescriptionsDescriptionThe danger sign warns about a hazard. It calls attention to a procedure orpractice which, if not adhered to, could result in injury or loss of life.Do not proceed beyond a danger sign until the indicated conditions are fullyunderstood and met.The warning sign denotes a hazard. It calls attention to a procedure orpractice which, if not adhered to, could result in severe injury or damage ordestruction of parts or all of the equipment.Do not proceed beyond a warning sign until the indicated conditions are fullyunderstood and met.<strong>EKSpot</strong> <strong>MALDI</strong> <strong>Spotter</strong> <strong>System</strong><strong>Operator</strong> <strong>Guide</strong>5 of 38 September 2012
Safety and Site RequirementsPictorialCAUTION:DescriptionThe caution signal word denotes a hazard. It calls attention to a procedure orpractice which, if not adhered to, could result in damage or destruction of partsor all of the equipment.Do not proceed beyond a caution sign until the indicated conditions are fullyunderstood and met.The tip sign signals relevant information. Read this information, as it might behelpful.The note sign signals additional information. It provides advice or asuggestion that may support you in using the equipment.This symbol indicates that the waste of electrical and electronic equipmentmust not be disposed as unsorted municipal waste and must be collectedseparately. Please contact an AB SCIEX field service employee forinformation concerning the decommissioning of equipment.<strong>EKSpot</strong> <strong>MALDI</strong> <strong>Spotter</strong> <strong>System</strong> Safety PracticesThe following safety practices apply to the <strong>EKSpot</strong> <strong>MALDI</strong> spotter system:WARNING! Potential <strong>Operator</strong> Injury: Use of this equipment in a manner notapproved by the manufacturer may inhibit its safety protection.WARNING! Electrical Shock Hazard: Only use fuses of the type and currentrating specified. Do not use repaired fuses or by-pass the fuse holder.WARNING! Electrical Shock Hazard: The supplied power cord must be usedwith a power outlet containing a protective ground contact.<strong>EKSpot</strong> <strong>MALDI</strong> <strong>Spotter</strong> <strong>System</strong><strong>Operator</strong> <strong>Guide</strong>6 of 38 September 2012
Safety and Site RequirementsWARNING! Biohazardous Material: When replacing tubing or fittings on the<strong>EKSpot</strong> <strong>MALDI</strong> spotter system, exposure to solvents may occur. It is thereforerecommended that appropriate safety procedures be followed and personalprotective equipment be used, according to the applicable Material SafetyData Sheets supplied by the solvent vendor.WARNING! Environmental Hazard Do not allow flammable and/or toxicsolvents to accumulate. Follow a regulated, approved waste disposalprogram. Never dispose of flammable and/or toxic solvents into a municipalsewage system.Site RequirementsThis section describes the requirements for power, space, and environment for operation of thesystem.<strong>EKSpot</strong> <strong>MALDI</strong> <strong>Spotter</strong> <strong>System</strong> Power RequirementsTable 1-2 Power Requirements for the <strong>EKSpot</strong> <strong>MALDI</strong> <strong>Spotter</strong> <strong>System</strong>Component Line Voltage Amperage<strong>EKSpot</strong> <strong>MALDI</strong> spotter 100 V and 240 V AC (47 Hz to 63 Hz) 4 AMatrix addition syringe pump 100 V and 240 V AC (47 Hz to 63 Hz) 1 ABench Space RequirementThe <strong>EKSpot</strong> <strong>MALDI</strong> spotter system requires clear bench space of at least the followingdimensions.• 21 inch (53 cm) wide × 15 inch (38 cm) deep × 25.5 inch (65 cm) high (allow excessspace for cables).Additional bench space is required for the LC system, the computer, keyboard, mouse, andmonitor.Environmental RequirementsThe instrument is designed to operate in an environment with ambient temperatures between15°C and 30°C (59°F to 86°F) and non-condensing humidity.<strong>Operator</strong> <strong>Guide</strong><strong>EKSpot</strong> <strong>MALDI</strong> <strong>Spotter</strong> <strong>System</strong>September 2012 7 of 38
Safety and Site Requirements<strong>EKSpot</strong> <strong>MALDI</strong> <strong>Spotter</strong> <strong>System</strong><strong>Operator</strong> <strong>Guide</strong>8 of 38 September 2012
Chapter 2.IntroductionOverviewThe <strong>Eksigent</strong> <strong>EKSpot</strong> <strong>MALDI</strong> spotter system is designed to allow the analyst to collect HPLCfractions on a <strong>MALDI</strong> plate for introduction to a <strong>MALDI</strong> mass spectrometer.The system consists of the following components:• <strong>Eksigent</strong> NanoLC system with AS-1 autosampler and <strong>Eksigent</strong> control software• <strong>EKSpot</strong> <strong>MALDI</strong> spotter with matrix addition pumpThis guide describes installation, calibration, and operation of the system.For additional information, refer to the operator guides provided by the manufacturers of thevarious components.<strong>EKSpot</strong> <strong>MALDI</strong> <strong>Spotter</strong> <strong>System</strong><strong>Operator</strong> <strong>Guide</strong>9 of 38 September 2012
Introduction<strong>EKSpot</strong> <strong>MALDI</strong> <strong>Spotter</strong> <strong>System</strong><strong>Operator</strong> <strong>Guide</strong>10 of 38 September 2012
Chapter 3.InstallationInstall the NanoLC <strong>System</strong>Refer to the installation guide for the LC system for detailed instructions.1. Carefully unpack the NanoLC system from the box and place the instrument on a labbench.2. Set up the computer and monitor next to the LC system and install the <strong>Eksigent</strong>control software.3. Connect the LC system to the computer using the LC system serial cable.4. Install all the necessary components and connect the LC system to a 100 psiregulated dry, clean gas (air or nitrogen) supply.5. Install the <strong>Eksigent</strong> control software from the installation CD.6. Launch the <strong>Eksigent</strong> control software and configure the instrument.7. Reinitialize the pressure transducers, verify the flow rate, and autotune the flowcontrollers to optimize the performance of the LC system.Install the NanoLC AS-1 AutosamplerRefer to the autosampler manual for more detailed instructions.1. Carefully unpack the NanoLC AS-1 autosampler from the box and place theautosampler on top of the LC instrument.2. Connect the autosampler and the LC system.3. Install all the necessary components for the autosampler.4. Power up the autosampler.5. Perform a syringe wash and make sure there are no bubbles in the syringe.6. Connect fused silica between the LC system and the autosampler.7. Select Serial on the menu to set the autosampler to serial mode.<strong>EKSpot</strong> <strong>MALDI</strong> <strong>Spotter</strong> <strong>System</strong><strong>Operator</strong> <strong>Guide</strong>11 of 38 September 2012
InstallationInstall the <strong>EKSpot</strong> <strong>MALDI</strong> <strong>Spotter</strong> <strong>System</strong>1. Place the spotter to the right of the NanoLC system.Figure 3-1Position of the <strong>EKSpot</strong> <strong>MALDI</strong> spotter and the NanoLC system2. Assemble the spotter and place it on the base plate.Refer to the PAL manual for more detailed instructions.3. Secure the spotter to the base plate by tightening the two set screws on each side ofthe base plate, if necessary.Note: The set screws are for alignment purposes only. They do notsecure the spotter to the base plate.4. Install the stack holder to the right of the spotter as shown in Figure 3-1.5. Connect the spotter to the computer.Use COM port 1 to minimize communication errors.<strong>EKSpot</strong> <strong>MALDI</strong> <strong>Spotter</strong> <strong>System</strong><strong>Operator</strong> <strong>Guide</strong>12 of 38 September 2012
InstallationFigure 3-2Position of the <strong>EKSpot</strong> <strong>MALDI</strong> spotter legs and stack holder6. Power up the spotter and make sure it is loaded with firmware version 3.0.2 or higher.If not, load the firmware using the PAL Loader software from the CTC PAL installationdisk.7. Install the Object Manager software from the CTC PAL installation disk.8. Start the Object Manager software and find the directory where the <strong>MALDI</strong> OptionsObject Lists is stored (typically C:\Program Files\<strong>Eksigent</strong> NanoLC\settings\ekspot).9. Use the Object Manager software to load the following objects to the instrument:• PAL <strong>MALDI</strong>Opt• PAL Stack4DW_1_<strong>MALDI</strong> or PAL Stack8MT_1_<strong>MALDI</strong> (or the stack holder that isinstalled)• Target plates adapter (Waters etc.)Install the Spotting Tip1. Connect the capillary from the column and the matrix addition pump to the end of theNanoTight Y-connector with ring marks.2. Connect the spotting tip to the other end the Y-connector.3. Install the base of the Y-connector holder to the CTC syringe carrier.<strong>Operator</strong> <strong>Guide</strong><strong>EKSpot</strong> <strong>MALDI</strong> <strong>Spotter</strong> <strong>System</strong>September 2012 13 of 38
InstallationThe magnet in the syringe carrier will hold it in place.4. Place the spotting tip through the supporting tubing in the needle guide and securethe Y-connector to the base using the holder clamp.Install the Matrix Addition Syringe Pump1. Install the vial holder on the syringe pump (Figure 3-3).Figure 3-3Matrix addition syringe pump and vial holder2. Install the syringe in the syringe drive.3. Connect the intake tubing to the bottom port of the valve. Place the other end oftubing in the matrix vial.4. Connect the waste tubing to the top port of the valve. Place the other end of tubing inthe waste vial.5. Connect the spotter connecting capillary (360 µm OD x 75 µm ID) to the middle portof the valve.6. Connect the RS-232 cable between the computer and the matrix addition syringepump.7. Connect the power supply to the pump and power up the pump.<strong>EKSpot</strong> <strong>MALDI</strong> <strong>Spotter</strong> <strong>System</strong><strong>Operator</strong> <strong>Guide</strong>14 of 38 September 2012
Chapter 4.Configure the Software and Initialize the<strong>System</strong><strong>Eksigent</strong> Control SoftwareThe <strong>Eksigent</strong> control software can simultaneously control the LC system, the autosampler, the<strong>EKSpot</strong> <strong>MALDI</strong> spotter and the matrix addition syringe pump. Use the Run Manager window tocreate autosampler and LC methods, as well as to set the spotting parameters. The instructionsbelow assume the LC system and the NanoLC AS-1 autosampler are already configured.Configure the <strong>EKSpot</strong> <strong>MALDI</strong> <strong>Spotter</strong> <strong>System</strong>1. Power up the spotter and the matrix addition syringe pump.2. Launch the <strong>Eksigent</strong> control software.The Acquisition window appears.Figure 4-1<strong>Eksigent</strong> control software—Acquisition window<strong>EKSpot</strong> <strong>MALDI</strong> <strong>Spotter</strong> <strong>System</strong><strong>Operator</strong> <strong>Guide</strong>15 of 38 September 2012
Configure the Software and Initialize the <strong>System</strong>3. Click Run Manager.The Run Manager window appears (Figure 4-2).Figure 4-2<strong>Eksigent</strong> control software—Run Manager window4. Select Devices > <strong>Spotter</strong> Type > ekspot.This initializes the spotter and the matrix addition syringe pump.Note: If there is a communication error between the LC and the spotter, awarning dialog indicating the nature of the problem is presented (Figures4-3 through 4-5). It is necessary to remedy the situation before continuing.Figure 4-3Communication Failure dialogFigure 4-4Error Warning dialog<strong>EKSpot</strong> <strong>MALDI</strong> <strong>Spotter</strong> <strong>System</strong><strong>Operator</strong> <strong>Guide</strong>16 of 38 September 2012
Configure the Software and Initialize the <strong>System</strong>Figure 4-5 <strong>Spotter</strong> Device Control dialog5. Click OK to return to the Run Manger window.6. Select Device > <strong>Spotter</strong> Device Settings.The ekspot Configuration dialog appears.Figure 4-6ekspot Configuration dialog—Configuration tab<strong>Operator</strong> <strong>Guide</strong><strong>EKSpot</strong> <strong>MALDI</strong> <strong>Spotter</strong> <strong>System</strong>September 2012 17 of 38
Configure the Software and Initialize the <strong>System</strong>7. In the Configuration tab (Figure 4-6), click Arm Config.The Autosampler Configuration dialog appears (Figure 4-7).Figure 4-7Autosampler Configuration dialog8. In the Comm Port field in the Comm Port Setup area, select the COM portconnected to the <strong>EKSpot</strong> <strong>MALDI</strong> spotter.9. Click OK to return to the ekspot Configuration dialog.This re-initializes the spotter (Figure 4-8).Figure 4-8Initializing PAL <strong>Spotter</strong> dialog<strong>EKSpot</strong> <strong>MALDI</strong> <strong>Spotter</strong> <strong>System</strong><strong>Operator</strong> <strong>Guide</strong>18 of 38 September 2012
10. Click Syringe Config.Configure the Software and Initialize the <strong>System</strong>The Syringe Pump Configuration dialog appears (Figure 4-9).Figure 4-9 Syringe Pump Configuration dialog—Syringe 1 tab dialog11. In the Com Port field, select the COM port connected to the syringe pump.12. In the Syringe Volume field, select 50 µL.13. Clear the CleanUp Method check box.<strong>Operator</strong> <strong>Guide</strong><strong>EKSpot</strong> <strong>MALDI</strong> <strong>Spotter</strong> <strong>System</strong>September 2012 19 of 38
Configure the Software and Initialize the <strong>System</strong>14. Click the Valve tab and select Int. Three Port in the Valve Type field (Figure 4-10).Figure 4-10 Syringe Pump Configuration Dialog—Valve tab15. Select 1 for the Initialization Port.16. Type the following in the Valve Port Naming area:• For Port #1, type Matrix• For Port #2, type <strong>Spotter</strong>• For Port #3, type Waste17. Click OK to return to the ekspot Configuration dialog and re-initialize the pump.Figure 4-11 Initializing matrix addition syringe pump dialog18. If the pump won’t initialize, close the Run Manager window.<strong>EKSpot</strong> <strong>MALDI</strong> <strong>Spotter</strong> <strong>System</strong><strong>Operator</strong> <strong>Guide</strong>20 of 38 September 2012
Configure the Software and Initialize the <strong>System</strong>19. Click Run Manager in the Acquisition window to re-start the Run Manager.20. If there is still a communication error, check the address switch on the syringe pump.It should match the Module ID in the Syringe Pump Configuration.The address switch of the syringe pump is located at the back of the pump, which canbe found when the cover of the pump is off (Figure 4-12).If needed, edit the Module ID in the Syringe Pump Configuration dialog to matchnumber of the address switch.Figure 4-12 Location of the address selection switch of the syringe pump21. Click OK to re-initialize the pump.<strong>Operator</strong> <strong>Guide</strong><strong>EKSpot</strong> <strong>MALDI</strong> <strong>Spotter</strong> <strong>System</strong>September 2012 21 of 38
Configure the Software and Initialize the <strong>System</strong>The right side of the Configuration tab in the ekspot Configuration dialog (Figure 4-13)should indicate that all devices are ready.Figure 4-13 ekspot Configuration dialog—Configuration tab<strong>EKSpot</strong> <strong>MALDI</strong> <strong>Spotter</strong> <strong>System</strong><strong>Operator</strong> <strong>Guide</strong>22 of 38 September 2012
Chapter 5.Operate the <strong>EKSpot</strong> <strong>MALDI</strong> <strong>Spotter</strong><strong>System</strong>Purge the SyringeBefore spotting, it is important to clean the syringe and eliminate any bubbles in the syringe1. Click the Direct Control tab in the ekspot Configuration dialog (Figure 5-1).2. In the Purge Syringe area, type the Flowrate (uL/min).It is recommended that the syringe is purged at 1200 µL/min or less.Figure 5-1 ekspot Configuration dialog—Direct Control tab dialog3. Set the Number of Cycles to purge the syringe.4. Click Purge Syringe to start.<strong>EKSpot</strong> <strong>MALDI</strong> <strong>Spotter</strong> <strong>System</strong><strong>Operator</strong> <strong>Guide</strong>23 of 38 September 2012
Operate the <strong>EKSpot</strong> <strong>MALDI</strong> <strong>Spotter</strong> <strong>System</strong>Set the PreFlush OptionThe preflush option instructs the system to flush the matrix addition capillary at a higher flow ratebefore each run1. In the Configuration tab in the ekspot Configuration dialog (Figure 5-2), select theEnabled check box to enable the preflush option.Figure 5-2ekspot Configuration dialog—Configuration tab2. Type a value (in µL/min) in the Flowrate field for the preflush flow rate.A flow rate of 20 µL/min is recommended.Flow rates higher than 20 µL/min may generate high back pressure and can causeleakage in the syringe pump valve.3. Type a value (in minutes) in the Duration field for the preflush duration.Be sure to set the duration long enough to completely flush the matrix additioncapillary.<strong>EKSpot</strong> <strong>MALDI</strong> <strong>Spotter</strong> <strong>System</strong><strong>Operator</strong> <strong>Guide</strong>24 of 38 September 2012
Operate the <strong>EKSpot</strong> <strong>MALDI</strong> <strong>Spotter</strong> <strong>System</strong>7. Click F4 to return to the main menu.8. Click OK in the ekspot Calibration dialog to re-initialize the spotter with the newconfiguration if this is the last calibration to be done.Note: It is important to calibrate the Home Position after changing thespotting tip.Calibrate the Tray Holder1. Make sure there is no target adapter in the tray holder.2. Using the keypad terminal, go to Menu > F3 > Setup > Object > Trayholder >Stack1.3. Open the appropriate drawer for the calibration.• 4DW stack holder—open the first drawer• 8MT stack holder—open the second drawer4. Select Clear Position (F2) then Z. This is to avoid collision between needle guideand the tray holder. (Skip this step if the Z position is already at 0 mm)5. Select Check Position (F1) to move spotter to preset position.6. Adjust the X, Y and Z positions until the needle guide is accurately placed in the traycalibration hole.Make sure the bottom of the needle guide (not the spotting tip) is flushed with thebottom surface of the tray.7. Press Esc twice to return to the Objects menu.8. Click OK in the ekspot Calibration dialog to re-initialize the spotter with the newconfiguration if this is the last calibration to be done.<strong>EKSpot</strong> <strong>MALDI</strong> <strong>Spotter</strong> <strong>System</strong><strong>Operator</strong> <strong>Guide</strong>26 of 38 September 2012
Operate the <strong>EKSpot</strong> <strong>MALDI</strong> <strong>Spotter</strong> <strong>System</strong>Calibrate the Spotting Tip for the <strong>MALDI</strong> Option (3-position Calibration)The plate number assignments for the targets are shown in Figure 5-4 (4DW stack holder) andFigure 5-5 (8MT stack holder).Figure 5-4 Plate assignment on the keypad terminal for the 4DW stack holderFigure 5-5 Plate assignment on the keypad terminal for the 8MT stack holder1. Place the target on the target holder in the tray.2. Using the soft key on the keypad terminal, go to Menu > Utilities > Trays.3. Select the tray that holds the target.4. Select the type of target in the tray.5. Use F3 to move the spotter to the first position.6. Adjust Offset X and Offset Y to move the spotting tip to the center of spot 1.<strong>Operator</strong> <strong>Guide</strong><strong>EKSpot</strong> <strong>MALDI</strong> <strong>Spotter</strong> <strong>System</strong>September 2012 27 of 38
Operate the <strong>EKSpot</strong> <strong>MALDI</strong> <strong>Spotter</strong> <strong>System</strong>7. Adjust Offset Z to move the spotting tip down (in the Z-direction) until it touches thesurface of the target.8. Use F3 to move the spotter to the spotting position at the end of the first row.9. Adjust dzRow until the spotting tip touches the surface of the target, and then pressEnter.10. Use F3 to move the spotter to the spotting position at the end of the last row.11. Adjust dzCol until the spotting tip touches the surface of the target, and then pressEnter.12. Press Esc to return to previous dialog.13. Repeat steps 1 to 10 for all trays that will be used.14. Click OK in the ekspot Calibration dialog to re-initialize the spotter with the newconfiguration if this is the last calibration to be done.Calibrate the Spotting Tip for Fraction Collection (1-position Calibration)1. Place a microtiter plate in the tray.2. Using the soft key on the keypad terminal, go to Menu > Utilities > Trays.3. Select the tray that holds the microtiter plate.4. Select the type of plate in the tray.5. Use F3 to move the spotter to the first position.6. Adjust Offset X and Offset Y to move the spotting tip to the center of spot 1.7. Adjust Offset Z to move the spotting tip down (in the Z-direction) to the surface (notthe well) of the plate.It is unnecessary to calibrate the position of the other wells.8. Press F1 to check the other well positions or Esc to return to previous dialog.9. Repeat steps 1 to 8 for all trays that will be used.10. Click OK in the ekspot Calibration dialog to re-initialize the spotter with the newconfiguration if this is the last calibration to be done.<strong>EKSpot</strong> <strong>MALDI</strong> <strong>Spotter</strong> <strong>System</strong><strong>Operator</strong> <strong>Guide</strong>28 of 38 September 2012
Create a New Tray Type (Optional)Operate the <strong>EKSpot</strong> <strong>MALDI</strong> <strong>Spotter</strong> <strong>System</strong>Both regular and staggered pattern tray types can be used by the <strong>EKSpot</strong> <strong>MALDI</strong> spotter (Figure5-6).Row LengthRow LengthCol Length YCol Length YRegularPatternStaggeredPatternFigure 5-6 Spot patterns—regular (left) and staggered (right)If a blank target with no pre-etched spots on the target plate is used, different tray types withvarious number of spots can be created.1. Go to Menu > F3 > Setup > Objects > Tray Types.2. Set the tray type.• If available, select a pre-existing tray type with geometry similar to the new traytype. Select Copy Tray Type and give a new name to the new tray type.• If not, select Insert Tray Type and give a new name to the new tray type.3. As needed, change Row Length X.4. As needed, change Col Length Y.5. Select the number of spots per row in Spl Per Row.6. Select the number of spots per column in Spl Per Col.7. Select the pattern of spots: Regular or Staggered.8. Press Esc twice to return to the Objects menu.9. Press OK in the ekspot Calibration dialog to re-initialize the spotter with the newconfiguration if this is the last calibration to be done.Change the Spotting Tip1. Click Change Tip in the Configuration tab of the ekspot Configuration dialog(Figure 5-2) to move the spotter out of the wash vial.2. Loosen the screws that secure the holder clamp.<strong>Operator</strong> <strong>Guide</strong><strong>EKSpot</strong> <strong>MALDI</strong> <strong>Spotter</strong> <strong>System</strong>September 2012 29 of 38
Operate the <strong>EKSpot</strong> <strong>MALDI</strong> <strong>Spotter</strong> <strong>System</strong>3. Carefully remove the spotting tip from the supporting tubing.4. Change the spotting tip by loosening the nut that holds the spotting tip to theY-connector.5. Replace the tip, then place the spotting tip through the supporting tubing in the needleguide and secure the Y-connector to the vase using the holder clamp.6. Click OK in the Change Tip dialog (Figure 5-7).Figure 5-7Change Tip dialogThe spotter tip returns to the home position.<strong>EKSpot</strong> <strong>MALDI</strong> <strong>Spotter</strong> <strong>System</strong><strong>Operator</strong> <strong>Guide</strong>30 of 38 September 2012
Chapter 6.Set up the Run Manager WindowUse the Run Manager window (Figure 6-1) to set up methods for the autosampler, the LCsystem, and the <strong>EKSpot</strong> <strong>MALDI</strong> spotter.Figure 6-1 Run Manager window1. In the Run Manager window (Figure 6-1), select all instruments to be controlled usingthe <strong>Eksigent</strong> control software:• Devices > Autosampler Type > <strong>Eksigent</strong> NanoLC AS-1• Devices > <strong>Spotter</strong> Type > ekspot<strong>EKSpot</strong> <strong>MALDI</strong> <strong>Spotter</strong> <strong>System</strong><strong>Operator</strong> <strong>Guide</strong>31 of 38 September 2012
Set up the Run Manager Window2. Select Edit > Choose Columns (Figure 6-2).Figure 6-2 Choose Columns dialog3. Select the following columns to be shown in the Run Manager window.Refer to Table 6-1 for a description of each column.• Autosampler Method• Autosampler Tray• Autosampler Vial• LC Method• LC Channel• LC Flowrate (nL/min)• <strong>Spotter</strong> Plate #• <strong>Spotter</strong> Start Row• <strong>Spotter</strong> Time/Drop (ms)• <strong>Spotter</strong> Time (min)• <strong>Spotter</strong> Matrix Flow (µL/min)• Other Status<strong>EKSpot</strong> <strong>MALDI</strong> <strong>Spotter</strong> <strong>System</strong><strong>Operator</strong> <strong>Guide</strong>32 of 38 September 2012
Set up the Run Manager WindowTable 6-1ColumnAutosampler MethodAutosampler TrayAutosampler VialLC MethodLC ChannelLC Flowrate (nL/min)<strong>Spotter</strong> Plate #<strong>Spotter</strong> Start Row<strong>Spotter</strong> Time/Drop (s)<strong>Spotter</strong> Time (min)Columns Available in the Run Table<strong>Spotter</strong> Matrix Flow (µL/min)Other StatusFunctionSelects the autosampler method to be used in the run.Double-click the cell to activate the menu, and then select theautosampler method.Selects the autosampler tray where the sample vial is placed.Default tray is 1.Selects the sample vial used in the run.Double-click the cell to activate the menu, and then select thevial. As an alternative, click the vial holder picture to select thevial.Selects the LC method to be used in the run.Double-click the cell to activate the menu, and then select theLC method.Selects the LC channel where the method is going to be run.Channel 1 is the high flow channel and Channel 2 is the lowflow channel.Double-click the cell to activate the menu, and then select theLC Channel.Sets the LC flow rate.If this cell is blank, the flow rate defined in the LC method isused.Selects the target plate for spotting.Double-click the cell to activate the menu, and then select theplate number. Refer to Figures 5-4 and 5-5 for plate numberassignment.Selects the row where the spotting is to start.Sets the size/duration of the spot in msec.Sets the time interval in the LC method for spotting.It is possible to have multiple intervals in the same LC run. Forexample, if 0-5 min and 10-23 min are entered in the column,the spotter will spot from 0 min to 5 min and from 10 min to23 min in the LC method.Sets the matrix flow rate in µL/min.Shows the status of the run.<strong>Operator</strong> <strong>Guide</strong><strong>EKSpot</strong> <strong>MALDI</strong> <strong>Spotter</strong> <strong>System</strong>September 2012 33 of 38
Set up the Run Manager WindowFigure 6-3Plate assignment in Run Manager window for 4DW stack holderNote: If the 8MT stack holder is installed, Figure 6-4 shows the additionalplate number assignments.Figure 6-4Plate assignment in Run Manager window for 8MT stack holder4. Type the appropriate information in the various columns of the Run Manager windowwith the autosampler, LC, and spotter methods.5. Select the desired Preflush option in the ekspot Configuration dialog.6. In the Run Sequence area of the Run Manager window, select Sequential(Figure 6-5).7. Ensure that Flush/Equilibrate when Idle is cleared (Figure 6-5).This will ensure the drawer remains closed at the end of the run.<strong>EKSpot</strong> <strong>MALDI</strong> <strong>Spotter</strong> <strong>System</strong><strong>Operator</strong> <strong>Guide</strong>34 of 38 September 2012
Set up the Run Manager Window8. Click Start to initiate operation.Figure 6-5Run Sequence area of the Run Manager window<strong>Operator</strong> <strong>Guide</strong><strong>EKSpot</strong> <strong>MALDI</strong> <strong>Spotter</strong> <strong>System</strong>September 2012 35 of 38
Set up the Run Manager Window<strong>EKSpot</strong> <strong>MALDI</strong> <strong>Spotter</strong> <strong>System</strong><strong>Operator</strong> <strong>Guide</strong>36 of 38 September 2012
Index11-position Calibration, 2833-position Calibration, 27AAcquisition Window, 16Address Selection Switch, Matrix AdditionSyringe Pump, 21Autosampler Configuration Dialog, 18Autosampler Method, 7, 33Autosampler Tray, 33Autosampler Vial, 33BBench Space Requirement, 7CCalibrationHome Position, 25Spotting Tip, 27, 28Tray Holder, 26Change Tip Dialog, 30Communication Erors, 16Configuring Software, 15E<strong>Eksigent</strong> Control Software, 15Installing, 11ekspot Configuration DialogConfiguration Tab, 17Direct Control Tab, 23<strong>EKSpot</strong> <strong>MALDI</strong> spotter systemConfiguration, 15Installing, 12Safety Practices, 6<strong>EKSpot</strong> <strong>MALDI</strong> <strong>Spotter</strong> <strong>System</strong>Calibration, 25Environmental Requirements, 7FFraction Collection, Calibrating <strong>Spotter</strong>, 28Fraction Collector Option, Selecting, 25HHome Position, Calibrating, 25IInitializing the <strong>System</strong>, 15Installation, 11LLC Channel, 33LC Flowrate, 33LC Method, 33MMatrix Addition Syringe PumpAddress Selection Switch, 21Installing, 14NNanoLC AS-1 Autosampler, Installing, 11NanoLC <strong>System</strong>, Installing, 11New Tray Type, Creating, 29OOther Status, 33PPlate Assignment4DW Stack Holder, 27, 34<strong>EKSpot</strong> <strong>MALDI</strong> <strong>Spotter</strong> <strong>System</strong><strong>Operator</strong> <strong>Guide</strong>37 of 38 September 2012
Index8MT Stack Holder, 27, 34Power Requirements, 7Preflush Option, Selecting, 24Purging the Syringe, 23RRequirementsBench Space, 7Environmental, 7Power, 7Site, 7Run Manager Window, 16, 31Columns in Run Table, 33Plate Assignment for 4DW Stack Holder,34Plate Assignment for 8MT Stack Holder,34SSafety, 5Safety Symbols and Conventions, 5Site Requirements, 7<strong>Spotter</strong> Matrix Flow, 33<strong>Spotter</strong> Plate #, 33<strong>Spotter</strong> Start Row, 33<strong>Spotter</strong> Time/Drop, 33Spotting TipCalibrating, 27, 28Changing, 29Installing, 13Syringe Pump Configuration DialogSyringe 1 Tab, 19Valve Tab, 20Syringe, Purging, 23<strong>System</strong> Components, 9TTray Holder, Calibrating, 26<strong>EKSpot</strong> <strong>MALDI</strong> <strong>Spotter</strong> <strong>System</strong><strong>Operator</strong> <strong>Guide</strong>38 of 38 September 2012


