

PT-AE8000U PT-AT6000E PT-AE8000EA PT ... - Panasonic
PT-AE8000U PT-AT6000E PT-AE8000EA PT ... - Panasonic
PT-AE8000U PT-AT6000E PT-AE8000EA PT ... - Panasonic

You also want an ePaper? Increase the reach of your titles
YUMPU automatically turns print PDFs into web optimized ePapers that Google loves.
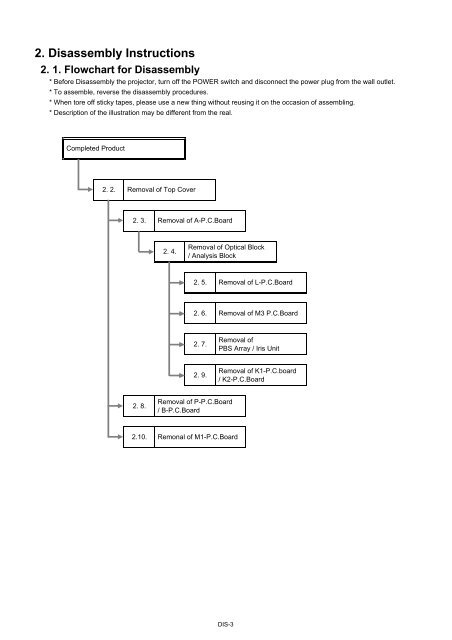
2. Disassembly Instructions2. 1. Flowchart for Disassembly* Before Disassembly the projector, turn off the POWER switch and disconnect the power plug from the wall outlet.* To assemble, reverse the disassembly procedures.* When tore off sticky tapes, please use a new thing without reusing it on the occasion of assembling.* Description of the illustration may be different from the real.Completed Product2. 2. Removal of Top Cover2. 3.Removal of A-P.C.Board2. 4.Removal of Optical Block/ Analysis Block2. 5. Removal of L-P.C.Board2. 6. Removal of M3 P.C.Board2. 7.Removal ofPBS Array / Iris Unit2. 9.Removal of K1-P.C.board/ K2-P.C.Board2. 8.Removal of P-P.C.Board/ B-P.C.Board2.10. Remonal of M1-P.C.BoardDIS-3


