

PT-AE8000U PT-AT6000E PT-AE8000EA PT ... - Panasonic
PT-AE8000U PT-AT6000E PT-AE8000EA PT ... - Panasonic
PT-AE8000U PT-AT6000E PT-AE8000EA PT ... - Panasonic

You also want an ePaper? Increase the reach of your titles
YUMPU automatically turns print PDFs into web optimized ePapers that Google loves.
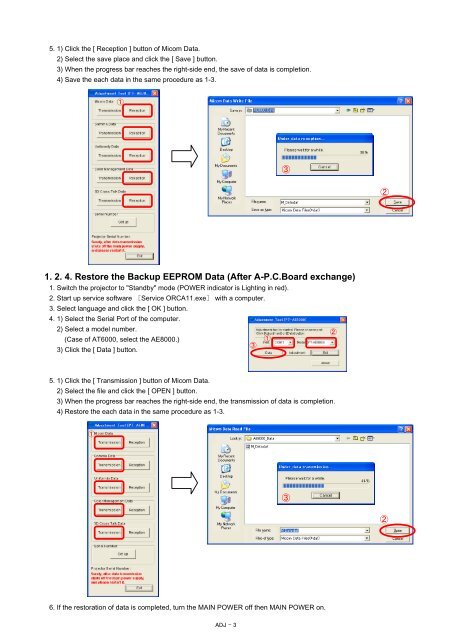
5. 1) Click the [ Reception ] button of Micom Data.2) Select the save place and click the [ Save ] button.3) When the progress bar reaches the right-side end, the save of data is completion.4) Save the each data in the same procedure as 1-3.1321. 2. 4. Restore the Backup EEPROM Data (After A-P.C.Board exchange)1. Switch the projector to "Standby" mode (POWER indicator is Lighting in red).2. Start up service software [Service ORCA11.exe] with a computer.3. Select language and click the [ OK ] button.4. 1) Select the Serial Port of the computer.2) Select a model number.(Case of AT6000, select the AE8000.)133) Click the [ Data ] button.25. 1) Click the [ Transmission ] button of Micom Data.2) Select the file and click the [ OPEN ] button.3) When the progress bar reaches the right-side end, the transmission of data is completion.4) Restore the each data in the same procedure as 1-3.1326. If the restoration of data is completed, turn the MAIN POWER off then MAIN POWER on.ADJ - 3


