LPS Instruction Manual - HygroMatik
LPS Instruction Manual - HygroMatik
LPS Instruction Manual - HygroMatik

You also want an ePaper? Increase the reach of your titles
YUMPU automatically turns print PDFs into web optimized ePapers that Google loves.
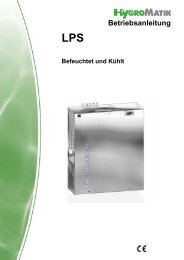
Operating manual<strong>LPS</strong>Humidifies and CoolsÁ<strong>LPS</strong>.Ä4-&3Ö.ENhÈ<strong>LPS</strong>.20130619.EN
Certain computer programs contained in this product [or device] were developed by <strong>HygroMatik</strong>GmbH ("the Work(s)").Copyright © <strong>HygroMatik</strong> GmbH [2013.06.19]<strong>LPS</strong>All Rights reserved.<strong>HygroMatik</strong> GmbH grants the legal user of this product [or device] the right to use the Work(s)solely within the scope of the legitimate operation of the product [or device]. No other right isgranted under this licence. In particular and without prejudice to the generality of the foregoing,the Work(s) may not be used, sold, licensed, transferred, copied or reproduced in whole or in partor in any manner or form other than as expressly granted here without the prior written consent of<strong>HygroMatik</strong> GmbH.Information in this manual is subject to change or alteration without prior notice.Caution: Voltage: All work must be carried out by specialists. All electrical installationwork and work on the device's electrical components must be carried out byauthorised electricians. Switch off devices and disconnect them from the mains supplyfirst!Page 2
1. Introduction ....................................................................................................................... 51.1 Typographic markings .......................................................................................................51.2 Documentation .................................................................................................................. 51.3 Intended use ..................................................................................................................... 62. Safety instructions ............................................................................................................ 82.1 General information ........................................................................................................... 82.2 Operational safety instructions .......................................................................................... 82.3 Disposal upon disassembly ............................................................................................... 93. Transport ............................................................................................................................ 103.1 General information ........................................................................................................... 103.2 Packaging .......................................................................................................................... 103.3 Temporary storage ............................................................................................................ 103.4 Inspecting for correctness and completeness ................................................................... 103.5 Scope of delivery ............................................................................................................... 104. Function and design .........................................................................................................114.1 Functioning ........................................................................................................................ 114.2 Design and process ........................................................................................................... 114.2.1 Pump group .................................................................................................................... 124.2.2 Dimension drawing of <strong>HygroMatik</strong> <strong>LPS</strong> nozzle system .................................................. 124.2.3 Vortex modules .............................................................................................................. 134.2.4 Atomising nozzles .......................................................................................................... 144.2.5 Droplet separators (optional) .......................................................................................... 154.2.6 Humidification section .................................................................................................... 154.3 Partial and Full-Load ......................................................................................................... 165. Connnections .................................................................................................................... 175.1 Water ................................................................................................................................. 175.2 Waste water ...................................................................................................................... 175.3 Pressure water .................................................................................................................. 175.4 Electrical ............................................................................................................................ 186. Interfaces to the <strong>HygroMatik</strong> nozzle system <strong>LPS</strong> ........................................................... 196.1 Air ...................................................................................................................................... 196.2 Humidification chamber .....................................................................................................197. Mechanical assembly ........................................................................................................ 217.1 Overview of the humidification chamber ........................................................................... 217.2 Vortex wall module assembly ............................................................................................ 227.3 Assembling the vortex module wall ................................................................................... 227.3.1 Guide rails for the vortex module wall: ........................................................................... 227.3.2 Examplary design of guide rails for a vortex module wall .............................................. 237.3.3 Side rails for the vortex module wall: .............................................................................. 237.3.4 Assembling of the side rails for the vortex module wall .................................................. 237.4 Installation of the nozzles, distributor pipe and tubing ....................................................... 247.4.1 Nozzle Installation: ......................................................................................................... 257.4.2 Assembling the distributor pipe ...................................................................................... 26Page 3
7.4.3 Piping ............................................................................................................................. 277.5 Assembling the droplet separators .................................................................................... 327.5.1 Examplary design of guide rails for the droplet separators ............................................ 327.6 Pump station wall mounting .............................................................................................. 357.7 Checking the installation ................................................................................................... 368. Dimensions - Pump Station .............................................................................................. 379. Water connection .............................................................................................................. 389.1 Overview Water connection .............................................................................................. 389.2 Water supply ..................................................................................................................... 399.3 Drainage ............................................................................................................................ 409.3.1 Water drain for the humidification chamber .................................................................... 409.4 Water Quality ..................................................................................................................... 419.5 Inspection the water supply ............................................................................................... 4110. Hygiene ............................................................................................................................ 4210.1 Ensuring hygiene (VDI 6022) .......................................................................................... 4210.2 Automatic flushing ........................................................................................................... 4211. Electrical connection ......................................................................................................4311.1 Connection data .............................................................................................................. 4411.2 System enabling / Safety chain ....................................................................................... 4411.3 Circuit diagram ................................................................................................................ 4511.4 Inspecting the electrical installation ................................................................................. 4712. Commissioning ............................................................................................................... 4813. Maintenance ..................................................................................................................... 4913.1 Maintenance activities ..................................................................................................... 4913.1.1 Inspection / replacement of the net-based water filter .................................................. 5013.1.2 Cleaning the atomizer nozzle ....................................................................................... 5113.1.3 Cleaning the droplet separators ................................................................................... 5213.1.4 Cleaning the vortex module wall .................................................................................. 5213.1.5 Cleaning the humidification chamber ........................................................................... 5314. Control System ................................................................................................................ 5414.1 Control and speed regulation .......................................................................................... 5414.1.1 Full load and part load .................................................................................................. 5514.1.2 Summer / winter mode ................................................................................................. 5514.2 Description of the programmable controller (PLC) .......................................................... 5614.2.1 General description ...................................................................................................... 5614.2.2 Menu ............................................................................................................................ 5814.2.3 Overview of error reports .............................................................................................. 6115. EC declaration of conformity ......................................................................................... 6316. Spare parts ....................................................................................................................... 6417. Fax Form - Order for spare parts ................................................................................... 6618. Technical Specifications ................................................................................................ 6719. Plant scheme ................................................................................................................... 68Page 4
1. IntroductionDear Customer,Thank you for purchasing a <strong>LPS</strong> nozzle system.The <strong>HygroMatik</strong> <strong>LPS</strong> nozzle system corresponds to the currentstate of the art. It features exceptional operational reliability,ease of use and cost-effectiveness.To ensure the proper, safe and economical operation of your<strong>HygroMatik</strong> <strong>LPS</strong> nozzle system, please read this operating manual.Only use the <strong>HygroMatik</strong> <strong>LPS</strong> nozzle system if it is in perfectcondition and only for its intended purpose, considering allsafety and risk aspects as well as all instructions in this manual.If you have further questions please contact us:Tel.: +49 (0)4193 895 0 (Switchboard)Tel.: +49 (0)4193 895 293 (Technical Hotline)Fax: +49 (0)4193 895 33Email: hot1@<strong>HygroMatik</strong>.dePlease have your device data ready for queries or spare partorders!1.1 Typographic markings• lists with items beginning with bullets: general lists» lists with items beginning with arrows: work or operatingsteps which should or must be carried out in the specifiedorder installation steps which must be checkeditalics figure and plan names1.2 DocumentationStoragePlease keep this operating manual in a safe place where it isaccessible at all times. If you sell the product, be sure to includethis manual. Please contact <strong>HygroMatik</strong> if the documentation islost.Language versionsThis operating manual is available in different languages. Pleasecontact your <strong>HygroMatik</strong> dealer or <strong>HygroMatik</strong> for details.Page 5
1.3 Intended useThe <strong>HygroMatik</strong> <strong>LPS</strong> nozzle system is used for air humidificationand cooling with desalinated water having a conductivity of 5-20µS/cm. The feed water should have a temperature of 5-15°C.Caution: Proper use includes fulfilment of the assembly, disassembly,reassembly, start-up, operating and maintenance conditionsspecified by us as well as disposal measures.Only appointed qualified staff may work on or with the system.Persons transporting or working on or with the system musthave read and understood the relevant parts of this operatingmanual, particularly the 'Safety instructions' section. Staff mustalso be informed of possible hazards by the operating company.Please keep a copy of the operating manual at the locationwhere the device is being used.The <strong>HygroMatik</strong> <strong>LPS</strong> nozzle system is not frost-proofed and notsuitable for outdoor installation.The room temperature should be between 5 and 40°C.At an altitude of over 1000 meters please contact your <strong>HygroMatik</strong>dealer or <strong>HygroMatik</strong> for details.Applications:The <strong>HygroMatik</strong> <strong>LPS</strong> nozzle system has a wide range of applications.These systems are used wherever low-energy adiabatichumidification or cooling or systems with high-precision controlare needed. They can be found in such places as offices, storerooms,production halls, clean rooms, hospitals and concerthalls.Note: Components installed in ventilation and air-conditioningsystems must be suitable for the intended use; i.e. they must becorrosion-resistant, easy to clean, accessible and hygienic. Furthermore,they must not facilitate growth of micro-organisms.Improper use:Hardware and software may not be modified.Page 6
Exemptions of usage:The <strong>HygroMatik</strong> nozzle system <strong>LPS</strong> is not frost resistant and isunsuitable for outdoor installation.The <strong>HygroMatik</strong> nozzle system <strong>LPS</strong> PLC control may not bedeviate from the preset programmed On-/Off Control (or onlyafter consultation with <strong>HygroMatik</strong>).The default constant pressure level of the <strong>HygroMatik</strong> <strong>LPS</strong> nozzlesystem may not be changed (or only after consultation with<strong>HygroMatik</strong>).The <strong>HygroMatik</strong> <strong>LPS</strong> nozzle system may only be used for thepurpose of cold-water cooling after consultation with <strong>HygroMatik</strong>.The <strong>HygroMatik</strong> <strong>LPS</strong> nozzle system or may not be used in a verticalflow (or only after consultation with <strong>HygroMatik</strong>).Page 7
2. Safety instructions2.1 General informationThe safety instructions are prescribed by law. They are intendedto ensure health and safety at work and accident prevention.Warnings and safety symbolsThe following safety symbols are used in this manual to indicatehazard and risk warnings. Please familiarise yourself with thesesymbols.Caution: Failure to heed this warning may result in injury or dangerto life and limb and/or damage to the device.Caution: Voltage: Dangerous electrical voltage! Failure to heedthis warning may result in injury or danger to life and limb.Note: indicates materials and consumables which must be handledand/or disposed of in accordance with statutory requirements.Note: precedes explanations for or cross-references to otherplaces in the text.2.2 Operational safety instructionsGeneral informationObserve all safety instructions and warnings found on the system.If malfunctions occur switch the system off immediately andsecure it to prevent it from being switched on. Eliminate the malfunctionsimmediately.After maintenance work has been carried out, expert staff mustensure that the system is safe to operate.Only use original spare parts.National regulations beyond the scope of this manual apply withoutrestriction for operation of this device.During operation of the <strong>HygroMatik</strong> <strong>LPS</strong> nozzle system it is notallowed to stay in the humidification chamber.The desalinated water used for feeding the <strong>HygroMatik</strong> <strong>LPS</strong>nozzle systemis unsuitable for drinking.Work on the high pressure components of the nozzle system isonly allowed if the unit is disconnected from the power supply.This unit is not designed for the use by persons (also children)with limited physical, sensory and mental abilities - or withoutknowledge and experience. Unless they are supervised ortrained by a person, who is responsible for their safety.Page 8
Supervise children in order to ensure that they will not play withthe unit.Accident prevention regulationsCaution: Heed the HSW (Health and Safety at Work) regulationsfor electrical installations and equipment (VBG4/BGVA3).By doing so you protect yourself and others from harm.Operating the <strong>HygroMatik</strong> <strong>LPS</strong> nozzle systemRefrain from all work practices which compromise the safety ofthe system.Check all protection and warning devices at regular intervals toensure they are in perfect working order.Do not remove or deactivate safety devices.Assembling, disassembling, servicing and maintaining thedeviceDisconnect system parts from the mains supply before servicingor repairing them.Mounting or insertion of additional devices is only permittedwith the written consent of the manufacturer.The <strong>HygroMatik</strong> <strong>LPS</strong> nozzle system is protected to IP20. Ensurethat the devices are protected from dripping water and dust atthe installation location.If a <strong>HygroMatik</strong> <strong>LPS</strong> nozzle system is to be set up in an areawithout water drainage, safety measures which eliminate thepossibility of water entering the system due to leaks must betaken.Electrical equipmentCaution: Only a qualified electrician is permitted to work on theelectrical system and the control cabinet.Disconnect system parts from the mains supply before workingon them. Switch off the system immediately if faults in the electricalenergy supply occur. Only use original fuses with the specifiedamperage. Inspect the system's electrical equipment atregular intervals. Promptly eliminate deficiencies, such as looseconnections or melted cables. After carrying out the correspondingelectrical assembly or maintenance work, test all protectivemeasures used (e.g. earth resistance).2.3 Disposal upon disassemblyNote: The operating company is responsible for disposal of thesystem parts in accordance with statutory requirements.Page 9
3. Transport3.1 General informationNote: Take care when transporting the <strong>HygroMatik</strong> <strong>LPS</strong> nozzlesystem to prevent the device and packaging from being damagedby impact or accidental loading or unloading.3.2 PackagingNote: The <strong>HygroMatik</strong> <strong>LPS</strong> nozzle system is delivered on a pallet.3.3 Temporary storageStore the material in a clean dry place. The storage temperatureshould be 0-40°C.Note: Only clean components may be installed in a ventilationduct.3.4 Inspecting for correctness and completenessWhen you receive the goods, ensure that:• the equipment is complete and all parts are in perfectcondition.Note: Any transport damages and/or missing parts must be reportedimmediately to the shipper or supplier.The periods in which notification of the transport company mustoccur for the purposes of identifying the damage are as follows*:Transport companyPostRailRail and road transportcompaniesParcel services* Periods are subject to change without notice.3.5 Scope of deliveryTime after receipt ofgoodsno later than 24 hours7 days at the latest4 days at the latestimmediatelyThe following items are included in the delivery:• vortex modules• droplet separators (optional; Hygiene compliancechecks applies only to systems with droplet separators)• pump station• operating instructions for the system• bushing/s for ductNote: Hoses and nozzles are delivered at the time of start-up.Page 10
4. Function and design4.1 FunctioningThe <strong>HygroMatik</strong> <strong>LPS</strong> nozzle system is based on atomisation ofwater.Desalinated water is fed into a vane pump. With an operatingpressure of up to 16 bar, the water then goes to the nozzles.These nozzles generate a very fine spray mist which is taken upby the air in the device chamber. The ambient air is cooled adiabaticallyin the process.4.2 Design and process1: Pump group2: Water feed3: Vortex module wall4: Viewing window (necessary according to VDI 6022)5: 2-stage droplet separator6: Humidification chamber or duct with service doors and watertray7: Water drain, siphoned8: SPS-controlPage 11
4.2.1 Pump groupThe vane pump generates a pressure of up to 16 bar. The maintenance-freeasynchronous motor with variable frequency enablescontinuous operation up to 50 Hz.Pump group Capacity [l/h] Max. speed[rpm]<strong>LPS</strong> 45 45 1350<strong>LPS</strong> 72 72 1350<strong>LPS</strong> 110 110 13504.2.2 Dimension drawing of <strong>HygroMatik</strong> <strong>LPS</strong> nozzlesystemTBHH T B Weight<strong>LPS</strong> 45-110 700 230 600 30 KgPage 12
4.2.3 Vortex modulesThe vortex modules provide for effective mixing of the air andthe water mist.Due to their special design, they generate turbulence and shearzones which lead to a homogeneous distribution of moisturealong the humidification section (0.9 m).The vortex modules (dimensions: 150 x 150 mm) are deliveredindividually and can be assembled to form a wall. For optimalmoisture absorption, the air velocity is 1.0-2.5 m/s. The vortexmodule wall exhibits a low pressure drop of 10Pa at an air velocityof 2.0 m/s.Page 13
4.2.4 Atomising nozzlesDesalinated water at a pressure of up to 16 bar reaches the nozzleswhere the water is atomised to form ultra-fine mist-like aerosols.The aerosols enter the area of the vortexed air streamdownstream of the vortex modules. The air and aerosols aremixed intensively here.The atomising nozzle generates a spray cone with a wide openingangle.211: Nozzle opening2: Nozzle bodyFunctioning:The nozzle sets the flowing water in rotation and thereby it canleave at high speed. This enables a very fine water spray. Thehigher the operating pressure, the finer the droplets.Material of the nozzle: corrosion-free stainless steelPage 14
4.2.5 Droplet separators (optional)droplet separatorsThere are no more atomised water droplets in the air streambehind the <strong>HygroMatik</strong> <strong>LPS</strong> nozzle system (if the environmentalparameter specifications are complied with). The two wire-meshdroplet separators arranged in series ensure this. The trap padsexhibit a low pressure drop (75 Pa at air velocity of 2.0 m/s andaverage air density of 1.2 kg/m³).The air velocity should be between 0.9 m/s and 2.8 m/s. If it isoutside this range it can cause moisture breakthrough downstreamof the droplet separators - in such cases please first contact<strong>HygroMatik</strong>.The droplet separators are inserted into the humidificationchamber via guide rails and are hence easy to remove for servicing.The traps are standardly delivered with corrosion-resistant metalframes.Note: Hygiene compliance checks applies only to systems withdroplet separators.4.2.6 Humidification sectionThe section between the vortex module wall and the droplet separatorsis called the 'humidification section' in this system. It isunobstructed and hence easy to monitor and clean.For a total standard installation length of 1.5 m for the <strong>HygroMatik</strong><strong>LPS</strong> nozzle system the humidification section should have alength of at least 0.9 m. The exact dimensions are described inthe schematic in the section entitled 'Overview of the humidificationchamber'.Page 15
4.3 Partial and Full-LoadFor optimal humidification control under various input conditionsthe <strong>HygroMatik</strong> nozzle system <strong>LPS</strong> can be equipped with a „Partialand Full-Load” control function.At Full-load all nozzles are fed with water. At Partial-load a solenoidvalve switches off the water supply for approximately halfof the nozzles.Construction:The vane pump has to exits for water - one is the water supplyfor the nozzles for Partial load and the othe one is the water supplyfor the nozzles for Full load.If the external control signal decreases below a special switchingpoint, the <strong>HygroMatik</strong> nozzle system <strong>LPS</strong> switches off the watersupply for half of the nozzles.Page 16
5. Connnections5.1 WaterConnection:3/4”-external thread (within thesystem)Conductivity:5-20 µS/cmPressure:0.15-0.5 MPa (1.5-5 bar)Temperature: max. 15°CpH value: 7 +/- 1Note: The supply water for the <strong>HygroMatik</strong> high-pressure nozzlesystem must comply with VDI 6022; i.e. from a microbiologicalpoint of view it must be of drinking water quality.5.2 Waste waterConnection:Fitting:Connecting piece DN 12 forplastic hose (resistant to lowconductive water)with constant fall and free outletand siphon5.3 Pressure waterConnection „Full-Load”: plug-in connection for 6/4pressure hoseConnection „Cooling”: plug-in connection for 6/4pressure hoseConnection „Partial-Load”: plug-in connection for 6/4pressure hosePage 17
5.4 ElectricalPower supply:External control signal:System enabling:Collective fault signal:Operating status signal:LNE 230 V AC, 50 Hz (a fixedsocket (16 A) at the installationsite is necessary)0-10 V DC4-20 mA DCvia ext. potential-free contactpotential-free contact (changeover contact)potential-free contact (NO)Page 18
6. Interfaces to the <strong>HygroMatik</strong> nozzle system<strong>LPS</strong>6.1 AirAir purity:A Class F7 pre-filter is to beplaced upstream of the <strong>HygroMatik</strong> nozzle system <strong>LPS</strong>.Air velocity:0.9-2.8* m/sIf the air velocity is outside this range please contact <strong>HygroMatik</strong>.(*: under ideal conditions)Pressure drop:Approx. 80 Pa (at an air velocityof 2.0 m/s and with use of a vortex module wall and two drydroplet separators).Air volume flow (for 'partial-load / full-load switching'option):If the <strong>HygroMatik</strong> nozzle system <strong>LPS</strong> is operated in systems withmodifiable air volume flows (reduced air volume of less than70% of the maximum air volume), the full-load solenoid valve isswitched off and the partial-load mode is activated. This alsoapplies for systems with multi-stage ventilators.Note: For humidification of rooms the humidified air must exhibita purity in terms of bacterial count in accordance with VDI 6022.6.2 Humidification chamberThe humidification component should be designed with a floortray that has an inclination of at least 1.5° towards the trap andto be waterproof.The water drain must be at the end of the humidification section.The ideal humificiation section length (distance between vortexmodule wall and droplet separators) is 0.9 m. This correspondsto a total installation length of 1.5 m (see schematic in sectionentitled 'Overview of the humidification chamber'). Should thisinstallation length not be available please contact <strong>HygroMatik</strong>.The humidification chamber should be aerosol-tight and itshould be able to withstand desalinated water.Note: The guide rails for the vortex module wall and droplet separatorsare supplied by the manufacturer. The guide rails mustalready be installed for the system to be started. The vortexmodule wall and droplet separators must also already beinstalled.Page 19
Note: The guide rails must be designed such that- the vortex module wall and droplet separators can be removed(for servicing)- there cannot be any stagnant water.Note: When starting the system check again that the humidificationchamber has been thoroughly cleaned. In particular thehumidification chamber and the ventilation duct upstream of itmust be free from metal swarfs to prevent corrosion.Page 20
7. Mechanical assemblyCaution: The device may only be assembled by qualified staff.<strong>HygroMatik</strong> accept no liability for damages resulting from incorrectassembly.Observe all safety instructions and warnings found on thedevice. The device must be de-energised during assembly.Mounting or insertion of additional devices is only permitted withthe written consent of the manufacturer. Otherwise the guaranteeand warranty will become void.7.1 Overview of the humidification chamber1: Vortex module wall with spray system2: Droplet separators3: Upper guide rails for droplet separators4: Lower guide rails for droplet separators5: Collection tray6: Drain with trap7. Guide rails for vortex module wall8. Humidification section, >/= 0.9 m9. Two supplied bushings for the duct (for partial-load / full-loadswitching) for connecting high-pressure hoses * Only one bushingis needed for the standard model.10. Distribution pipeNote: In front of the vortex module wall and from the dropletseparators a minimum distance of 0.3 m to other installed componentsmust be maintained (see above schematic). In case ofan upstream installation of a fan in front of the vortex modulewall, the minimum distance shall be 1 m or appropriate actionhas to be taken in order to ensure a laminar flow of the vortexmodule wall. Temperatures higher than 60°C may destroy thevortex modules.Page 21
7.2 Vortex wall module assemblyThe vortex module wall provides firstly the air turbulence andsecondly it holds the atomiser nozzles and water distributor.The vortex module wall is supplied as specified (please note thenumber of vortex modules in width and height), assembled in theaccompanying nozzle assembly data sheet:» The Vortex modules are slotted together piece bypiece, starting at the bottom right1The bottom right vortex module must be so positioned that theright hand and lower side is flat surface up while the other twosides show the guide bars (1).7.3 Assembling the vortex module wallTwo guide rails are required for assembly of the vortex modulewall.We recommend to have an air gap sideways between the vortexmodule wall and the housing wall as it generates a laminar airflow and prevents moisture build-up on the walls.7.3.1 Guide rails for the vortex module wall:In order to position the vortex module wall in the humidificationchamber guide rails are required. The guide rails are fixed to theceiling and the floor of the humidification chamber.The guide rails must be installed in a way that makes it possibleto either pull out of or lift up the vortex module wall and stagnantwater is prevented.Ensure that after installation the floor of the humidification chamberis leackage-free.Page 22
7.3.2 Examplary design of guide rails for a vortexmodule wallGuide rail (cross section)Pos. 1: upper guide railPos. 2: vortex module wallPos. 3: spacer or direct connection floor of chamberPos. 4: lower guide railPos. 5: humidification chamberInner dimension of guide rail: 62 mmHight: please see above sketchMaterial: 1.4301 stainless steel sheet, thickness: 1 mm7.3.3 Side rails for the vortex module wall:If the wall consists of 11 or more vortex module rows side railsare required in order to avoid bending of the vortex module wall.Having more than 16 vortex modules in horizontal position thethe vortex module wall has to be vertically separated into twohalfs, that are separately fixed by side railsPage 23
7.3.4 Assembling of the side rails for the vortexmodule wallVortex module walls consisting of 11 or more vortex modulerows are automatically equipped with side rails and self-tappingscrews.The side rails have to be adapted to the right lenght by theinstaller. The required lenght is the distance between the middleof the lowest and the middle of the top vortex module.The side rail is an u-section and made of stainless steel. It is1.5mm thick. For the assembling the open side of the u-sectionhas to be attached to the latteral edge of the vortex module wall(pos. 3). The lower end of the side rail is positioned in the middleof the lowest vortex module. The lowest drilling (pos. 2) of theside rail is used to screw in a self-tapping screw (M3.9X20). Asecond self-tapping screw is used for the upper end of the siderail.The side rail for the other side of the vortex module wall has tobe assembled in the same way.123Page 24
7.4 Installation of the nozzles, distributor pipeand tubing7.4.1 Nozzle Installation:» In accordance with the supplied nozzle assembly datasheet locate the vortex module to be equipped with anozzle.» Then plug the nozzle body (1), as shown in the picture,on the upstream side of the vortex module, so that itprotrudes about 1 cm on the other side1» Screw the nozzle (2) and copper washer (3) firmly intothe nozzle body.23Page 25
7.4.2 Assembling the distributor pipeThe high-pressure water coming from pump station first enters amanifold and is routed from there to the nozzle.The manifold is mounted according to the nozzle assemblysheet (project specific) produced by <strong>HygroMatik</strong> on the vortexwall.Each nozzle in the vortex wall is connected to the manifold witha hose. Each nozzle must be higher than the corresponding porton the manifold - the water hose must have a constant slopeInstallation:2345212ABC» A manifold is mounted on the inlet side to at least twovortex modules.» Determine distributor pipe position (1) on vortex wall inaccordance with nozzle data sheet.» Place retaining clips (3) on the appropriate position onVortex Modules.» Put screw (2) through by retaining clip Vortex Module.» Tighten nut (4) with washer (5) on the rear of the VortexModule where the screw stands proud.» Repeat this process for all the holding clamps.» Press manifold (1) into the holding clamps (see figureC) and check for tightness.Page 26
7.4.3 PipingManifold - Nozzles» The supplied 4 / 2 Hose pipe is firmly fitted into one ofthe snap-connections on the manifold pipe.» Check connection by gently pulling on the hose.» Estimate the hose length (noting nozzle assembly plan)to the nozzle by observation. Minimum bending radiusno less than 25mm.» Cut the hose at right angles with a hose cutter.» Insert hose into the nozzle snap-connector.» Check connection by gently pulling the hose.Page 27
The completed finished hose connection should look like this:Manifold - Pump StationIn the standard version a 6/4 hose leads from the pump stationto a manifold. However, if the <strong>LPS</strong> nozzle system is equippedwith a partial/full load switch, then there is a 6/4 hose line leadingto two manifolds.Since the 6/4 hose line goes through the air conditioning duct aduct wall grommet is provided (or two in the case of a partial/fullload switch).Page 28
Assembly of the hose guide» Drill a hole with a diameter of 15mm. through the wall ofthe air conditioning duct,» Assemble snap connector (4), nut (3) and washer (2) tohose opening (1) and insert through the duct wall fromthe outside (see picture below).1234» From the inside of the duct, assemble washer (5),mother (6) and necessary snap-connectors (7) andscrew tight.567Page 29
Hoses:Connection I: Water supply fornozzles (for standard and partialload operation)Connection II, Optional: Watersupply for nozzles (only at fullload operation)For standard version:The pump station has a hose leading to a manifold at the vortexwall. From the manifold, it goes to all the nozzles of the <strong>LPS</strong> nozzlesystem.Additionally:» All hose assemblies are to be laid with a constant incline.» Put a 6/4 hose line in the pump station outlet (I).» Check by gently pulling the tube.» Estimate the hose length to the ducting snap-connector(external duct wall). Maximum bend radius 40mm.» Cut the hose at right angles with a hose cutter.» Put the 6/4 hose line into the ducting angled snap-connector(external duct wall).» Check by gently pulling the tube.» Put a further 6/4 hose line into the straight snap-connector(internal duct wall).Page 30
» Check by gently pulling the tube.» Estimate the hose length from the snap-connector tothe duct opening (external duct wall) to the manifold.Maximum bending radius 40mm.» Cut the hose at right angles with a hose cutter.» Put the 6/4 hose line into the angled snap-connector onthe duct opening (external duct wall).» Check by gently pulling the tube.Partial / full load switching:The tubing for partial/full load switching is initially in the same asdescribed above for the standard version.In addition, though, there is a further pump station hose foroptional output II (for full load operation) to a second manifold onthe vortex wallPage 31
7.5 Assembling the droplet separatorsThe guide rails must be installed in a way that makes it possibleto either pull out or lift up the vortex module wall.Detail BDetail A7.5.1 Examplary design of guide rails for the dropletseparatorsDetail A:Dimensions given in mmA1: Trap guide rail: U-section with perforated 1.4301 stainlesssteel sheetA2: Trap guide rail holder: U-section made from 1.4301 stainlesssteelA3: Several holes (at least 4 per metre) 8-10 mm in diameterdistributed over the length of the trap holderA4: Collection tray for humidification chamberA5: Fixation of guide rail with the floor of the humidificationchamber (ensure that condensate can freely run to the drain)Page 32
Dimensions of guide rails for droplet separatorsMaterial used for upper guide rail: 1.4301 stainless steel sheet,thickness: 1 mmDetail B:Hight is variabel:pushed in dropletseparators: 55lifted in dropletseparatosr: 30The upper guide rail is directly attache to the ceiling of thehumidification chamber (using screws, rivets or similar)Assembling two droplet separators in a stackFor installation heights of above 1.5 m, two droplet separatorsmust be mounted in a stack.The waste water from the upper droplet separator is drained viaan additional collector. For this the waste water from the uppertrap is drained via a flexible hose either directly or into the collectiontray. This additional collector is to be provided for both thepreliminary and the final droplet separator.1. Upper guide rail2. Detail C (please see nextpage)3. Lower guide railPage 33
Detail C (side view):B1: Preliminary droplet separatorB2: Final droplet separatorB3: Angle bracketB4: Hose connection for drainage of waste water from upperdroplet separatorPerforated sheet metal (material: 1.4301) should be used for thelower guide rails for the droplet separators. Alternatively, sheetmetal with several holes (at least 4 per metre) 8-10 mm in diametercan be used.The assembly must be made with 1.5% incline.Page 34
7.6 Pump station wall mountingThe installation of this unit must be carried out only by qualifiedpersonnel. We can assume no liability for damages caused byincorrect installation.Please observe all the safety instructions and warnings on theequipment.On the rear wall of the unit housing there are 4 mounting brackets(see also: Dimensions, pump station). There is a mountingkit supplied in which four screws, and rawlplugs are included forhanging the unit housing.Firstly, holes are to bedrilled according to thepump station dimensions(see pump station dimensions).Press rawlplugsinto the drilled holes ifdealing with stone or concretewalls. Then screwthe top two fittings to thewall (allowing a 12mmdistance from the screwhead to the wall) andhang up the pump station.Then attach and tightenthe bottom two screws.Hanging tabNote: If installing the system is done by a single person there isa danger that the unit can be dropped. Therefore we recommendthat two qualified persons do the installation.Page 35
7.7 Checking the installationAssembling the vortex module wall Have all electrical cable and plug connections beenproperly tightened?Is the vortex module wall in accordancewith the nozzle arrangement data sheet? (pleasenote the number of modules in width and height)?Vortex module wall assembly Have all electrical cable and plug connections beenproperly tightened?Are the guide rails built so that thevortex wall module can be lifted or slid from the guiderails? Is it ensured after assembly that the floor pan is showingno leaks? Have all electrical cable and plug connections beenproperly tightened?With a wall height of 11 modules isthe Vortex-Vortex-module supported by two side rails.With16 Vortex modules is it vertically split and supportedindividually by side rails?Droplet separator assembly Are the guide rails built so that separator can be lifted orslid from the guide rails? Is it ensured after assembly that the floor pan is showingno leaks? Are all electrical plug connectionssecure?Mounting of the distributor pipe / tubing Has the seating of the individual hoses on their connectorsbeen checked by pulling gently on them? Are allelectrical plug connections secure? Is the arrangement of the nozzles and tubing in accordancewith to the supplied nozzle arrangement datasheet?Pump station installation Is the pump station fixed horizontally on a suitable wall?Does the mains voltage match the voltage on the nameplate/delivery note?Page 36
8. Dimensions - Pump StationView frombelowRear viewSide viewPage 37
9. Water connection9.1 Overview Water connection7631495281: Water supply2: Water drainage3: 12mm plastic tube (1.5 meter ): included4: plastic hose DN12: on site5: Water filter (input side: 3/4 external threadoutput side: 12mm snap-connector)6: Mounting Bracket7: Pump Station8: External drain, siphoned (free entry must be assured)9: Manometer, 0-10 barPage 38
Note: There must be a stopcock and a sampling valve in theimmediate vicinity of the <strong>HygroMatik</strong> <strong>LPS</strong> nozzle system provided.9.2 Water supplyAttention: Please observe during installation:• All work must only be performed by qualified personnel.• System must be switched off and voltage free.• Please observe local waterworks and utilities regulationsWhen using de-mineralized water we recommend the use ofstainless steel or plastic pipes.Water supply:» Locate water Filter (position 5 in the graph above) nearthe pump station (7).» Transfer mounting bracket hole pattern (6) to a suitablelocation on wall.» Then drill using rawplugs and mounting brackets includingwater filters.» An 8mm plastic tube is supplied (length 1.5 m, shortenif necessary). Connect this to the snap-connector onthe output side of the water filter. Gently pull on thehose to check for tight fit.» Attach other end of the 8mm plastic tube into the snapconnectorto the pump station water supply. Gently pullon the hose to check for tight fit.» Connect the external feed water line to the input side ofthe water filter (3/4 "external thread).Page 39
9.3 DrainageAt the bottom of the housing, a DN12 spout is sticking out. Thisis a drain and is used to:• empty and relieve the pressure lines to the vortex wallafter removal of the module enable signal• drain the flush water after flushingWater drainage» A DN12 water hose (position 4 on the graph above) isattached to the DN12spout on the bottom and madefast with a clamp.» The tube is then siphoned off and installed on the slopeto the drain (8).9.3.1 Water drain for the humidification chamberNote: The water drain in the collection tray must be at the lowestpoint in the humidification chamber.It is recommendable to have the water drain positioned behindthe droplet separators with respect to the direction of air flow.Only in this way can the waste water drain completely.Page 40
9.4 Water QualityConductivity:5-20 µS/cmPressure:0,15-0,5 MPa (1,5-5 bar)Flow rategreater than max output of thenozzle sytemTemperature:5-15°CPH value: 7 +/-19.5 Inspection the water supplyWater supplyIs the supplied water filter installed to the water inlet forthe pump station?Is the feed water quality within the specified range?Is the hose that lies between the water filter and pumpstation waterproofed?DrainageIs the drain hose siphoned and installed with a constantincline to the drain?Can the flushing water drain off freely?Humidification chamberIs the humidification chamber provided with a drain atthe lowest point?Page 41
10. Hygiene10.1 Ensuring hygiene (VDI 6022)The regulations require that only inert materials must be usedand biocides should only be used as a last option.Prior to humidification the supply air is to be purified using aClass F7 filter.A metal filter made of mesh wire is used as a droplet separator.The droplet separators can, as far as is necessary, be easilycleaned and reused. Addition of a biocide is not required.All components must be easily accessible to perform a cleaningin accordance with VDI6022.In order to carry out a visual inspection according to VDI 6022sufficiently large windows / removable panels have to be providedin the area of the droplet separators and the vortex modules.10.2 Automatic flushingIf the <strong>HygroMatik</strong> nozzle system <strong>LPS</strong> is in „stand by mode” andthere is no demand for work for 24 hours the system will periodicallyrun (every 24h) flush cycles.Hereby the growth of bacteria in standing water is obviated.During flushing the inlet water solenoid valve and the flushingvalve are simultaneously open. Thus the water in the pump stationis being exchanged and directly led into the drain withoutreaching the humidification chamber.Page 42
11. Electrical connectionCaution: Voltage! All electrical installation work must be carriedout by qualified specialist staff (electricians or skilled workerswith equivalent training) only. It is the customer's responsibility tomonitor qualifications.Caution: Voltage! All installation work must be completedbefore the <strong>HygroMatik</strong> nozzle system <strong>LPS</strong> is connected to themains supply.Please observe all local regulations for electrical installationwork.Caution: The electronic components of the <strong>HygroMatik</strong> nozzlesystem <strong>LPS</strong> control system are sensitive to electrostatic discharge.To protect these components from damage by electrostaticdischarge, special measures must be taken during allinstallation work.Caution: During installation please perform the following steps:• Disconnect the system from the mains supply and secureit to prevent it from being switched on again.• Ensure that the system is de-energised.• Installation and removal of the control system may only beperformed if the device is switched off.• Lay electrical cables properly.• Make the electrical connections according to the circuitdiagrams.• Ensure that all terminals are tight.• Connect the system via socket to the supply network. Theback-up fuses specified in the technical data must beused.• The mains plug of the nozzle system <strong>HygroMatik</strong> <strong>LPS</strong> isthe network point of separation according to VDE and istherefore absolutely necessary.Page 43
11.1 Connection dataPower supply:External control signal:System enabling:Group fault signal:Operating status signal:LNE 230 V AC, 50 Hz0-10 V DC4-20 mA DCvia ext. potential-free contactpotential-free contact (changeover contact)potential-free contact (NO)Note: If a residual current device should be installed upstream ofthe system a universal-current-sensitive circuit-breaker shouldbe selected.Note: When sizing the connection lines, observe that the supplyimpendance must be low! If a short circuit occurs the circuitbreakermust switch off automatically within 0.4 s. The magneticshort circuit trigger for the circuit-breaker (type B) acts immediatelywhen the flowing short circuit current is more than fivetimes the rated current.Pump group Rated power [kW] Rated current [A] Fuse [A]<strong>LPS</strong> 45 0.15 1.9 1 x 16<strong>LPS</strong> 72 0.16 2.1 1 x 16<strong>LPS</strong> 110 0.18 2.7 1 x 1611.2 System enabling / Safety chainNote: Interlock contacts, such as max. hygrostat, air flow relay,duct pressure switch, ventilator interlock etc., are placed inseries between series terminals X2.1 and X2.2 (= safety chain).Caution: If the ventilation system fails or the supply air facevelocity is too low (less than 0.9 m/s) the built-in control mustswitch off the humidifier via the safety chain. Otherwise undesiredcondensate build-up behind the droplet separator mayoccur.Caution: Integration of a max. hygrostat into the safety chain isstate-of-the-art. The max. hygrostat serves as a safety elementin case of malfunction of the humidity sensor and protectsagainst over-humidification.Caution: The contacts which are placed on terminals X2.1 andX2.2 must be potential-free and suitable for switching 24 V DC /100 mA. After the <strong>HygroMatik</strong> nozzle system <strong>LPS</strong> has beenstarted, a standard voltage of 24 V DC is applied to terminalX2.1.Page 44
11.3 Circuit diagramUVWNL3215.09.2011SchlS-103801HYGROMATIKLise-Meitner-Str. 3D-24558 Henstedt-UlzburgGermanyTelefax+49-(0)4193 / 895 - 3313K1+24V14Motor230V/3phPhone+49-(0)4193 / 895 - 0S-103801B.0013x 0,75 qmm1.5 qmm682425controlerSMP5500/CGNDPE 21 N PE 20 N PE 19 N PE 18 N PE 17 N PE 16 N PE 15 14 PE 13 12 PE 11 10 PEX4A010,75 qmmOPTIONSupplyLANSupplyGND GND AI4 AI3LAN 5 3 G 4SupplyDO1 DO2 DO3Extension moduleSE63210 9 8 7A04A02powersupply+12VACSupply12VDO6DI6 DI5 DI4 DI3 DI2 DI1F31,6AFS1L'LF15AFL12DO1 DO2 DO3 DO46 5 4 8 7 3AOA03F25AFL' N'PENC1LN0V+12VA1A2K1K2A1A2OPTIONwinter-/ summerModeOPTIONFull-/ PartloadMV 230Vfull loadsummerMV 230Vpart loadwinterMV 230Vfull loadwinterMV 230VflushingMV 230Vwater inletvalveK112Fan 230VwatersupplypressureswitchwindingmotorHP-sensor0...20mAX3K2 K1collectivefault5630 29 28 PE 22 21 PE 9 8 PE 7 6 PE 5 4 PE 4 3 PE 2 1 PE(+) (-) (-)operationmessageB150°Cinputwinter-/summerModecontrol signalinterlockpotentialfreeX2A release 15.09.2011 SchlB 05.01.2012 Schlmodification date namedateeditNorm(description)<strong>LPS</strong> + Optionsorigin Ers.fErs.d(drawing Nr.)(file)FrequencyconverterX1ATTENTION:Plug in positionwithout blackmarker.If ELCB wasactivated, set theplug to
UVWNL32A release 25.10.2011 SchlB 20.03.2012 Schlmodification date namedateeditNorm25.10.2011Schl(description)<strong>LPS</strong> 3-Step controlorigin Ers.fErs.d(drawing Nr.)S-103802HYGROMATIKLise-Meitner-Str. 3D-24558 Henstedt-UlzburgGermanyTelefax+49-(0)4193 / 895 - 33(file)13K1+24V14Motor230V/3phPhone+49-(0)4193 / 895 - 0S-103802B.001page 1of 1 p.3x 0,75 qmm1.5 qmm682425DO1 DO2 DO3 DO4+12VAC controlerSMP5500/CGNDPE 20 N PE 19 N PE 18 N PE 17 N PE 16 N PE 15 14 PE 13 12 PE 11 10 PEX4A010,75 qmmSupplyLANSupplyGND GND AI4 AI3LAN 5 3 G 4SupplyDO1 DO2 DO3Extension moduleSE63210 9 8 7A04A02powersupplySupply12VDO6DI6 DI5 DI4 DI3 DI2 DI16 5 4 8 7 3AOA03F31,6AFS1L'LF15AFF25AFL' N'LPEN12C1LN0V+12VA1A2K1K2A1A2MV 230V2nd StepMV 230V3rd StepMV 230VflushingMV 230Vwater inletvalveK112Fan 230VwatersupplypressureswitchwindingmotorHP-sensor0...20mAX3K2 K130 29 28 PE 22 21 PE 9 8 PE 7 6 PE 5 4 PE 4 3 PE 2 1 PE(+) (-) (-)collectivefault56operationmessageB150°Cinputwinter-/summerModecontrol signalinterlockpotentialfreeX2FrequencyconverterX1ATTENTION:Plug in positionwithout blackmarker.If ELCB wasactivated, set theplug to
11.4 Inspecting the electrical installationThe electrical installation must be checked by an electrician inaccordance with customer requirements and the regulations setout by the public electricity supply company:Does the mains voltage match the voltage specified onthe nameplate / delivery note?Have all electrical connections been carried out accordingto the connection diagrams?Have all electrical screw and plug cable connectorsbeen attached properly?Are the switch-off conditions for protection in case offaults complied with?Has the system been earthed?The system can then be switched on.Page 47
12. CommissioningNote: The <strong>LPS</strong> nozzle system may only be operated by qualifiedpersonnel.Turning the <strong>LPS</strong> nozzle system offNote: Before the <strong>LPS</strong> nozzle system is put into operation, itmust be clear how to switch the system off.» Switch off Nozzle system using control switch (Pos.0).» Shut off water supply shut-off valve.Check all cable connections» Check all cable connections for tightness.Activating the <strong>LPS</strong> nozzle system» Operate main switch.» Set manometer to „open“» Open up water shut-off valve» Switch on unit using control switch (Pos.I).» Set commissioning control to permanent demandsteam production.The following functions begin:A self-test.When humidity is demanded, the pump vane is operated anddirects the water at a pressure of up to 16 bar to the nozzle.The water is atomized at the nozzle. All nozzles should not dripand show an even spray pattern.Further tests: All electrically-powered functions must function.» Observe <strong>LPS</strong> nozzle system and let it run for 15-30minutes. The air conditioning duct fan should be in operationso that the moisture produced can be blownaway. Should any leakages be evident then turn the<strong>LPS</strong> nozzle system off.» Eliminate the leaks:Attention, voltage! Please observe all safety instructions whileworking on live components.Page 48
13. MaintenanceThe <strong>HygroMatik</strong> nozzle system <strong>LPS</strong> is maintenance-friendly.However, operational faults which can be traced back to inadequateor improper maintenance may occur.Regular maintenance of the <strong>HygroMatik</strong> nozzle system <strong>LPS</strong> isindispensable for ensuring long service life.Caution: For maintenance work please bear in mind that:• the system must be serviced by qualified appointed staffonly;• safety instructions must be followed;• the system must be taken out of operation and secured toprevent it from being switched (take the plug out of thesocket) on before maintenance work is performed;• after maintenance work has been completed the devicemust be inspected by qualified staff to determine whether itis safe to operate.13.1 Maintenance activitiesFor the system to operate without any problems the followingchecks and maintenance tasks must be carried out regularly:1 x per month:» Check housing for contamination and clean if necessary.» Carry out a visual inspection of droplet separators andclean if necessary.» Check the water filter cartridge upstream of the pumpfor contamination and replace if necessary; flush themains water system if necessary.» Check the resulting spray cone of the nozzles andclean or change nozzles if necessary.1 x per year (or after 2500 h)» Nozzles should be checked as part of annual maintenanceand cleaned if necessary (see "Cleaning nozzle).If required, the nozzles to be replaced.» Water filter cartridge change» Visual inspection of the vortex module wall, if necessaryclean.» Check shutdown function, such as a "Max-Hygrostat".Page 49
13.1.1 Inspection / replacement of the net-basedwater filterWater filter checkWater filter must be checked for contamination 1 x monthly and ifnecessary replaced. If the white water filter cartridge changes itscolour this means it is polluted.Pollution causes a higher flow resistance. This reduces thewater pressure at the pump. Too little pressure can cause thenozzle system to switch off (dry-run protection).Replacing the water filter:1. Filter housing holder2. Filter cartridge (insidelying3. Filter housing4. Mounting plate4123Page 50
1. Set the main switch on the control panel of the <strong>HygroMatik</strong>nozzle system <strong>LPS</strong> to '0'.2. Close the (external) stopcock.3. Relieve the line pressure.4. Open the filter housing by hand. The threads may be damagedif pliers are used.5. Clean the filter housing.6. Replace the filter cartridge (if necessary).7. Screw the filter housing into the seat by hand.Note: Do not pinch the sealing ring.8. Open the external stopcock.9. Set the main switch to 'I'.13.1.2 Cleaning the atomizer nozzle1. Switch the <strong>HygroMatik</strong> <strong>LPS</strong> Nozzle System power supply to 02. Unscrew the nozzle from nozzle holder. Take care not to touchthe impact pin.3. Unscrew the nozzle by screwing the inside part out.4. Clean the nozzle components in an ultrasonic bath for about10 minutes, if necessary use a lime remover in low concentration(less than 10%).5. Put nozzle components back together.6. Screw nozzle in the nozzle holder.7. Switch power switch back to I8. Finally check spray patternCaution: Make sure that the pressure reduces by, for instance,activating the wash cycle.Caution: Wear eye protection when cleaning the nozzle.Caution: Use only an appropriate tool to remove the nozzles.Page 51
13.1.3 Cleaning the droplet separatorsThe droplet separators should be checked every 4 weeks forpossible contamination and cleaned if necessary. The dropletseparators should be thoroughly cleaned at least once a year.Cleaning the droplet separators:1. Pull or lift the droplet separators out of the guide rails.2. Clean the droplet separators with a cleaning agent and thenrinse and dry them.3. Carry out a visual inspection of the droplet separators, repeatthe cleaning step if necessary and replace the droplet separatorsif damaged.4. Place the droplet separators back on the guide rails. Whiledoing so ensure that the trap frame drain holes are facing downwardsto guarantee free drainage.13.1.4 Cleaning the vortex module wallThe vortex module wall should be checked for contamination anddamage as part of annual maintenance. Any contaminants mustbe removed with a cleaning agent.Page 52
13.1.5 Cleaning the humidification chamberClean the humidifier housing and the base tray as required witha cleaning agent, then rinse and dry them.For cleaning and disinfection we recommend INCIDUR producedby Ecolab.When using other cleaning and disinfection agents please checkmaterial compatibility with all plastic materials used in the humidificationchamber.Caution: Do not aim the water jet at the droplet separators. Anyupstream or downstream heating or cooling units must notbecome wet during cleaning.Page 53
14. Control System14.1 Control and speed regulationThe electrical components and terminals are located in thesystem cabinet under the removable cover. A programmablelogic controller PLC (Item 1 in the illustration below) isresponsible for the control function.Important operating data are depicted in the control systemdisplay. A frequency inverter (Item 2) supplies differentfrequencies and voltages for the asynchronous motor of thepumping station located in the lower part of the system cabinet.Depending on the speed of the pump, it is possible to vary thewater pressure and thereby the quantity of water atomized. Thewater pressure may range between 5 and 16 bars.The main switch (Item 3), which is located at the top left-handside, is for switching off the <strong>HygroMatik</strong> low-pressure nozzlesystem <strong>LPS</strong>.<strong>HygroMatik</strong> low-pressure nozzle system <strong>LPS</strong>3 21Page 54
14.1.1 Full load and part loadThe <strong>HygroMatik</strong> low-pressure nozzle system <strong>LPS</strong> is controlledby a 0-10V control signal.In the 5-10V range, all the nozzles are charged with pressurizedwater. If the control signal falls below a value of 5 volts, thesystem switches to part load operation. In this case, approx.50% of the nozzles are no longer supplied with water. The rotaryvane pump then works with a higher pressure, whereby animproved spray pattern is produced.14.1.2 Summer / winter modeThe <strong>HygroMatik</strong> low pressure nozzle system can be operated insummer or winter mode.In winter mode, the <strong>HygroMatik</strong> low pressure nozzle system isused to regulate air humidity, whereas summer mode is used forexhaust air cooling.Changeover between summer and winter modes is made bypotential-free contact between connecting terminals 6 and 7:Contact open = Winter modeContact closed = Summer modeIn summer mode, regulation of the <strong>HygroMatik</strong> low pressurenozzle system <strong>LPS</strong> is made solely by means of the safety chain(Terminals 1 and 2) in single-stage switching mode; as long asthe safety chain is closed, the system operates at 100%humidification performance.Page 55
14.2 Description of the programmablecontroller (PLC)14.2.1 General descriptionThe <strong>HygroMatik</strong> low pressure nozzle system <strong>LPS</strong> controllerregulates the complete atomizing operation. The user interfacefor operating and regulating the function of the appliance is onthe face of the PLC controller.Functions of keys:(F1):(F3):(F2):(F4):- increase value- to the next identifier- decrease value- to previous identifier- exit without saving the setting- return to previous level- confirm value / exit and setting save- to the next level (select menu,submenu, parameter, value)- select reading levelPage 56
Functional description of the display and LED:The display consists of 14 icons in 3 categories:1. Operating modes2. Values and dimensional units3. Switching statesIcon Description ColorErrorred(Error codes F1...F8 are displayed;detailed description see below)Summer modegreen(cooling)Winter modegreen(humidify)No demandgreen(the safety chain is closed,the demand is howeverbelow the activation threshold)Pressure [bars]redRelative humidity [%]redControl signal errorred(control signal wrong or missing -humidification is interrupted)Page 57
Description of switching states:Condition DescriptionLED color1 Mode (nozzle system operating) orange2 Maintenance/fault orange3 Magnetic valve drain enabled orange4 Magnetic valve full load enabled orange5 Magnetic valve water inlet enabled orange6 Magnetic valve winter mode part loadenabledorange7 Magnetic valve summer mode full loadenabledorange14.2.2 MenuSystem startAfter switching on the Hygromatik low pressure nozzle system<strong>LPS</strong> at the main switch, an initial flushing operation is carried out(default setting 10 sec.).The system is then in the main menu, i.e. the actual pressure isdisplayed.From here one can navigate to the reading level and read offcurrent reading parameters (L1 ... L15) or to the programminglevel, where parameters can be set or changed.A detailed description of the programming steps can be found inthe following subsection "Menu structure and parameter setting”.Page 58
14.2.2.1 Reading level:The following reading parameters can be selected in the readinglevel:L01 Actual value of pressure [bars]L03 Actual value of the control signalL04 Setpoint control signalL05 Set value of performance limiter [%]L06 Set value for the target humidity (only validwith PI control [%]L07 Actual value of current humidity (only validwith PI control [%]L11 Total running time of pump [h]L13 Total running hours [h]L14 Remaining running time before next servicereminder [h]L15 Remaining time until standby-draining [hh:mm]14.2.2.2 Programming level:The following parameters can be changed in the programminglevel:Parameter Designation Option Factory settingU6 Controls 0 = external controller 01 = single-stage/ On-Off2= PI controlL06 Setpoint rel. humidity 10-100% 50%(only activ if U6=2)L05 Output limitation 25-100% 100%r_S Reset „Service” message ON/OFF OFFC12 Integral part, 50-500 100with PI humidity controllerC11 Proportional part, 50-200 100with PI humidity controllerE03 External control signal 4 = 0-10V DC 43 = 4-20mA DCPage 59
14.2.2.3 OperationIf the <strong>HygroMatik</strong> low pressure nozzle system <strong>LPS</strong> is enabled,(i.e. the safety chain is closed) and a control signal greater thanthe activation threshold is put in, the system atomizes water.The LED 1 for status "Operating" is illuminated.At the same time the current working pressure in bars is shownon the display.In addition, the topmost line of the display shows whether the<strong>HygroMatik</strong> low pressure nozzle system <strong>LPS</strong> is operating insummer or winter mode.14.2.2.4 Function of the safety chainIt is possible to read off from the main display window whetherthe system is enabled for operation. It is essential that apotential-free normally closed contact for enabling (= closing thesafety chain between terminals X2.1 and X2.2) is provided onsite. Here, several safety contacts (NO / NC) can be connectedin series.No demand:Should the PLC controller showthe safety chain is closed,however the requirement is below the activation threshold.There is no demand for humidification.Ready for use:If is not displayed and if the display indicates 0.0 bars thesafety chain is open (terminals X2.1 and X2.2 are not bridged).The <strong>HygroMatik</strong> low pressure nozzle system <strong>LPS</strong> is ready foruse.14.2.2.5 Accumulated malfunctionIf a fault is detected in the <strong>HygroMatik</strong> low pressure nozzlesystem <strong>LPS</strong> by the controls, the dedicated changeover relay isde-energized (terminals X2.28-30 NC, terminals X2.29-30 NO).Simultaneously a specific error report (F1 ... F8) is shown in thedisplay and the icon is illuminated red. The <strong>HygroMatik</strong>low pressure nozzle system <strong>LPS</strong> is deactivated.If no fault exists, the changeover relay is energized.You will find a detailed description of the errors and theirpossible elimination in the following table.Page 60
14.2.3 Overview of error reportsFaultNo.F1F2F3F4F5F6F7F8MalfunctionreportWater inletPressure< 1barTemperaturein controlcabinetFUdefectiveMotorwindingLowpressureExcesspressureSensor faultpressureSensor faulthumidityDescription Possible cause Remedial actionWater supplyinadequate. Inletpressure must bebetween 1 to 5 bars.The temperature sensorin the control cabinet isrecording a temperaturein excess of 50°C +/-10%Frequency inverterreports a malfunction.This is shown in thefrequency inverterdisplay.Temperature control ofthe motor windingactivated due to excesstemperature.No pressure can be builtup after activating therotary vane pump for30 secondsThe supply ofpressurized waterexceeds a pressure of16 bars for 30 secondsThe value of thepressure sensor isoutside the normalrangeThe value of thehumidity sensor fitted(optional) is outside thenormal rangeWater supply notconnected.The ventilator in thecontrol cabinet failedAir inlets blockedOverload of motorMotor cable shortcircuitedFault in electronicsfrequency inverterEarthing fault of outputterminalsFailure of externalventilatorAir inlets of the externalventilator blocked.Pressure pipe leakingWater deficiencySignal cable pressuresensor not connectedNozzles blockedPressure-relief valvenot set correctlyPressure sensordefectiveBurst pipeHumidity sensordefectiveBurst pipeConnect watersupply withadequate pressure.Check ventilatorand replace ifnecessaryClean out air inletsFor remedial actionplease observe theinstructions in thedocumentation forthe frequencyinverter.Check externalventilator andreplace ifnecessary.Remove blockageCheck pressurizedwater pipe andreplace if necessaryCheck cableconnection andcorrectClean nozzles orreplacePlease contact<strong>HygroMatik</strong>Replace pressuresensorRenew pipeReplace humiditysensorRenew pipePage 61
14.2.3.1 Menu structure and parameter setting43Page 62
15. EC declaration of conformityPage 63
16. Spare partsArticle no. pump stationE-7800100 Motor <strong>LPS</strong> systems, 230V, 0,37kWE-7800202 Rotary vane pumpe <strong>LPS</strong>-100; <strong>LPS</strong>110E-7800204 Rotary vane pumpe <strong>LPS</strong>72E-7800206 Rotary vane pumpe <strong>LPS</strong>45E-3720010 fan, axial, 230VACE-7702200 protection grill, cabinet fan HDS, incl. filter inlay 120 x 120 mmB-7800400 Solenoid valve water inlet, incl. pressure switch 1barE-7800300 3/2 Solenoid valve, incl. coil 230V/50-60HzE-7800310 Plug for solenoid valveE-7800610 High pressure sensor <strong>LPS</strong>E-7800436 pipe fitting G3/8, 12mm hoseE-7800438 pipe fitting G3/8, 90°, turnable, 12mm hoseE-7800416 pipe fitting G1/8, 6mm hoseE-7800444 female pipe fitting G1/8, 6mm hoseFilter element 10" filter quality 10 µm for water-prefilter HPpumpstationE-7621028Water filter housing, 10" bothside connection 3/4" iD blue sump,E-7705200 pressure release buttonB-2504021 Auxiliary relay 230V AC 2 switching contactE-2505206 Safety fuse 1,6A 5x20mmE-2504039 Safety fuse 1,6A 5x20mmThermal circuit breaker ; NC with automatic reset, switching point atE-7704870 50°C ± 5KE-7800544 Transformer 230V/12V 11VAE-7800500 Frequenzy converter 0,37kWE-7800540 Display CPU unitE-2501005 main contactor 16A(AC1)coil 230V ACPage 64
Artikel-Nr. Article no. Vortex-wallE-7701000 E-7701000 Vortex moduleE-7800400 E-7800400 <strong>LPS</strong> water distribution tubeE-7601630 E-7601630 T-piece female 1/8"E-7601586 E-7601586 Double nipple G1/8" - G1/8"E-7800410 E-7800410 Sealing plug M5E-7800412 E-7800412 Sealing plug male 1/8"E-7800414 E-7800414 Pipe fitting M5, 4mm hoseE-7800416 E-7800416 Pipe fitting G1/8, 6mm HoseE-7800472 E-7800472 Fixing clipE-7800452 E-7800452 Mountin bracket for nozzleE-7621020 E-7621020 O-ring for nozzle mounting bracketE-7800450 E-7800450 Nozzle HY 0,27/120°E-7800454 E-7800454 Nozzle HY 0,27/60°E-7601572 E-7601572 O-Ring, 10 x 1.5, 70° ShoreE-7800424 E-7800424 Pipe fitting male 1/8", 90°, turnable, 4mm hoseE-7800428 E-7800428 Hose PA, 6mmE-7800426 E-7800426 Hose PA, 4mmB-7800301 B-7800301 <strong>LPS</strong> duct inlet fittingPage 65
17. Fax Form - Order for spare partsFax FormLise-Meitner-Str. 324558 Henstedt-UlzburgTel. +4904193/895-0Order of spare partsPlease copy, fill in and fax toFax.No. +49(0)4193/895-33unit type *______________ serial no.* ___________________commission: ______________ order no.: __________________quantity article article no.date of delivery ____________forwarder _____________ shipment by ___________delivery address (if differentfrom invoice address)________________________________________________________________________________________________________company stamp (delivery adress)date/signature* Order can only be processed if unit type and unit serial no. are filled in.Page 66
18. Technical Specifications<strong>LPS</strong> 45 <strong>LPS</strong> 72 LSP 110Effective humidification capacity [l/h] 45 72 110Nominal power rating [kW] 0,15 0,16 0,18Amps [A] 1,9 2,1 2,7Volts [V/Ph/Hz] 230/1/50Control signals0-10V / 4-20mA(other control signal levels on request)Nozzle number 15 22 32Humidification path, ideal [m] 0,9Installation lenght, ideal [m] 1,5Flow velocity [m/s] 0,9 - 2,8Pressure drop in duct [Pa]80 at 2.0m/s air speedDimensions H, D, W [mm] 700, 230, 600Weight [kg] 30DWHPage 67
19. Plant schemeOption:Sommer-/ Winterschaltungsummer-/ winter controlMVFUSPSTeillastpartial loadWinterTeillast-Magnetventilwinter part load valveVE-WasserDeionised water1 - 5 bar5 - 20μs/cmPIDWassereinlassfilterwater filterMVWassereinlass-Magnetventilwater solenoidvalvePumpepump5 - 16 barPIDOption:Teil-/ Volllastpart-/ full loadMVMVWinterVolllast-Magnetventilwinter full load valveVolllast-Magnetventilfull load valveMVFU: Frequenzumrichterfrequency converterSPS: Speicherprogrammierbare Steuerungprogrammable logic controllerMVSpülmagnetventilflushing solenoid valveMVSommer Magnetventilsummer valveSpülmagnetventilflushing solenoid valvePID: Drucksensorpressure sensorA Blatt 2 eingefügt 22.10.12 Mar Lise-Meitner-Str. 324558 Henstedt-UlzburgTel.: +49/(0)4193/895-0Fax: +49/(0)4193/895-33 Option:Zuluftbefeuchtung 3-stufighumidification 3-step controlFUSPS1. Stufe1st stepVE-WasserDeionised water1 - 5 bar5 - 20μs/cmPIDWassereinlassfilterwater filterMVWassereinlass-Magnetventilwater solenoidvalvePumpepump5 - 16 barPIDMV2. Stufe2nd stepMVFU: Frequenzumrichterfrequency converterSPS: Speicherprogrammierbare Steuerungprogrammable logic controllerMV3. Stufe3rd stepSpülmagnetventilflushing solenoid valvePID: Drucksensorpressure sensorA Blatt 2 eingefügt 22.10.12 Mar Lise-Meitner-Str. 324558 Henstedt-UlzburgTel.: +49/(0)4193/895-0Fax: +49/(0)4193/895-33 Page 68
43Page 69
12/2004Lise-Meitner-Str.3 • D-24558 Henstedt-UlzburgPhone +49(0)4193/ 895-0 • Fax -33eMail hy@hygromatik.de • www.hygromatik.comA member of theGroup