SERVICE MANUAL SERIES 360 EP SERIES 360 ES - Precisa
SERVICE MANUAL SERIES 360 EP SERIES 360 ES - Precisa
SERVICE MANUAL SERIES 360 EP SERIES 360 ES - Precisa

You also want an ePaper? Increase the reach of your titles
YUMPU automatically turns print PDFs into web optimized ePapers that Google loves.
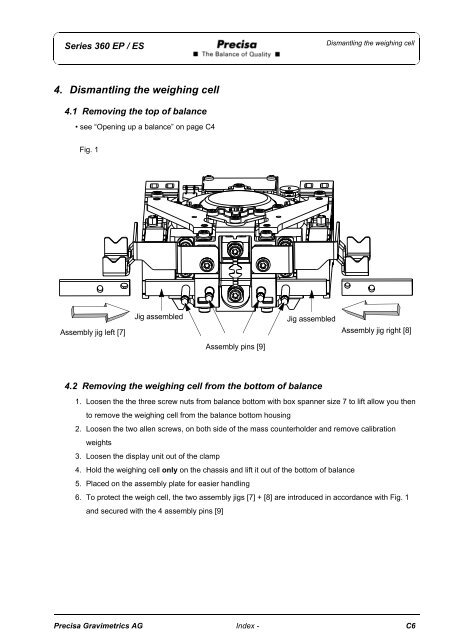
Series <strong>360</strong> <strong>EP</strong> / <strong>ES</strong>Dismantling the weighing cell4. Dismantling the weighing cell4.1 Removing the top of balance• see “Opening up a balance” on page C4Fig. 1Assembly jig left [7]Jig assembledJig assembledAssembly jig right [8]Assembly pins [9]4.2 Removing the weighing cell from the bottom of balance1. Loosen the the three screw nuts from balance bottom with box spanner size 7 to lift allow you thento remove the weighing cell from the balance bottom housing2. Loosen the two allen screws, on both side of the mass counterholder and remove calibrationweights3. Loosen the display unit out of the clamp4. Hold the weighing cell only on the chassis and lift it out of the bottom of balance5. Placed on the assembly plate for easier handling6. To protect the weigh cell, the two assembly jigs [7] + [8] are introduced in accordance with Fig. 1and secured with the 4 assembly pins [9]<strong>Precisa</strong> Gravimetrics AG Index - C6