SERVICE MANUAL SERIES 360 EP SERIES 360 ES - Precisa
SERVICE MANUAL SERIES 360 EP SERIES 360 ES - Precisa
SERVICE MANUAL SERIES 360 EP SERIES 360 ES - Precisa

You also want an ePaper? Increase the reach of your titles
YUMPU automatically turns print PDFs into web optimized ePapers that Google loves.
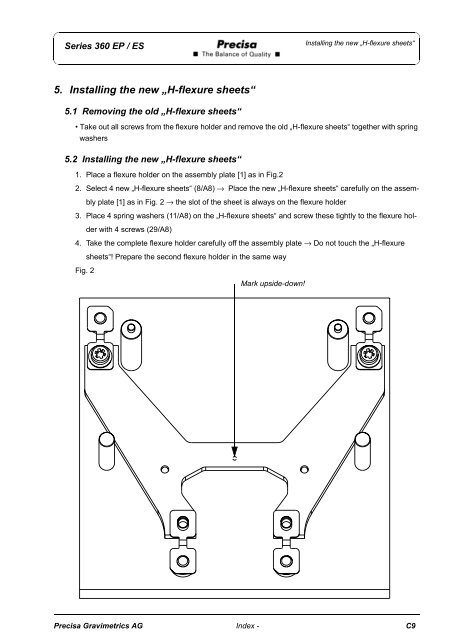
Series <strong>360</strong> <strong>EP</strong> / <strong>ES</strong>Installing the new „H-flexure sheets“5. Installing the new „H-flexure sheets“5.1 Removing the old „H-flexure sheets“• Take out all screws from the flexure holder and remove the old „H-flexure sheets“ together with springwashers5.2 Installing the new „H-flexure sheets“1. Place a flexure holder on the assembly plate [1] as in Fig.22. Select 4 new „H-flexure sheets“ (8/A8) → Place the new „H-flexure sheets“ carefully on the assemblyplate [1] as in Fig. 2 → the slot of the sheet is always on the flexure holder3. Place 4 spring washers (11/A8) on the „H-flexure sheets“ and screw these tightly to the flexure holderwith 4 screws (29/A8)4. Take the complete flexure holder carefully off the assembly plate → Do not touch the „H-flexuresheets“! Prepare the second flexure holder in the same wayFig. 2Mark upside-down!<strong>Precisa</strong> Gravimetrics AG Index - C9