® SX4e GSM - RACOman.com
® SX4e GSM - RACOman.com
® SX4e GSM - RACOman.com

Create successful ePaper yourself
Turn your PDF publications into a flip-book with our unique Google optimized e-Paper software.
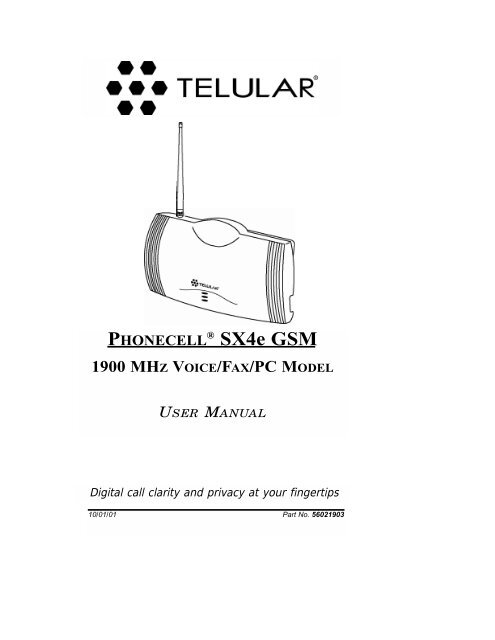
PHONECELL <strong>®</strong> <strong>SX4e</strong> <strong>GSM</strong><br />
1900 MHZ VOICE/FAX/PC MODEL<br />
USER MANUAL<br />
Digital call clarity and privacy at your fingertips<br />
10/01/01 Part No. 56021903
PHONECELL <strong>®</strong> <strong>SX4e</strong> <strong>GSM</strong><br />
1900 MHZ VOICE/FAX/PC MODEL<br />
USER MANUAL
Introduction<br />
Phone Port<br />
Optional connection<br />
with Single Jack<br />
Serial Port<br />
Power<br />
Supply<br />
Fax Port<br />
or<br />
Phone(s)<br />
Fax<br />
Machine<br />
Computer<br />
Thank you for choosing the Phonecell <strong>®</strong> <strong>SX4e</strong> Fixed Wireless Terminal (FWT) from<br />
Telular. This innovative product lets you connect up to five pieces of standard telephone<br />
equipment into a cellular network for total <strong>com</strong>munications flexibility.<br />
Please follow this guide to unpack, set up and operate your new<br />
Phonecell <strong>SX4e</strong> FWT safely and properly.<br />
Telular is proud to wel<strong>com</strong>e you as a valued customer.<br />
Your satisfaction is our most important concern.<br />
Telular Corporation<br />
Corporate Headquarters<br />
647 North Lakeview Parkway<br />
Vernon Hills, Illinois 60061, USA<br />
TECHNICAL SUPPORT<br />
Battery Backup<br />
Unit (optional)<br />
Tel: 847-247-9400 · Fax: 847-247-0021<br />
E-mail: mainoffice@telular.<strong>com</strong> · http://www.telular.<strong>com</strong><br />
Patents: Telular Corporation products are protected and manufactured under<br />
one or more of the following U.S. patents and related<br />
international patents and patents pending relating thereto:<br />
4,658,096; 4,737,975; 4,775,997; 4,868,519; 4,922,517; 5,134,651;<br />
5,361,297; 5,469,494; 5,046,085; 5,715,296; 5,812,637; 5,859,894;<br />
5,946,616; 5,966,428; 6,035,220.<br />
Trademarks: Telular Corporation owns the following registered trademarks:<br />
TELULAR, TELULAR plus design, CELJACK, PCSone, TELCEL,<br />
HEXAGON LOGO, PHONECELL, CELSERV, TELGUARD, and CPX.<br />
PLEASE SEE PAGES 7 and 8 FOR IMPORTANT<br />
RESTRICTIONS ON USE, AS WELL AS, WARRANTY<br />
AND INDEMNIFICATION<br />
AC Power<br />
Part No. 56021903 ©2001 Telular Corporation, all rights reserved.<br />
<strong>SX4e</strong> <strong>GSM</strong> 1900 2 USER MANUAL<br />
●<br />
●
Table of Contents<br />
Introduction.............................................................................................. 2<br />
Technical Support.................................................................................. 2<br />
Safety Information................................................................................... 4<br />
Important Notices ...................................................................................... 7<br />
Getting Started......................................................................................... 9<br />
Unpacking Your Phonecell <strong>SX4e</strong>........................................................... 9<br />
Pre-Installation Checklist....................................................................... 9<br />
Installation Summary ............................................................................ 10<br />
Step 1. Antenna Location and Setup ................................................... 11<br />
Antenna Setup..................................................................................... 11<br />
Antenna Location Tips......................................................................... 12<br />
Connect the Power.............................................................................. 13<br />
Step 2. Plug in Your Telephone............................................................ 14<br />
Connect Your Telephone ..................................................................... 14<br />
Dual Jack Operation............................................................................ 14<br />
Single Jack Operation ......................................................................... 14<br />
Place a Call – Adjust Your FWT .......................................................... 15<br />
Adding More Phones or Fax Machines............................................... 15<br />
Step 3. Optional PC Data Connection ................................................. 16<br />
Step 4. SIM Card Installation & Setup ................................................. 20<br />
How to Install the Mini-SIM Card......................................................... 20<br />
SIM PIN Programming......................................................................... 21<br />
Step 5. Wall-Mount Installation ............................................................ 24<br />
Phonecell <strong>SX4e</strong> Operation.................................................................... 25<br />
How to Use the LED Status Indicators................................................ 25<br />
How to Place a Call............................................................................. 26<br />
How to Receive a Call......................................................................... 26<br />
How to End a Call ............................................................................... 26<br />
Hookflash Function.............................................................................. 26<br />
Important Tones and Alerts.................................................................. 26<br />
How to Use Call-Dependent Supplementary Services........................ 27<br />
How to Adjust the Volume Level ......................................................... 28<br />
Variable Dial Time (Auto SEND Delay) Option.................................... 28<br />
Data After SEND (In-Call DTMF Signaling) Option............................. 28<br />
Zero Dial Delay for Frequently Called Numbers ................................. 28<br />
Caller ID Format .................................................................................. 29<br />
Mobile Equipment Personalization ...................................................... 30<br />
Using Standard Supplementary Services............................................ 30<br />
How to Make an Analog Fax Call ......................................................... 34<br />
How to Make Analog Fax Calls ........................................................... 34<br />
How to Send Fax Calls........................................................................ 34<br />
How to Receive Fax Calls ................................................................... 34<br />
How to Set Up Analog Fax By-Pass String ......................................... 34<br />
Dual/Single Jack Operation................................................................. 35<br />
How to Set a Single Jack Option .........................................................35<br />
How to Set In-Bound Fax Port Option................................................. 35<br />
Phonecell <strong>SX4e</strong> Troubleshooting ........................................................ 36<br />
Phonecell <strong>SX4e</strong> Programming ............................................................. 37<br />
Phonecell <strong>SX4e</strong> User-Programming Commands................................ 37<br />
How to Enter the User Programming Mode ........................................ 37<br />
Phonecell <strong>SX4e</strong> Technician-Programming Commands....................... 39<br />
Appendix A: How to Setup PC Serial Ports for Phonecell<br />
Computer Digital Fax/Data ................................................................ 43<br />
<strong>SX4e</strong> <strong>GSM</strong> 1900 3 USER MANUAL
Safety Information<br />
Your Phonecell <strong>SX4e</strong> FWT (Fixed Wireless Terminal) functions as both a<br />
radio transmitter and receiver. When it is ON, the FWT receives and sends out<br />
radio frequency (RF) energy. The <strong>SX4e</strong> <strong>GSM</strong> 1900 operates between 1850<br />
MHz and 1990 MHz. It employs the <strong>com</strong>monly used phase/frequency modulation<br />
techniques. When you use your Phonecell <strong>SX4e</strong>, the cellular system<br />
handling your call controls the power level at which your unit transmits.<br />
Nominal power for the <strong>GSM</strong> 1900 unit is 1 watt.<br />
Exposure to RF (Radio Frequency) Energy<br />
In 1991, the Institute of Electrical and Electronics Engineers (IEEE), and in 1992, the<br />
American National Standards Institute (ANSI), updated the 1982 ANSI Standard for<br />
safety levels with respect to human exposure to RF energy. After reviewing the<br />
available body of research, more than 120 scientists, engineers and physicians from<br />
universities, government health agencies and industry developed this updated<br />
Standard. In March, 1993, the U.S. Federal Communications Commission (FCC)<br />
proposed the adoption of this updated Standard.<br />
The design of your Telular Phonecell <strong>SX4e</strong> FWT (Fixed Wireless Terminal) <strong>com</strong>plies<br />
with the requirements of EN 55022, 47 CFR Part 15, Class B, and ICES-003 for conducted<br />
and radiated emissions. Of course, if you want to limit RF exposure even further<br />
than the updated ANSI Standard, you may choose to control the duration of your<br />
calls and operate your phone in the most power-efficient manner.<br />
Safe Operation Requirement<br />
Do not operate your Phonecell when any person is within 8 inches (20 cm) of the antenna.<br />
Protective Earth (Safety Ground) Terminal<br />
A protective earth (safety ground) terminal (screw) marked with the<br />
protective earth symbol is provided on the back of the SX4 Phonecell unit.<br />
This terminal must have a permanent connection to a good earth ground<br />
(i.e. a cold water pipe) by means of an 18 gauge or heavier insulated wire.<br />
The wire insulation should be green with a yellow stripe to indicate that this is a<br />
protective earth (safety ground) connection.<br />
WARNING: The protective earth is to be installed by a qualified electrician.<br />
Temperature Environment<br />
Operating Temperature: From -10°C (14°F) to +50°C (122°F);<br />
Up to 95% relative humidity (non-condensing)<br />
Storage Temperature: From -20°C (-4°F) to +60°C (140°F);<br />
Up to 95% relative humidity (non-condensing)<br />
!<br />
IMPORTANT!<br />
To ensure safe and efficient operation, please read the following information<br />
and observe these guidelines whenever using your Phonecell FWT.<br />
WARNING!<br />
Your Phonecell must be placed or mounted on a flat surface to allow proper<br />
ventilation. Do not block the air vents or the space beneath your Phonecell as<br />
this could cause the unit to overheat and fail.<br />
<strong>SX4e</strong> <strong>GSM</strong> 1900 4 USER MANUAL
Safety Information - continued<br />
Antenna Care and Replacement<br />
Do not use the FWT with a damaged antenna. If a damaged antenna <strong>com</strong>es into<br />
contact with the skin, a minor burn may result. Have your antenna replaced by a<br />
qualified technician immediately. Use only a manufacturer-approved antenna.<br />
Unauthorized antennas, modifications, or attachments could damage the FWT<br />
(Fixed Wireless Terminal) and will void the user's authority to operate the equipment.<br />
Driving<br />
Check the laws and regulations on the use of cellular products<br />
in the areas where you drive. Some jurisdictions prohibit your<br />
using a cellular device while driving a vehicle. Even if your<br />
jurisdiction does not have such a law, we strongly suggest that,<br />
for safety reasons, the driver use extreme caution when operating the cellular<br />
device while the vehicle is in motion. Always obey the law.<br />
Electronic Devices<br />
Most modern electronic equipment is shielded from RF energy. However, RF<br />
energy from cellular devices may affect inadequately shielded electronic<br />
equipment.<br />
RF energy may affect improperly installed or inadequately shielded electronic<br />
operating and entertainment systems in motor vehicles. Check with the<br />
manufacturer or its representative to determine if these systems are adequately<br />
shielded from external RF energy. You should also check with the manufacturer of<br />
any equipment that has been added to your vehicle.<br />
Consult the manufacturer of any personal medical devices (such as pacemakers,<br />
hearing aids, etc.) to determine if they are adequately shielded from external RF<br />
energy.<br />
Turn your Phonecell FWT OFF in health care facilities when any regulations<br />
posted in the areas instruct you to do so. Hospitals or health care facilities may be<br />
using equipment that could be sensitive to external RF energy.<br />
Aircraft<br />
Turn OFF your Phonecell before boarding any aircraft.<br />
• Use it on the ground only with crew permission.<br />
• Do not use it in the air.<br />
To prevent possible interference with aircraft systems, U.S.<br />
Federal Aviation Administration (FAA) regulations require you to have permission<br />
from a crew member to use your cellular phone (or any other cellular product)<br />
while the plane is on the ground. To prevent interference with aircraft systems,<br />
FCC regulations prohibit using your cellular FWT while the plane is in the air.<br />
Children<br />
Do not allow children to play with your Phonecell to prevent damage to the unit.<br />
Blasting Areas<br />
Construction crews often use remote control RF devices to set off explosives.<br />
Therefore, to avoid interfering with blasting operations, turn your Phonecell OFF<br />
when in a "blasting area" or in areas posted: "Turn off two-way radio."<br />
<strong>SX4e</strong> <strong>GSM</strong> 1900 5 USER MANUAL
Safety Information - continued<br />
Potentially Explosive Atmospheres<br />
Turn your Phonecell OFF when in any area with a potentially<br />
explosive atmosphere. It is rare, but your Phonecell or its accessories<br />
could generate sparks. Sparks in such areas could cause an<br />
explosion or fire resulting in bodily injury or even death.<br />
Areas with a potentially explosive atmosphere are often, but not<br />
always, clearly marked. They include fueling areas such as gas<br />
stations; below deck on boats; fuel or chemical transfer or storage facilities; areas<br />
where the air contains chemicals or particles, such as grain, dust, or metal powders;<br />
and any other area where you would normally be advised to turn off your<br />
vehicle engine.<br />
Do not transport or store flammable gas, liquid or explosives in the area of your<br />
Phonecell or accessories.<br />
Vehicles using liquefied petroleum gas (such as propane or butane) must <strong>com</strong>ply<br />
with the National Fire Protection Standard (FPA-58). For a copy of this standard,<br />
contact the National Fire Protection Association, One Batterymarch Park, Quincy,<br />
MA 02269, Attn: Publications Sales Division.<br />
FCC Part 15 Class B Compliance<br />
This Phonecell <strong>SX4e</strong> model has been tested and found to <strong>com</strong>ply with the limits<br />
for a Class B digital device, pursuant to Part 15 of the FCC rules. These limits are<br />
designed to provide reasonable protection against harmful interference in a<br />
residential installation. This equipment generates, uses and can radiate radio<br />
frequency energy and, if not installed and used in accordance with the<br />
instructions, may cause harmful interference to radio <strong>com</strong>munications. However,<br />
there is no guarantee that interference will not occur in a particular installation. If<br />
this equipment does cause harmful interference to radio or television reception,<br />
which can be determined by turning the equipment OFF and ON, the user is<br />
encouraged to try to correct the interference by one or more of the following<br />
measures:<br />
• Reorient or relocate the antenna.<br />
• Increase the separation between the equipment and the terminal.<br />
• Connect the equipment into an outlet on a circuit different from that to which the<br />
terminal is connected.<br />
• Consult your Authorized Telular Distributor or an experienced radio/TV<br />
technician for help.<br />
<strong>GSM</strong> Type Acceptance<br />
The Phonecell <strong>SX4e</strong> <strong>GSM</strong> 1900 model utilizes a Telular-designed mobile terminal<br />
integrated onto the main board. The Phonecell <strong>SX4e</strong> <strong>GSM</strong> 1900 model <strong>com</strong>plies<br />
with the TIA/EIA J-STD-007 PCS 1900 Air Interface Standard.<br />
<strong>SX4e</strong> <strong>GSM</strong> 1900 6 USER MANUAL
Important Notices<br />
TERMS AND CONDITIONS FOR USE OF PHONECELL<strong>®</strong> PRODUCTS ("Product")<br />
These Terms and Conditions are a legal contract between you and Telular Corporation for the title to and use of<br />
the Product. BY RETAINING AND USING THE PRODUCT AFTER RECEIPT OF IT, YOU AGREE TO THE TERMS<br />
AND CONDITIONS INCLUDING WARRANTY DISCLAIMERS, LIMITATIONS OF LIABILITY AND INDEMNIFICA-<br />
TION PROVISIONS BELOW. IF YOU DO NOT AGREE TO THE TERMS AND CONDITIONS, DO NOT USE THE<br />
PRODUCT AND IMMEDIATELY RETURN THE UNUSED PRODUCT FOR A COMPLETE REFUND. You agree to<br />
accept sole responsibility for any misuse of the Product by you; and, in addition, any negligent or illegal act or omission<br />
of your or your agents, contractors, servants, employees, or other users of the Product so long as the Product<br />
was obtained from you, in the use and operation of the Product.<br />
INDEMNIFICATION OF TELULAR CORPORATION ("TELULAR")<br />
YOU SHALL INDEMNIFY, DEFEND AND HOLD HARMLESS TELULAR FOR ANY OF THE COST, INCLUDING<br />
REASONABLE ATTORNEYS' FEES, AND FROM CLAIMS ARISING OUT OF YOU, YOUR CLIENTS' OR<br />
OTHER THIRD PARTIES' USE OR OPERATION OF THE PRODUCT: (i) FOR MISUSE OR IN A MANNER NOT<br />
CONTEMPLATED BY YOU AND TELULAR OR INCONSISTENT WITH THE PROVISIONS OF THIS MANUAL;<br />
(ii) IN AN ILLEGAL MANNER OR AGAINST PUBLIC POLICY; (iii) IN A MANNER SPECIFICALLY UNAUTHO-<br />
RIZED IN THIS MANUAL; (iv) IN A MANNER HARMFUL OR DANGEROUS TO THIRD PARTIES; (v) FROM<br />
CLAIMS BY ANYONE RESPECTING PROBLEMS, ERRORS OR MISTAKES OF THE PRODUCT; OR (vi) COM-<br />
BINATION OF THE PRODUCT WITH MATERIAL, MODIFICATION OF THE PRODUCT OR USE OF THE PROD-<br />
UCT IN AN ENVIRONMENT NOT PROVIDED, OR PERMITTED, BY TELULAR IN WRITING. THE PARTIES<br />
SHALL GIVE EACH OTHER PROMPT NOTICE OF ANY SUCH COST OR CLAIMS AND COOPERATE, EACH<br />
WITH THE OTHER, TO EFFECTUATE THIS INDEMNIFICATION, DEFENSE AND HOLD HARMLESS.<br />
WARRANTY<br />
I. WHAT THIS WARRANTY COVERS AND FOR HOW LONG:<br />
TELULAR CORPORATION ('Telular") warrants to a distributor Buyer, or to a customer only if the customer is a<br />
Buyer directly from Telular, that the Products (including accessories) shall <strong>com</strong>ply with the applicable Specifications<br />
and shall be free from defects in material and workmanship under normal use and service for a period of fifteen<br />
(15) months from date of shipment from Telular. Telular, at its option, shall at no charge either repair, replace or<br />
refund the purchase price of the Product during the warranty period, provided it is returned by Buyer in accordance<br />
with the terms of this warranty to the Telular designated repair center. Repair or replacement, at Telular's option,<br />
may include the replacement of parts, boards or Products with functionally equivalent reconditioned items.<br />
Repaired and replacement items are warranted for the balance of the original warranty period. All replaced items<br />
shall be<strong>com</strong>e the property of Telular. SUCH ACTION ON THE PART OF TELULAR SHALL BE THE FULL<br />
EXTENT OF TELULAR'S LIABILITY HEREUNDER, AND BUYERS EXCLUSIVE REMEDY. Buyer shall be<br />
responsible for all costs and expenses incurred by Buyer including without limitation any handling, labor or transportation<br />
charges. OTHER THAN AFORESAID, THIS EXPRESS WARRANTY IS EXTENDED BY TELULAR TO<br />
BUYER ONLY AND NOT TO BUYER'S CUSTOMERS OR USERS OF BUYER'S PRODUCTS.<br />
II. HOW TO OBTAIN WARRANTY SERVICE<br />
Product covered under this warranty shall only be accepted from and returned to Buyer's designated repair center.<br />
Buyer's dealers, distributors, agents, and end users cannot submit items to Telular under this warranty. To<br />
receive warranty service an RMA number must first be obtained from Telular Technical Support. The defective or<br />
non-<strong>com</strong>pliant Product should be sent by Buyer freight pre-paid to: Telular Corporation, 647 North Lakeview<br />
Parkway, Vernon Hills, IL 60061, USA or other designated location. The product must be packaged in the original<br />
carton and packing material or an equivalent package and must have the assigned RMA number clearly marked<br />
on the carton. Returned Product received without an RMA number will be returned to the sender.<br />
III. WARRANTY CONDITIONS:<br />
This is the <strong>com</strong>plete warranty for the Products manufactured by Telular and sold to Buyer. Telular assumes no<br />
obligation or liability for additions or modifications to this warranty unless made in writing and signed by an officer<br />
of Telular. Unless made in separate written agreement between Telular and Buyer, Telular does not warrant the<br />
installation, field maintenance or service of the Products or parts.<br />
<strong>SX4e</strong> <strong>GSM</strong> 1900 7 USER MANUAL
Important Notices - continued<br />
TELULAR CANNOT BE RESPONSIBLE IN ANY WAY FOR ANY ANCILLARY EQUIPMENT NOT FURNISHED<br />
BY TELULAR WHICH IS ATTACHED TO OR USED IN CONNECTION WITH THE PRODUCTS OR FOR OPER-<br />
ATION OF THE PRODUCTS WITH ANY ANCILLARY EQUIPMENT AND ALL SUCH EQUIPMENT IS<br />
EXPRESSLY EXCLUDED FROM THIS WARRANTY. FURTHERMORE, TELULAR CANNOT BE RESPONSI-<br />
BLE FOR ANY DAMAGE TO THE PRODUCTS RESULTING FROM THE USE OF ANCILLARY EQUIPMENT<br />
NOT FURNISHED BY TELULAR FOR USE WITH THE PRODUCTS.<br />
WHEN THE PRODUCT IS USED IN CONJUNCTION WITH ANCILLARY OR PERIPHERAL EQUIPMENT NOT<br />
MANUFACTURED BY TELULAR, TELULAR DOES NOT WARRANT THE OPERATION OF THE<br />
PRODUCT/PERIPHERAL COMBINATION, AND TELULAR SHALL HONOR NO WARRANTY CLAIM WHERE<br />
THE PRODUCT IS USED IN SUCH A COMBINATION AND IT IS DETERMINED BY TELULAR THAT THERE IS<br />
NO FAULT WITH THE PRODUCT. TELULAR DISCLAIMS LIABILITY FOR RANGE, COVERAGE, AVAILABIL-<br />
ITY, OR OPERATION OF THE CELLULAR SYSTEM WHICH IS PROVIDED BY THE CARRIER.<br />
IV. WHAT THIS WARRANTY DOES NOT COVER:<br />
(a) Subsequent upgrades and enhancements to the Product. (b) Defects, non-<strong>com</strong>pliance or damage resulting<br />
from use of the Product in other than its normal and customary manner or environment. (c) Defects, non<strong>com</strong>pliance<br />
or damage from misuse, lightening, accident or neglect. (d) Defects, non<strong>com</strong>pliance or damage from improper<br />
testing, operation, maintenance, installation, adjustment, or any alteration or modification of any kind. (e)<br />
Product disassembled or repaired in such a manner as to adversely affect performance or prevent adequate<br />
inspection and testing to verify any warranty claim. (f) Product which has had the serial number removed or made<br />
illegible. (g) Defects, non-<strong>com</strong>pliance or damage due to spills of food or liquid. (h) All plastic surfaces and all other<br />
externally exposed parts that are scratched or damaged due to customer normal use. (i) Costs and expenses,<br />
including without limitation handling, labor and transportation, incurred in returning Product for warranty service to<br />
Telular's Repair Center. (j) Repair, programming or servicing by someone other than Telular.<br />
V. GENERAL PROVISIONS:<br />
THIS WARRANTY IS GIVEN IN LIEU OF ALL OTHER EXPRESS OR STATUTORY WARRANTIES. IMPLIED<br />
WARRANTIES, INCLUDING WITHOUT LIMITATION IMPLIED WARRANTIES OF MERCHANTABILITY, FIT-<br />
NESS FOR A PARTICULAR PURPOSE, TITLE, INFRINGEMENT, DELIVERY, NEGLIGENCE AND PERSON-<br />
AL INJURY, ARE DISCLAIMED. FURTHER, AS THE CELLULAR CARRIER IS NOT CONTROLLED BY TELU-<br />
LAR, NO WARRANTY IS MADE AS TO COVERAGE, AVAILABILITY OR GRADE OF SERVICE PROVIDED BY<br />
THE CELLULAR CARRIER. IN NO EVENT SHALL TELULAR BE LIABLE FOR DAMAGES IN EXCESS OF THE<br />
PURCHASE PRICE OF THE PRODUCT, FOR ANY LOSS OF USE, LOSS OF TIME, INCONVENIENCE, COM-<br />
MERCIAL LOSS, LOST PROFITS OR SAVINGS OR OTHER INCIDENTAL, SPECIAL OR CONSEQUENTIAL<br />
DAMAGES ARISING OUT OF THE USE OR INABILITY TO USE SUCH PRODUCT TO THE FULL EXTENT<br />
SUCH MAY BE DISCLAIMED BY LAW. SOME JURISDICTIONS DO NOT ALLOW THE EXCLUSION OR LIM-<br />
ITATIONS OF INCIDENTAL OR CONSEQUENTIAL DAMAGES OR LIMITATION ON HOW LONG AN IMPLIED<br />
WARRANTY LASTS.<br />
VI. SOFTWARE PROVISIONS:<br />
Laws in the United States and other countries preserve for Telular certain exclusive rights for copyrighted Telular<br />
software such as the exclusive rights to reproduce in copies and distribute copies of such Telular software. Telular<br />
software may be copied into, used in and redistributed with only the Product associated with such Telular software.<br />
No other use, including without limitation, disassembly of such Telular software or exercise of exclusive rights in<br />
such Telular software is permitted and Telular reserves all rights not expressly granted in this Limited Commercial<br />
Warranty.<br />
<strong>SX4e</strong> <strong>GSM</strong> 1900 8 USER MANUAL
Getting Started...<br />
Unpacking Your Phonecell <strong>SX4e</strong><br />
➊ ➋<br />
➌<br />
The Phonecell <strong>SX4e</strong> <strong>com</strong>es with the following:<br />
➊ Phonecell <strong>SX4e</strong> Fixed Wireless Terminal (FWT)<br />
➋ Dipole antenna<br />
➌ 2-Wire, Linear Power Supply with 6 kV Lightning and Surge Protection, and<br />
AC Line Cord<br />
Carefully remove the unit from the shipping carton and check for evidence of<br />
shipping damage. If damage is found, contact your Authorized Telular<br />
Distributor or shipping agent immediately.<br />
Pre-Installation Checklist<br />
Before attempting Phonecell <strong>SX4e</strong> installation, make sure you have the following<br />
<strong>com</strong>ponents, tools and materials.<br />
Additional Components Needed<br />
Qty. Description Supplied Not Supplied<br />
1 Mini-SIM (Subscriber ID Module) Card* ✔<br />
1 RJ-11 Modular Phone Cord ✔<br />
1 Data Cable - for Digital Fax/Data Transmission** ✔<br />
* Supplied by your Network Service Provider<br />
** See “Step 3: Optional PC Data Connection” section of this manual.<br />
Tools & Materials Needed – for Wall-Mount Installation Only<br />
Qty. Description Supplied Not Supplied<br />
1 Drill & Drill Bit ✔<br />
1 Screwdriver ✔<br />
2 11 /2-inch (3.75 cm) Mounting Screws ✔<br />
Optional Components<br />
Qty. Description Supplied Not Supplied<br />
Phone Line Splitter – if you plan to connect<br />
more than one telephone to the FWT<br />
✔<br />
<strong>SX4e</strong> <strong>GSM</strong> 1900 9 USER MANUAL
Installation Summary<br />
There are five steps to installing the Phonecell <strong>SX4e</strong> FWT properly. These steps<br />
are summarized below and explained in detail in the remainder of this manual.<br />
Step 1. Choose an Antenna Location (pages 11 - 13)<br />
• Choose an antenna location.<br />
• Connect the antenna.<br />
!<br />
WARNING!<br />
DO NOT power unit until antenna<br />
is connected, as it may burn out<br />
the radio transmitter.<br />
• Connect the FWT to a good earth ground.<br />
• Connect power to the FWT. Allow time for the unit to find service<br />
and stabilize.<br />
• Then, check the cellular signal strength and move the antenna<br />
until you achieve the best signal possible.<br />
Step 2. Plug In Your Telephone (pages 14 - 15)<br />
• Once the antenna is connected, hook up a phone.<br />
• Then, make a test call to verify proper operation.<br />
Adjust the antenna location accordingly.<br />
NOTE: If your Phonecell <strong>SX4e</strong> did not <strong>com</strong>e<br />
with a pre-installed mini-SIM (Subscriber Identity<br />
Module) card, you need to perform the SIM Card<br />
Installation and Setup procedure in Step 4. Then,<br />
return to this step (2).<br />
• Choose Single or Dual jack option (Dual jack allows<br />
you to connect a separate fax line)- see the<br />
Connect Your Telephone section of this manual.<br />
• You may plug in additional phones via a Line Splitter<br />
(not supplied) if desired.<br />
Step 3. Optional PC Data Connection (pages 16 - 19)<br />
• Now that the Phonecell is functioning properly,<br />
plug in your <strong>com</strong>puter for <strong>com</strong>puter digital<br />
fax/data transmission, using a DB-9 cable<br />
(not supplied).<br />
Step 4. SIM Card Installation & Setup (pages 20 - 23)<br />
• If your Phonecell did not <strong>com</strong>e with a preinstalled<br />
mini-SIM card, you need to perform the<br />
SIM Card Installation and SIM PIN Setup.<br />
• Otherwise, continue to Step 5.<br />
Step 5. Wall-Mount Installation (pages 24)<br />
• After you’ve selected a location and made all the<br />
necessary connections and adjustments, your<br />
Phonecell <strong>SX4e</strong> is ready for wall-mounting.<br />
<strong>SX4e</strong> <strong>GSM</strong> 1900 10 USER MANUAL
Step 1. Antenna Location and Setup<br />
The Phonecell <strong>SX4e</strong> <strong>com</strong>es with a dipole antenna.<br />
Antenna Setup:<br />
1) Connect the antenna to the TNC<br />
antenna connector on top of the<br />
FWT - see Figure 1.<br />
2) Connect power to the FWT - see<br />
the Connect the Power section<br />
of this manual. Wait for the unit to<br />
acquire service.<br />
3) Check the LED cellular status<br />
indicator (middle LED) on<br />
the front of your Phonecell:<br />
• RED Continuous = No Service<br />
• RED Flashing = SIM Problem<br />
• GREEN Continuous = Good signal.<br />
• GREEN Flashing = Poor signal.<br />
4) Move the antenna from one<br />
location to another until you<br />
achieve the best signal<br />
strength possible (GREEN).<br />
5) When you’re getting a strong<br />
(GREEN) signal, you’re ready for<br />
the next step - connecting a phone<br />
and making a call.<br />
NOTE: If you’re still receiving a<br />
Continuous RED “no-service”<br />
signal, contact your service<br />
provider to make sure cellular<br />
service is activated.<br />
If the LED is flashing RED, there’s<br />
a SIM card problem - see Step 5.<br />
!<br />
WARNING!<br />
Never operate your Phonecell<br />
when any person is within 8<br />
inches (20 cm) of the antenna.<br />
Figure 1<br />
Standard<br />
Dipole<br />
Antenna<br />
Female TNC<br />
Antenna<br />
Connector<br />
LED Cellular<br />
Status Indicator<br />
<strong>SX4e</strong> <strong>GSM</strong> 1900 11 USER MANUAL
Antenna Location & Setup - continued<br />
Your Phonecell receives operating <strong>com</strong>mands from the cellular network<br />
and relies upon signal strength for proper operation. Therefore, finding an<br />
antenna location with good signal strength is critical for optimal call clarity.<br />
After you choose a good location, connect the antenna, test the signal<br />
strength and adjust the location accordingly.<br />
ANTENNA LOCATION TIPS<br />
• Locate the antenna above ground and as close<br />
to windows (or exterior walls) as possible - see<br />
Figure 2 and Figure 3.<br />
Figure 3 – Table-mount with antenna<br />
pointed upward and located near a<br />
window for optimum signal strength.<br />
!<br />
WARNING!<br />
DO NOT install antenna close to<br />
telephones, as the RF emissions will<br />
cause interference.<br />
Figure 2 – Wall-mount with<br />
antenna pointed upward and located<br />
near a window for optimum signal<br />
strength.<br />
<strong>SX4e</strong> <strong>GSM</strong> 1900 12 USER MANUAL
Antenna Location & Setup - continued<br />
Connect the Power<br />
1) A protective earth (safety ground) terminal<br />
(screw) marked with this protective earth<br />
symbol is provided on the back of the<br />
<strong>SX4e</strong> unit - see Figure 4.<br />
2) Connect this terminal to a good earth ground<br />
(i.e. a cold water pipe) by means of an 18<br />
gauge or heavier insulated wire. The wire<br />
insulation should be green with a yellow stripe<br />
to indicate that this is a protective earth (safety<br />
ground) connection.<br />
WARNING: The protective earth is to be<br />
installed by a qualified electrician.<br />
3) Connect the Line Cord from the AC power<br />
source to the Power Supply.<br />
!<br />
4) Connect the barrel plug on the Power Supply<br />
to the Power Input port on the side of the<br />
Phonecell.<br />
5) The LED Power Status indicator (located on<br />
the front of the FWT) will turn green immediately<br />
upon connecting to power - see Figure 6.<br />
LED<br />
Power<br />
Indicator<br />
Figure 6<br />
WARNING!<br />
The mounting bracket and<br />
protective earth/ground wire<br />
must be installed on the<br />
Phonecell before power is<br />
applied.<br />
Serial Port<br />
Line<br />
Cord<br />
Protective earth (safety<br />
ground) terminal screw<br />
Figure 4<br />
Fax Port<br />
Power Input Port<br />
Figure 5<br />
Phone Port<br />
Power<br />
Supply<br />
●<br />
●<br />
AC Power<br />
<strong>SX4e</strong> <strong>GSM</strong> 1900 13 USER MANUAL
Step 2. Plug In Your Telephone<br />
The Phonecell <strong>SX4e</strong> lets you connect up to a 5 REN telephone load into a<br />
cellular network. Follow the steps below for quick installation.<br />
Connect Your Telephone<br />
Dual-Jack Operation<br />
The Phonecell <strong>SX4e</strong> may be operated in either<br />
dual-jack or single-jack mode. The factory default<br />
is the dual- jack mode. In dual-jack operation, for<br />
outgoing calls, the first jack to seize the line (go<br />
off-hook) will disconnect the other jack. The other<br />
jack will remain disconnected until the first jack<br />
goes back on-hook. For in<strong>com</strong>ing calls, voice<br />
calls will be routed to the Phone voice jack and<br />
fax calls will be routed to the Fax jack. See How<br />
to Set A Single Jack Option, to change programming<br />
to single jack operation.<br />
1) Locate the modular line port on your<br />
phone and plug in one end of a standard<br />
phone cord.<br />
2) Connect the other end of the cord to the<br />
telephone port (marked PHONE) on the side<br />
of your Phonecell <strong>SX4e</strong> - see Figure 7.<br />
NOTE: An RJ-11 connector will fit into the<br />
Phone port.<br />
NOTE: The Phonecell <strong>SX4e</strong> does not<br />
support direct <strong>com</strong>puter modem (data)<br />
operation through the Phone port or Fax<br />
port. It also does not support the phone<br />
through the fax port.<br />
3) Locate the modular line port on<br />
your fax machine and plug in one end of a<br />
standard phone cord.<br />
4) Connect the other end of the cord<br />
to the fax port (To the Left of the Phone<br />
port) on the side of your Phonecell <strong>SX4e</strong>.<br />
Single-Jack Operation<br />
The analog fax jack can be disabled leaving<br />
only the telephone jack operational (single-jack<br />
operation). In single-jack operation, voice calls<br />
can be placed and received normally if a telephone<br />
is connected. If a fax is connected,<br />
in<strong>com</strong>ing analog fax calls can be received<br />
normally, but to place outbound fax calls using<br />
the voice jack, a bypass sequence must be<br />
used as a prefix in the dialed telephone number.<br />
To Fax Port<br />
Phone Cord<br />
To Phone Port<br />
To Fax Machine<br />
Phone Cord<br />
To Phone(s)<br />
Figure 7: Dual Port<br />
<strong>SX4e</strong> <strong>GSM</strong> 1900 14 USER MANUAL
Plug In Your Telephone - continued<br />
1) Locate the modular line port on your fax<br />
machine or phone and plug in one end of<br />
a standard phone cord.<br />
2) Connect the other end of the cord to the<br />
phone port (marked PHONE) on the side<br />
of your Phonecell <strong>SX4e</strong> - see Figure 8.<br />
NOTE: An RJ-11 connector will fit into the<br />
Phone port.<br />
NOTE: To place outbound fax calls using the<br />
voice jack, see the How to Set up an Analog<br />
Fax Bypass String section of this manual. For<br />
single jack programming, see the How to Set<br />
A Single Jack Option section of this manual.<br />
Place a Call - Adjust Your FWT<br />
1) Pick up the phone receiver and listen for<br />
dial tone.<br />
2) If you hear dial tone, make a call.<br />
3) While you’re talking with the other party,<br />
listen for buzz and echo. If you hear either,<br />
move the antenna and/or POTS phone<br />
until you find the location where voice<br />
conversation is strong, and buzz and echo<br />
are minimized.<br />
NOTE: If you are unsuccessful in<br />
dialing out, verify the following:<br />
• The antenna location needs to be<br />
adjusted - see Figure 2.<br />
• The SIM card needs to be installed and/or<br />
set up - see Step 4.<br />
• Your cellular phone number has not been<br />
activated - contact your cellular<br />
service provider.<br />
Adding More Phones<br />
Plug in a line splitter (not supplied) to connect<br />
additional phones to your FWT- see Figure 9.<br />
NOTE: The FWT will only let you make one<br />
phone call at a time.<br />
PBX/KSU Systems - NOTE: PABX<br />
installation should only be performed by<br />
experienced telephone technicians.<br />
Phone Cord<br />
Line<br />
Splitter<br />
To Phone Port<br />
To Fax Machine<br />
Phone Cord<br />
Figure 8: Single Port<br />
To Phone(s)<br />
Phone<br />
Cords<br />
Phone<br />
Port<br />
Figure 9 – An optional Line Splitter<br />
lets you connect additional phones<br />
to your Phonecell <strong>SX4e</strong>.<br />
<strong>SX4e</strong> <strong>GSM</strong> 1900 15 USER MANUAL<br />
OR
Step 3. Optional PC Data Connection<br />
The Phonecell <strong>SX4e</strong> features a DB-9 Digital Computer Fax/Data Port for connection<br />
to a Personal Computer (PC) – not supplied (see - Figure 10). When connected<br />
to a PC, the Phonecell’s PC interface is capable of digital fax/data transmission at<br />
speeds up to 9600 baud.<br />
NOTE: A data cable (DB-9 to DB-9 or DB-25 to DB-9) is required for data transmission<br />
– not included. To determine the necessary cable, count the number of PIN<br />
connections in the serial port of your PC (see below). If there are 9 PIN connections<br />
in the PC serial port, a DB-9 (female) to DB-9 (male) cable is required. If there are<br />
25 PIN connections in the PC serial port, a DB-25 (female) to DB-9 (male) cable is<br />
required.<br />
To PC Serial Port<br />
DB-9 (female) to DB-9 (male) Cable<br />
OR<br />
DB-9 cable and PC<br />
serial port have 9 PIN<br />
connections<br />
DB-25 cable and PC<br />
serial port have 25<br />
PIN connections<br />
DB-25 (female) to DB-9 (male) Cable<br />
To DB-9 Data<br />
Port on FWT<br />
Figure 10<br />
NOTE: The Phonecell <strong>SX4e</strong> does not support direct <strong>com</strong>puter modem (data)<br />
operation through the telephone or fax ports.<br />
The Phonecell’s PC interface supports the ETSI <strong>GSM</strong> 07.05 and 07.07 AT<br />
Command Set.<br />
For specific digital fax/data setup procedures, see Appendix A - How to<br />
Setup Your PC Serial Ports for Phonecell Digital Fax/Data.<br />
<strong>SX4e</strong> <strong>GSM</strong> 1900 16 USER MANUAL
Optional PC Data Connection - continued<br />
Serial Port Protocol<br />
The DB-9 port operates at a fixed baud rate of 19,200. Note that this rate only<br />
applies to the serial interface; the over-the-air data rate is independent. The format<br />
is one start bit, 8 data bits, one stop bit, and no parity. The interface supports the<br />
necessary V.24 (RS-232) signals.<br />
AT Command Set<br />
The following is a list of the <strong>com</strong>mands from the AT Command Set defined in <strong>GSM</strong><br />
07.07 Digital Cellular Communications System (Phase 2); AT Command Set for<br />
<strong>GSM</strong> Mobile Equipment (ME).<br />
Supported AT Commands from Description<br />
<strong>GSM</strong> 07.07<br />
ATS3 Command Line Termination Character<br />
“ S4 Response Formatting Character<br />
“ S5 Command Line Editing Character<br />
“ S6 Pause Before Blind Dialing<br />
“ S7 Connection Completion Timeout<br />
“ S8 Comma Dial Modifier Time<br />
“ S10 Automatic Disconnect Delay<br />
ATA Answer<br />
ATD Dial<br />
ATDP Dial-Select Pulse Dialing<br />
ATDT Dial-Select Tone Dialing<br />
ATDL Dial-Monitor Speaker Loudness<br />
ATDI Dial-Request Identification Information<br />
ATE Command Echo<br />
ATH Hook Control<br />
ATI Request Identification Information<br />
ATO Return to On-line Data State<br />
ATQ Result Code Suppression<br />
ATV DCE Response Format<br />
ATX Result Code Selection and Call Progress<br />
Monitoring Control<br />
ATZ Reset To Default Configuration<br />
AT & F Set to Factory-Defined Configuration<br />
AT & V Display Current Profile<br />
AT & W Write Current Profile to Stored Profile<br />
AT + CBST Select bearer service type<br />
AT + CEER Extended Error Report<br />
AT + CGMI Request Manufacturer Identification<br />
AT + CGMM Request Model Identification<br />
<strong>SX4e</strong> <strong>GSM</strong> 1900 17 USER MANUAL
Optional PC Data Connection - continued<br />
Supported AT Commands from Description<br />
<strong>GSM</strong> 07.07<br />
AT + CGMR Request Revision Identification<br />
AT + CGSN Request Product Serial Number Identification<br />
AT + GSN Request Product Serial Number Identification<br />
AT + CGOI Returns Null Global Object ID<br />
AT + GOI Request Global Object Identification<br />
AT + CPIN Enter PIN<br />
AT + CR Service reporting control<br />
AT + CRC Cellular Result Codes<br />
AT + CREG (h = 0, 1, 2) Network Registration<br />
(no #2 options incall)<br />
AT + CRLP Radio Link Protocol<br />
AT + DR Data Compression Reporting<br />
AT + DS Data Compression<br />
AT + FCLASS Select Mode<br />
AT + FMI Request DCE Manufacturer Identification<br />
AT + FMM Request DCE Model<br />
AT + FMR Request DCE Version<br />
AT + GCAP Request Complete Capabilities List<br />
AT + GMI Request Manufacturer Identification<br />
AT + GMM Request Model Identification<br />
AT + GMR Request Revision Identification<br />
AT + ICF DTE-DCE Character Framing<br />
AT + IFC DTE-DCE Local Flow Control<br />
AT + ILRR DTE-DCE Local Rate Reporting<br />
AT + IPR Fixed DTE Rate<br />
NOTE: For AT <strong>com</strong>mand syntax, parameters and details please refer to<br />
European Technical Standard (ETS) documents: ETS 300 642 / <strong>GSM</strong> - 07.07,<br />
Mar. ‘99 and ETS 300 585 / <strong>GSM</strong> - 07.05, Apr. ‘97 for Digital Cellular<br />
Communications System (Phase 2); AT Command Set for <strong>GSM</strong> Mobile<br />
Equipment (ME).<br />
<strong>SX4e</strong> <strong>GSM</strong> 1900 18 USER MANUAL
Optional PC Data Connection - continued<br />
AT Command Set<br />
The following is a list of supported <strong>com</strong>mands from the AT Command Set defined<br />
in ESTI <strong>GSM</strong> 07.05, Digital Cellular Tele<strong>com</strong>munications System (Phase 2+); Use<br />
of Data Terminal Equipment (DTE -DCE) Interface for Short Message Service<br />
(SMS) and Cell Broadcast Service (CBS).<br />
Supported AT Commands from Description<br />
<strong>GSM</strong> 07.05<br />
AT+ CSCA Service Center Address<br />
AT + CSCS Select TE character Set<br />
AT + CSTA Select Type of Address<br />
AT + CMGF Message Format<br />
AT + CMGD Delete Message<br />
AT + CMGL List Message<br />
AT + CSMS Select Message Service<br />
AT + CMPS Preferred Message Storage<br />
AT + CSCB Select Cell Broadcast Message Types<br />
AT + CMGR Read Message<br />
AT + CMGS Select Message<br />
AT + CMGW Write Message to Memory<br />
AT + CMSS Send Message from Storage<br />
AT + CNMI New Message Indications to TE<br />
Bearer Services<br />
The following bearer services are supported:<br />
Class Bearer Modulation Baud Rate<br />
Service Scheme (bps)<br />
Facsimile TS62 V.27ter 2400, 4800<br />
(Class 1) TS62 V.29 9600<br />
Data BS21 V.21 300<br />
(Asynchronous BS22 V.22 1200<br />
Circuit Switched) BS23 V.23 1200/75<br />
BS24 V.22bis 2400<br />
BS24 V.26ter 2400<br />
BS25 V.32 4800<br />
BS26 V.32 9600<br />
<strong>SX4e</strong> <strong>GSM</strong> 1900 19 USER MANUAL
Step 4. SIM Card Installation & Setup<br />
How to Install the Mini-SIM Card<br />
The <strong>GSM</strong> module within the Phonecell<br />
requires a Subscriber Identification<br />
Module (SIM) for normal operation. The<br />
service provider supplies a SIM card,<br />
which carries the account information<br />
needed to operate the Phonecell. The<br />
mini-SIM <strong>com</strong>partment is on the back of<br />
the Phonecell - see Figure 11.<br />
NOTE: If your mini-SIM card is already<br />
installed, skip to the SIM PIN<br />
Programming section of this manual.<br />
If you don’t have a mini-SIM card,<br />
contact your network service provider.<br />
1) Disconnect DC power.<br />
2) Remove the SIM <strong>com</strong>partment cover<br />
by removing the screw.<br />
3) Open the SIM card holder.<br />
4) Line up the mini-SIM card with the<br />
arrow on the SIM card holder.<br />
5) Gently insert the mini-SIM card in the<br />
slot of the SIM card holder - See<br />
Figure 12.<br />
6) Close the SIM card holder.<br />
NOTE: If you insert the SIM card<br />
improperly, the holder will not<br />
close. Do not force it shut. Make<br />
sure the SIM card is aligned properly<br />
with the directional arrow on the holder.<br />
7) Reattach the SIM <strong>com</strong>partment cover<br />
with the screw.<br />
8) Reconnect DC power.<br />
9) Proceed with SIM PIN Programming.<br />
IMPORTANT!<br />
If your Phonecell did NOT <strong>com</strong>e with a pre-installed mini-SIM (Subscriber Identity<br />
Module) card, OR if you’re experiencing SIM card-related problems, follow the<br />
steps below. Otherwise, continue with STEP 5.<br />
Figure 11<br />
SIM Compartment<br />
Cover<br />
Mini-SIM<br />
Compartment<br />
Mini-SIM Card<br />
Mini-SIM<br />
Card Holder<br />
Figure 12 - Mini-SIM Card Installation<br />
<strong>SX4e</strong> <strong>GSM</strong> 1900 20 USER MANUAL
SIM PIN Programming<br />
The mini-SIM may require entry of a Personal Identification Number (PIN). The PIN<br />
is a four- to eight-digit number provided with the SIM card. If the service provider has<br />
set the SIM to require PIN entry, the Phonecell will request the PIN each time it is<br />
powered ON or the SIM is removed and replaced. The PIN can be stored within the<br />
Phonecell for automatic entry when required. To use the automatic PIN entry feature,<br />
the PIN must be correctly programmed and automatic PIN entry must be enabled.<br />
If PIN entry is requested while automatic PIN entry is disabled, the Phonecell emits<br />
a SIM Inactive tone. The SIM PIN can be manually entered at that time by dialing<br />
the PIN and pressing #. If entry is successful, the SIM Inactive tone will be replaced<br />
by service dial tone.<br />
IMPORTANT!<br />
Automatic PIN entry must be disabled before the SIM is changed (including<br />
initial entry) so that the PIN for the new SIM card can be entered correctly<br />
before the <strong>GSM</strong> module requests the PIN.<br />
How to Enable/Disable the Automatic PIN Entry Feature<br />
1) Using a POTS (Plain Old Telephone Set) phone connected to the telephone port,<br />
lift up the handset (take off-hook).<br />
NOTE: You must have tone-dial (DTMF) capability to enable/disable the<br />
Automatic PIN Entry Feature.<br />
2) Enter the Programming mode:<br />
� Press:<br />
# * 0 * 1 2 3 4 5 6 7 8 #<br />
The dial tone will cease upon entry of the first digit. If you enter the access code<br />
correctly, the dial tone should change to a different, steady Programming tone<br />
and the bottom LED indicator on the front of the Phonecell will blink alternately<br />
RED and GREEN to indicate that you’re in the programming mode.<br />
3). Once in Programming mode:<br />
� Press: # 65 < auto_PIN> #<br />
* * *<br />
To disable automatic PIN entry, set the "auto PIN" value to 0.<br />
To enable automatic PIN entry, set the "auto PIN" value to 1.<br />
You must enter either 0 or 1, otherwise, the FWT will not update or store this<br />
value and the existing stored parameter will remain. The factory default value is<br />
0 (disabled). The factory default PIN setting within the FWT’s non-volatile<br />
memory is "1234."<br />
4) Correct entry will be confirmed by the return of the programming tone, which<br />
signifies that the unit is ready to accept the next entry. Incorrect entry will result in<br />
a short, three tone sequence of rising frequencies, followed by the return of the<br />
programming tone, which again signifies that the unit is ready to accept the<br />
corrected entry.<br />
5) Hang up the telephone handset (place on-hook).<br />
For Example: To enable automatic PIN entry for PIN "1234,"<br />
dial: # * 65 * 1 * 1234 #<br />
Continued...<br />
<strong>SX4e</strong> <strong>GSM</strong> 1900 21 USER MANUAL
SIM PIN Programming - continued<br />
IMPORTANT!<br />
You must enter the PIN correctly. After three attempts to load an incorrect PIN, the<br />
SIM will be blocked and the SIM card will have to be unblocked. If you do not<br />
have the unblocking key, the SIM will have to be returned to the service provider<br />
for reactivation. See How to Unblock a SIM PIN to unblock a SIM card.<br />
How to Change the PIN Value Entered by the Automatic PIN Entry Feature<br />
REMINDER: Automatic PIN entry must be disabled - before and while the automatic<br />
PIN entry value is changed - until programming of the new PIN and Auto PIN Entry is<br />
<strong>com</strong>pleted.<br />
1) Using a tone-dial (DTMF) POTS telephone connected to the Phone port, lift up<br />
the handset(take off-hook).<br />
2) Enter the Programming mode:<br />
Press: # 0 1 2 3 4 5 6 7 8 #<br />
* *<br />
The dial tone will cease upon entry of the first digit. If you enter the access code<br />
correctly, the dial tone should change to a different, steady “Programming” tone<br />
and the bottom LED indicator on the front of the Phonecell will blink alternately<br />
RED and GREEN to indicate that you’re in the programming mode.<br />
3) Press: # 64 < old_PIN> #<br />
* * * *<br />
The new SIM PIN will be supplied by the service provider with a new SIM.<br />
If the SIM card is changed, the PIN must be reprogrammed using the above<br />
<strong>com</strong>mand with the correct new PIN for the new SIM.<br />
NOTE: The factory default PIN setting within the FWT’s non-volatile memory is<br />
"1234."<br />
4) Correct entry will be confirmed by the return of the programming tone, which<br />
signifies that the unit is ready to accept the next entry. Incorrect entry will result in<br />
a short, three tone sequence of rising frequencies, followed by the return of the<br />
programming tone, which again signifies that the unit is ready to accept the<br />
corrected entry.<br />
5) Hang up the telephone handset (place on-hook).<br />
For Example: To set up a new SIM with PIN "5678,"<br />
dial: # * 64 * 1 2 3 4 * 5 6 7 8 * 5 6 7 8 #<br />
NOTE: This procedure will not change the PIN encoded on the SIM. It will only<br />
change the PIN stored in the FWT for automatic entry of the PIN when requested<br />
by the <strong>GSM</strong> module.<br />
If the SIM card in use has SIM PIN Entry enabled, it is strongly re<strong>com</strong>mended<br />
that Automatic PIN Entry be selected.<br />
<strong>SX4e</strong> <strong>GSM</strong> 1900 22 USER MANUAL
SIM PIN Programming - continued<br />
How to Set a New PIN in the SIM<br />
REMINDER: Automatic PIN entry must be disabled - before and while the SIM PIN<br />
is changed - until programming of the new PIN and Auto PIN Entry (see previous<br />
page) is <strong>com</strong>pleted.<br />
1) Using a tone-dial (DTMF) POTS telephone connected to the Phone port, lift up<br />
the handset (take off-hook).<br />
2) Press: ** 04 * < old_PIN> * * #<br />
NOTE: You must know the old PIN to change it and the new PIN must be 4 to 8<br />
digits (0 − 9) in length.<br />
3) Incorrect entry of the old PIN will be indicated by a short, three tone sequence of<br />
rising frequencies. Hang up the telephone handset and start over at step 1 with the<br />
correct old PIN.<br />
Incorrect length (less than 4 or more than 8 digits) of the new PIN or not entering<br />
the same value in both new PIN entries will result in silence. Hang up the telephone<br />
handset and start over at step1.<br />
Correct entry will be confirmed by a short beep. Hang up the telephone handset.<br />
For Example: To set up a new SIM with PIN "5678," where the old PIN is<br />
“1234,” dial: ** 04 * 1 2 3 4 * 5 6 7 8 * 5 6 7 8 #<br />
NOTE: In case of PIN2, substitute the following step 2:<br />
2) Press: ** 042 * * * #<br />
NOTE: You must know the old PIN2 to change it and the new PIN2 must be 4 to<br />
8 digits (0 − 9) in length.<br />
For Example: To set up a new SIM with PIN2 "5678," where the old PIN2 is<br />
“1234,” dial: ** 042 1 2 3 4 * * 5 6 7 8 * 5 6 7 8 #<br />
NOTE: This procedure will change the PIN encoded on the SIM. It will not<br />
change the PIN stored in the FWT for automatic entry of the PIN when requested<br />
by the <strong>GSM</strong> module. (See previous page for instructions on how to enter the<br />
auto-entry PIN value).<br />
How to Unblock a SIM PIN<br />
Use the following key sequence to unblock a SIM card:<br />
1) Press: 05
Step 5. Wall-Mount Installation<br />
After you’ve selected a location and made all the necessary connections,<br />
your Phonecell <strong>SX4e</strong> is ready for wall-mounting.<br />
PRE-INSTALLATION TIPS:<br />
Make sure the location is dry, away from<br />
overhead water pipes, and protected<br />
from weather conditions.<br />
The area should be free of airborne<br />
contaminants.<br />
The Phonecell <strong>SX4e</strong> power supply<br />
should be located within 2 meters (6<br />
feet) of an AC power outlet.<br />
Wall-Mount Instructions:<br />
1) To mount the FWT on a wall, mark<br />
two hole locations 166 mm (6-17/32<br />
inch) apart. These hole locations<br />
match the mounting hooks on the<br />
back of unit - see Figure 13.<br />
2) Install the screws (not supplied), leaving<br />
a gap (approximately 3mm (1/8<br />
inches)) between screw head and wall<br />
- see Figures 14 and 15.<br />
3) Mount the FWT onto the screws - see<br />
Figure 16.<br />
Figure 16<br />
Figure 13<br />
Figure 14<br />
Figure 15<br />
166 mm (6-17/32 inches)<br />
Mounting Hooks<br />
<strong>SX4e</strong> <strong>GSM</strong> 1900 24 USER MANUAL
Phonecell <strong>SX4e</strong> Operation<br />
Once your Phonecell <strong>SX4e</strong> is installed and tested, it’s ready for operation.<br />
How to Use the LED Status Indicators<br />
1) Plug in the power supply.<br />
2) Wait approximately 10 seconds for<br />
the unit to initialize.<br />
3) The three LED indicators on the<br />
front of your Phonecell will turn ON.<br />
The Tables below describe the<br />
modes and operation of the three<br />
indicators - see Figure 17.<br />
Figure 17<br />
LED 1 – Power Status<br />
LED 3 – FWT Status<br />
LED 1 – Power Status Indicator<br />
LED Color LED Activity Description<br />
GREEN Continuous FWT Power ON<br />
YELLOW Continuous Low-Voltage Detection<br />
NONE (Dark) None No FWT Power<br />
LED 2 – Cellular Status Indicator<br />
LED Color LED Activity Description<br />
GREEN Continuous Good Cellular Signal Strength<br />
GREEN Flashing Poor Cellular Signal Strength<br />
RED Continuous No cellular service*<br />
RED Flashing SIM Card Problem<br />
*Contact your service provider to verify that cellular service is activated.<br />
LED 3 – FWT Status Indicator<br />
LED Color LED Activity Description<br />
GREEN Continuous Normal Operation<br />
GREEN/RED Alternating Programming Mode<br />
RED Continuous FWT Failure**<br />
RED Flashing Phone or Fax Interface Failure, Check<br />
external wiring to telephone<br />
**Contact your Authorized Telular Service Representative<br />
LED 2 – Cellular<br />
Status<br />
<strong>SX4e</strong> <strong>GSM</strong> 1900 25 USER MANUAL
Phonecell Operation - continued<br />
How to Place a Call<br />
1) Pick up your telephone handset (your phone is now “off-hook”).<br />
2) Listen for dial tone (If service is not available, a No-Service tone is<br />
produced. Hang-up the phone and try again. If the No-Service tone continues,<br />
contact your service provider to make sure cellular service is activated.).<br />
3) Dial the phone number.<br />
How to Receive a Call<br />
• When your telephone rings, pick up the handset and begin talking.<br />
How to End a Call<br />
• Hang-up the phone (place the handset back onto the telephone cradle).<br />
The Hookflash Function<br />
When you initiate the Hookflash function, it automatically lets you:<br />
• Speed up the connection after you dial a phone number.<br />
• Answer an in<strong>com</strong>ing call that occurs when you’re dialing a phone number.<br />
• Use special (supplementary) cellular services which may be available in your<br />
cellular service area (see the Using Standard Supplementary Services section<br />
of this manual).<br />
How to Use the Hookflash Function<br />
Depending upon your phone, there are two ways to initiate the Hookflash function:<br />
• Press the dedicated “HOOKFLASH” or “FLASH” key on your telephone.<br />
• Press the hang-up or switch-hook mechanism on your phone once quickly<br />
(approximately 1 /2-second).<br />
Important Tones and Alerts<br />
No-Service Tone – When cellular service is not available, the receiver emits a<br />
No-Service (fast-beeping) tone instead of the normal (steady) dial tone.<br />
ROH (Receiver Off-Hook) Tone – If the telephone equipment remains off-hook<br />
(off its cradle) with no dialing activity for 45 seconds, the receiver emits an ROH<br />
tone for 60 seconds.<br />
In<strong>com</strong>ing Call Alert – If you’re dialing a number and an in<strong>com</strong>ing call occurs,<br />
the receiver will emit an audible ring. To answer the in<strong>com</strong>ing call:<br />
• Press the “HOOKFLASH” button once. This will connect the in<strong>com</strong>ing call.<br />
• OR hang-up immediately. This will cause the phone to start ringing.<br />
Supplementary Service Dial Tone – When supplementary services are<br />
enabled and active, the receiver may emit a special dial tone to indicate that<br />
one or more services are active.<br />
Roam Dial Tone – When cellular service is available, but the Phonecell is in a<br />
Roam area, the receiver may emit a different dial tone to indicate the roaming<br />
condition. However, unless the FWT is re-programmed in the field, the factory<br />
default tone is set the same as normal service dial tone.<br />
Non-Registered Service Tone – When the SIM Card is inactive, missing from<br />
the Phonecell, or installed but requires PIN entry, the receiver emits a<br />
non-registered service tone instead of the normal (steady) dial tone.<br />
<strong>SX4e</strong> <strong>GSM</strong> 1900 26 USER MANUAL
Phonecell Operation - continued<br />
How to Use Call-Dependent Supplementary Services<br />
Call-dependent supplementary services are those services handled within an<br />
active call. These features are network-dependent. Check with your cellular<br />
provider to determine available features.<br />
Use the following <strong>com</strong>mands to activate the call-dependent supplementary services:<br />
NOTE: is provided by the hookflash function (See the Hookflash<br />
Function section of this manual).<br />
To Release All Held Calls or Set User Determined User Busy For a Waiting Call:<br />
��<br />
��<br />
��<br />
��<br />
��<br />
��<br />
Press: 0 .<br />
To Release All Active Calls and Accept the Held/Waiting Call:<br />
Press: 1 .<br />
To Release a Specific Active Call x:<br />
Press: 1 x (x represents the call ID 1-7).<br />
To Place All Active Calls on Hold and Accept the Held/Waiting Call:<br />
Press: 2 .<br />
To Place All Active Calls on Hold Except Call x:<br />
Press: 2 x (x represents the call ID 1-7).<br />
To Add a Held Call to the Conversation:<br />
Press: 3 .<br />
To Place All Active Calls on Hold and Make the Call to the Specified Phone<br />
Number:<br />
��<br />
Press: PhoneNo .<br />
NOTE: When both a held and a waiting call exist in a conflicting situation, the<br />
above procedures apply to the waiting call.<br />
Call Waiting:<br />
Permits a subscriber to be notified of an in<strong>com</strong>ing call while the subscriber is<br />
engaged in an active or held call. The subscriber can either accept, reject, or<br />
ignore the in<strong>com</strong>ing call.<br />
Activate: 43 # * Deactivate: # 43 #<br />
Interrogate: # 43 # *<br />
Call Hold:<br />
Allows a served subscriber, who is provisioned with this supplementary service, to<br />
interrupt <strong>com</strong>munication on an existing active call and then subsequently, if<br />
desired, re-establish <strong>com</strong>munication. The traffic channel remains assigned to the<br />
subscriber after the <strong>com</strong>munication is interrupted to allow origination or possible<br />
termination of other calls.<br />
<strong>SX4e</strong> <strong>GSM</strong> 1900 27 USER MANUAL
Phonecell Operation - continued<br />
How to Adjust the Volume Level<br />
If the volume level on your phone is too high or too low, you can adjust the levels<br />
using the keypad on your telephone. Note: your telephone must be in Tone-<br />
Dial (DTMF) mode to adjust the levels.<br />
To Increase Audio Level - Increase the audio level in steps by pressing:<br />
� # 8 (also known as # * * Up)<br />
Continue to press # 8 until the desired level is reached.<br />
*<br />
To Decrease Audio Level - Decrease the audio level in steps by pressing:<br />
� # 3 (also known as # * * Down)<br />
Continue to press # 3 until the desired level is reached.<br />
*<br />
NOTE: The default setting lets you adjust the audio up to three (3) steps from<br />
the default volume in either direction (Up or Down). The volume setting<br />
remains in effect for future calls until changed manually, even if the telephone<br />
is on-hooked. If the Phonecell power is cycled (turned OFF/ON), the default<br />
mid-range volume setting will be restored.<br />
Variable Dial Time (Auto SEND Delay) Option<br />
When you place a call, your Phonecell <strong>SX4e</strong> automatically sends the phone<br />
number over the cellular network after you dial the last digit – just like a landline<br />
phone. However, to make sure you have enough time to dial the last digit, a 3-second<br />
Auto SEND Delay is programmed into the unit at the factory. To change the<br />
Auto SEND Delay setting, see the How To Set the Auto SEND Delay section of this<br />
manual.<br />
Data After SEND (In-Call DTMF Signaling) Option<br />
Depending upon your cellular provider, the Data After SEND option may need to be<br />
Enabled or Disabled to use special cellular features such as call waiting, three-way<br />
conference calls, voice mail, etc. Please consult your service provider for the<br />
required Data After Send/In-Call DTMF Signaling configuration.<br />
The factory default setting is 0 (In-Band Signaling only). To change the Data After<br />
SEND setting, see the How To Set Data After SEND (In-Call DTMF Signaling) section<br />
of this manual.<br />
Zero Dial Delay for Frequently Called Numbers<br />
A new patented feature enables the Phonecell to recognize your frequently called<br />
phone numbers and send them immediately–without the 3-second Auto SEND<br />
Delay. The Phonecell stores a list of up to 50 numbers in its memory. This list contains<br />
any number that you’ve called at least twice successfully.<br />
NOTE: Cycling (turning OFF/ON) the power will erase the current list. A new list will<br />
be started when power is re-applied. To enable or disable this feature, see the<br />
Enable/Disable Zero Dial Delay for Frequently Called Numbers section of this manual.<br />
<strong>SX4e</strong> <strong>GSM</strong> 1900 28 USER MANUAL
Phonecell Operation - continued<br />
Caller ID Format<br />
The Phonecell <strong>SX4e</strong> <strong>GSM</strong> 1900 FWT will support Caller ID device operation. The<br />
FWT factory default format is designed to work for most Caller ID devices. If the<br />
Caller ID device does not respond, then change the FWT Caller ID format using<br />
the programming <strong>com</strong>mand below. The Phonecell can be programmed with an<br />
ordinary touch-tone telephone.<br />
NOTE: The User Programming mode is not accessible during a call. Refer to<br />
the Phonecell <strong>SX4e</strong> Programming section of this manual to enter the<br />
Programming Mode.<br />
Enter Caller ID Format<br />
The following key sequence is used to select the Caller ID format:<br />
Press # * 84 * #<br />
The Caller ID Format factory default value will work for most Caller ID devices. If<br />
the Caller ID device does not respond, program a value of 1 in the "CID Format"<br />
field. If the Caller ID device still does not respond, then program a value of 2. If<br />
the value is not in the range 0 to 2, it is considered invalid and the FWT will not<br />
update or store this value; the currently stored value will remain. The factory<br />
default value is 0.<br />
When the FWT is programmed to Format 0, date and time information is not provided<br />
by the FWT. When the FWT is programmed to Format 1 or Format 2, the<br />
FWT provides "January 1, Midnight" as generic time and date information. The<br />
actual display of this generic date and time ("January 1, Midnight") will vary as it<br />
is determined by the Caller ID device.<br />
For Caller ID Devices with Date and Time Display<br />
When the Caller ID device is first powered, the date and time information will<br />
begin from "January 1, Midnight." The user cannot change the date and time<br />
through the FWT.<br />
When the Caller ID format is set to factory default 0, date and time will continue<br />
to advance. Each in<strong>com</strong>ing call will not affect the date and time.<br />
When the Caller ID format is set to either 1 or 2, the date and time will be reset to<br />
"January 1, Midnight" for each in<strong>com</strong>ing call.<br />
<strong>SX4e</strong> <strong>GSM</strong> 1900 29 USER MANUAL
Phonecell Operation - continued<br />
Mobile Equipment Personalization<br />
The terminal will support all five lock type features of <strong>GSM</strong> 02.02 Personalization<br />
features check information stored in the terminal which limits the SIMs with which<br />
the terminal will operate.Factory default is all lock types set to be deactivated.<br />
Please contact Telular Corporation if you need more information on this feature.<br />
Using Standard Supplementary Services<br />
Your Phonecell <strong>SX4e</strong> is <strong>com</strong>patible with a variety of special services, including:<br />
• Call Forwarding<br />
• Call Barring<br />
• Call Waiting<br />
• Three-Way Calling<br />
• Caller ID<br />
• Voice Mail<br />
and more...<br />
Depending upon your cellular provider, these services may be available on a<br />
subscription basis. However, certain dialing sequences must be entered. Please<br />
consult your service provider for the dialing instructions for your system.<br />
Standard supplementary services are defined as those supplementary services<br />
handled while not in a call. Depending on the supplementary service, several<br />
<strong>com</strong>mands may be available. The <strong>com</strong>mand list is defined below:<br />
Registration - The programming by the user of information to enable subsequent<br />
operation of a service. This action involves input of specific supplementary information.<br />
For example, when call-forwarding registration is initiated by the user, a<br />
forwarding number must be supplied.<br />
Erasure - The deletion of information stored against a particular service by a previous<br />
registration.<br />
Activation - An action taken by the FWT user to enable a previously registered<br />
process to run.<br />
Deactivation - An action taken by the FWT user to terminate the process started<br />
at activation.<br />
Depending on the supplementary service, additional parameters may be required<br />
to successfully <strong>com</strong>plete an operation, such as phone number or password. Some<br />
supplementary services have optional parameters, such as Teleservice and/or<br />
Delay settings. Delay is the amount of time to wait before <strong>com</strong>pleting performance<br />
of a service that has a condition controlling its activity; for example, call forward<br />
on no answer waits an amount of time equal to the "delay" for the phone to be<br />
answered before declaring no answer and forwarding the call.<br />
Teleservice: 10 = All Teleservices, 11 = Speech, 12 = Data, 13 = Fax, 16 = SMS,<br />
19 = All Teleservices except SMS.<br />
Delay: 5-30 seconds<br />
PhoneNo: Up to 20 digits (0-9)<br />
NOTE: is provided by the hookflash function (See the Hookflash<br />
Function section of this manual).<br />
<strong>SX4e</strong> <strong>GSM</strong> 1900 30 USER MANUAL
Phonecell Operation - continued<br />
Call Forwarding Unconditional:<br />
Allows a called subscriber to have the network send immediately all in<strong>com</strong>ing calls, or just<br />
those associated with a specific teleservice, addressed to the called subscriber's directory<br />
number to another directory number.<br />
Register: ** 21 * Ph No *<br />
* 21 * Ph No *<br />
Activate: * 21 *<br />
Teleservice # <br />
Teleservice # <br />
Erase: # # 21 Teleservice # <br />
* Teleservice # <br />
Deactivate: # 21 Teleservice # <br />
*<br />
Call Forwarding on Mobile Subscriber Busy:<br />
Allows a called subscriber to have the network send immediately all in<strong>com</strong>ing calls, or just<br />
those associated with a specific basic service group, addressed to the called subscriber's<br />
directory number and which meet "subscriber busy" to another directory number.<br />
<strong>SX4e</strong> <strong>GSM</strong> 1900 31 USER MANUAL<br />
or<br />
Register: ** 67 * Ph No or *<br />
* 67 * Ph No *<br />
Activate: * 67 *<br />
Teleservice # <br />
Teleservice # <br />
Erase: # # 67 Teleservice # <br />
* Teleservice # <br />
Deactivate: # 67 Teleservice # <br />
*<br />
Call Forwarding on No Reply:<br />
Allows a called subscriber to have the network send all in<strong>com</strong>ing calls, or just those associated<br />
with a specific basic service group, addressed to the called subscriber's directory number and<br />
which meet "no reply" for a specific amount of time to another directory number.<br />
Register: ** 61 * Ph No * Teleservice Erase: # # 61 Teleservice # *<br />
Activate: *<br />
* 61 Teleservice # <br />
*<br />
Deactivate: # 61 * Teleservice # <br />
Delay # <br />
Call Forwarding on Mobile Subscriber Not Reachable:<br />
Allows a called subscriber to have the network send all in<strong>com</strong>ing calls, or just<br />
those associated with a specific Teleservice group, addressed to the called mobile<br />
subscriber's directory number, but which is determined to be "not reachable", to<br />
another directory number.<br />
Register: ** 62 * Ph No Teleservice # <br />
Erase: # # 62 Teleservice * # <br />
Activate: *<br />
* 62 Teleservice # <br />
Deactivate: # 62 * Teleservice # <br />
*<br />
Call Forwarding All Call Forwarding:<br />
Allows a called subscriber to have the network send-after the stated delay-all<br />
in<strong>com</strong>ing calls, or just those associated with a specific teleservice, addressed to<br />
the called subscriber's directory number to another directory number.<br />
Register: ** 002 * Ph No * Teleservice *<br />
<br />
Erase: # # 002 Teleservice # <br />
Activate: *<br />
* 002 Teleservice # <br />
Deactivate: # 002 * Teleservice # <br />
*<br />
Delay #
Phonecell Operation - continued<br />
Call Forwarding Conditional Call Forwarding:<br />
Register: ** 004 * Ph No * Teleservice *<br />
<br />
Erase: # # 004 Teleservice # <br />
* Activate: * 004 Teleservice # <br />
* Deactivate: # 004 Teleservice # <br />
*<br />
Delay #<br />
Calling Line Identification Restriction:<br />
If subscribed to in temporary mode, enable the calling party to countermand the<br />
subscribed-to presentation of its line identity to the called party for a specific call<br />
(i.e., the next call) only. (If subscribed to in permanent mode, the network will prevent<br />
presentation of the calling party’s line identity to the calling party for every<br />
outgoing call.)<br />
If subscribed to in temporary mode with default value “presentation restricted,”<br />
the user may suppress CLIR, for the specific call only:<br />
Register: 31 # Call Phone Number <br />
*<br />
If subscribed to in temporary mode with default value “presentation not<br />
restricted,” the user may invoke CLIR, for the specific call only:<br />
Register: # 31 # Call Phone Number <br />
Barring of All Outgoing Calls:<br />
Allows a subscriber to have barring of certain categories of outgoing calls according<br />
to a barring program which is selected from a set of one or more barring programs<br />
chosen at provision time and is valid for all outgoing calls, or just those<br />
associated with a specific Teleservice.<br />
Activate: * 33 * Password TeleService # <br />
* Deactivate: # 33 Password TeleService # <br />
* *<br />
Barring of Outgoing International Calls:<br />
Outgoing call setup possibilities exist only to subscribers of the PLMN(s) and the<br />
fixed network(s) of the country where the mobile subscriber is presently located.<br />
Activate: * 331 * Password * Deactivate: # 331 Password TeleService # <br />
* *<br />
TeleService # <br />
Barring of Outgoing International Calls Except Those Directed to the Home<br />
PLMN Country:<br />
Outgoing call setup possibilities exist only to subscribers of the PLMN(s) and the<br />
fixed network(s) of the country where the subscriber is presently located or to subscribers<br />
of the home PLMN country of the served subscriber and to subscribers of<br />
the fixed network(s) in the home PLMN country.<br />
Activate: * 332 * Password TeleService # <br />
* Deactivate: # 332 Password TeleService # <br />
* *<br />
<strong>SX4e</strong> <strong>GSM</strong> 1900 32 USER MANUAL
Phonecell Operation - continued<br />
Barring of All In<strong>com</strong>ing Calls:<br />
Allows a subscriber to have barring of certain categories of in<strong>com</strong>ing calls according<br />
to a barring program which is selected from a set of one or more barring programs<br />
chosen at provision time and is valid for all in<strong>com</strong>ing calls, or just those<br />
associated with a specific basic service group.<br />
Activate: * 35 * Password TeleService # <br />
* Deactivate: # 35 Password TeleService # <br />
* *<br />
Barring of In<strong>com</strong>ing Calls when Roaming Outside the Home PLMN Country:<br />
Calls which are terminated for the served subscriber is barred if the subscriber is<br />
roaming outside the home PLMN country.<br />
Activate: * 351 * Password TeleService # <br />
* Deactivate: # 351 Password TeleService # <br />
* *<br />
All Call Barring:<br />
On activation all calls is barred; on deactivation all call barring is disabled.<br />
Activate: * 330 * Password TeleService # <br />
* Deactivate: # 330 Password TeleService # <br />
* *<br />
All Outgoing Call Barring:<br />
On activation all outgoing calls is barred; on deactivation all outgoing call barring<br />
is disabled.<br />
Activate: * 333 * Password TeleService # <br />
* Deactivate: # 333 Password TeleService # <br />
* *<br />
All In<strong>com</strong>ing Call Barring:<br />
On activation all in<strong>com</strong>ing calls is barred; on deactivation all in<strong>com</strong>ing call barring<br />
is disabled.<br />
Activate: * 353 * Password TeleService # <br />
* Deactivate: # 353 Password TeleService # <br />
* *<br />
Enter Caller ID Format Selection:<br />
The following key sequence is used to enter the Caller ID format selection.<br />
# * 84 * #<br />
The CID format value is set to 0 to select a CID Multiple Data Message Format<br />
(MDMF) with no date of time information; set to 1 to select a CID MDMF with date<br />
and time information fixed at midnight, January 1; set 2 to select a CID Single<br />
Data Message Format (SDMF) with the date and time information at midnight,<br />
January 1. If the CID format is greater than 2, it is considered invalid. The factory<br />
default is 0.<br />
Unstructured Supplementary Services:<br />
Allows a user and a PLMN operator-defined application to <strong>com</strong>municate in a way<br />
which is transparent to the terminal and to intermediate network entities.<br />
"any characters, from <strong>GSM</strong> 3.08 default alphabet" # <br />
or<br />
"1 or 2 characters, from <strong>GSM</strong> 3.08 default alphabet" <br />
<strong>SX4e</strong> <strong>GSM</strong> 1900 33 USER MANUAL
How to Make an Analog Fax Call<br />
How To Make Analog Fax Calls<br />
Analog (i.e. normal fax from fax machine) fax calls (CCITT Group 3, Bearer<br />
Service TS 62) can be made from phone and fax jacks, depending on the option<br />
set.<br />
How to Send Fax Calls<br />
Step by Step Fax Instructions<br />
1. Set up your fax machine just as you would for a wired telephone.<br />
2. Outgoing fax calls at the fax jack are processed directly. Outgoing fax<br />
calls at the phone jack always require the analog fax bypass string,<br />
since the default for this jack is voice calls. See the User Programming<br />
Commands section of this manual for analog fax setup.<br />
NOTE: Make sure the fax machine is properly connected as shown in Figure 7.<br />
How to Receive Fax Calls<br />
By factory default, you do not have to do anything to receive a fax, provided you<br />
have set-up your fax machine as shown in Figure 7. However, the user can have<br />
options to receive a fax through the phone port. Refer to the User Programming<br />
section of this addendum for instructions on programming of the single jack option<br />
and in-bound fax port option.<br />
How to Set Up Analog Fax Bypass String<br />
NOTE: The analog fax bypass string can only be used in single jack operation.<br />
This feature allows the phone jack to process the next outgoing call as an analog<br />
fax call. After this call, the phone jack automatically returns to the default voice<br />
protocol. The user enters this string prior to dialing the telephone number. The terminal<br />
interprets the string and properly sets up the call. Refer to the following<br />
examples.<br />
To Send a Fax on a Fax Machine Connected to the Phone Jack:<br />
1. Lift up the handset (take off-hook).<br />
2. Dial # * 19 * 1 #, followed by the fax number to be called.<br />
3. Press START on the fax machine.<br />
NOTE: If the fax machine does not have a handset, enter # * 19 * 1 #, followed by<br />
the remote fax number to be called. Press START.<br />
If the fax machine has the capability to store telephone numbers for speed dialing,<br />
the # * 19 * 1 # <strong>com</strong>mand string may be programmed into the machine as a prefix<br />
to the telephone number. With some machines, it may also be possible to store<br />
the <strong>com</strong>mand string as a speed dial number and dial the remote fax machine telephone<br />
number manually.<br />
<strong>SX4e</strong> <strong>GSM</strong> 1900 34 USER MANUAL
How to Make an Analog Fax Call - continued<br />
Dual/Single Jack Operation<br />
Dual-Jack Operation<br />
The Phonecell <strong>SX4e</strong> may be operated in either dual-jack or single-jack mode.<br />
The factory default is dual-jack mode. In dual-jack operation, for outgoing calls,<br />
the first jack to seize the line (go off-hook) will disconnect the other jack. The<br />
other jack will remain disconnected until the first jack goes back on-hook. For<br />
in<strong>com</strong>ing calls, voice calls will be routed to the phone voice jack and fax calls will<br />
be routed to the fax jack.<br />
Single-Jack Operation<br />
The analog fax jack can be disabled leaving only the voice phone jack operational<br />
(single-jack operation). In single-jack operation, voice calls can be placed<br />
and received normally if a telephone is connected. If a fax is connected, in<strong>com</strong>ing<br />
analog fax calls can be received normally, but to place outbound fax calls using<br />
the voice jack, a bypass sequence must be used as a prefix in the dialed telephone<br />
number. The analog fax jack will not generate dial tone nor ring signal if it<br />
is disabled.<br />
How to Set A Single - Jack Option<br />
The following key sequence is used to enable or disable fax jack operation in<br />
favor of single jack operation (all telephone calls through phone jack):<br />
# * 63 * #<br />
The single jack value is set to 0 for single fax jack operation; 1 for both voice and<br />
fax jacks. If the single jack value is neither 0 nor 1, it is considered invalid. The<br />
factory default is 1.<br />
How to Set In-Bound Fax Port Option<br />
The following key sequence is used to enter the inbound fax port option:<br />
# * 67 * #<br />
The fax port value is set to 1 in<strong>com</strong>ing fax calls to the fax port (dual port operation),<br />
or phone port (single port operation), and 3 to send in<strong>com</strong>ing fax calls to<br />
the DB - 9 PC port. If the fax port value is neither 1 nor 3, it is considered invalid.<br />
The factory default is 1.<br />
NOTE: If the single jack option above is set to single, all in<strong>com</strong>ing analog calls will<br />
always go to the phone port.<br />
<strong>SX4e</strong> <strong>GSM</strong> 1900 35 USER MANUAL
Phonecell <strong>SX4e</strong> Troubleshooting<br />
Telephone Service is Not Working<br />
If the telephone service is not working, first check the operation of the telephone<br />
equipment and wiring connected to your Phonecell. Test the equipment on a different<br />
service or piece of equipment to ensure proper operation, or connect a known good<br />
telephone device to the phone port on the Phonecell unit. This will verify the condition<br />
of the telephone equipment and the internal wiring of the telephone service to ensure<br />
that it’s working properly. If the telephone system or wiring is not working properly,<br />
replace or repair the equipment as required. Otherwise, contact your cellular provider<br />
or your authorized Telular distributor.<br />
Unable to Receive In<strong>com</strong>ing Calls<br />
If more than one telephone or telephone device is connected to your Phonecell,<br />
make sure that all devices are “on-hook” (hung up). If one extension is “off-hook”<br />
(off its cradle), none of the extensions on your phone line will ring when an<br />
in<strong>com</strong>ing call occurs.<br />
Moisture or Ventilation Problems<br />
Visually inspect your Phonecell’s unit enclosure. Moisture can damage the equipment.<br />
Ventilation is also very important. If there are moisture or ventilation problems, move<br />
your Phonecell to correct as necessary, see the Temperature Environment section of<br />
this manual.<br />
No Power<br />
The top LED lamp on the front of your Phonecell <strong>SX4e</strong> indicates the unit’s power<br />
condition. If the LED is YELLOW or GREEN, your Phonecell is receiving power. If<br />
the power cord is connected and the LED lamp is not lit, the Phonecell is not<br />
receiving power. Verify that the AC power source and its corresponding circuit<br />
breaker are functioning properly.<br />
Battery Backup Failure<br />
If you’re using the optional Inline Battery Backup Unit, the unit must be connected to<br />
AC power for at least 24 hours to fully charge the batteries before they’ll provide backup<br />
power to your Phonecell. Verify that the batteries have been charged for at least 24<br />
hours and that the power source and its corresponding circuit breaker are functioning<br />
properly. Then, examine the batteries for physical damage and corrosion. Replace the<br />
batteries if necessary.<br />
!<br />
WARNING!<br />
Only Authorized Service Personnel should remove the cover of your<br />
Phonecell. For further assistance, contact your Authorized Telular<br />
Representative. Please have your units model and serial number ready.<br />
<strong>SX4e</strong> <strong>GSM</strong> 1900 36 USER MANUAL
Phonecell <strong>SX4e</strong> Programming<br />
Phonecell <strong>SX4e</strong> User-Programming Commands<br />
The Phonecell can be programmed on location with an ordinary telephone, which<br />
is sometimes referred to as a POTS (Plain Old Telephone Set) phone. NOTE: the<br />
User Programming mode is not accessible while you’re in a call.<br />
In the following sections, an is <strong>com</strong>prised of the digits 0 through<br />
9. The digits ' ' and '#' are considered invalid when used inside an , and will cause that <strong>com</strong>mand/value to be rejected.<br />
When you enter the programming mode, a timer is started. If there are no key<br />
entries within any 2-minute period, the FWT will revert to its normal mode.<br />
Going on-hook (hanging up the phone) will exit the programming mode.<br />
Correct entry of the <strong>com</strong>mands below will be confirmed by the return of the programming<br />
tone, which signifies that the unit is ready to accept the next entry.<br />
Incorrect entry will result in a short, three tone sequence of rising frequencies, followed<br />
by the return of the programming tone, which again signifies that the unit is<br />
ready to accept the corrected entry.<br />
How to Enter the User Programming Mode<br />
Use the following access code to enter the User Programming mode:<br />
�<br />
Press: # * 0 * 1 2 3 4 5 6 7 8 #<br />
The access code is 8 digits. If the access code is not 8 digits or does<br />
not match the access code, the Programming mode cannot be<br />
entered. This code is pre-programmed during production and cannot<br />
be changed in the field.<br />
If you enter the access code correctly, the dial tone should change to a<br />
different, steady “Programming” tone and the bottom LED indicator on<br />
the front of the Phonecell will blink alternately RED and GREEN to<br />
indicate that you’re in the programming mode.<br />
User Programming Commands<br />
How To Set Data After SEND (In-Call DTMF Signaling)<br />
Use the following key sequence to select the type of in-call DTMF signaling:<br />
�<br />
Press: # * 10 * #<br />
The < > brackets represents the 1-digit in-call DTMF signaling option:<br />
enter 0 for In-Band Signaling;<br />
� enter � 1 for Out-of-Band Signaling;<br />
enter � 2 for both In-Band and Out-of-Band signaling;<br />
enter �<br />
3 for neither.<br />
The in-call DTMF signaling value is set to 0 for in-band signaling; 1 for outof-band<br />
signaling, 2 for both in-band and out-of-band, and 3 for neither. If<br />
the in-call DTMF signaling value is greater than 3, it is considered invalid.<br />
The factory default is 1 (In-band signaling).<br />
<strong>SX4e</strong> <strong>GSM</strong> 1900 37 USER MANUAL
User Programming Commands - continued<br />
How To Set the Auto SEND Delay<br />
Use the following key sequence to set the Auto SEND Delay:<br />
Press: # * 11 * #<br />
The < > brackets represent the Auto SEND Delay. You must enter a<br />
value between 2 and 20 seconds, otherwise the FWT will not update or<br />
store this value; the existing stored parameter will remain. (For<br />
instance, to enter a 5-second delay, press: # * 11 * 5.) The factory<br />
default setting is 3 seconds.<br />
How to Set the Pulse Dial Option<br />
Use the following key sequence to set the Pulse Dial option:<br />
Press: # * 12 * #<br />
The < > brackets represent the 1-digit Pulse Dial option:<br />
enter: 0 to disable pulse dialing capability<br />
enter: 1 to enable pulse dialing capability.<br />
You must enter either 0 or 1, otherwise the FWT will not update or<br />
store this value; the existing stored parameter will remain. The factory<br />
default setting is 1.<br />
Enable/Disable Zero Dial Delay for Frequently Called Numbers<br />
Use the following key sequence to set the Zero Dial Delay option:<br />
Press: # * 21 * #<br />
The < > brackets represent the 1-digit Zero Dial Delay option:<br />
enter: 0 to disable Zero Dial Delay option<br />
enter: 1 to enable Zero Dial Delay option<br />
You must enter either 0 or 1, otherwise the FWT will not update or<br />
store this value; the existing stored parameter will remain. The factory<br />
default setting is 1.<br />
Output Level Option<br />
Use the following key sequence to program the nominal audio output<br />
level:<br />
Press: # * 69 * #<br />
The output level value is set to 0 for low (-20dBm), 1 for normal (-14dBm)<br />
and 2 for high (-8dBm). If the output level value is greater than 2, it will be<br />
considered invalid. The factory default is 1.<br />
<strong>SX4e</strong> <strong>GSM</strong> 1900 38 USER MANUAL
Phonecell <strong>SX4e</strong> Programming - continued<br />
!<br />
IMPORTANT!<br />
The following <strong>com</strong>mands may be used by a trained service technician to change<br />
the configuration of the Phonecell <strong>SX4e</strong>. WARNING: These <strong>com</strong>mands are<br />
intended for use by trained service technicians only. Untrained users could damage<br />
the Phonecell <strong>SX4e</strong>, violate local regulations and breach the service agreement<br />
with the cellular provider. For further assistance, please contact your<br />
Authorized Telular Representative.<br />
Phonecell <strong>SX4e</strong> Technician-Programming Commands<br />
The following <strong>com</strong>mands are to used by trained field technicians to set up the<br />
Phonecell <strong>SX4e</strong> for operation in the network. Since these <strong>com</strong>mands can directly<br />
affect the proper operation of the unit, there is an additional level of security to<br />
prevent casual access.<br />
How to Enter Technician-Programming Mode<br />
Use the following access code to enter the Technician-Programming mode:<br />
Press: # * 0 * 1 2 3 4 4 3 2 1 #<br />
The access code is 8 digits. If the access code is not 8 digits or does<br />
not match the access code, the Programming mode cannot be entered.<br />
This code is pre-programmed during production and cannot be<br />
changed in the field.<br />
If you enter the access code correctly, the dial tone should change to a<br />
different, steady “Programming” tone and the bottom LED indicator on<br />
the front of the Phonecell will blink alternately RED and GREEN to indicate<br />
that you are in the Programming mode.<br />
Technician Programming Commands<br />
Enter Dial Tone After Remote On-Hook Option<br />
Use the following key sequence to enter the dial tone after remote onhook<br />
option:<br />
Press: # * 8 * #<br />
The dial tone value is set to 0 for no tone after a remote on-hook; 1 to<br />
enable dial tone after remote on hook. If the value is neither 0 nor 1, it<br />
is considered invalid. The factory default is 0.<br />
Enter Post Receiver Off-Hook Option<br />
Use the following key sequence to enter the post receiver off-hook<br />
option:<br />
Press: # * 9 * #<br />
The post ROH value is set to 0 for continuous ROH tone; 1 to disable<br />
ROH tone and periodically check for an on-hook condition. If the post<br />
ROH value is neither 0 nor 1, it is considered invalid. The factory<br />
default is 1.<br />
<strong>SX4e</strong> <strong>GSM</strong> 1900 39 USER MANUAL
Phonecell <strong>SX4e</strong> Programming - continued<br />
Enter Call-Answered Supervision Pulse Option<br />
Use the following key sequence to enable or disable the call-answered<br />
supervision pulse, select its frequency, and program its duration:<br />
Press: # * 18 * * *<br />
* #<br />
The cas_pls_enable value is set to 0 to disable the pulse, 1 to enable<br />
the pulse. If the value is neither 0 nor 1, it will be considered invalid.<br />
The cas_pls_frequency value is set to 0 for 12 kHz, 1 for 16 kHz. If the<br />
value is neither 0 nor 1, it will be considered invalid. The cas_pls_<br />
duration value is programmed in 1 ms increments from 10 to 65535<br />
(10 - 65,535 ms). If the value is not between 10 and 65535, inclusive, it<br />
will be considered invalid. The cas_pls_level can be programmed to<br />
any of the values shown in the table below. If the cas_pls_level is not<br />
between 0 and 6, inclusive, it will be considered invalid. The factory<br />
default is 0, 0, 100, 3.<br />
Power (dBm)<br />
0 0 ± 3<br />
1 3 ± 3<br />
2 -6 ± 3<br />
3 -9 ± 3<br />
4 -12 ± 3<br />
5 -15 ± 3<br />
6 -18 ± 3<br />
Enter Line-Reversal Outgoing Option<br />
Use the following key sequence to enable or disable line (tip/ring)<br />
reversal for outgoing calls:<br />
Press: # * 22 * #<br />
The line-reversal outgoing value is set to 0 to disable line reversal, 1 to<br />
enable line reversal. If the value is neither 0 nor 1, it is considered<br />
invalid. The factory default is 0.<br />
Enter Line-Reversal In<strong>com</strong>ing Option<br />
Use the following key sequence to enable or disable line (tip/ring)<br />
reversal for in<strong>com</strong>ing calls:<br />
Press: # * 23 * #<br />
The line-reversal outgoing value is set to 0 to disable line reversal, 1 to<br />
enable line reversal. If the value is neither 0 nor 1, it is considered<br />
invalid. The factory default is 0.<br />
<strong>SX4e</strong> <strong>GSM</strong> 1900 40 USER MANUAL
Phonecell <strong>SX4e</strong> Programming - continued<br />
Enter On-Hook Call Alert Cadence Option<br />
Use the following key sequence to program the on-hook call alert ring<br />
cadence:<br />
Press: # * 30 * * #<br />
Both the on-time and off-time durations are programmed in 100 ms<br />
increments from 1 to 255 (0.1 - 25.5 seconds). If the value is not<br />
between 1 and 255, inclusive, it will be considered invalid. The factory<br />
default is 20 and 40, respectively.<br />
Enter On-Hook Call Alert Frequency Option<br />
Use the following key sequence to program the on-hook call alert ring<br />
frequency:<br />
Press: # * 32 * #<br />
The frequency value is set to 0 for 20 Hz, 1 for 25 Hz, and 2 for 50 Hz.<br />
If the frequency value is greater than 2, it will be considered invalid.<br />
The factory default is 0.<br />
Enter Audio Input Impedance Option<br />
Use the following key sequence to select the audio input impedance:<br />
Press: # * 68 * #<br />
The audio Z value is set to 0 for 600 ohms, 1 for 900 ohms. If the<br />
value is neither 0 nor 1, it is considered invalid. The factory default is 0.<br />
Enter Ring Back Request<br />
Use the following key sequence to request immediate ring back:<br />
Press: # * 13 * #<br />
There is no ring back value to be set; the <strong>com</strong>mand activates when the<br />
phone is placed back on-hook.<br />
Enter Restore Factory Defaults Request<br />
Use the following key sequence to request restoration of all factory set<br />
default values (including the SIM PIN auto entry value):<br />
Press: # * 15 * #<br />
There is no restore defaults value to be entered; the <strong>com</strong>mand<br />
activates immediately. If a value is entered, it is considered invalid and<br />
the Phonecell will not restore the factory defaults.<br />
Enter Periodic Self Test Option<br />
Use the following key sequence to program periodic self test:<br />
Press: # * 76 * #<br />
The self-test interval is programmed in 1 minute increments from 1 to<br />
65,535. A value of 0 disables periodic self test. If the value is not<br />
between 0 and 65,535, inclusive, it will be considered invalid. The<br />
factory default is 180.<br />
<strong>SX4e</strong> <strong>GSM</strong> 1900 41 USER MANUAL
Phonecell <strong>SX4e</strong> Programming - continued<br />
Enter Disconnect Pulse Option<br />
Use the following key sequence to enter the disconnect pulse option:<br />
Press: # * 79 * #<br />
The disconnect pulse value is programmed in 1 millisecond increments<br />
from 10 to 65,535. A value of 0 disables the disconnect pulse. If the<br />
value is not 0 or between 10 and 65,535, inclusive, it will be considered<br />
invalid and the FWT will not update or store this value; the currently<br />
stored value will remain. The factory default is 0.<br />
Enter Dial Tone Frequency Selection Option<br />
Use the following key sequence to select the dial tone frequency<br />
option:<br />
Press: # * 80 * #<br />
The dial tone frequency value is set to 0 to select the North American<br />
dial tone frequency pair (350 + 440 Hz) ; set to 1 to select European<br />
dial tone frequency (425 Hz). If the dial tone frequency selection option<br />
value is neither 0 nor 1, it is considered invalid and the FWT will not<br />
update or store this value; the currently stored value will remain. The<br />
factory default is 0.<br />
Enter Mobile Equipment Personalization Option<br />
Use the following key sequence to enter the Mobile Equipment<br />
Personalization (MEP) options:<br />
Press: # * 37 * * <br />
* #<br />
The MEP lock type value is set to 0 for SIM personalization; 1 for<br />
Network personalization; 2 for Network subset personalization, 3 for<br />
Service Provider personalization, 4 for Corporate personalization. If the<br />
MEP lock type value is not in the range 0 to 4, it is considered invalid.<br />
The MEP operation value is set to 0 to activate personalization; 1 to<br />
deactivate personalization; 2 to disable personalization; 3 is reserved<br />
for future use. If the MEP operation value is not in the range 0 to 3, it<br />
is considered invalid. The MEP password is a special value available<br />
only to authorized personnel. Factory default is all lock types set to<br />
deactivated.<br />
Operation and Maintenance Center Terminate Number<br />
Use the following key sequence to program the operations and maintenance<br />
center telephone number that the FWT receives calls from:<br />
Press: # * 83 * < number> #<br />
If the number length is greater than 16 numeric digits, it will be considered<br />
invalid. If no number is entered, the stored value is null. The factory default<br />
is null.<br />
<strong>SX4e</strong> <strong>GSM</strong> 1900 42 USER MANUAL
Appendix A: How to Setup PC Serial Ports<br />
for Phonecell Digital Fax/Data<br />
Requirements<br />
• <strong>GSM</strong> account with your network service provider including a Data/Fax facility.<br />
• PC/Laptop/ Notebook with Com Port.<br />
• Windows 95/98<br />
NOTE: When all of the above have been satisfied, you may proceed.<br />
Modem Setup<br />
1) Power on your PC/laptop and start Windows 95/98.<br />
2) Using the PC pointing device, press the "START" button, select<br />
"SETTINGS" and then "CONTROL PANEL". Once the Control Panel<br />
window appears double click the MODEMS icon button. The modem<br />
properties window will appear.<br />
NOTE: A data card modem device may appear in the list of installed modems.<br />
3) Click the ADD button to install a new modem device for the phonecell.<br />
<strong>SX4e</strong> <strong>GSM</strong> 1900 43 USER MANUAL
Appendix A: Phonecell Digital Fax/Data - continued<br />
4) The install new modem window may appear asking for the type of modem to<br />
install. Click on "Other" followed by clicking the NEXT button. If this window<br />
does not appear, go to Step 5.<br />
5) The install new modem window will appear. Then, click on the "Don't detect my<br />
modem option" followed by clicking the NEXT button.<br />
<strong>SX4e</strong> <strong>GSM</strong> 1900 44 USER MANUAL
Appendix A: Phonecell Digital Fax/Data - continued<br />
6) The install new modem will update again to select the manufacturer and<br />
modem model. Click on "Standard Modem Types" from the manufactures list<br />
followed by "Standard 19200 bps Modem" from the model list. Then click on<br />
the NEXT button.<br />
7) The install new modem will update to select the <strong>com</strong> port. Click on the available<br />
serial port and then click on the "Next" button. Windows 95 will create a<br />
modem configuration file for the phonecell. This may take several minutes.<br />
<strong>SX4e</strong> <strong>GSM</strong> 1900 45 USER MANUAL
Appendix A: Phonecell Digital Fax/Data - continued<br />
8) The Install New Modem window will update again. Click on Finish to proceed.<br />
9) The Modems Properties window should appear. Click on the Properties button.<br />
<strong>SX4e</strong> <strong>GSM</strong> 1900 46 USER MANUAL
Appendix A: Phonecell Digital Fax/Data - continued<br />
10) The Standard 19200 bps Modem Properties window will open in the General<br />
tab. Set as shown with the <strong>com</strong> port you have selected.<br />
11) Then click on the Connection tab. Set as shown below.<br />
<strong>SX4e</strong> <strong>GSM</strong> 1900 47 USER MANUAL
Appendix A: Phonecell Digital Fax/Data - continued<br />
12) Click on the Advanced button. Set as shown.<br />
13) Click on OK and Close to back out of each window. Your modem is now set up.<br />
<strong>SX4e</strong> <strong>GSM</strong> 1900 48 USER MANUAL
©2001 TELULAR CORPORATION<br />
56021903