Manual MR3140-M - DResearch
Manual MR3140-M - DResearch
Manual MR3140-M - DResearch

Create successful ePaper yourself
Turn your PDF publications into a flip-book with our unique Google optimized e-Paper software.
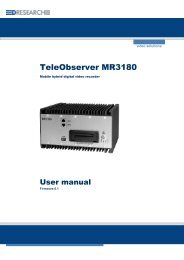
<strong>DResearch</strong> – User <strong>Manual</strong> TeleObserver <strong>MR3140</strong>-M 2011-02-03<br />
In this dialogue box you determine the cameras which are to be activated for recording and/or for the<br />
display on a monitor. To determine the settings select one of the cameras and change the values to<br />
suit your requirements.<br />
Global settings Description<br />
Video norm � For selecting the video standard (PAL or NTSC) for data recording.<br />
List of cameras � Lists the analogue cameras and their settings.<br />
Frame rate � Select how many pictures per second are to be recorded (valid for all cameras).<br />
Specific settings Description<br />
� Maximum picture rate varies depending on the number of active cameras.<br />
� Configuration of one or more analogue cameras for the video-OUT reduces the<br />
frame rate of the other cameras, as if they were activated for recording!<br />
Camera name � Give the camera a name (max. 50 characters).<br />
� To achieve accurate identification the name might include reference to the<br />
camera’s location (Cam1_entrance).<br />
� Keep names as short as possible so that the whole name is visible on the monitor.<br />
Camera connected � Signals the system, that on the relevant video input a camera is connected<br />
physically. All detectors regarding this video input will be activated with this.<br />
� Only activate this option, if the camera is really connected to the entry, otherwise<br />
the device displays error messages (e.g. video signal of a camera is missing).<br />
� Icon for those cameras which are connected physically to the system, but not<br />
activated for recording:<br />
� After setting the option the camera has to be activated for recording. This setting<br />
has to be made in the dialogue ‚Activations’, by setting a new activation ‚At<br />
system start ���� permanent recording of camera X’.<br />
Only then appears the icon for the cameras activated for recording:<br />
37