HP Officejet Pro K550
HP Officejet Pro K550
HP Officejet Pro K550

You also want an ePaper? Increase the reach of your titles
YUMPU automatically turns print PDFs into web optimized ePapers that Google loves.
6<br />
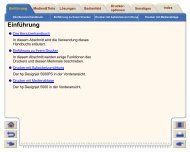
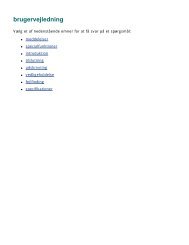
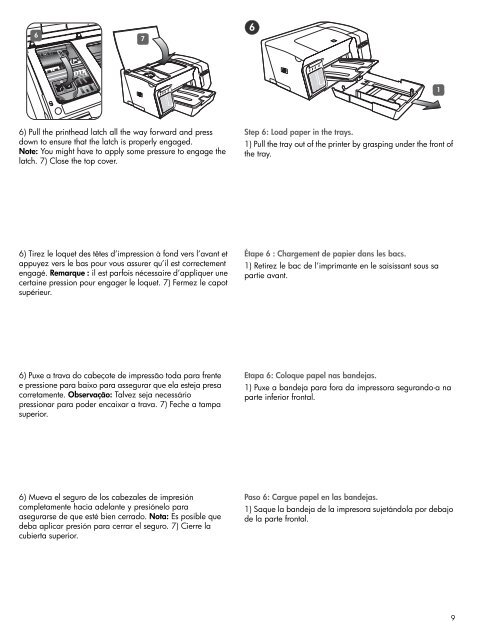
6) Pull the printhead latch all the way forward and press<br />
down to ensure that the latch is properly engaged.<br />
Note: You might have to apply some pressure to engage the<br />
latch. 7) Close the top cover.<br />
6) Tirez le loquet des têtes d’impression à fond vers l’avant et<br />
appuyez vers le bas pour vous assurer qu’il est correctement<br />
engagé. Remarque : il est parfois nécessaire d’appliquer une<br />
certaine pression pour engager le loquet. 7) Fermez le capot<br />
supérieur.<br />
6) Puxe a trava do cabeçote de impressão toda para frente<br />
e pressione para baixo para assegurar que ela esteja presa<br />
corretamente. Observação: Talvez seja necessário<br />
pressionar para poder encaixar a trava. 7) Feche a tampa<br />
superior.<br />
6) Mueva el seguro de los cabezales de impresión<br />
completamente hacia adelante y presiónelo para<br />
asegurarse de que esté bien cerrado. Nota: Es posible que<br />
deba aplicar presión para cerrar el seguro. 7) Cierre la<br />
cubierta superior.<br />
7<br />
6<br />
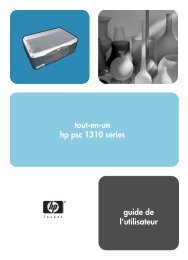
Step 6: Load paper in the trays.<br />
1) Pull the tray out of the printer by grasping under the front of<br />
the tray.<br />
Étape 6 : Chargement de papier dans les bacs.<br />
1) Retirez le bac de l’imprimante en le saisissant sous sa<br />
partie avant.<br />
Etapa 6: Coloque papel nas bandejas.<br />
1) Puxe a bandeja para fora da impressora segurando-a na<br />
parte inferior frontal.<br />
Paso 6: Cargue papel en las bandejas.<br />
1) Saque la bandeja de la impresora sujetándola por debajo<br />
de la parte frontal.<br />
1<br />
9