

Manual de Usuario SC-HC4EP(es) - Panasonic
Manual de Usuario SC-HC4EP(es) - Panasonic
Manual de Usuario SC-HC4EP(es) - Panasonic

Create successful ePaper yourself
Turn your PDF publications into a flip-book with our unique Google optimized e-Paper software.
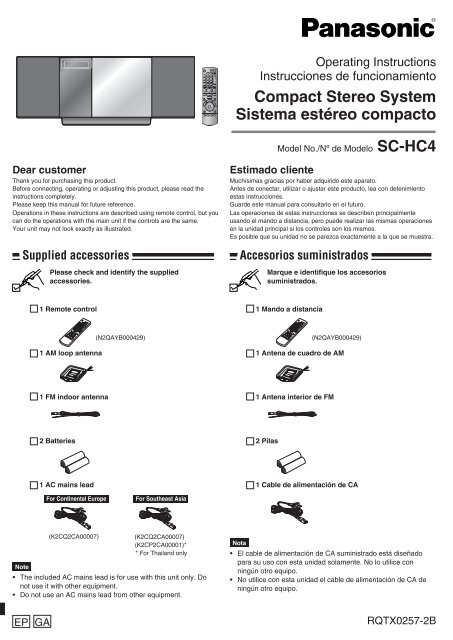
Operating InstructionsInstruccion<strong>es</strong> <strong>de</strong> funcionamientoCompact Stereo SystemSistema <strong>es</strong>téreo compactoMo<strong>de</strong>l No./Nº <strong>de</strong> Mo<strong>de</strong>lo <strong>SC</strong>-HC4Dear customerThank you for purchasing this product.Before connecting, operating or adjusting this product, please read theinstructions completely.Please keep this manual for future reference.Operations in th<strong>es</strong>e instructions are <strong>de</strong>scribed using remote control, but youcan do the operations with the main unit if the controls are the same.Your unit may not look exactly as illustrated.Supplied acc<strong>es</strong>sori<strong>es</strong>Please check and i<strong>de</strong>ntify the suppliedacc<strong>es</strong>sori<strong>es</strong>.Estimado clienteMuchísimas gracias por haber adquirido <strong>es</strong>te aparato.Ant<strong>es</strong> <strong>de</strong> conectar, utilizar o ajustar <strong>es</strong>te producto, lea con <strong>de</strong>tenimiento<strong>es</strong>tas instruccion<strong>es</strong>.Guar<strong>de</strong> <strong>es</strong>te manual para consultarlo en el futuro.Las operacion<strong>es</strong> <strong>de</strong> <strong>es</strong>tas instruccion<strong>es</strong> se <strong>de</strong>scriben principalmenteusando el mando a distancia, pero pue<strong>de</strong> realizar las mismas operacion<strong>es</strong>en la unidad principal si los control<strong>es</strong> son los mismos.Es posible que su unidad no se parezca exactamente a la que se mu<strong>es</strong>tra.Acc<strong>es</strong>orios suministradosMarque e i<strong>de</strong>ntifique los acc<strong>es</strong>oriossuministrados.1 Remote control1 Mando a distancia1 AM loop antenna(N2QAYB000429)(N2QAYB000429)1 Antena <strong>de</strong> cuadro <strong>de</strong> AM1 FM indoor antenna1 Antena interior <strong>de</strong> FM2 Batteri<strong>es</strong>2 Pilas1 AC mains lead1 Cable <strong>de</strong> alimentación <strong>de</strong> CAFor Continental EuropeFor Southeast AsiaNote(K2CQ2CA00007)(K2CQ2CA00007)(K2CP2CA00001)** For Thailand only• The inclu<strong>de</strong>d AC mains lead is for use with this unit only. Donot use it with other equipment.• Do not use an AC mains lead from other equipment.Nota• El cable <strong>de</strong> alimentación <strong>de</strong> CA suministrado <strong>es</strong>tá diseñadopara su uso con <strong>es</strong>ta unidad solamente. No lo utilice conningún otro equipo.• No utilice con <strong>es</strong>ta unidad el cable <strong>de</strong> alimentación <strong>de</strong> CA <strong>de</strong>ningún otro equipo.EP GARQTX0257-2B
RQTX0257 ENGLISHTable of contentsSupplied acc<strong>es</strong>sori<strong>es</strong>CoverSafety precautions 2Connections 4Preparing the remote control 5Demo function 5Control gui<strong>de</strong> 6Disc operations 8Radio operations 9RDS broadcasts 10Timer 10Sound adjustment 11External unit 12Troubl<strong>es</strong>hooting gui<strong>de</strong> 14Specifications 15Maintenance 15Safety precautionsPlacementSet the unit up on an even surface away from direct sunlight,high temperature, high humidity, and exc<strong>es</strong>sive vibration. Th<strong>es</strong>econditions can damage the cabinet and other components,thereby shortening the unit’s service life.Place it at least 15 cm away from wall surfac<strong>es</strong> to avoiddistortion and unwanted acoustical effects.Do not place heavy items on the unit.VoltageDo not use high voltage power sourc<strong>es</strong>. This can overload theunit and cause a fire.Do not use a DC power source. Check the source carefully whensetting the unit up on a ship or other place where DC is used.AC mains lead protectionEnsure the AC mains lead is connected correctly and notdamaged. Poor connection and lead damage can cause fire orelectric shock. Do not pull, bend, or place heavy items on the lead.Grasp the plug firmly when unplugging the lead. Pulling theAC mains lead can cause electric shock.Do not handle the plug with wet hands. This can causeelectric shock.Foreign matterDo not let metal objects fall insi<strong>de</strong> the unit. This can causeelectric shock or malfunction.Do not let liquids get into the unit. This can cause electricshock or malfunction. If this occurs, immediately disconnect theunit from the power supply and contact your <strong>de</strong>aler.Do not spray insectici<strong>de</strong>s onto or into the unit. They containflammable gas<strong>es</strong> which can ignite if sprayed into the unit.ServiceDo not attempt to repair this unit by yourself. If sound isinterrupted, indicators fail to light, smoke appears, or any otherproblem that is not covered in th<strong>es</strong>e instructions occurs, disconnectthe AC mains lead and contact your <strong>de</strong>aler or an authorized servicecenter. Electric shock or damage to the unit can occur if the unit isrepaired, disassembled or reconstructed by unqualified persons.Extend operating life by disconnecting the unit from the powersource if it is not to be used for a long time.22
75Ω LOOP EXT LOOP ANTFM ANT AM ANT GROUNDAUXAC INCAUTION!THIS PRODUCT UTILIZES A LASER.USE OF CONTROLS OR ADJUSTMENTS ORPERFORMANCE OF PROCEDURES OTHER THAN THOSESPECIFIED HEREIN MAY RESULT IN HAZARDOUSRADIATION EXPOSURE.DO NOT OPEN COVERS AND DO NOT REPAIR YOURSELF.REFER SERVICING TO QUALIFIED PERSONNEL.CAUTION!• DO NOT INSTALL OR PLACE THIS UNIT IN ABOOKCASE, BUILT-IN CABINET OR IN ANOTHERCONFINED SPACE. ENSURE THE UNIT IS WELLVENTILATED. TO PREVENT RISK OF ELECTRIC SHOCKOR FIRE HAZARD DUE TO OVERHEATING, ENSURETHAT CURTAINS AND ANY OTHER MATERIALS DONOT OBSTRUCT THE VENTILATION VENTS.• DO NOT OBSTRUCT THE UNIT’S VENTILATIONOPENINGS WITH NEWSPAPERS, TABLECLOTHS,CURTAINS, AND SIMILAR ITEMS.• DO NOT PLACE SOURCES OF NAKED FLAMES, SUCHAS LIGHTED CANDLES, ON THE UNIT.• DISPOSE OF BATTERIES IN AN ENVIRONMENTALLYFRIENDLY MANNER.WARNING:TO REDUCE THE RISK OF FIRE, ELECTRIC SHOCK ORPRODUCT DAMAGE,•••DO NOT EXPOSE THIS APPARATUS TO RAIN,MOISTURE, DRIPPING OR SPLASHING AND THAT NOOBJECTS FILLED WITH LIQUIDS, SUCH AS VASES,SHALL BE PLACED ON THE APPARATUS.USE ONLY THE RECOMMENDED ACCESSORIES.DO NOT REMOVE THE COVER (OR BACK); THEREARE NO USER SERVICEABLE PARTS INSIDE. REFERSERVICING TO QUALIFIED SERVICE PERSONNEL.The socket outlet shall be installed near the equipment an<strong>de</strong>asily acc<strong>es</strong>sible.The mains plug of the power supply cord shall remain readilyoperable.To completely disconnect this apparatus from the AC Mains,disconnect the power supply cord plug from AC receptable.This product may receive radio interference caused by mobiletelephon<strong>es</strong> during use. If such interference is apparent, pleaseincrease separation between the product and the mobiletelephone.CAUTIONDanger of explosion if battery is incorrectly replaced.Replace only with the same or equivalent typerecommen<strong>de</strong>d by the manufacturer. Dispose of usedbatteri<strong>es</strong> according to the manufacturer’s instructions.For Continental EuropeTHIS UNIT IS INTENDED FOR USE IN MODERATE CLIMATES.For Southeast AsiaTHIS UNIT IS INTENDED FOR USE IN TROPICAL CLIMATES.iPod is a tra<strong>de</strong>mark of Apple Inc., registered in the U.S. andother countri<strong>es</strong>.EUPursuant to at the directive 2004/108/EC, article 9(2)<strong>Panasonic</strong> T<strong>es</strong>ting Centre<strong>Panasonic</strong> Marketing Europe GmbHWinsbergring 15, 22525 Hamburg, GermanyInsi<strong>de</strong> of productInformation for Users on Collection and Disposal of OldEquipment and used Batteri<strong>es</strong>Th<strong>es</strong>e symbols on the products, packaging, and/or accompanying documents mean that use<strong>de</strong>lectrical and electronic products and batteri<strong>es</strong>should not be mixed with general householdwaste.For proper treatment, recovery and recyclingof old products and used batteri<strong>es</strong>, pleasetake them to applicable collection points, inaccordance with your national legislation andthe Directiv<strong>es</strong> 2002/96/EC and 2006/66/EC.By disposing of th<strong>es</strong>e products and batteri<strong>es</strong>correctly, you will help to save valuabler<strong>es</strong>ourc<strong>es</strong> and prevent any potential negativeeffects on human health and the environmentwhich could otherwise arise from inappropriatewaste handling.For more information about collection andrecycling of old products and batteri<strong>es</strong>, pleasecontact your local municipality, your wastedisposal service or the point of sale where youpurchased the items.Penalti<strong>es</strong> may be applicable for incorrectdisposal of this waste, in accordance withnational legislation.For busin<strong>es</strong>s users in the European UnionIf you wish to discard electrical and electronicequipment, please contact your <strong>de</strong>aler orsupplier for further information.[Information on Disposal in other Countri<strong>es</strong>outsi<strong>de</strong> the European Union]Th<strong>es</strong>e symbols are only valid in the EuropeanUnion. If you wish to discard th<strong>es</strong>e items, pleasecontact your local authoriti<strong>es</strong> or <strong>de</strong>aler and askfor the correct method of disposal.Note for the battery symbol (bottom twosymbol exampl<strong>es</strong>):This symbol might be used in combination witha chemical symbol. In this case it compli<strong>es</strong> withthe requirement set by the Directive for thechemical involved.3RQTX0257ENGLISH3
LOOP ANTGROUNDConnectionsPortable audio equipment (Cords and equipment not inclu<strong>de</strong>d)RQTX0257 ENGLISH44Portable audio playerNote75ΩFM ANT1LOOP EXTAM ANT2AUXPlug type:➡Ø3.5 mm stereo Start playback from theportable audio source.AC IN3Headphon<strong>es</strong> (not inclu<strong>de</strong>d)Reduce the volume level andconnect the headphon<strong>es</strong>.Plug type: Ø3.5 mm stereo.NoteMAIN UNIT• Adjust the volume and sound quality of this unit and the other equipment. Reduce the level of input signal (for example, by switchingoff the equalizer or reducing the volume) of the other equipment before connection. High levels of input signal will distort the sound.• For <strong>de</strong>tails, refer to the instruction manual of the other equipment.1 Connect the FM indoor antenna. 3 Connect the AC mains lead.275 ΩTape the antenna to a wall or column, in a position with the leastamount of interference.Connect the AM loop antenna.12 3BlackWhiteRedAM indoor antennaUse a Phillips-headscrewdriver, etc.Stand the antennaup on its base.Adh<strong>es</strong>ive tapeFM indoor antennaClick!Keep the loose antenna cord away from other wir<strong>es</strong> and cords.Do not screw too tightly. Otherwise, the screwdriver go<strong>es</strong> aroundin circle and cannot be fixed.NoteConnect the AC mains leadafter all other connectionsare complete.To household ACmains socketInsertion of connectorAppliance inletApprox. 6 mm• Avoid listening for prolongedperiods of time to preventhearing damage.• Exc<strong>es</strong>sive sound pr<strong>es</strong>surefrom earphon<strong>es</strong> andheadphon<strong>es</strong> can causehearing loss.To save power when the unit is not to be used for a long time,unplug it from the household AC mains socket. You will need tor<strong>es</strong>et some memory items after plugging in the unit.ConnectorEven when the connector is perfectly inserted, <strong>de</strong>pending onthe type of inlet used, the front part of the connector may jutout as shown in the drawing. However there is no problemusing the unit.
Connections (continued)Optional antenna connections••••Never use an outdoor antenna during a lightning storm.You can connect the FM outdoor antenna for better reception. Please consult your <strong>de</strong>aler for installation.Disconnect the FM indoor antenna if an FM outdoor antenna is installed.Connect the AM outdoor antenna without removing the AM loop antenna. Run 5 to 12 m of vinyl-coveredwire horizontally along a window or other convenient location.Preparing the remote control■ Batteri<strong>es</strong>• Use a mangan<strong>es</strong>e dry battery or an alkaline dry battery.• Insert so the pol<strong>es</strong> (+ and – ) match those in the remote control.• Remove if the remote control is not going to be used for a long periodof time.• Store in a cool, dark place.• Do not heat or expose to flame.• Do not leave the batteri<strong>es</strong> in an automobile exposed to direct sunlightfor a long period of time with doors and windows closed.• Mishandling of batteri<strong>es</strong> in the remote control can cause electrolyteleakage, which may cause a fire.Do not:•••••FM outdoor antennaPlace this si<strong>de</strong> in before the other si<strong>de</strong>Demo functionTop View (Top Panel)FM outdoor antenna (not inclu<strong>de</strong>d)75 Ω coaxial cable(not inclu<strong>de</strong>d)mix old and new batteri<strong>es</strong>;use different typ<strong>es</strong> of batteri<strong>es</strong> at the same time;take apart or short-circuit;attempt to recharge alkaline or mangan<strong>es</strong>e batteri<strong>es</strong>;use batteri<strong>es</strong> if their covering has been peeled off.DEMO[g, –DEMO]R6/LR6, AAAM outdoor antennaRemote controlsignal sensor12 3■ Use• Aim at the sensor, avoiding obstacl<strong>es</strong>, at a maximum range of 7 mdirectly in front of the unit (Exact distance <strong>de</strong>pends on angl<strong>es</strong>).• Operation can be affected by strong light sourc<strong>es</strong>, such as directsunlight, and the glass doors on cabinets.When the unit is first plugged in, a <strong>de</strong>monstration of its functions may b<strong>es</strong>hown on the display.If the <strong>de</strong>mo setting is off, you can show a <strong>de</strong>monstration by selecting“DEMO ON”.Pr<strong>es</strong>s and hold [g, –DEMO].The display chang<strong>es</strong> each time the button is held down.DEMO OFFAM outdoor antenna(not inclu<strong>de</strong>d)5 to 12 mDEMO ONAM loop antenna(inclu<strong>de</strong>d)Transmission windowWhile in standby mo<strong>de</strong>, select “DEMO OFF” to reduce powerconsumption.5RQTX0257ENGLISH5
Control gui<strong>de</strong>••Remote ControlRefer to the numbers in parenth<strong>es</strong><strong>es</strong> for page reference.[u/t] and [y/i] <strong>de</strong>scribed in the operations have the same controls as [w] and [q] r<strong>es</strong>pectively.RQTX0257 ENGLISH123456789Standby/on switch [^], [8] (8, 10)Pr<strong>es</strong>s to switch the unit from on to standbymo<strong>de</strong> or vice versa.In standby mo<strong>de</strong>, the unit is still consuming asmall amount of power.[DIMMER] Dims the display panelNumeric buttons [1-9, 0, ≧10] (8, 9, 13)To select a 2-digit numbere.g. 16: [≧10] [1] [6]To select a 3-digit numbere.g. 226: [≧10] [≧10] [2] [2] [6][DEL] Delete last programmed track (8)[PROGRAM] (8, 9)CD/MP3 ProgramTuner Pr<strong>es</strong>et (<strong>Manual</strong>)[CD q/h] (8)Selector switch to CDDirect CD Play/CD Pause[USB q/h] (13)Selector Switch to USBDirect USB Play/USB Pause[iPod q/h] (12)Selector switch to iPodDirect iPod Play/iPod Pause[g] Stop button (8, 12, 13)10 [RE-MASTER] Re-master on/off (11)1112[PRESET EQ] (11)Pr<strong>es</strong>et EQ mo<strong>de</strong> selector[e, r, ALBUM] (8, 12, 13)Album/track selectioniPod menu browsing[w, q]Track skip/searchTune/pr<strong>es</strong>et channel selectionTime adjustmentBass/treble adjustment13 [DISPLAY] (8, 10, 13)CD: CD Display (Elapsed play time/Remaining play time)MP3: MP3 Display (Elapsed play time/Albumname/Track name)USB: USB Display (Elapsed play time/Remaining play time/Album name/Trackname)For Continental EuropeRDS: RDS Display (Station Name/ProgramType/Frequency)1415[AUTO PRESET] (9)Tuner Pr<strong>es</strong>et (Auto)[TUNE MODE] (9)Tune mo<strong>de</strong> on/offSelector switch to <strong>Manual</strong>/Pr<strong>es</strong>et123456789101112131415MP3INFO1617181920212223242526272829303132(10) [z, PLAY]Play timer on/off(10) [CLOCK/TIMER]Clock and Timer setting[AUTO OFF]This function allows you to turn off the unit indisc mo<strong>de</strong> or USB mo<strong>de</strong> only after the unitis left unused for 10 minut<strong>es</strong>. The setting ismaintained even if the unit is turned off.Pr<strong>es</strong>s again to cancel this function.(11) [SLEEP]Sleep timer setting(8, 10, 12, 13) [VOL +, –], [–VOLUME+]To adjust the volume[MUTE]Mut<strong>es</strong> the soundPr<strong>es</strong>s again to cancel muting(9) [REPEAT]Repeat on/off(8, 9, 11) [PLAY MODE]Play mo<strong>de</strong> buttonTuner: Low<strong>es</strong>t/CurrentAdjusting level in AUX mo<strong>de</strong> to Normal/High(9) [FM/AM]FM/AM selection(8, 9, 10, 11, 12, 13) [u/t], [y/i]Track skip/searchTune/pr<strong>es</strong>et channel selectionTime adjustmentBass/treble adjustment(11) [D.BASS]D.BASS on/off(12) [iPod MENU]To display iPod menu(11) [BASS/TREBLE]Bass/Treble selection(8, 12, 13) [OK]Disc playConfirm selection(11) [SURROUND]Surround mo<strong>de</strong> on/off(8, 13) [MP3 INFO]MP3: MP3 Display [ID3 (Album)/ID3 (Track)/ID3 (Artist)/Elapsed play time](9) [FM MODE]FM mo<strong>de</strong> on/offSelector switch to Mono/Stereo161718192021222324252627282930313266
Control gui<strong>de</strong> (continued)Main Unit• Buttons such as 1function the same as the remote control.33343536Front ViewTop View (Top Panel)[iPod ;, OPEN/CLOSE] (12)Open and close sliding door foriPod operation.[g, –DEMO] (5)Stop/Demo[FM/AM/AUX] (4, 9, 13)FM/AM selectionConnecting to other external units[CD ;, OPEN/CLOSE] (8)Open and close sliding door forCD operation.37 USB port (13)37DisplayRemote control signal sensorDEMOVOLUME1 33 25 34 8 7 35 6 20 36 26Sliding door OperationDocking switch36Pr<strong>es</strong>sto open sliding door.Pr<strong>es</strong>s again to close sliding door aftersetting the CD in place. (Refer topage 8 for inserting the CD.)33Pr<strong>es</strong>sTo operate CDTo operate iPodto open sliding door.Pr<strong>es</strong>s again to close sliding door afteriPod is inserted into the dock properly.(Refer to page 12 for inserting theiPod.)7RQTX0257ENGLISH7
Disc operationsBasic playPlay Mo<strong>de</strong> functionRQTX0257 ENGLISH88 Pr<strong>es</strong>s [^] to turn the unit on. Pr<strong>es</strong>s [CD ;, OPEN/CLOSE] to open the sliding door and thenset the CD in place.This function allows you to display the information of the current track.Pr<strong>es</strong>s [DISPLAY] repeatedly during play or pause.••Tostoppaus<strong>es</strong>kip/searchskip albumdirectacc<strong>es</strong>s play(Play startswith thetrack youselect.)CDMP3Note•MP3ActionPr<strong>es</strong>s [g].Pr<strong>es</strong>s [CD q/h].Pr<strong>es</strong>s again to r<strong>es</strong>ume play.Pr<strong>es</strong>s [u/t] or [y/i] to skip.Pr<strong>es</strong>s and hold [u/t] or [y/i] to search.Note• You can search during play or while paused.• You cannot search through MP3 fil<strong>es</strong>.• You can only search within the current track duringprogram play, one track repeat, and random play.Pr<strong>es</strong>s [e,r, ALBUM] in the play mo<strong>de</strong>.Pr<strong>es</strong>s [e,r, ALBUM] once and then the numericbuttons in the stop mo<strong>de</strong>.CD Pr<strong>es</strong>s the numeric buttons to select the <strong>de</strong>siredtrack.MP3 Pr<strong>es</strong>s [e,r, ALBUM] to select the album. Pr<strong>es</strong>s [y/i] once and then pr<strong>es</strong>s the numericbuttons to select the <strong>de</strong>sired track.Display functionElapsed play timeCenter part• Tilt the CD to the left• Label must face outward.and sli<strong>de</strong> it in place.Pr<strong>es</strong>s until you hear itclicks into place. Pr<strong>es</strong>s [CD ;, OPEN/CLOSE] again to close the sliding door.Keep fingers away from the sliding door when it is closing to avoidpossible minor injuri<strong>es</strong>. Pr<strong>es</strong>s [CD q/h] or [OK] to start play. Pr<strong>es</strong>s [VOL +, –] to adjust the volume.Note• Be sure to pr<strong>es</strong>s the [CD ;, OPEN/CLOSE] button to open and closethe sliding door. Damage may occur if the sliding door is forced closed.• Be careful of CD hitting the sliding door while being removed.Remaining play timeElapsed play time Album name Track namePr<strong>es</strong>s [MP3 INFO] repeatedly during play or pause.MP3ID3 (Album)ID3 (Track)Elapsed play timeID3 (Artist)MP3INFOMaximum number of displayable characters: approximately 30.This unit supports ver. 1.0 & 1.1 ID3 tags. Text data that is notsupported will not be displayed.ID3 is a tag embed<strong>de</strong>d in MP3 tracks to provi<strong>de</strong> information aboutthe track. Pr<strong>es</strong>s [CD q/h]. Pr<strong>es</strong>s [PLAY MODE] to select the <strong>de</strong>sired mo<strong>de</strong>.Mo<strong>de</strong>1-TRACK1TR1-ALBUM1ALBUMMP3RANDOMRND1-ALBUMRANDOM1ALBUM RNDMP3••NoteTo playone selected track on the disc.Pr<strong>es</strong>s the numeric buttons to select the track.one selected album on the disc.Pr<strong>es</strong>s [e,r, ALBUM] to select the album.a disc randomly.all tracks in one selected album randomly.Pr<strong>es</strong>s [e,r, ALBUM] to select the album.During random play, you cannot skip to previous track.The current play mo<strong>de</strong> is cleared when you open the sliding door.CD• During RANDOM play, you can search backward or forward onlywithin the current track.The function allows you to program up to 24 tracks.CD Pr<strong>es</strong>s [CD q/h] and then [g]. Pr<strong>es</strong>s [PROGRAM]. Pr<strong>es</strong>s the numeric buttons to select tracks.Repeat this step to program other tracks. Pr<strong>es</strong>s [CD q/h] or [OK] to start play.MP3 Pr<strong>es</strong>s [CD q/h] and then [g]. Pr<strong>es</strong>s [PROGRAM]. Pr<strong>es</strong>s [e,r, ALBUM] to select your <strong>de</strong>sired album. Pr<strong>es</strong>s [y/i] once and then pr<strong>es</strong>s the numeric buttons toselect tracks. Pr<strong>es</strong>s [OK].Repeat step 3 to 5 to program other tracks. Pr<strong>es</strong>s [CD q/h] to start play.ToProgram playcancel programmo<strong>de</strong>replay the programcheck programcontentsclear the last trackclear allprogrammed tracksActionPr<strong>es</strong>s [PROGRAM] in the stop mo<strong>de</strong> to clear“PGM” indicator from the display.Pr<strong>es</strong>s [PROGRAM] then [CD q/h].Pr<strong>es</strong>s [u/t] or [y/i] when “PGM” isdisplayed in the stop mo<strong>de</strong>. To check whileprogramming, pr<strong>es</strong>s [PROGRAM] twice after“PGM” appears, then pr<strong>es</strong>s [u/t] or[y/i].Pr<strong>es</strong>s [DEL] in the stop mo<strong>de</strong>.Pr<strong>es</strong>s [g] in the stop mo<strong>de</strong>.“CLR ALL” is displayed. Within 5 seconds,pr<strong>es</strong>s the button again to clear all tracks.Note• When you try to program more than 24 tracks “PGM FULL” appears.• The program memory is cleared when you open the sliding door.CD• During program play, you can search backward or forward only withinthe current track.
Disc operations (continued)Repeat playRadio operations<strong>Manual</strong> tuningYou can repeat program play or other selected play mo<strong>de</strong>.Pr<strong>es</strong>s [REPEAT] before or during play.“ON REPEAT” and “ & ” are displayed.To cancelPr<strong>es</strong>s [REPEAT] again.“OFF REPEAT” is displayed and “& ” is cleared.Note on CD-R and CD-RWThis unit can play CD-R and CD-RW recor<strong>de</strong>d with CD-DA or MP3.Use an audio recording disc for CD-DA and finalize* it when you finishrecording.The unit may not be able to play some discs due to the condition ofthe recording.* A proc<strong>es</strong>s performed after recording that enabl<strong>es</strong> CD-R/CD-RWplayers to play audio CD-R and CD-RW.CautionDo not:••••••use irregularly shaped CDs.attach extra labels and stickers.use CDs with labels and stickers that are coming off or withadh<strong>es</strong>ive exuding from un<strong>de</strong>r labels and stickers.attach scratch-proof covers or any other kind of acc<strong>es</strong>sori<strong>es</strong>.write anything on the CD.clean CDs with liquids (Wipe with a soft, dry cloth).Note about using a DualDiscThe digital audio content si<strong>de</strong> of a DualDisc do<strong>es</strong> not meet thetechnical specifications of the Compact Disc Digital Audio (CD-DA)format so playback may not be possible.MP3The unit can play MP3, a method of compr<strong>es</strong>sing audio withouthurting audio quality.When creating MP3 fil<strong>es</strong> to play on this unit• Maximum number of tracks and albums: 999 tracks and 256albums.• Compatible compr<strong>es</strong>sion rate:Between 64 kbps and 320 kbps (stereo).128 kbps (stereo) is recommen<strong>de</strong>d.• Disc formats: ISO9660 level 1 and level 2 (except for exten<strong>de</strong>dformats).• The time for reading TOC <strong>de</strong>pends on the number of the tracks, thefol<strong>de</strong>rs or fol<strong>de</strong>r structur<strong>es</strong>.Limitations on MP3• This unit is compatible with multi-s<strong>es</strong>sions but if there are a lot ofs<strong>es</strong>sions it tak<strong>es</strong> more time for play to start. Keep the number ofs<strong>es</strong>sions to a minimum to avoid this.• This unit cannot play fil<strong>es</strong> recor<strong>de</strong>d using packet write.• If the disc inclu<strong>de</strong>s both MP3 and normal audio data (CD-DA), theunit plays the type recor<strong>de</strong>d in the inner part of the disc.If the disc inclu<strong>de</strong>s both MP3 and other typ<strong>es</strong> of audio data (e.g.WMA or WAV), the unit plays only the MP3.• Depending on how you create MP3 fil<strong>es</strong>, they may not play in theor<strong>de</strong>r you numbered them or may not play at all. Pr<strong>es</strong>s [FM/AM] to select “FM” or “AM”. Pr<strong>es</strong>s [TUNE MODE] to select “MANUAL”. Pr<strong>es</strong>s [u/t] or [y/i] to select the frequency of therequired station.To tune automatically Pr<strong>es</strong>s [FM/AM] to select “FM” or “AM”. Pr<strong>es</strong>s [TUNE MODE] to select “MANUAL”. Pr<strong>es</strong>s and hold [u/t] or [y/i] until the frequency starts••changing rapidly.Auto tuning stops when it finds a station.To cancel auto tuning, pr<strong>es</strong>s [u/t] or [y/i] once again.NoteAuto tuning may not function when there is exc<strong>es</strong>sive interference.To improve FM sound qualityPr<strong>es</strong>s [FM MODE] to display “MONO” indicator.To cancelPr<strong>es</strong>s [FM MODE] again until “MONO” indicator disappears.• “MONO” is also canceled if the frequency is changed.• Turn off “MONO” for normal listening.To improve AM sound qualityMemory pr<strong>es</strong>et“ST” is displayed when a stereo FMbroadcast is being received. Pr<strong>es</strong>s [FM/AM] to select “AM”. Pr<strong>es</strong>s and hold [TUNE MODE] repeatedly to change beat proofsetting (“BP1”, “BP2”, “BP3” or “BP4”).You can pr<strong>es</strong>et up to 30 FM channels and up to 15 AM channels.Preparation: Pr<strong>es</strong>s [FM/AM] to select “FM” or “AM”.Automatic pr<strong>es</strong>etting Pr<strong>es</strong>s [PLAY MODE] to switch between “LOWEST” or“CURRENT” frequency. Pr<strong>es</strong>s [AUTO PRESET] to start pr<strong>es</strong>etting.The tuner pr<strong>es</strong>ets all the stations it can receive into the channels inascending or<strong>de</strong>r. When finished, the last station memorised is tunedin.<strong>Manual</strong> pr<strong>es</strong>etting Pr<strong>es</strong>s [TUNE MODE] to select “MANUAL”. Pr<strong>es</strong>s [u/t] or [y/i] to tune to the required station. Pr<strong>es</strong>s [PROGRAM]. Pr<strong>es</strong>s the numeric buttons to select a channel.The station occupying a channel is erased if another station is pr<strong>es</strong>etin that channel. Repeat steps 2 to 4 to pr<strong>es</strong>et more stations.Selecting a pr<strong>es</strong>et stationPr<strong>es</strong>s the numeric buttons to select the channel.For channels 10 to 30 pr<strong>es</strong>s [≧10], then the two digits.OR Pr<strong>es</strong>s [TUNE MODE] to select “PRESET”. Pr<strong>es</strong>s [u/t] or [y/i] to select the channel.9RQTX0257ENGLISH9
RQTX0257 ENGLISH1010RDS broadcastsFor Continental EuropeEnable you to display the name of a broadcasting station or a programtype.“RDS” lights while RDS signals are being received.Pr<strong>es</strong>s [DISPLAY] to display.Station Name (PS) Program Type (PTY)Frequency displayNoteRDS displays may not be available if reception is poor.Program type displaysNEWS VARIED FINANCE COUNTRYAFFAIRS POP M CHILDREN NATIONALINFO ROCK M SOCIAL A OLDIESSPORT M-O-R- M* RELIGION FOLK MEDUCATE LIGHT M PHONE IN DOCUMENTDRAMA CLASSICS TRAVEL TESTCULTURE OTHER M LEISURE ALARM<strong>SC</strong>IENCE WEATHER JAZZ* M-O-R- M = Middle-of-the-Road musicTimerSetting the clockThis is a 24-hour clock. Pr<strong>es</strong>s [CLOCK/TIMER] to set the clock. Pr<strong>es</strong>s [u/t] or [y/i] to select the time within 5 seconds.(Pr<strong>es</strong>s and hold to change the time faster.) Pr<strong>es</strong>s [CLOCK/TIMER] again.g To display the clock for fewseconds when the unit is on or instandby mo<strong>de</strong>NoteR<strong>es</strong>et the clock regularly to maintain accuracy.ToPlay timerActionchange the settings Repeat steps 1 to 4 and 6.change the source orvolumecheck the settings(when the unit is on orin standby mo<strong>de</strong>)cancelPr<strong>es</strong>s [CLOCK/TIMER]You can set the timer to come on at a certain time to wake you up.This unit offers 3 optional play timers.Preparation:• Turn the unit on and set the clock. (➡ see above)• Prepare the music source (disc, radio, iPod, AUX or USB) and setthe volume. Pr<strong>es</strong>s [CLOCK/TIMER] repeatedly to select play timer.CLOCK zPLAY 1 zPLAY 2 zPLAY 3Original display Within 5 seconds, pr<strong>es</strong>s [u/t] or [y/i] to set the startingtime.Start timePlay timer indicator Pr<strong>es</strong>s [CLOCK/TIMER] to confirm. Repeat steps 2 and 3 to set the finishing time.Finish time“ON” is displayedPlay timer indicator “OFF” is displayedTo activate the timer Pr<strong>es</strong>s [z, PLAY] repeatedly to turn on your <strong>de</strong>sired play timer. Pr<strong>es</strong>s [^] to turn off the unit. Pr<strong>es</strong>s [z, PLAY] to clear zPLAYindicator from the display. Make chang<strong>es</strong> to the source or volume. Perform steps 5 and 6.Pr<strong>es</strong>s [CLOCK/TIMER] repeatedly toselect zPLAY 1, zPLAY 2 or zPLAY 3.Pr<strong>es</strong>s [z, PLAY] to clear the timerindicator from the display.Note• The timer will start at the pr<strong>es</strong>et time, with the volume increasinggradually to the pr<strong>es</strong>et level.• The timer com<strong>es</strong> on at the set time every day if the timer is on.• The unit must be in the standby mo<strong>de</strong> for the timer to function.• If you turn the unit off and on again while the timer is functioning, thefinish time setting will not be activated.• When external unit is selected as the source when the timer com<strong>es</strong>on, the system turns on and engag<strong>es</strong> external unit as the source. Ifyou wish to playback from the portable audio equipment, activate theequipment’s play mo<strong>de</strong> and increase the volume. (See the portableaudio equipment’s instruction manual.)
Timer (continued)Sleep timerSound adjustment (continued)Enjoying surround soundThe SLEEP timer can turn the unit off after a set time.Pr<strong>es</strong>s [SLEEP] to turn the SLEEP function on/off.• Each time you pr<strong>es</strong>s the button:Sound adjustmentEnabl<strong>es</strong> you to enjoy lower or higher pitch sound. Pr<strong>es</strong>s [BASS/TREBLE] repeatedly to select your <strong>de</strong>sired setting.SettingBASSTREBLESelecting sound effectsYou can change the sound effect by selecting Pr<strong>es</strong>et EQ or adjusting thebass or treble effect.Pr<strong>es</strong>et EQPr<strong>es</strong>s [PRESET EQ] repeatedly to select your <strong>de</strong>sired setting.SettingHEAVYCLEARSOFTVOCALFLATHEAVY CLEAR SOFT VOCAL FLATBass or trebleOFF (Canceled)g To check the remaining timeNote30MIN 60MIN 90MIN 120MINSleep timer indicatorEffectAdds punch to rockClarifi<strong>es</strong> higher frequenci<strong>es</strong>For background musicAdds gloss to vocalsNo effectEffectBASSFor lower pitch soundTREBLEOriginal DisplayFor higher pitch sound Pr<strong>es</strong>s [u/t] or [y/i] to adjust the level.Pr<strong>es</strong>s [SLEEP] onceThe play timer and sleep timer can be used together. The sleep timeralways has priority. Be sure not to overlap timer settings.Enabl<strong>es</strong> you to add natural width and <strong>de</strong>pth to the stereo sound.To activatePr<strong>es</strong>s [SURROUND] to display “To cancelPr<strong>es</strong>s [SURROUND] again to clear “••NoteEnabl<strong>es</strong> you to enjoy the powerful bass effect.Pr<strong>es</strong>s [D.BASS] during play to select “ON D.BASS”.• Each time you pr<strong>es</strong>s the button:NoteThe actual effect <strong>de</strong>pends on the music source.MP3Digital remaster is effective on CD (MP3) and USBAnalog remaster is effective on iPod and AUXThis feature reproduc<strong>es</strong> the frequenci<strong>es</strong> lost during recording to giveyou a sound closer to the original.Pr<strong>es</strong>s [RE-MASTER] during play to select “ON RE-MASTER”.• Each time you pr<strong>es</strong>s the button:” indicator.” indicator.Surround sound is l<strong>es</strong>s discernible when listening through headphon<strong>es</strong>.If interference in FM stereo reception increas<strong>es</strong>, cancel the surroundsound effect.Enhancing the bassON D.BASSOFF D.BASSRe-master–Enjoying more natural soundON RE-MASTEROFF RE-MASTERLevel adjustment (during AUX mo<strong>de</strong>)You can select the sound input level of your portable audio equipment. Pr<strong>es</strong>s [FM/AM/AUX] on the main unit to enter AUXmo<strong>de</strong>. Pr<strong>es</strong>s [PLAY MODE] repeatedly to select your<strong>de</strong>sired setting.HIGHNoteNORMALSelect “NORMAL” if the sound is distorted when level “HIGH” isactivated.RQTX0257 ENGLISHNoteThe tone level can be varied within -4 to +4.1111
External unitRQTX0257 ENGLISH••••Enjoying audio from iPodg Inserting the iPod Pr<strong>es</strong>s [iPod ;, OPEN/CLOSE] to open the sliding door. Push [;] to open the docking switch.g Charging the iPodPush [;]Docking switch Adjust the docking switch and insert the suitable dock adapter foryour iPod. Insert your iPod into the dock. Push back the docking switch.• Recharging starts when the iPod dock is properly locked.ClickDock adapter(not inclu<strong>de</strong>d)iPod(not inclu<strong>de</strong>d) Pr<strong>es</strong>s [iPod ;, OPEN/CLOSE] again to close the sliding door.Keep fingers away from the sliding door when it is closing to avoidpossible minor injuri<strong>es</strong>.Note• It is recommen<strong>de</strong>d to use the dock adapter from Apple.• Be sure to push [;] to open and adjust the docking switch whenremoving the iPod. Push back the docking switch after iPod beingremoved.iPod will start recharging regardl<strong>es</strong>s of whether this unit is in ON orStandby condition.“IPOD ” will be shown on the main unit’s display during iPod chargingin main unit standby mo<strong>de</strong>.Check iPod to see if the battery is fully recharged.If you are not using iPod for an exten<strong>de</strong>d period of time afterrecharging has completed, disconnect it from main unit, as the batterywill be <strong>de</strong>pleted naturally. (Once fully recharged, additional rechargingwill not occur.)g Playing the iPodPreparation:• Reduce the volume of the main unit to minimum before connecting/disconnecting the iPod.• Confirm the iPod connection. (➡ left) Pr<strong>es</strong>s [iPod q/h] to play the iPod. Adjust the volume of the main unit.To Remote control Main unitdisplay iPod menu/return previous menu(During play/pause)select contents fromiPod menu(During play/pause)pause trackskip a track(During play/pause)search the current track(During play/pause)■ Compatible iPodNameiPod touch 2nd generationiPod nano 4th generation (vi<strong>de</strong>o)iPod classiciPod touch 1st generationiPod nano 3rd generation (vi<strong>de</strong>o)iPod classicPr<strong>es</strong>s [iPod MENU]. 3Pr<strong>es</strong>s[e,r, ALBUM]followed by [OK].Pr<strong>es</strong>s [iPod q/h]or [g].Pr<strong>es</strong>s [u/t] or[y/i].Pr<strong>es</strong>s and hold[u/t] or[y/i].iPod nano 2nd generation (aluminum)iPod 5th generation (vi<strong>de</strong>o)iPod 5th generation (vi<strong>de</strong>o)iPod nano 1st generationiPod 4th generation (colour display)iPod 4th generation (colour display)iPod 4th generationiPod 4th generationiPod mini3Pr<strong>es</strong>s [iPod q/h]or [g].Pr<strong>es</strong>s [u/t] or[y/i].Pr<strong>es</strong>s and hold[u/t] or[y/i].Memory size8 GB, 16 GB, 32 GB8 GB, 16 GB120 GB8 GB, 16 GB, 32 GB4 GB, 8 GB80 GB, 160 GB2 GB, 4 GB, 8 GB60 GB, 80 GB30 GB1 GB, 2 GB, 4 GB40 GB, 60 GB20 GB, 30 GB40 GB20 GB4 GB, 6 GB• Compatibility <strong>de</strong>pends on the software version of your iPod.1212
External unit (continued)USB operationsCompatible <strong>de</strong>vic<strong>es</strong>MP3The USB connectivity enabl<strong>es</strong> you to connect and play MP3 tracks fromUSB mass storage class. Typically, USB memory <strong>de</strong>vic<strong>es</strong> (Bulk onlytransfer).Preparation:Before connecting any USB mass storage <strong>de</strong>vice to the unit, ensure thatthe data stored therein has been backed up.It is not recommen<strong>de</strong>d to use a USB extension cable. The <strong>de</strong>viceconnected via the cable will not be recognised by this unit. Reduce the volume and connect the USB mass storage <strong>de</strong>vice. Pr<strong>es</strong>s [USB q/h] or [OK] to start play.Topause playstop playskip trackskip albumdirect acc<strong>es</strong>s play(Play starts with thetrack you select.)Display functionActionPr<strong>es</strong>s [USB q/h].Pr<strong>es</strong>s again to r<strong>es</strong>ume play.Pr<strong>es</strong>s [g].“RESUME” is displayed. The position ismemorized.Pr<strong>es</strong>s [USB q/h] to r<strong>es</strong>ume play.ORPr<strong>es</strong>s [g] again to clear the position.Pr<strong>es</strong>s [u/t] or [y/i].Pr<strong>es</strong>s [e, r, ALBUM] in the play mo<strong>de</strong>.Pr<strong>es</strong>s [e, r, ALBUM] once and then thenumeric buttons in the stop mo<strong>de</strong>. Pr<strong>es</strong>s [e, r, ALBUM] to select the album. Pr<strong>es</strong>s [y/i] once and then pr<strong>es</strong>s thenumeric buttons to select the <strong>de</strong>sired track.Pr<strong>es</strong>s [DISPLAY] repeatedly during play or pause.Elapsed playtimeUSB enabled <strong>de</strong>vice (not inclu<strong>de</strong>d)DEMORemaining playtimeFor other operating functions, they are similar as those <strong>de</strong>scribed in “Discoperations” (➡ page 8 and 9).To remove the USB mass storage <strong>de</strong>viceSelect a source other than “USB”.Removing the USB mass storage <strong>de</strong>vice with it selected as a source candamage the data stored in the <strong>de</strong>vice.VOLUMEAlbum namePr<strong>es</strong>s [MP3 INFO] repeatedly during play or pause.MP3ID3 (Album) ID3 (Track)Elapsed play timeID3 (Artist)MP3INFOTrack nameDevic<strong>es</strong> which are <strong>de</strong>fined as USB mass storage class:• USB <strong>de</strong>vic<strong>es</strong> that support bulk only transfer.• USB <strong>de</strong>vic<strong>es</strong> that support USB 2.0 full speed.Supported formatFil<strong>es</strong> must have the extension “.mp3” or “.MP3”.••••••Note••CBI (Control/Bulk/Interrupt) is not supported.A <strong>de</strong>vice using NTFS file system is not supported[Only FAT 12/16/32 (File Allocation Table 12/16/32) file system issupported].Depending on the sector size, some fil<strong>es</strong> may not work.This unit can acc<strong>es</strong>s up to 255 albums and 2500 tracks.The maximum number of tracks in a fol<strong>de</strong>r are 999 tracks.Only one memory card will be selected when connecting amultiport USB card rea<strong>de</strong>r. Typically the first memory card inserted.Disconnect the USB card rea<strong>de</strong>r from the unit when you removethe memory card. Failure to do so may cause malfunction to the<strong>de</strong>vice.When you connect your digital audio player to the USB port, itcharg<strong>es</strong> all the time when the unit is on.Changing the main unit and remotecontrol mo<strong>de</strong>The remote control and main unit are factory-set to “REMOTE 1” mo<strong>de</strong>.If you find the remote control unintentionally also controls otherequipment, you can switch to operate in “REMOTE 2” mo<strong>de</strong>.To switch to “REMOTE 2” mo<strong>de</strong> Pr<strong>es</strong>s [FM/AM/AUX] to enter AUX mo<strong>de</strong>. (While pr<strong>es</strong>sing [FM/AM/AUX] on the main unit)Pr<strong>es</strong>s and hold [2] until “REMOTE 2” appears on the main unitdisplay. Pr<strong>es</strong>s and hold [OK] followed by [2] for at least 2 seconds.The main unit and remote control are now set to operate in“REMOTE 2” mo<strong>de</strong>.To return to “REMOTE 1” mo<strong>de</strong>Perform steps 1 to 3 but use [1] instead of [2] for steps 2 and 3.(“REMOTE 1” appears on the main unit during step 2.)The remote control cannot work with the main unit if their mo<strong>de</strong>sare different.“REMOTE 1” or “REMOTE 2” appears on the main unit when youoperate the remote control.** If “REMOTE 1” appears (The main unit is in “REMOTE 1” mo<strong>de</strong>.)Pr<strong>es</strong>s and hold [OK] followed by [1] on the remote control for at least2 seconds.If “REMOTE 2” appears (The main unit is in “REMOTE 2” mo<strong>de</strong>.)Pr<strong>es</strong>s and hold [OK] followed by [2] on the remote control for at least2 seconds.RQTX0257 ENGLISH1313
Troubl<strong>es</strong>hooting gui<strong>de</strong>Before requ<strong>es</strong>ting service, make the following checks. If you are in doubt about any of the check points, or if the solutions indicated in thechart do not solve the problem, consult your <strong>de</strong>aler for instructions.RQTX0257 ENGLISH1414Common problemsIncorrect display or play will notstart.MP3 cannot be read.Noise is heard or no sound.Humming heard during play.A beat sound or noise is heardwhile receiving a radio broadcast.A low hum or noise is heardduring AM broadcasts.The picture on the television nearthe unit disappears or strip<strong>es</strong>appear on the screen.No r<strong>es</strong>ponse when remote controlbuttons are pr<strong>es</strong>sed.Display“--:--”“ADJUST CLOCK”“ADJUST TIMER”“PGM FULL”“NO PLAY”“ERROR”“F61” or “F76”“UNLOCKED”“ILLEGAL OPEN”••••••••••You have not inserted the disc correctly; insert it correctly.The disc is scratched or dirty. (Tracks skipped.)There is moisture on the lens. Wait for about an hour and then try again.You may not be able to play MP3 if you have copied a multi-s<strong>es</strong>sion disc that has no data betweens<strong>es</strong>sions.When creating a multi-s<strong>es</strong>sion disc, it is nec<strong>es</strong>sary to close the s<strong>es</strong>sion.The amount of data on the disc is too small. Set the amount of data to greater than approximately 5 MB.Noise may occur when playing MP3 if recording quality is poor.Keep this unit away from mobile telephon<strong>es</strong> if the interference is apparent.Turn the volume up.Switch the unit off, check and correct the connection, then switch the unit on. Caus<strong>es</strong> inclu<strong>de</strong> straining ofthe speakers through exc<strong>es</strong>sive volume or power, and using the unit in a hot environment.• An AC mains lead or fluor<strong>es</strong>cent light is near the cords. Keep other applianc<strong>es</strong> and cords away from thisunit’s cabl<strong>es</strong>.••••••Switch the television or other audio player off or separate it from the unit.Switch off the portable audio player if connected to “AUX” port.Keep the antenna away from other cabl<strong>es</strong> and cords.Keep the AM antenna away from the unit.The location and orientation of the antenna are incorrect.The television antenna wire is too close to the unit. Separate the antenna wire of the television from the unit.• Check that the batteri<strong>es</strong> are inserted correctly. (➡ page 5)• You plugged the AC mains lead in for the first time and there was a power failure recently. Set the time.(➡ page 10)• Clock not set. Adjust the clock accordingly.• Play timer not set. Adjust the play timer accordingly.• The number of programmed tracks is limited to 24. No further tracks can be programmed.• A CD-ROM disc that is not CD-DA or MP3 format is inserted. It cannot be played.• Incorrect operation performed. Read the instructions and try again.• There is a power supply problem. Consult the <strong>de</strong>aler.• Make sure the docking switch is pushed back properly.• Sliding door is not in correct position. Turn the unit off and on again.“IPOD NO DEV” • The iPod <strong>de</strong>vice is not inserted correctly. Read the instructions and try again. (➡ page 12)iPodiPod do<strong>es</strong> not turn on.No sound is coming from th<strong>es</strong>peakers.Distorted sound or the soundlevel is too low.Cannot control the iPod usingremote control or main unit.•••••Verify that the iPod battery is not <strong>de</strong>pleted before connecting it to the unit.Before inserting your iPod into the dock, turn off both the unit and iPod. Turn power back on and select theappropriate source.The iPod is not correctly inserted into the dock. Turn off the iPod, remove it from the dock connector.Reinsert it and turn it on again.Make sure that iPod is actually playing something.Adjust the volume.• Make sure the equalizer function of your iPod is turned off.••iPod do<strong>es</strong> not charge. • Check all connections. (➡ page 4, 12)Make sure the iPod is inserted properly into the dock.Check the dock connection and make sure that iPod is selected as the source of music. (➡ page 12)
Troubl<strong>es</strong>hooting gui<strong>de</strong>(continued)USBNo r<strong>es</strong>ponse when [USB q/h]button is pr<strong>es</strong>sed.The USB drive or it’s contentscannot be read.Slow operation of the USB flashdrive.“USB OVER CURRENT ERROR”“NO PLAY”“NO DEV”Specificationsg AMPLIFIER SECTIONRMS Output Power Stereo mo<strong>de</strong>Front Ch (both ch driven)20 W per channel (6 Ω), 1 kHz, 10 % THDPMPO Output powerFor Southeast Asia450 WPhone jackTerminalStereo, 3.5 mm jackOutput level (CD, 1 kHz, -20 dB)max. 1.18 mW +1.18 mW, 32 ΩAux (Rear)SensitivityNormal level630 mV, 12.4 kΩHigh level100 mV, 12.4 kΩTerminalStereo, 3.5 mm jackg TUNER SECTIONPr<strong>es</strong>et MemoryMaintenance■ If the surfac<strong>es</strong> are dirtyFM 30 stationsAM 15 stationsFrequency Modulation (FM)Frequency range87.50 MHz to 108.00 MHz (50 kHz step)Antenna terminals 75 Ω (unbalanced)Amplitu<strong>de</strong> Modulation (AM)Frequency range522 kHz to 1629 kHz (9 kHz step)To clean this unit, wipe with a soft, dry cloth.• Never use alcohol, paint thinner or benzine to clean this unit.• Before using chemically treated cloth, read the instructions that camewith the cloth carefully.• Disconnect the USB <strong>de</strong>vice and then reconnect it back. Alternatively, turn the unit off and then back on.•••The USB drive format or it’s contents is/are not compatible with the system. (➡ page 13)The USB host function of this product may not work with some USB <strong>de</strong>vic<strong>es</strong>.USB <strong>de</strong>vic<strong>es</strong> with storage capacity of more than 8 gigabyt<strong>es</strong> may not work in some instanc<strong>es</strong>.• Large file size or high memory USB flash drive tak<strong>es</strong> longer time to read.• The USB mass storage <strong>de</strong>vice rating exceeds 500 mA. Disconnect the USB <strong>de</strong>vice. Turn the unit off andthen back on.••Check the content.Only MP3 format fil<strong>es</strong> can be played.• The USB <strong>de</strong>vice is not inserted. Check the connection.g DI<strong>SC</strong> SECTIONDisc played [8 cm or 12 cm](1) CD-Audio (CD-DA)(2) CD-R/RW (CD-DA, MP3)(3) MP3** MPEG-1 Layer 3, MPEG-2 Layer 3Pick up (CD)Wavelength795 nmLaser power CLASS 1Audio Output (Disc)Number of channels FL, FR, 2 channelAudio performance (CD-Audio)Frequency r<strong>es</strong>ponse 4 Hz to 20 kHzS/N ratio95 dBDynamic range93 dBTotal harmonic distortion 0.005 %g USB PORTMedia file format supportUSB <strong>de</strong>vice file systemUSB port powerMP3 (*.mp3)FAT12/16/32Max 500 mAg SPEAKER SECTIONType 1 way, 1 speaker system (Bass reflex)Speaker unit(s)Full range6.5 cm Cone typeImpedance6 ΩInput power (IEC)30 W (Max)Output sound pr<strong>es</strong>sure 79 dB/W (1.0m)Frequency range55 Hz to 25 kHz (-16 dB)90 Hz to 22 kHz (-10 dB)■ Care of the CD lensg GENERALPower supplyFor Continental Europe AC 220 to 240 V, 50 HzFor Southeast Asia AC 220 to 240 V, 50/60 HzPower consumption33 WDimensions (W x H x D)500 mm x 195 mm x 102.5 mm(D = 69 mm minimum)MassApprox. 3 kgOperating temperature range0 °C to +35 °COperating humidity range35 % to 80 % RH (no con<strong>de</strong>nsation)Power consumption in standby mo<strong>de</strong>:0.2 W (approx.)Note• Specifications are subject to change withoutnotice.• Total harmonic distortion is measured by thedigital spectrum analyzer.• Clean the lens regularly to prevent malfunctions. Use a blower toremove dust and a cotton swab if it is extremely dirty.• Do not use the lens cleaner of the CD type.RQTX0257 ENGLISH1515
ESPAÑOLÍndiceAcc<strong>es</strong>orios suministradosTapaPrecaucion<strong>es</strong> <strong>de</strong> seguridad 2Conexion<strong>es</strong> 4Preparando el mando a distancia 5Función <strong>de</strong> <strong>de</strong>mostración 5Guía <strong>de</strong> control 6Operacion<strong>es</strong> con discos 8Funcionamiento <strong>de</strong> la radio 9Emision<strong>es</strong> RDS 10Temporizador 10Ajuste <strong>de</strong>l sonido 11Unidad externa 12Guía para la solución <strong>de</strong> problemas 14Especificacion<strong>es</strong> 15Mantenimiento 15Precaucion<strong>es</strong> <strong>de</strong> seguridadInstalaciónColoque la unidad sobre una superficie lisa lejos <strong>de</strong> la luzdirecta <strong>de</strong>l sol, <strong>de</strong> zonas <strong>de</strong> temperatura y humedad elevadasy una vibración exc<strong>es</strong>iva. Estas condicion<strong>es</strong> pue<strong>de</strong>n dañar lacaja y otros component<strong>es</strong>, y por lo tanto acortar la vida útil <strong>de</strong> launidad.Coloque el aparato a una distancia <strong>de</strong> al menos 15 cm <strong>de</strong> lapared para evitar distorsion<strong>es</strong> y efectos acústicos no <strong>de</strong>seados.No coloque objetos p<strong>es</strong>ados encima <strong>de</strong>l aparato.RQTX0257VoltajeNo utilice fuent<strong>es</strong> <strong>de</strong> alimentación <strong>de</strong> alto voltaje. Esto pue<strong>de</strong>sobrecargar la unidad y causar un incendio.No use una fuente <strong>de</strong> alimentación <strong>de</strong> CC. Verifiquecuidadosamente la fuente cuando coloque la unidad en unaembarcación u otro lugar don<strong>de</strong> se utilice CC.Protección <strong>de</strong>l cable <strong>de</strong> alimentación <strong>de</strong> CAAsegúr<strong>es</strong>e <strong>de</strong> que el cable <strong>de</strong> alimentación <strong>de</strong> CA <strong>es</strong>tá bienconectado y que no <strong>es</strong>tá dañado. Una mala conexión y un cabledañado pue<strong>de</strong>n ser la causa <strong>de</strong> un incendio o una <strong>de</strong>scargaeléctrica. No tire <strong>de</strong>l cable <strong>de</strong> alimentación, ni lo doble, nicoloque objetos p<strong>es</strong>ados encima <strong>de</strong> él.Agarre el enchufe firmemente cuando <strong>de</strong>senchufe el cable.Si tira <strong>de</strong>l cable <strong>de</strong> corriente pue<strong>de</strong> provocar una <strong>de</strong>scargaeléctrica.No manipule el enchufe con las manos mojadas. Esto pue<strong>de</strong>provocar una <strong>de</strong>scarga eléctrica.Materias extrañasNo permita que ningún objeto <strong>de</strong> metal caiga en el interior<strong>de</strong>l aparato. Esto pue<strong>de</strong> causar una <strong>de</strong>scarga eléctrica o unaavería.No permita la entrada <strong>de</strong> líquidos en la unidad. Estopue<strong>de</strong> causar una <strong>de</strong>scarga eléctrica o una avería. Si <strong>es</strong>toocurre, <strong>de</strong>sconecte inmediatamente la unidad <strong>de</strong> la fuente <strong>de</strong>alimentación y póngase en contacto con su distribuidor.No rocíe insecticidas sobre o <strong>de</strong>ntro <strong>de</strong>l aparato. Contienengas<strong>es</strong> inflamabl<strong>es</strong> que pue<strong>de</strong>n ar<strong>de</strong>r al ser rociados <strong>de</strong>ntro <strong>de</strong>la unidad.ServicioNo intente reparar el aparato usted mismo. Si el sonido seinterrumpe, los indicador<strong>es</strong> no se iluminan, sale humo o suce<strong>de</strong>cualquier otro problema que no se indica en <strong>es</strong>tas instruccion<strong>es</strong>,<strong>de</strong>sconecte el adaptador <strong>de</strong> la CA y póngase en contacto consu distribuidor o centro <strong>de</strong> servicio autorizado. Si el aparato<strong>es</strong> reparado, <strong>de</strong>sarmado o reconstruido por personas nocualificadas podrían producirse <strong>de</strong>scargas eléctricas o daños.Prolongará la vida útil <strong>de</strong> la unidad si <strong>de</strong>sconecta la fuente <strong>de</strong>alimentación cuando no vaya a utilizarlo durante mucho tiempo.216
75ΩFM ANTLOOP EXTAM ANTLOOP ANTGROUNDAUXAC IN¡ADVERTENCIA!ESTE APARATO UTILIZA UN LÁSER.EL USAR LOS CONTROLES, HACER LOS REGLAJES OLOS PASOS REQUERIDOS EN FORMA DIVERSA DE LAAQUÍ EXPUESTA PUEDE REDUNDAR EN EXPOSICIÓNPELIGROSA A LA RADIACIÓN.NO ABRA LAS TAPAS NI HAGA REPARACIONES USTEDMISMO. EN CASO DE PRODUCIRSE ANOMALÍASSOLICITE AYUDA DE PERSONAL CUALIFICADO.¡ADVERTENCIA!• PARA MANTENER BIEN VENTILADA ESTA UNIDAD,NO LA INSTALE NI PONGA EN UN ESTANTE DELIBROS, MUEBLE EMPOTRADO U OTRO ESPACIODE DIMENSIONES REDUCIDAS. ASEGÚRESE QUECORTINAS Y OTROS MATERIALES NO OBSTRUYANLAS CONDICIONES DE VENTILACIÓN PARAPREVENIR EL RIESGO DE SACUDIDAS ELÉCTRICAS OINCENDIOS DEBIDOS AL RECALENTAMIENTO.• NO OBSTRUYA LAS ABERTURAS DE VENTILACIÓNDE LA UNIDAD CON PERIÓDICOS, MANTELES,CORTINAS U OBJETOS SIMILARES.• NO COLOQUE OBJETOS CON LLAMA DE<strong>SC</strong>UBIERTA,UNA VELA POR EJEMPLO, ENCIMA DE LA UNIDAD.• TIRE LAS PILAS DE FORMA QUE NO CONTAMINE ELMEDIO AMBIENTE.ADVERTENCIA:PARA REDUCIR EL RIESGO DE INCENDIOS,DE<strong>SC</strong>ARGAS ELÉCTRICAS O DAÑOS EN EL PRODUCTO,• NO EXPONGA ESTE APARATO A LA LLUVIA,HUMEDAD, GOTEO O SALPICADURAS, Y NOCOLOQUE ENCIMA DEL MISMO OBJETOS CONLÍQUIDOS COMO, POR EJEMPLO, FLOREROS.• UTILICE SOLAMENTE LOS ACCESORIOSRECOMENDADOS.• NO QUITE LA CUBIERTA (O EL PANEL TRASERO); ENEL INTERIOR NO HAY PIEZAS QUE PUEDA REPARAREL USUARIO. SOLICITE LAS REPARACIONES ALPERSONAL DE SERVICIO CUALIFICADO.La toma <strong>de</strong> corriente <strong>de</strong>berá <strong>es</strong>tar instalada cerca <strong>de</strong>l equipoy don<strong>de</strong> se pueda acce<strong>de</strong>r a ella fácilmente.El enchufe <strong>de</strong>l cable <strong>de</strong> la alimentación <strong>de</strong>berá <strong>es</strong>tar siemprelisto para ser utilizado.Para <strong>de</strong>sconectar completamente <strong>es</strong>te aparato <strong>de</strong> la red <strong>de</strong>CA, <strong>de</strong>sconecte el enchufe <strong>de</strong>l cable <strong>de</strong> alimentación <strong>de</strong>lreceptáculo <strong>de</strong> CA.Este producto pue<strong>de</strong> tener interferencias causadas porteléfonos móvil<strong>es</strong> durante su utilización. Si tal<strong>es</strong> interferenciasr<strong>es</strong>ultan evi<strong>de</strong>nt<strong>es</strong>, aumente la separación entre el producto yel teléfono móvil.CUIDADOHay peligro <strong>de</strong> explosión por si se sustituyeincorrectamente la batería. Sólo sustituya con el mismotipo recomendado por el fabricante o que sea equivalente.D<strong>es</strong>eche las baterías usadas según instruye el fabricante.ESTA UNIDAD HA SIDO DISEÑADA PARA SER UTILIZADAEN CLIMAS MODERADOS.iPod <strong>es</strong> una marca <strong>de</strong> Apple Inc., registrada en EUA y otros país<strong>es</strong>.EUPursuant to at the directive 2004/108/EC, article 9(2)<strong>Panasonic</strong> T<strong>es</strong>ting Centre<strong>Panasonic</strong> Marketing Europe GmbHWinsbergring 15, 22525 Hamburg, GermanyParte interior <strong>de</strong>l aparatoInformación para <strong>Usuario</strong>s sobre la Recolección yEliminación <strong>de</strong> aparatos viejos y baterías usadasEstos símbolos en los productos, embalaj<strong>es</strong>y/o documentos adjuntos, significan que losaparatos eléctricos y electrónicos y las bateríasno <strong>de</strong>berían ser mezclados con los <strong>de</strong>sechosdomésticos.Para el tratamiento apropiado, la recuperación yel reciclado <strong>de</strong> aparatos viejos y baterías usadas,por favor, observe las normas <strong>de</strong> recolecciónaplicabl<strong>es</strong>, <strong>de</strong> acuerdo a su legislación nacional ya las Directivas2002/96/CE y 2006/66/CE.Al <strong>de</strong>sechar <strong>es</strong>tos aparatos y bateríascorrectamente, Usted <strong>es</strong>tará ayudando apr<strong>es</strong>ervar recursos valiosos y a prevenircualquier potencial efecto negativo sobre la salud<strong>de</strong> la humanidad y el medio ambiente que, <strong>de</strong> locontrario, podría surgir <strong>de</strong> un manejo inapropiado<strong>de</strong> los r<strong>es</strong>iduos.Para mayor información sobre la recolección yel reciclado <strong>de</strong> aparatos y baterías viejos, porfavor, contacte a su comunidad local, su servicio<strong>de</strong> eliminación <strong>de</strong> r<strong>es</strong>iduos o al comercio don<strong>de</strong>adquirió <strong>es</strong>tos aparatos.Podrán aplicarse penas por la eliminaciónincorrecta <strong>de</strong> <strong>es</strong>tos r<strong>es</strong>iduos, <strong>de</strong> acuerdo a lalegislación nacional.Para usuarios empr<strong>es</strong>arial<strong>es</strong> en la UniónEuropeaSi usted <strong>de</strong>sea <strong>de</strong>scartar aparatos eléctricos yelectrónicos, por favor contacte a su distribuidoro proveedor a fin <strong>de</strong> obtener mayor información.[Informacion sobre la Eliminación en otrosPaís<strong>es</strong> fuera <strong>de</strong> la Unión Europea]Estos símbolos sólo son válidos <strong>de</strong>ntro <strong>de</strong>la Unión Europea. Si <strong>de</strong>sea <strong>de</strong>sechar <strong>es</strong>tosobjetos, por favor contacte con sus autorida<strong>de</strong>slocal<strong>es</strong> o distribuidor y consulte por el métodocorrecto <strong>de</strong> eliminación.Nota sobre el símbolo <strong>de</strong> la bateria (abajo,dos ejemplos <strong>de</strong> símbolos):Este símbolo pue<strong>de</strong> ser usado en combinacióncon un símbolo químico. En <strong>es</strong>te caso, el mismocumple con los requerimientos <strong>es</strong>tablecidos porla Directiva para los químicos involucrados.17ESPAÑOLRQTX02573
LOOP ANTGROUNDConexion<strong>es</strong>Equipo <strong>de</strong> audio portátil (Cabl<strong>es</strong> y equipos no incluidos)Reproductor <strong>de</strong> audio portátilTipo <strong>de</strong> clavija:Inicie la reproducción<strong>es</strong>téreo <strong>de</strong><strong>de</strong>s<strong>de</strong> la fuente <strong>de</strong> ➡Ø3,5 mmaudio portátil.UNIDADPRINCIPALNota• Ajuste el volumen y la calidad <strong>de</strong>l sonido <strong>de</strong> <strong>es</strong>ta unidad y <strong>de</strong>l otro equipo. Reduzca el nivel <strong>de</strong> la señal <strong>de</strong> entrada (por ejemplo,<strong>de</strong>sconectando el ecualizador o reduciendo el volumen) <strong>de</strong>l otro equipo ant<strong>es</strong> <strong>de</strong> la conexión. Los nivel<strong>es</strong> elevados <strong>de</strong> señal <strong>de</strong>entrada distorsionarán el sonido.• Para conocer <strong>de</strong>tall<strong>es</strong>, consulte el manual <strong>de</strong> instruccion<strong>es</strong> <strong>de</strong>l otro equipo.ESPAÑOL75Ω LOOP EXTFM ANT AM ANT1 2AUXAC IN3Auricular<strong>es</strong> (no suministrados)Reduzca el nivel <strong>de</strong>l volumeny conecte los auricular<strong>es</strong>.Tipo <strong>de</strong> clavija: <strong>es</strong>téreo <strong>de</strong>Ø3,5 mm.Nota• Intente no usarlos durantemucho tiempo seguido paraevitar l<strong>es</strong>ion<strong>es</strong> auditivas.• Una pr<strong>es</strong>ión sonora exc<strong>es</strong>ivaen los auricular<strong>es</strong> pue<strong>de</strong>producir una pérdida <strong>de</strong>audición.1Conecte la antena interior <strong>de</strong> FM. 3 Conecte el cable <strong>de</strong> alimentación <strong>de</strong> CA.Cinta adh<strong>es</strong>ivaAntena interior <strong>de</strong> FMConecte el cable <strong>de</strong> alimentación<strong>de</strong> CA una vez terminado el r<strong>es</strong>to<strong>de</strong> las conexion<strong>es</strong>.75 Ω2Fije la antena en una pared o columna en una posición en que laseñal <strong>de</strong> radio se reciba con las menor<strong>es</strong> interferencias.Conecte la antena <strong>de</strong> cuadro <strong>de</strong> AM.12 3Antena interior <strong>de</strong> AMUtilice un <strong>de</strong>stornilladorPhillips, etc.NotaA la toma <strong>de</strong>corriente <strong>de</strong> casaPara ahorrar energía cuando no se vaya a utilizar el aparatodurante un período largo <strong>de</strong> tiempo, <strong>de</strong>senchúfelo para mantenerloalejado <strong>de</strong> la toma <strong>de</strong> corriente. D<strong>es</strong>pués <strong>de</strong> enchufar el aparatotendrá que r<strong>es</strong>tablecer algunos elementos <strong>de</strong> la memoria.Inserción <strong>de</strong>l conectorNegroBlancoRojoColoque la antenaen posición verticalsobre su base.Toma <strong>de</strong>l aparatoConector6 mm aproximadamenteRQTX0257418¡Clic!Mantenga el cable <strong>de</strong> la antena alejado <strong>de</strong> otros cabl<strong>es</strong>. No apriete<strong>de</strong>masiado. De lo contrario, el <strong>de</strong>stornillador gira sin parar en círculosy no <strong>es</strong> posible arreglarlo.Incluso cuando el conector <strong>es</strong>tá bien insertado, <strong>de</strong>pendiendo<strong>de</strong>l tipo <strong>de</strong> toma usada, la parte <strong>de</strong>lantera <strong>de</strong>l conector pue<strong>de</strong>sobr<strong>es</strong>alir como se mu<strong>es</strong>tra en la figura. Sin embargo, nohabrá problemas para usar el aparato.
Conexion<strong>es</strong> (continuación)Conexion<strong>es</strong> <strong>de</strong> antenas opcional<strong>es</strong>Antena exterior <strong>de</strong> FMAntena exterior <strong>de</strong> FM (no incluida)Antena exterior <strong>de</strong> AM12 3Antena exterior <strong>de</strong> AM(no incluida)5 a 12 m••••Preparando el mando a distancia■ Pilas• Utilice pilas secas <strong>de</strong> mangan<strong>es</strong>o o una pila seca alcalina.• Introduzca las pilas <strong>de</strong> forma que los polos (+ y –) coincidan con los<strong>de</strong>l mando a distancia.• Retire las pilas si no va a utilizar el mando a distancia durante unperiodo <strong>de</strong> tiempo largo.• Guár<strong>de</strong>las en un lugar fr<strong>es</strong>co y oscuro.• No las caliente ni exponga a las llamas.• No <strong>de</strong>je las baterías en un automóvil directamente al sol durante unperiodo <strong>de</strong> tiempo prolongado con las puertas y ventanillas cerradas.• Un mal manejo <strong>de</strong> pilas en el mando a distancia pue<strong>de</strong> provocar fugaselectrolíticas, que pue<strong>de</strong>n provocar fuego.No:•••••Introduzca <strong>es</strong>te lado ant<strong>es</strong> que el otroFunción <strong>de</strong> <strong>de</strong>mostraciónVista superior (Panel superior)Cable coaxial <strong>de</strong> 75 Ω(no incluido)Nunca utilice una antena exterior durante una tormenta eléctrica.Pue<strong>de</strong> conectar la antena exterior <strong>de</strong> FM para conseguir una mejor recepción. Consulte con su distribuidorpara la instalación.D<strong>es</strong>conecte la antena interior <strong>de</strong> FM si se encuentra instalada una antena exterior <strong>de</strong> FM.Conecte la antena exterior <strong>de</strong> AM sin quitar la antena <strong>de</strong> cuadro <strong>de</strong> AM. Pase horizontalmente <strong>de</strong> 5 a 12 m<strong>de</strong> conductor cubierto <strong>de</strong> vinilo a lo largo <strong>de</strong> una ventana o <strong>de</strong> otro lugar conveniente.mezcle pilas viejas y nuevas;utilice pilas <strong>de</strong> diferent<strong>es</strong> tipos a la vez;<strong>de</strong>smonte las pilas ni las cortocircuite;intente recargar pilas alcalinas o <strong>de</strong> mangan<strong>es</strong>o;utilice pilas cuya cubierta protectora <strong>es</strong>té levantada.DEMO[g, –DEMO]R6/LR6, AASensor <strong>de</strong> señal <strong>de</strong>lmando a distancia■ Utilización• Apunte el mando a distancia al sensor, evitando obstáculos, <strong>de</strong>ntro <strong>de</strong>una distancia máxima <strong>de</strong> 7 m directamente enfrente <strong>de</strong>l aparato (Ladistancia exacta <strong>de</strong>pen<strong>de</strong> <strong>de</strong> los ángulos).• El funcionamiento pue<strong>de</strong> verse afectado por fuent<strong>es</strong> <strong>de</strong> luz intensa,como la luz solar directa, y las puertas <strong>de</strong> cristal <strong>de</strong> los muebl<strong>es</strong> don<strong>de</strong>se coloca el aparato.Cuando el equipo se conecta por primera vez, pue<strong>de</strong> aparecer una<strong>de</strong>mostración <strong>de</strong> sus funcion<strong>es</strong> en el visualizador.Si la función <strong>de</strong> <strong>de</strong>mostración <strong>es</strong>tá <strong>de</strong>sactivada, podrá ver una<strong>de</strong>mostración si selecciona “DEMO ON”.Mantenga pulsado [g, –DEMO].La pantalla cambia cada vez que se mantiene pulsado el botón.DEMO OFF (<strong>de</strong>sactivación)Antena <strong>de</strong> cuadro<strong>de</strong> AM (incluida)Ventana <strong>de</strong> transmisiónDEMO ON (activación)Cuando <strong>es</strong>té en modo <strong>de</strong> <strong>es</strong>pera, seleccione “DEMO OFF” para reducir elconsumo <strong>de</strong> electricidad.19ESPAÑOLRQTX02575
Guía <strong>de</strong> control••Mando a distanciaLos números entre parént<strong>es</strong>is indican la página <strong>de</strong> referencia.[u/t] y [y/i] <strong>de</strong>scritos en las operacion<strong>es</strong> tienen los mismos control<strong>es</strong> que [w] y [q] r<strong>es</strong>pectivamente.ESPAÑOLRQTX0257123456789101112131415Interruptor <strong>de</strong> alimentación en <strong>es</strong>pera/conectada [^], [8] (8, 10)Pulse <strong>es</strong>te interruptor para cambiar <strong>de</strong>l modo <strong>de</strong>alimentación conectada al modo <strong>de</strong> alimentaciónen <strong>es</strong>pera o viceversa. En el modo <strong>de</strong>alimentación en <strong>es</strong>pera, el aparato consume unapequeña cantidad <strong>de</strong> corriente.[DIMMER] Reduce la iluminación <strong>de</strong>l visualizadorBoton<strong>es</strong> numéricos [1-9, 0, ≧10] (8, 9, 13)Para seleccionar un número <strong>de</strong> 2 dígitosPor ejemplo, 16: [≧10] [1] [6]Para seleccionar un número <strong>de</strong> 3 dígitosPor ejemplo, 226: [≧10] [≧10] [2] [2] [6][DEL] Borrar última pista programada (8)[PROGRAM] (8, 9)Programa CD/MP3Pr<strong>es</strong>intonía <strong>de</strong>l sintornizador (<strong>Manual</strong>)[CD q/h] (8)Cambiar selector a CDReproducción directa CD/Pausa CD[USB q/h] (13)Interruptor selector a USBReproducción directa USB/Pausa USB[iPod q/h] (12)Cambiar selector a iPodReproducción directa iPod/Pausa iPod[g] Botón <strong>de</strong> parada (8, 12, 13)[RE-MASTER] Activación/<strong>de</strong>sactivación <strong>de</strong>remasterización (11)[PRESET EQ] (11)Selector <strong>de</strong> modo Pr<strong>es</strong>et EQ[e, r, ALBUM] (8, 12, 13)Selección <strong>de</strong> Álbum/pistaNavegación por menú iPod[w, q]Saltar/buscar pistaSintonización/selección <strong>de</strong> canal pr<strong>es</strong>intonizadoAjuste <strong>de</strong> horaAjuste <strong>de</strong> bajos/agudos[DISPLAY] (8, 10, 13)CD: Pantalla CD (Tiempo <strong>de</strong> reproduccióntranscurrido/Tiempo <strong>de</strong> reproducción r<strong>es</strong>tante)MP3: Pantalla MP3 (Tiempo <strong>de</strong> reproduccióntranscurrido/Nombre <strong>de</strong>l álbum/Nombre <strong>de</strong> lapista)USB: Pantalla USB (Tiempo <strong>de</strong> reproduccióntranscurrido/Tiempo <strong>de</strong> reproducción r<strong>es</strong>tante/Nombre <strong>de</strong>l álbum/Nombre <strong>de</strong> la pista)RDS:Pantalla RDS (Nombre <strong>de</strong> la emisora/Tipo<strong>de</strong> programa/Frecuencias)[AUTO PRESET] (9)Pr<strong>es</strong>intonía <strong>de</strong>l sintornizador (Automática)[TUNE MODE] (9)Activación/D<strong>es</strong>activación <strong>de</strong>l modo sintonizadorInterruptor selector en <strong>Manual</strong>/Pr<strong>es</strong>intonía123456789101112131415MP3INFO1617181920212223242526272829303132(10) [z, PLAY]Conexión/D<strong>es</strong>conexión <strong>de</strong>l temporizador <strong>de</strong>reproducción(10) [CLOCK/TIMER]Ajuste <strong>de</strong> la hora y <strong>de</strong>l temporizador[AUTO OFF]Esta función le permite apagar la unida<strong>de</strong>n modo disco o USB sólo <strong>de</strong>spués <strong>de</strong> 10minutos <strong>de</strong> inactividad. El ajuste se mantieneaunque el aparato <strong>es</strong>té apagado.Vuélvalo a pulsar para cancelar la función.(11) [SLEEP]Ajuste <strong>de</strong>l temporizador <strong>de</strong> <strong>de</strong>sconexiónautomática(8, 10, 12, 13) [VOL +, –], [–VOLUME+]Para ajustar el volumen[MUTE]Silencia el sonidoVuélvalo a pulsar para cancelar.(9) [REPEAT]Conexión/D<strong>es</strong>conexión <strong>de</strong> Repetición(8, 9, 11) [PLAY MODE]Botón <strong>de</strong>l modo <strong>de</strong> reproducciónSintonizador: Inferior/ActualAjuste <strong>de</strong> nivel en modo AUX a Normal/Alto(9) [FM/AM]Selección FM/AM(8, 9, 10, 11, 12, 13) [u/t], [y/i]Saltar/buscar pistaSintonización/selección <strong>de</strong> canalpr<strong>es</strong>intonizadoAjuste <strong>de</strong> horaAjuste <strong>de</strong> bajos/agudos(11) [D.BASS]Con/<strong>de</strong>sc. D. BASS(12) [iPod MENU]Para visualizar el menú <strong>de</strong>l iPod(11) [BASS/TREBLE]Selección <strong>de</strong> grav<strong>es</strong>/agudos(8, 12, 13) [OK]Reproducción <strong>de</strong>l discoConfirmar selección(11) [SURROUND]Conexión/D<strong>es</strong>conexión <strong>de</strong>l modo sonidoenvolvente(8, 13) [MP3 INFO]MP3: Pantalla MP3 [ID3 (Álbum)/ID3 (Pista)/ID3 (Artista)/Tiempo <strong>de</strong> reproduccióntranscurrido](9) [FM MODE]Conexión/D<strong>es</strong>conexión <strong>de</strong>l modo FMInterruptor selector en Mono/Estéreo1617181920212223242526272829303132620
Operacion<strong>es</strong> con discosReproducción básicaFunción <strong>de</strong> modo <strong>de</strong> reproducciónESPAÑOLRQTX0257822 Pulse [^] para activar la unidad. Pulse [CD ;, OPEN/CLOSE] para abrir la puerta <strong>de</strong>slizante yluego coloque el CD en posición.Partecentral• Incline el CD a la• Etiqueta hacia afuera.izquierda y colóqueloPr<strong>es</strong>ione hasta que seen posición.coloque en su lugarhaciendo un ruido seco. Pulse <strong>de</strong> nuevo [CD ;, OPEN/CLOSE] para cerrar la puerta<strong>de</strong>slizante.Para evitar sufrir heridas lev<strong>es</strong>, mantenga los <strong>de</strong>dos alejados <strong>de</strong> lapuerta <strong>de</strong>slizante cuando la cierre. Pulse [CD q/h] o [OK] para iniciar la reproducción. Pulse [VOL +, –] para ajustar el volumen.Nota• Asegúr<strong>es</strong>e <strong>de</strong> pulsar el botón the [CD ;, OPEN/CLOSE] para abriry cerrar la puerta <strong>de</strong>slizante. Si la puerta <strong>de</strong>slizante se cierra a lafuerza pue<strong>de</strong>n producirse daños.• Tenga cuidado <strong>de</strong> que el CD no golpee la puerta <strong>de</strong>slizante al retirarlo.Paraparadapausasalto/búsquedasalto <strong>de</strong> álbumMP3reproducción <strong>de</strong>acc<strong>es</strong>o directo(La reproducciónempiezacon la pistaseleccionada.)AcciónPulse [g].Pulse [CD q/h].Pulse <strong>de</strong> nuevo para reanudar la reproducción.Pulse [u/t] o [y/i] para saltar.Pulse y mantenga pulsado [u/t] o [y/i]para buscar.Nota• Pue<strong>de</strong> realizar la búsqueda durante lareproducción o la pausa.• No pue<strong>de</strong> buscar por los archivos MP3.• Durante la reproducción programada, la repetición<strong>de</strong> una pista o la reproducción aleatoria sólopue<strong>de</strong> buscar <strong>de</strong>ntro <strong>de</strong> la pista actual.Pulse [e,r, ALBUM] en el modo <strong>de</strong> reproducción.Pulse [e,r, ALBUM] una vez y luego los boton<strong>es</strong>numerados en el modo <strong>de</strong> parada.CD Pulse las teclas numéricas para seleccionar lapista que <strong>de</strong>see.MP3 Pulse [e,r, ALBUM] para seleccionar el álbum. Pulse [y/i] una vez y <strong>de</strong>spués los boton<strong>es</strong>numéricos para seleccionar la pista <strong>de</strong>seada.Esta función le permite visualizar la información <strong>de</strong> la pista actual.Pulse [DISPLAY] repetidamente durante la reproducción o la pausa.CDMP3Función <strong>de</strong> visualizaciónTiempo <strong>de</strong> reproduccióntranscurridoTiempo <strong>de</strong> reproducciónr<strong>es</strong>tanteMP3INFOPulse [MP3 INFO] repetidamente durante la reproducción o la pausa.MP3NotaTiempo <strong>de</strong> reproduccióntranscurridoNombre <strong>de</strong>lálbumNombre <strong>de</strong>la pistaID3 (Álbum) ID3 (Pista) ID3 (Artista)Tiempo <strong>de</strong> reproduccióntranscurrido• Número máximo <strong>de</strong> caracter<strong>es</strong> que pue<strong>de</strong>n visualizarse:aproximadamente 30.• Esta unidad admite etiquetas ID3 versión 1.0 y 1.1. Los datos <strong>de</strong>texto no compatibl<strong>es</strong> no se pue<strong>de</strong>n visualizar.• ID3 <strong>es</strong> una etiqueta incluida en las pistas MP3 para proporcionarinformación acerca <strong>de</strong> las propias pistas. Pulse [CD q/h]. Pulse [PLAY MODE] para seleccionar el modo <strong>de</strong>seado.Modo1-TRACK1TR1-ALBUM1ALBUMMP3RANDOMRND1-ALBUMRANDOM1ALBUM RND••MP3NotaPara reproduciruna pista seleccionada <strong>de</strong>l disco.Pulse las teclas numéricas para seleccionar lapista.un álbum seleccionado <strong>de</strong>l disco.Pulse [e,r, ALBUM] para seleccionar el álbum.un disco aleatoriamente.todas las pistas <strong>de</strong> un álbum seleccionadoaleatoriamente.Pulse [e,r, ALBUM] para seleccionar el álbum.Durante la reproducción aleatoria no pue<strong>de</strong> saltar a la pista anterior.El modo actual <strong>de</strong> reproducción se borra cuando abre la puerta<strong>de</strong>slizante.CD• Durante la reproducción RANDOM, podrá buscar hacia <strong>de</strong>lante ohacia atrás <strong>de</strong>ntro <strong>de</strong> la pista actual solamente.Reproducción programadaEsta función le permite programar un máximo <strong>de</strong> 24 pistas. Pulse [CD q/h] y luego [g]. Pulse [PROGRAM]. Pulse los boton<strong>es</strong> numéricos para seleccionar las pistas.Repita <strong>es</strong>te paso para programar otras pistas. Pulse [CD q/h] o [OK] para iniciar la reproducción. Pulse [CD q/h] y luego [g]. Pulse [PROGRAM]. Pulse [e,r, ALBUM] para seleccionar el álbum que <strong>de</strong>see. Pulse [y/i] una vez y pulse los boton<strong>es</strong> numerados paraseleccionar las pistas. Pulse [OK].Repita los pasos 3 a 5 para programar otras pistas. Pulse [CD q/h] para comenzar la reproducción.••CDMP3Paracancelar el modo<strong>de</strong> programaciónreproducir elprograma otra vezverificar elcontenido <strong>de</strong>lprogramacancelar la últimapistacancelar todas laspistas programadasNotaAcciónPulse [PROGRAM] en el modo <strong>de</strong> paradapara borrar el indicador “PGM” <strong>de</strong> la pantalla.Pulse [PROGRAM] luego [CD q/h].Pulse [u/t] o [y/i] cuando semu<strong>es</strong>tre “PGM” en el modo <strong>de</strong> parada. Paracomprobar mientras se programa, pulse[PROGRAM] dos vec<strong>es</strong> <strong>de</strong>spués <strong>de</strong> queaparezca “PGM”, luego pulse [u/t] o[y/i].Pulse [DEL] en el modo <strong>de</strong> parada.Pulse [g] en el modo <strong>de</strong> parada.Se visualizará “CLR ALL”. Pulse el botónant<strong>es</strong> <strong>de</strong> que pasen 5 segundos para cancelartodas las pistas.Si intenta programar más <strong>de</strong> 24 pistas, aparecerá “PGM FULL”.La memoria <strong>de</strong>l programa se borra cuando se abre la puerta<strong>de</strong>slizante.CD• Durante la reproducción programada, podrá buscar hacia <strong>de</strong>lante ohacia atrás <strong>de</strong>ntro <strong>de</strong> la pista actual solamente.
Operacion<strong>es</strong> con discos (continuación)Repetición <strong>de</strong> reproducciónPue<strong>de</strong> repetir una reproducción programada u otro modo <strong>de</strong>reproducción que haya seleccionado.Pulse [REPEAT] ant<strong>es</strong> o durante la reproducción.Se visualizarán “ON REPEAT” y “ & ”.Para cancelarPulse otra vez [REPEAT].Se visualizará “OFF REPEAT” y “ & ” se borrará <strong>de</strong> la pantalla.Funcionamiento <strong>de</strong> la radioSintonización manual Pulse [FM/AM] para seleccionar la banda <strong>de</strong> “FM” o “AM”. Pulse [TUNE MODE] para seleccionar “MANUAL”. Pulse [u/t] o [y/i] para seleccionar la frecuencia <strong>de</strong> laemisora que <strong>de</strong>see.Cuando se <strong>es</strong>té recibiendo una emisiónen <strong>es</strong>téreo FM se visualizará “ST” .Nota acerca <strong>de</strong> los discos CD-R y CD-RWEsta unidad pue<strong>de</strong> reproducir discos CD-R y CD-RW grabados conCD-DA o MP3. Utilice un disco <strong>de</strong> grabación <strong>de</strong> audio para CD-DA yfinalícelo* cuando termine la grabación.La unidad tal vez no pueda reproducir algunos discos <strong>de</strong>bido a lacondición <strong>de</strong> la grabación.* Un proc<strong>es</strong>o realizado <strong>de</strong>spués <strong>de</strong> la grabación que permite a losreproductor<strong>es</strong> CD-R/CD-RW reproducir el audio <strong>de</strong> los discos CD-Ry CD-RW.PrecauciónNo:••••••utilice CDs <strong>de</strong> formas irregular<strong>es</strong>.coloque etiquetas ni pegatinas extra.utilice CDs que tengan etiquetas y pegatinas que <strong>es</strong>tén<strong>de</strong>spegadas o por <strong>de</strong>bajo <strong>de</strong> las cual<strong>es</strong> salga el adh<strong>es</strong>ivo <strong>de</strong> lasmismas.ponga cubiertas a prueba <strong>de</strong> rayas o ningún otro tipo <strong>de</strong> acc<strong>es</strong>orio.<strong>es</strong>criba nada en el CD.limpie los CDs con líquidos (pase un paño blando y seco).Nota acerca <strong>de</strong>l uso <strong>de</strong> un DualDiscEl lado <strong>de</strong>l contenido <strong>de</strong> audio digital <strong>de</strong> un DualDisc no cumple las<strong>es</strong>pecificacion<strong>es</strong> técnicas <strong>de</strong>l formato <strong>de</strong> Disco Compacto Digital <strong>de</strong>Audio (CD-DA), por ello no <strong>es</strong> posible su reproducción.MP3Esta unidad pue<strong>de</strong> reproducir MP3, un método <strong>de</strong> compr<strong>es</strong>ión <strong>de</strong>audio que no afecta abiertamente a la calidad <strong>de</strong>l audio.Cuando cree archivos MP3 para reproducir en <strong>es</strong>teaparato••••Máximo número <strong>de</strong> pistas y álbum<strong>es</strong>: 999 pistas y 256 álbum<strong>es</strong>.Velocidad <strong>de</strong> compr<strong>es</strong>ión compatible:Entre 64 kbps y 320 kbps (<strong>es</strong>téreo).Se recomienda 128 kbps (<strong>es</strong>téreo).Formatos <strong>de</strong> discos: ISO9660 nivel 1 y nivel 2 (excepto para losformatos extendidos).El tiempo que se tarda el leer el índice <strong>de</strong>pen<strong>de</strong> <strong>de</strong>l número <strong>de</strong>pistas, carpetas o <strong>es</strong>tructuras <strong>de</strong> carpetas.Limitacion<strong>es</strong> <strong>de</strong> MP3• Esta unidad <strong>es</strong> compatible con los discos multis<strong>es</strong>ión, pero si éstasson muchas, la reproducción tarda más en empezar. Mantenga elnúmero <strong>de</strong> s<strong>es</strong>ion<strong>es</strong> al mínimo para evitar <strong>es</strong>to.• Esta unidad no pue<strong>de</strong> reproducir archivos grabados utilizando<strong>es</strong>critura <strong>de</strong> paquete.• Si el disco incluye MP3 y datos <strong>de</strong> audio normal<strong>es</strong> (CD-DA), elaparato reproduce el tipo grabado en la parte interior <strong>de</strong>l disco.Si el disco incluye tanto MP3 como otros tipos <strong>de</strong> datos <strong>de</strong> audio(por ejemplo WMA o WAV), la unidad sólo reproduce los MP3.• Dependiendo <strong>de</strong> cómo se crearan los archivos MP3, éstos pue<strong>de</strong>que no se reproduzcan en el or<strong>de</strong>n en el que se los numeró o nose reproduzcan en absoluto.Para sintonizar automáticamente Pulse [FM/AM] para seleccionar la banda <strong>de</strong> “FM” o “AM”. Pulse [TUNE MODE] para seleccionar “MANUAL”. Pulse y mantenga pulsado [u/t] o [y/i] hasta que la••frecuencia comience a cambiar rápidamente.La sintonización automática se <strong>de</strong>tiene cuando encuentra una emisora.Para cancelar la sintonización automática, pulse [u/t] o[y/i] una vez más.NotaLa sintonización automática pue<strong>de</strong> no funcionar cuando la interferencia<strong>es</strong> exc<strong>es</strong>iva.Para mejorar la calidad <strong>de</strong>l sonido <strong>de</strong> FMPulse [FM MODE] para visualizar el indicador “MONO”.Para cancelarPulse [FM MODE] <strong>de</strong> nuevo hasta que <strong>de</strong>saparezca el indicador “MONO”.• “MONO” también se cancelará si se cambia la frecuencia.• Deje “MONO” apagado para la <strong>es</strong>cucha normal.Para mejorar la calidad <strong>de</strong>l sonido en AM Pulse [FM/AM] para seleccionar “AM”. Pulse y mantenga pulsada [TUNE MODE] varias vec<strong>es</strong> paracambiar el ajuste <strong>de</strong> prueba <strong>de</strong>l ritmo (“BP1”, “BP2”, “BP3” o“BP4”).Grabación <strong>de</strong> emisoras en memoriaPue<strong>de</strong> pr<strong>es</strong>intonizar un máximo <strong>de</strong> 30 canal<strong>es</strong> <strong>de</strong> FM y un máximo <strong>de</strong>15 canal<strong>es</strong> <strong>de</strong> AM.Preparación: Pulse [FM/AM] para seleccionar la banda <strong>de</strong> “FM” o“AM”.Pr<strong>es</strong>intonización automática Pulse [PLAY MODE] para cambiar entre las frecuencias“LOWEST” (MÁS BAJA) o “CURRENT” (ACTUAL). Pulse [AUTO PRESET] para iniciar la pr<strong>es</strong>intonización.El sintonizador pr<strong>es</strong>intoniza todas las emisoras que pue<strong>de</strong> recibiren los canal<strong>es</strong>, en or<strong>de</strong>n ascen<strong>de</strong>nte. Cuando finaliza, se activa laúltima emisora sintonizada.Pr<strong>es</strong>intonización manual Pulse [TUNE MODE] para seleccionar “MANUAL”. Pulse [u/t] o [y/i] para sintonizar la emisora que <strong>de</strong>see. Pulse [PROGRAM]. Pulse los boton<strong>es</strong> numéricos para seleccionar un canal.La emisora que ocupa un canal se borrará si se pr<strong>es</strong>intoniza otraemisora en <strong>es</strong>e canal. Repita los pasos 2 a 4 para pr<strong>es</strong>intonizar más emisoras.Selección <strong>de</strong> una emisora pr<strong>es</strong>intonizadaPulse los boton<strong>es</strong> numéricos para seleccionar el canal.Para los canal<strong>es</strong> <strong>de</strong>l 10 al 30 pulse [≧10], luego los dos dígitos.O BIEN Pulse [TUNE MODE] para seleccionar “PRESET”. Pulse [u/t] o [y/i] para seleccionar el canal.23ESPAÑOLRQTX02579
Emision<strong>es</strong> RDSLe permite visualizar el nombre <strong>de</strong> una emisora o un tipo <strong>de</strong> programa.Mientras se reciben señal<strong>es</strong> RDS la palabra “RDS” aparece en pantalla.Pulse [DISPLAY] para visualizarlo.Nombre <strong>de</strong> la emisora (PS) Tipo <strong>de</strong> programa (PTY)Pantalla <strong>de</strong> frecuenciasNotaLas visualizacion<strong>es</strong> RDS tal vez no se encuentren disponibl<strong>es</strong> si larecepción no <strong>es</strong> a<strong>de</strong>cuada.Visualización <strong>de</strong> tipos <strong>de</strong> programasTemporizadorAjuste <strong>de</strong>l relojEl reloj <strong>de</strong> la unidad <strong>es</strong> <strong>de</strong>l tipo <strong>de</strong> 24 horas. Pulse [CLOCK/TIMER] para ajustar el reloj. Pulse [u/t] o [y/i] para seleccionar la hora ant<strong>es</strong> <strong>de</strong>5 segundos.(Mantenga pulsado para cambiar la hora más rápidamente.) Pulse [CLOCK/TIMER] <strong>de</strong> nuevo.g Para mostrar el reloj cuando la unida<strong>de</strong>stá encendido o en modo <strong>de</strong> <strong>es</strong>peraNotaReinicie regularmente el reloj para mantener su precisión.Pulse [CLOCK/TIMER]ESPAÑOLNEWSAFFAIRSINFOSPORTEDUCATEDRAMACULTURE<strong>SC</strong>IENCEVARIEDPOP MROCK MM-O-R- MNoticiasTemas <strong>de</strong> actualidadInformaciónDeport<strong>es</strong>EducaciónTeatroCulturaCienciaVariosMúsica PopMúsica RockMúsica para viajarPue<strong>de</strong> ajustar el temporizador para que se encienda a una hora<strong>de</strong>terminada para <strong>de</strong>spertarle.Esta unidad ofrece tr<strong>es</strong> temporizador<strong>es</strong> <strong>de</strong> reproducción opcional<strong>es</strong>.Preparación:••Temporizador <strong>de</strong> reproducciónEncienda la unidad y ponga en hora el reloj. (➡ anterior)Prepare la fuente musical que <strong>de</strong>see <strong>es</strong>cuchar (disco, radio, iPod,AUX o USB) y ajuste el volumen. Pulse [CLOCK/TIMER] varias vec<strong>es</strong> para seleccionar eltemporizador <strong>de</strong> reproducción.CLOCK zPLAY 1 zPLAY 2 zPLAY 3Pantalla original Ant<strong>es</strong> <strong>de</strong> 5 segundos, pulse [u/t] o [y/i] para ajustar lahora <strong>de</strong> inicio.Hora <strong>de</strong> inicioLIGHT MClásicos ligerosCLASSICSOTHER MWEATHERFINANCECHILDRENClásica seriaOtra músicaInformación meteorológicaFinanzasInfantilIndicador <strong>de</strong>l temporizador <strong>de</strong>reproducción“ON” aparece en pantalla Pulse [CLOCK/TIMER] para confirmar. Repita los pasos 2 y 3 para ajustar la hora <strong>de</strong> finalización.Hora <strong>de</strong> finalizaciónSOCIAL ATemas social<strong>es</strong>RELIGIONPHONE INTRAVELLEISUREJAZZCOUNTRYNATIONALOLDIESFOLK MDOCUMENTTESTALARMReligiónProgramas en los que participael públicoViaj<strong>es</strong>Tiempo libreMúsica JazzMúsica CountryMúsica nacionalViejos éxitosMúsica FolkDocumental<strong>es</strong>Emisión <strong>de</strong> pruebaAnuncios <strong>de</strong> emergenciasIndicador <strong>de</strong>l temporizador <strong>de</strong>reproducciónPara activar el temporizador Pulse [z, PLAY] varias vec<strong>es</strong> para activar el temporizador <strong>de</strong>reproducción que <strong>de</strong>see. Pulse [^] para apagar la unidad.ParaAccióncambiar los ajust<strong>es</strong> Repita los pasos 1 a 4 y 6.cambiar la fuente o elvolumencomprobar los ajust<strong>es</strong>(cuando la unidad <strong>es</strong>táencendida o en modo<strong>de</strong> <strong>es</strong>pera)cancelar“OFF” aparece en pantalla Pulse [z, PLAY] para borrar elindicador zPLAY <strong>de</strong> la pantalla. Realice cambios a la fuente o el volumen. Realice los pasos 5 y 6.Pulse [CLOCK/TIMER] varias vec<strong>es</strong>para seleccionar zPLAY 1, zPLAY 2 ozPLAY 3.Pulse [z, PLAY] para borrar el indicador<strong>de</strong>l temporizador <strong>de</strong> la pantalla.RQTX02571024Nota• El temporizador se pondrá en marcha a la hora programada y elvolumen aumentará gradualmente hasta el nivel seleccionado.• Si el temporizador <strong>es</strong>tá activo, se encen<strong>de</strong>rá todos los días a la horafijada.• La unidad <strong>de</strong>be <strong>es</strong>tar en modo <strong>de</strong> <strong>es</strong>pera para que el temporizadorfuncione.• Si apaga y encien<strong>de</strong> la unidad mientras el temporizador <strong>es</strong>táfuncionando, el ajuste <strong>de</strong> la hora <strong>de</strong> finalización no se activará.• Cuando se selecciona la unidad externa como fuente cuando eltemporizador se activa, el sistema se conecta y activa la unida<strong>de</strong>xterna como fuente. Si <strong>de</strong>sea reproducir o grabar <strong>de</strong>s<strong>de</strong> elequipo reproductor portátil <strong>de</strong> audio, sólo ha <strong>de</strong> activar el modo <strong>de</strong>reproducción <strong>de</strong>l equipo reproductor y aumentar el volumen. (Ver elmanual <strong>de</strong> instruccion<strong>es</strong> <strong>de</strong>l reproductor portátil <strong>de</strong> audio.)
Temporizador (continuación)Temporizador <strong>de</strong> <strong>de</strong>sconexiónEl temporizador <strong>de</strong> <strong>de</strong>sconexión (SLEEP) pue<strong>de</strong> apagar el aparato<strong>de</strong>spués <strong>de</strong> transcurrir un tiempo <strong>es</strong>tablecido.Pulse [SLEEP] para encen<strong>de</strong>r/apagar la función SLEEP.• Cada vez que pulse el botón:30MIN 60MIN 90MIN 120MINOFF (Cancelado)Indicador <strong>de</strong>l temporizador<strong>de</strong> <strong>de</strong>sconexiónAjuste <strong>de</strong>l sonido (continuación)Le permite añadir amplitud y profundidad natural<strong>es</strong> al sonido <strong>es</strong>téreo.Para activarPulse [SURROUND] para mostrar el indicador “ ”.Para cancelarPulse [SURROUND] <strong>de</strong> nuevo para borrar el indicador “ ”.NotaSonido envolvente (SURROUND)• El sonido envolvente se percibe menos cuando se <strong>es</strong>cucha medianteauricular<strong>es</strong>.• Si aumentan las interferencias con la recepción <strong>es</strong>téreo <strong>de</strong> FM,cancele el efecto <strong>de</strong> sonido envolvente.g Para comprobar el tiempo r<strong>es</strong>tanteNotaPulse [SLEEP] una vezEl temporizador <strong>de</strong> reproducción y el temporizador <strong>de</strong> <strong>de</strong>sconexiónautomática pue<strong>de</strong>n utilizarse juntos. El temporizador <strong>de</strong> <strong>de</strong>sconexiónautomática siempre tiene prioridad. Asegúr<strong>es</strong>e <strong>de</strong> no solapar laconfiguración <strong>de</strong> la <strong>de</strong>sconexión automática.NotaAjuste <strong>de</strong>l sonidoLe permite disfrutar <strong>de</strong> un tono <strong>de</strong> sonido superior o inferior. Pulse [BASS/TREBLE] repetidamente para seleccionar el ajuste<strong>de</strong>seado.AjusteBASSTREBLESelección <strong>de</strong> efectos <strong>de</strong> sonidoPue<strong>de</strong> modificar el efecto <strong>de</strong> sonido seleccionando Pr<strong>es</strong>elección <strong>de</strong>ecualización (Pr<strong>es</strong>et EQ) o ajustando el efecto <strong>de</strong> los grav<strong>es</strong> o losagudos.Pr<strong>es</strong>elección <strong>de</strong> ecualización (Pr<strong>es</strong>et EQ)Pulse [PRESET EQ] repetidamente para seleccionar el ajuste <strong>de</strong>seado.AjusteHEAVYCLEARSOFTVOCALFLATHEAVY CLEAR SOFT VOCAL FLATGrav<strong>es</strong> o agudosEfectoAña<strong>de</strong> potencia al rockAporta niti<strong>de</strong>z a las frecuencias superior<strong>es</strong>Para música <strong>de</strong> fondoAña<strong>de</strong> brillo a las voc<strong>es</strong>Sin efectoEfectoBASSTREBLEPantalla originalPara un tono <strong>de</strong> sonido más bajoPara un tono <strong>de</strong> sonido más alto Pulse [u/t] o [y/i] para ajustar el nivel.El nivel <strong>de</strong>l tono se pue<strong>de</strong> cambiar <strong>de</strong>ntro <strong>de</strong> un margen <strong>de</strong> -4 a +4.Le permite disfrutar <strong>de</strong>l potente efecto <strong>de</strong> los bajos.Pulse [D.BASS] durante la reproducción para seleccionar“ON D.BASS”.• Cada vez que pulse el botón:ON D.BASS OFF D.BASSNotaEl efecto real <strong>de</strong>pen<strong>de</strong> <strong>de</strong> la fuente <strong>de</strong> música.MP3Mejora <strong>de</strong> los bajosRemasterización — Para disfrutar unsonido más naturalLa remasterización digital se aplica a los CD (MP3) y USBLa remasterización analógica <strong>es</strong> eficaz en iPod y AUXEsta función reproduce las frecuencias perdidas durante la grabaciónpara reproducir un sonido más próximo al original.Pulse [RE-MASTER] durante la reproducción para seleccionar“ON RE-MASTER”.• Cada vez que pulse el botón:ON RE-MASTER OFF RE-MASTERPue<strong>de</strong> seleccionar el nivel <strong>de</strong> entrada <strong>de</strong>l sonido <strong>de</strong> su equipo <strong>de</strong> audioportátil. Pulse [FM/AM/AUX] en la unidad principal paraentrar en el modo AUX. Pulse [PLAY MODE] varias vec<strong>es</strong> para seleccionar el ajuste que<strong>de</strong>see.HIGHNotaAjuste <strong>de</strong> nivel (durante el modo AUX)NORMALSeleccione “NORMAL” si el sonido se distorsiona cuando se activa elnivel “HIGH”.25ESPAÑOLRQTX025711
Unidad externaESPAÑOLDisfrute <strong>de</strong>l sonido <strong>de</strong>s<strong>de</strong>su iPodg Inserción <strong>de</strong>l iPod Pulse [iPod ;, OPEN/CLOSE] para abrir la puerta <strong>de</strong>slizante. Pr<strong>es</strong>ione [;] para abrir el interruptor <strong>de</strong> la base.Pr<strong>es</strong>ione [;]Interruptor <strong>de</strong> la base Ajuste el interruptor <strong>de</strong> la base e inserte el adaptador <strong>de</strong> basea<strong>de</strong>cuado para su mo<strong>de</strong>lo <strong>de</strong> iPod. Inserte el iPod en la base.Adaptador base(no incluido)g Reproducción <strong>de</strong>s<strong>de</strong> el iPodPreparación:• Baje el volumen <strong>de</strong> la unidad principal hasta el nivel mínimo ant<strong>es</strong> <strong>de</strong>conectar/<strong>de</strong>sconectar el iPod.• Confirme la conexión <strong>de</strong>l iPod. (➡ izquierda)RQTX0257 Pulse [iPod q/h] para reproducir el iPod. Ajuste el volumen <strong>de</strong> la unidad principal.Para Mando a distancia Unidad principalvisualizar el menú <strong>de</strong>liPod/volver al menúanterior(Durante lareproducción/pausa)seleccionar loscontenidos <strong>de</strong>l menúiPod(Durante lareproducción/pausa)realizar una pausa <strong>de</strong>la pistaPulse [iPod MENU]. 3Pulse[e,r, ALBUM]seguido <strong>de</strong> [OK].Pulse [iPod q/h]o [g].3Pulse [iPod q/h]o [g].iPod(no incluido)saltar una pista(Durante lareproducción/pausa)Pulse [u/t] o[y/i].Pulse [u/t] o[y/i].buscar la pista actual(Durante lareproducción/pausa)Pulse y mantengapulsado [u/t] o[y/i].Pulse y mantengapulsado [u/t] o[y/i]. Tire <strong>de</strong>l interruptor <strong>de</strong> la base.• La recarga comienza cuando la base <strong>de</strong>l iPod queda <strong>de</strong>bidamentebloqueada. Pulse <strong>de</strong> nuevo [iPod ;, OPEN/CLOSE] para cerrar la puerta<strong>de</strong>slizante.Para evitar sufrir heridas lev<strong>es</strong>, mantenga los <strong>de</strong>dos alejados <strong>de</strong> lapuerta <strong>de</strong>slizante cuando la cierre.••NotaClicSe recomienda usar el adaptador para la base <strong>de</strong> Apple.Asegúr<strong>es</strong>e <strong>de</strong> pr<strong>es</strong>ionar [;] para abrir y ajustar el interruptor <strong>de</strong> labase al retirar el iPod. Devuelva a su posición el interruptor <strong>de</strong> la baseuna vez retirado el iPod.g Carga <strong>de</strong>l iPod• El iPod comenzará a cargarse aunque <strong>es</strong>ta unidad se encuentre enmodo On o En <strong>es</strong>pera.• Aparecerá “IPOD ” en la pantalla <strong>de</strong> la unidad principal mientras secarga el iPod y la unidad se encuentra en modo En <strong>es</strong>pera.• Compruebe el iPod para ver si la batería se ha recargado porcompleto.• Si no va a utilizar el iPod durante un periodo prolongado tras finalizarla recarga, <strong>de</strong>sconéctelo <strong>de</strong> la unidad principal, ya que la batería seagotará <strong>de</strong> forma natural. (Una vez recargada por completo, no seproducirán recargas adicional<strong>es</strong>).■ iPod compatibleNombreTamaño <strong>de</strong> la memoriaiPod touch 2ª generación8 GB, 16 GB, 32 GBiPod nano 4ª generación (ví<strong>de</strong>o)8 GB, 16 GBiPod classic120 GBiPod touch 1ª generación8 GB, 16 GB, 32 GBiPod nano 3ª generación (ví<strong>de</strong>o)4 GB, 8 GBiPod classic80 GB, 160 GBiPod nano 2ª generación (aluminio) 2 GB, 4 GB, 8 GBiPod 5ª generación (ví<strong>de</strong>o)60 GB, 80 GBiPod 5ª generación (ví<strong>de</strong>o)30 GBiPod nano 1ª generación1 GB, 2 GB, 4 GBiPod 4ª generación (pantalla en color) 40 GB, 60 GBiPod 4ª generación (pantalla en color) 20 GB, 30 GBiPod 4ª generación40 GBiPod 4ª generación20 GBiPod mini4 GB, 6 GB• La compatibilidad <strong>de</strong>pen<strong>de</strong> <strong>de</strong> la versión <strong>de</strong>l software <strong>de</strong> su iPod.1226
Unidad externa (continuación)MP3Uso <strong>de</strong>l USBLa conectividad USB le permite conectarse y reproducir pistas MP3<strong>de</strong>s<strong>de</strong> un dispositivo <strong>de</strong> almacenamiento masivo USB. Normalment<strong>es</strong>erán dispositivos <strong>de</strong> memoria USB (sólo transferencia <strong>de</strong> datos).Preparación:Ant<strong>es</strong> <strong>de</strong> conectar un dispositivo <strong>de</strong> almacenamiento masivo USB a launidad, asegúr<strong>es</strong>e <strong>de</strong> que dispone <strong>de</strong> copia <strong>de</strong> seguridad <strong>de</strong> los datosalmacenados en la misma.No se recomienda usar un cable <strong>de</strong> extensión USB. El dispositivoconectado a través <strong>de</strong>l cable no será reconocido por <strong>es</strong>ta unidad.Dispositivo compatibleDispositivos que se incluyen <strong>de</strong>ntro <strong>de</strong>l grupo <strong>de</strong> almacenamientosmasivos USB:• Dispositivos USB que admiten sólo transferencia en masa.• Dispositivos USB que admiten velocidad total USB 2.0.Formatos admitidosLos archivos <strong>de</strong>ben tener la extensión “.mp3“ o “.MP3“. Reduzca el volumen y conecte el dispositivo <strong>de</strong> almacenamientomasivo USB. Pulse [USB q/h] o [OK] para iniciar la reproducción.ParaPara <strong>de</strong>jar en pausala reproducciónPara <strong>de</strong>tener lareproducciónPara saltar pistaPara saltar el álbumReproducción <strong>de</strong>acc<strong>es</strong>o directo(La reproducciónempieza con lapista seleccionada.)Dispositivo compatible USB (no incluido)DEMOAcciónFunción <strong>de</strong> visualizaciónVOLUMEPulse [USB q/h].Pulse <strong>de</strong> nuevo para reanudar la reproducción.Pulse [g].Se visualizará “RESUME“. La posición sememorizará.Pulse [USB q/h] para reanudar lareproducción.OPulse <strong>de</strong> nuevo [g] para borrar la posición.Pulse [u/t] o [y/i].Pulse [e, r, ALBUM] en el modo <strong>de</strong>reproducción.Pulse [e, r, ALBUM] una vez y luego losboton<strong>es</strong> numéricos en el modo <strong>de</strong> parada. Pulse [e, r, ALBUM] para seleccionar elálbum. Pulse [y/i] una vez y luego los boton<strong>es</strong>numéricos para seleccionar la pista que<strong>de</strong>see.MP3INFOPulse [DISPLAY] repetidamente durante la reproducción o la pausa.Tiempo <strong>de</strong>reproduccióntranscurridoTiempo <strong>de</strong>reproducciónr<strong>es</strong>tanteNombre <strong>de</strong>lálbumNombre<strong>de</strong> la pistaPulse [MP3 INFO] repetidamente durante la reproducción o la pausa.MP3ID3 (Álbum)ID3 (Pista)Tiempo <strong>de</strong> reproduccióntranscurridoID3 (Artista)Para otras funcion<strong>es</strong> existent<strong>es</strong>, son parecidas a las <strong>de</strong>scritas en“Operacion<strong>es</strong> con discos” (➡ página 8 y 9).Para retirar el dispositivo <strong>de</strong> almacenamiento masivo USBSeleccione una fuente diferente <strong>de</strong> “USB“.Si retira el dispositivo <strong>de</strong> almacenamiento masivo USB mientras seencuentra seleccionado como origen los datos almacenados pue<strong>de</strong>nr<strong>es</strong>ultar dañados.••••••Nota••CBI (en inglés, Control/Bulk/Interrupt) no <strong>es</strong> admitido.No se admiten dispositivos que utilizan el sistema <strong>de</strong> archivosNFTS [Sólo se admiten sistemas <strong>de</strong> archivos FAT 12/16/32 (Tabla<strong>de</strong> asignación <strong>de</strong> archivos 12/16/32)].Dependido <strong>de</strong>l tamaño <strong>de</strong>l sector, algunos archivos nofuncionarán.Esta unidad pue<strong>de</strong> acce<strong>de</strong>r hasta 255 álbum<strong>es</strong> y 2500 pistas.El número máximo <strong>de</strong> pistas <strong>de</strong> una carpeta <strong>es</strong> <strong>de</strong> 999.Sólo podrá seleccionarse una tarjeta <strong>de</strong> memoria cuando conecteun lector <strong>de</strong> tarjeta USB <strong>de</strong> puertos múltipl<strong>es</strong>. Generalmente laprimera tarjeta <strong>de</strong> memoria insertada.D<strong>es</strong>conecte el lector <strong>de</strong> tarjetas USB <strong>de</strong> la unidad cuando quite latarjeta <strong>de</strong> memoria. No hacerlo pue<strong>de</strong> provocar que funcione malel dispositivo.Al conectar el reproductor <strong>de</strong> audio digital a la toma USB, se cargaen siempre que la unidad se encuentre activada.Cambiar la unidad principal y el mando adistanciaEl mando a distancia y la unidad principal vienen con el preajuste <strong>de</strong>fábrica en el modo “REMOTE 1“.Si <strong>de</strong>scubre que el mando a distancia controla también otros equipos,pue<strong>de</strong> cambiar para trabajar en modo “REMOTE 2”.Para cambiar al modo “REMOTE 2“ Pulse [FM/AM/AUX] para entrar en el modo AUX. (Mientras pr<strong>es</strong>iona [FM/AM/AUX] en la unidad principal)Mantenga pulsado [2] hasta que aparezca “REMOTE 2“ en lapantalla <strong>de</strong> la unidad principal. Mantenga pulsado [OK] seguido <strong>de</strong> [2] durante por lo menos 2segundos.La unidad principal y el mando a distancia <strong>es</strong>tán ajustados ahorapara funcionar en modo “REMOTE 2“.Para volver al modo “REMOTE 1“Realice los pasos 1 a 3 anterior<strong>es</strong>, pero use [1] en vez <strong>de</strong> [2] paraambos pasos. (“REMOTE 1” aparece en la unidad principal durante elpaso 2.)El mando a distancia no pue<strong>de</strong> funcionar con la unidad principal sisus modos son diferent<strong>es</strong>.“REMOTE 1“ o “REMOTE 2“ aparece en la pantalla <strong>de</strong> la unidadprincipal cuando se utiliza el mando a distancia.** Si aparece “REMOTE 1“ (la unidad principal <strong>es</strong>tá en el modo“REMOTE 1“.)Mantenga pulsado [OK] seguido <strong>de</strong> [1] en el mando a distanciadurante al menos 2 segundos.Si aparece “REMOTE 2“ (la unidad principal <strong>es</strong>tá en el modo“REMOTE 2“.)Mantenga pulsado [OK] seguido <strong>de</strong> [2] en el mando a distanciadurante al menos 2 segundos.27ESPAÑOLRQTX025713
Guía para la solución <strong>de</strong> problemasRealice las siguient<strong>es</strong> verificacion<strong>es</strong> ant<strong>es</strong> <strong>de</strong> solicitar la ayuda <strong>de</strong>l servicio técnico. Si tiene dudas acerca <strong>de</strong> algunos <strong>de</strong> los puntos <strong>de</strong>comprobación, o si los remedios indicados en la tabla no solucionan el problema, consulte a su conc<strong>es</strong>ionario para recibir las instruccion<strong>es</strong>oportunas.ESPAÑOLProblemas comun<strong>es</strong>Pantalla incorrecta o lareproducción no se iniciará.No se pue<strong>de</strong>n leer los datos <strong>de</strong>MP3.Se oye ruido o no existe sonido.Se oye ruido <strong>de</strong> zumbido durantela reproducción.Se oye un sonido <strong>de</strong> batidoo ruido mientras se recibenemision<strong>es</strong> <strong>de</strong> radio.Se oye un zumbido o ruido bajodurante las emision<strong>es</strong> <strong>de</strong> AM.La imagen <strong>de</strong>l televisor próximoal equipo <strong>de</strong>saparece o aparecenfranjas en la pantalla.Al pulsar los boton<strong>es</strong> <strong>de</strong>l mandoa distancia no se obtiene ningunar<strong>es</strong>pu<strong>es</strong>ta.••••••••••No ha introducido el disco correctamente; insértelo correctamente.El disco <strong>es</strong>tá rayado o sucio. (Se saltan pistas.)Hay humedad en la lente. Espere una hora aproximadamente y luego inténtelo <strong>de</strong> nuevo.Tal vez no pueda reproducir MP3 si ha copiado un disco <strong>de</strong> múltipl<strong>es</strong> s<strong>es</strong>ion<strong>es</strong> que no tiene datos entre ellas.Cuando cree un disco <strong>de</strong> múltipl<strong>es</strong> s<strong>es</strong>ion<strong>es</strong> será nec<strong>es</strong>ario cerrarlas.La cantidad <strong>de</strong> datos <strong>de</strong>l disco <strong>es</strong> <strong>de</strong>masiado pequeña. Establezca una cantidad <strong>de</strong> datos superior a 5 MBaproximadamente.Al reproducir MP3 pue<strong>de</strong>n producirse ruidos si la calidad <strong>de</strong> la grabación <strong>es</strong> mala.Mantenga alejada <strong>es</strong>ta unidad <strong>de</strong> los teléfonos móvil<strong>es</strong>. si <strong>de</strong>tecta interferencias.Suba el volumen.Apague la unidad, compruebe y corrija la conexión y luego vuelva a conectar la unidad. Las causasincluyen <strong>es</strong>fuerzos <strong>de</strong> los altavoc<strong>es</strong> <strong>de</strong>bido a un volumen o una potencia exc<strong>es</strong>ivos, y la utilización <strong>de</strong>laparato en un ambiente caluroso.• Cerca <strong>de</strong> los cabl<strong>es</strong> <strong>es</strong>tá el cable <strong>de</strong> alimentación <strong>de</strong> CA o una luz fluor<strong>es</strong>cente. Mantenga otros aparatos ysus cabl<strong>es</strong> alejados <strong>de</strong> los cabl<strong>es</strong> <strong>de</strong> <strong>es</strong>ta unidad.••••••Apague el televisor u otro reproductor <strong>de</strong> audio o sepárelo <strong>de</strong> la unidad.Apague el reproductor <strong>de</strong> audio portátil si <strong>es</strong>tuviera conectado al puerto “AUX” .Mantenga la antena alejada <strong>de</strong> otros cabl<strong>es</strong>.Mantenga la antena <strong>de</strong> AM alejada <strong>de</strong> la unidad.La ubicación y orientación <strong>de</strong> la antena son incorrectas.El cable <strong>de</strong> la antena <strong>de</strong>l televisor <strong>es</strong>tá <strong>de</strong>masiado cerca <strong>de</strong>l aparato. Aleje el cable <strong>de</strong> la antena <strong>de</strong>ltelevisor <strong>de</strong> la unidad.• Compruebe que la pila <strong>es</strong>té bien introducida. (➡ página 5)Visualizador“—:—”“ADJUST CLOCK”“ADJUST TIMER”“PGM FULL”• Ud conectó el enchufe <strong>de</strong> corriente por primera vez y recientemente hubo un fallo <strong>de</strong> alimentación <strong>de</strong> lacorriente eléctrica. Ajuste la hora. (➡ página 10)• Reloj no ajustado. Ajuste el reloj <strong>de</strong>bidamente.• Temporizador <strong>de</strong> reproducción no ajustado. Ajuste el temporizador <strong>de</strong> reproducción <strong>de</strong>bidamente.• El número <strong>de</strong> pistas programadas se limita a 24. No se pue<strong>de</strong>n programar más pistas.“NO PLAY”“ERROR”“F61” o “F76”“UNLOCKED”“ILLEGAL OPEN”• Se ha introducido un disco que no <strong>es</strong> CD-DA ni MP3 CD-ROM. No se pue<strong>de</strong> reproducir.• Se ha realizado una operación incorrecta. Lea las instruccion<strong>es</strong> e inténtelo <strong>de</strong> nuevo.• Hay un problema con el suministro <strong>de</strong> alimentación. Consulte a su distribuidor.• Asegúr<strong>es</strong>e <strong>de</strong> que el interruptor <strong>de</strong> la base queda pr<strong>es</strong>ionado hacia atrás <strong>de</strong>bidamente.• La puerta corre<strong>de</strong>ra no se encuentra en posición correcta. Apague el aparato y vuelva a encen<strong>de</strong>rlo.“IPOD NO DEV” • El iPod no <strong>es</strong>tá <strong>de</strong>bidamente insertado. Lea las instruccion<strong>es</strong> e inténtelo <strong>de</strong> nuevo. (➡ página 12)iPodEl iPod no se activa.••Compruebe que la batería <strong>de</strong>l iPod tiene carga ant<strong>es</strong> <strong>de</strong> conectarlo a la unidad.Apague la unidad y el iPod ant<strong>es</strong> <strong>de</strong> insertarlo en la base. Encienda <strong>de</strong> nuevo la unidad y seleccione lafuente a<strong>de</strong>cuada.RQTX02571428No se <strong>es</strong>cucha nada por losaltavoc<strong>es</strong>.Sonido distorsionado o el nivel<strong>de</strong> sonido <strong>es</strong> <strong>de</strong>masiado bajo.No pue<strong>de</strong> controlar el iPod conel mando a distancia ni la unidadprincipal.•••El iPod no <strong>es</strong>tá bien asentado en la base. D<strong>es</strong>conecte el iPod, retírelo <strong>de</strong>l conector <strong>de</strong> la base. Vuelva acolocarlo en la base y actívelo <strong>de</strong> nuevo.Asegúr<strong>es</strong>e <strong>de</strong> que el iPod realmente reproduce algo.Ajuste el volumen.• Asegúr<strong>es</strong>e <strong>de</strong> que la función <strong>de</strong>l ecualizador <strong>de</strong>l iPod <strong>es</strong>tá <strong>de</strong>sactivada.••Asegúr<strong>es</strong>e <strong>de</strong> que el iPod <strong>es</strong>tá bien asentado en la base.Compruebe la conexión <strong>de</strong> la base y asegúr<strong>es</strong>e <strong>de</strong> que se selecciona el iPod como fuente <strong>de</strong> música.(➡ página 12)El iPod no carga. • Compruebe todas las conexion<strong>es</strong>. (➡ página 4, 12)
Guía para la solución <strong>de</strong> problemas (continuación)USBNo hay r<strong>es</strong>pu<strong>es</strong>ta al pulsar elbotón [USB q/h].No pue<strong>de</strong> leerse la unidad USB osu contenido.Bajo rendimiento <strong>de</strong> la unidadflash USB.“USB OVER CURRENT ERROR”“NO PLAY”• D<strong>es</strong>conecte el dispositivo USB y vuelva a conectarlo <strong>de</strong> nuevo. También pue<strong>de</strong> <strong>de</strong>sconectar el equipo yvolver a conectarlo.•••El formato <strong>de</strong> la unidad USB o su contenido no son compatibl<strong>es</strong> con el sistema. (➡ página 13)La función <strong>de</strong> almacenamiento USB <strong>de</strong> <strong>es</strong>te producto pue<strong>de</strong> no funcionar con algunos dispositivos USB.Los dispositivos USB con una capacidad <strong>de</strong> almacenamiento <strong>de</strong> más <strong>de</strong> 8 gigabyt<strong>es</strong> pue<strong>de</strong>n no funcionaren algunas ocasion<strong>es</strong>.• La lectura <strong>de</strong> archivos <strong>de</strong> gran tamaño o unidad flash USB <strong>de</strong> gran capacidad tarda mucho.• La clasificación <strong>de</strong>l dispositivo <strong>de</strong> almacenamiento masivo USB sobrepasa los 500 mA. D<strong>es</strong>conecte eldispositivo USB. Apague la unidad y vuélvala a encen<strong>de</strong>r.••Compruebe el contenido.Sólo se pue<strong>de</strong>n reproducir archivos en formato MP3.“NO DEV”Especificacion<strong>es</strong>g SECCIÓN DEL AMPLIFICADORPotencia <strong>de</strong> salida RMS en el modo <strong>es</strong>téreoCanal <strong>de</strong>lantero (ambos canal<strong>es</strong> activos)20 W por canal (6 Ω), 1 kHz, 10 % THDToma <strong>de</strong> auricular<strong>es</strong>Terminal clavija <strong>es</strong>téreo <strong>de</strong> 3,5 mmNivel <strong>de</strong> salida (CD, 1 kHz, -20 dB)máx. 1,18 mW +1,18 mW, 32 ΩAux (Trasera)SensibilidadNivel normal630 mV, 12,4 kΩNivel Alto100 mV, 12,4 kΩTerminal Clavija <strong>es</strong>téreo <strong>de</strong> 3,5 mmg SECCIÓN DEL SINTONIZADORMemoria <strong>de</strong> pr<strong>es</strong>intonías 30 emisoras <strong>de</strong> FM15 emisoras <strong>de</strong> AMModulación <strong>de</strong> frecuencia (FM)Gama <strong>de</strong> frecuencias87,50 MHz a 108,00 MHz(incrementos <strong>de</strong> 50 kHz)Terminal(<strong>es</strong>) <strong>de</strong> antena75 Ω (<strong>de</strong>sequilibrada)Modulación AM (AM)Gama <strong>de</strong> frecuencias522 kHz a 1629 kHz(incrementos <strong>de</strong> 9 kHz)Mantenimiento■ Si las superfici<strong>es</strong> <strong>es</strong>tán suciasUtilice un paño suave y seco para limpiar <strong>es</strong>ta unidad.• No utilice nunca alcohol, diluyente <strong>de</strong> pintura ni bencina para limpiarla unidad.• Ant<strong>es</strong> <strong>de</strong> utilizar un paño impregnado químicamente, lea con atenciónlas instruccion<strong>es</strong>, suministradas con él.• El dispositivo USB no <strong>es</strong>tá <strong>de</strong>bidamente insertado. Compruebe la conexión.g SECCIÓN DE DI<strong>SC</strong>OSDiscos reproducidos [8 cm o 12 cm](1) CD-Audio (CD-DA)(2) CD-R/RW (CD-DA, MP3)(3) MP3** MPEG-1 Layer 3, MPEG-2 Layer 3Lector (CD)Longitud <strong>de</strong> onda795 nmPotencia <strong>de</strong>l láser CLASS 1Salida <strong>de</strong> audio (Disco)Número <strong>de</strong> canal<strong>es</strong> FL, FR, 2 canal<strong>es</strong>Rendimiento <strong>de</strong> audio (CD-Audio)Frecuencia <strong>de</strong> r<strong>es</strong>pu<strong>es</strong>tas 4 Hz a 20 kHzRelación señal a ruido95 dBMargen dinámico93 dBDistorsión armónica total 0,005 %g PUERTO USBAdmisión <strong>de</strong> formato <strong>de</strong> archivosMP3 (*.mp3)Sistema <strong>de</strong> archivos <strong>de</strong>l dispositivo USBFAT12/16/32Potencia máxima <strong>de</strong>l puerto Máx. 500 mAg SECCIÓN DE ALTAVOCESTipo Sistema <strong>de</strong> 1 altavoc<strong>es</strong> <strong>de</strong> 1 vías(reflejo <strong>de</strong> grav<strong>es</strong>)Unida<strong>de</strong>s <strong>de</strong> altavozGama completa Tipo cónico <strong>de</strong> 6,5 cmImpedancia6 ΩPotencia <strong>de</strong> entrada (IEC) 30 W (Máx.)Nivel <strong>de</strong> pr<strong>es</strong>ión acústica <strong>de</strong> salida79 dB/W (1,0m)Gama <strong>de</strong> frecuencias55 Hz a 25 kHz (-16 db)90 Hz a 22 kHz (-10 dB)■ Cuidados <strong>de</strong> la lente CDg GENERALIDADESAlimentaciónCA 220 a 240 V, 50 HzConsumo33 WDimension<strong>es</strong> (An x Al x Prf)500 mm x 195 mm x 102,5 mm(Prf = 69 mm minimum)P<strong>es</strong>oAprox. 3 kgRango <strong>de</strong> temperatura operativa0 °C a +35 °CRango <strong>de</strong> humeda<strong>de</strong>s <strong>de</strong> funcionamiento35 % a 80 % RH (sin con<strong>de</strong>nsación)Consumo en el modo <strong>de</strong> <strong>es</strong>pera:0,2 W (aprox.)Nota• Las <strong>es</strong>pecificacion<strong>es</strong> <strong>es</strong>tán sujetas acambios sin previo aviso.• La distorsión armónica total se mi<strong>de</strong>mediante el analizador <strong>de</strong> <strong>es</strong>pectro digital.• Limpie con frecuencia la lente para impedir fallos en el funcionamiento.Utilice un soplador para quitar el polvo y un palillo con algodón en suextremo si <strong>es</strong>tá <strong>de</strong>masiado sucia.• No utilice un limpiador <strong>de</strong> lent<strong>es</strong> tipo CD.29ESPAÑOLRQTX025715
RQTX0257ESPAÑOL1630
31ESPAÑOLRQTX025717
EU<strong>Panasonic</strong> CorporationWeb Site: http://panasonic.netEnSpRQTX0257-2BH0309VC2049


