MILLER DURAHOIST The - Honeywell Safety Products
MILLER DURAHOIST The - Honeywell Safety Products
MILLER DURAHOIST The - Honeywell Safety Products

You also want an ePaper? Increase the reach of your titles
YUMPU automatically turns print PDFs into web optimized ePapers that Google loves.
6.0 Installation of Other Bases<br />
6.1 Temporary Bases<br />
USER INSTRUCTIONS - ENGLISH<br />
Minimum Mounting Requirements:<br />
Excessive wall taper can cause the retaining screws to slip. Each installation must be certifi ed by the installing engineer.<br />
Wall in excess of 1° from vertical on either wall must be modifi ed to meet this specification.<br />
<strong>The</strong> structure in the area of the clamp must withstand a 90,000in.-lbs. (10,000N.m) moment without deformation. Each<br />
installation must be certifi ed by the installing engineer.<br />
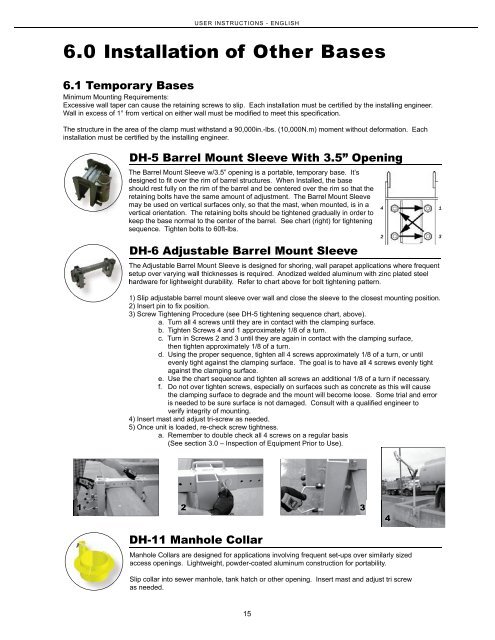
DH-5 Barrel Mount Sleeve With 3.5” Opening<br />
<strong>The</strong> Barrel Mount Sleeve w/3.5” opening is a portable, temporary base. It’s<br />
designed to fi t over the rim of barrel structures. When Installed, the base<br />
should rest fully on the rim of the barrel and be centered over the rim so that the<br />
retaining bolts have the same amount of adjustment. <strong>The</strong> Barrel Mount Sleeve<br />
may be used on vertical surfaces only, so that the mast, when mounted, is in a<br />
vertical orientation. <strong>The</strong> retaining bolts should be tightened gradually in order to<br />
keep the base normal to the center of the barrel. See chart (right) for tightening<br />
sequence. Tighten bolts to 60ft-lbs.<br />
DH-6 Adjustable Barrel Mount Sleeve<br />
<strong>The</strong> Adjustable Barrel Mount Sleeve is designed for shoring, wall parapet applications where frequent<br />
setup over varying wall thicknesses is required. Anodized welded aluminum with zinc plated steel<br />
hardware for lightweight durability. Refer to chart above for bolt tightening pattern.<br />
1) Slip adjustable barrel mount sleeve over wall and close the sleeve to the closest mounting position.<br />
2) Insert pin to fix position.<br />
3) Screw Tightening Procedure (see DH-5 tightening sequence chart, above).<br />
a. Turn all 4 screws until they are in contact with the clamping surface.<br />
b. Tighten Screws 4 and 1 approximately 1/8 of a turn.<br />
c. Turn in Screws 2 and 3 until they are again in contact with the clamping surface,<br />
then tighten approximately 1/8 of a turn.<br />
d. Using the proper sequence, tighten all 4 screws approximately 1/8 of a turn, or until<br />
evenly tight against the clamping surface. <strong>The</strong> goal is to have all 4 screws evenly tight<br />
against the clamping surface.<br />
e. Use the chart sequence and tighten all screws an additional 1/8 of a turn if necessary.<br />
f. Do not over tighten screws, especially on surfaces such as concrete as this will cause<br />
the clamping surface to degrade and the mount will become loose. Some trial and error<br />
is needed to be sure surface is not damaged. Consult with a qualifi ed engineer to<br />
verify integrity of mounting.<br />
4) Insert mast and adjust tri-screw as needed.<br />
5) Once unit is loaded, re-check screw tightness.<br />
a. Remember to double check all 4 screws on a regular basis<br />
(See section 3.0 – Inspection of Equipment Prior to Use).<br />
4<br />
2<br />
1<br />
3<br />
1<br />
2 3<br />
4<br />
DH-11 Manhole Collar<br />
Manhole Collars are designed for applications involving frequent set-ups over similarly sized<br />
access openings. Lightweight, powder-coated aluminum construction for portability.<br />
Slip collar into sewer manhole, tank hatch or other opening. Insert mast and adjust tri screw<br />
as needed.<br />
15