Samsung Multifunzione b/n MultiXpress SL-K7400GX (A3) (40 ppm) - User Manual_36.16 MB, pdf, ENGLISH
Samsung Multifunzione b/n MultiXpress SL-K7400GX (A3) (40 ppm) - User Manual_36.16 MB, pdf, ENGLISH
Samsung Multifunzione b/n MultiXpress SL-K7400GX (A3) (40 ppm) - User Manual_36.16 MB, pdf, ENGLISH
You also want an ePaper? Increase the reach of your titles
YUMPU automatically turns print PDFs into web optimized ePapers that Google loves.
Using the NFC feature (Optional)<br />
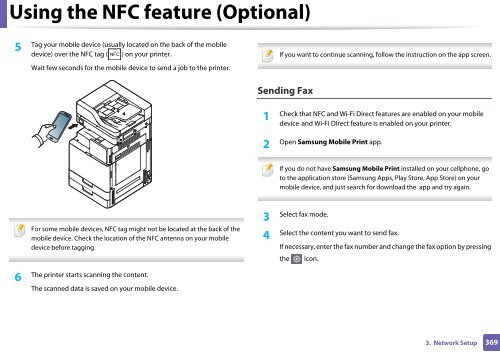
Tag your mobile device (usually located on the back of the mobile<br />
5<br />
device) over the NFC tag ( ) on your printer.<br />
Wait few seconds for the mobile device to send a job to the printer.<br />
If you want to continue scanning, follow the instruction on the app screen.<br />
Sending Fax<br />
1<br />
Check that NFC and Wi-Fi Direct features are enabled on your mobile<br />
device and Wi-Fi Direct feature is enabled on your printer.<br />
2<br />
Open <strong>Samsung</strong> Mobile Print app.<br />
If you do not have <strong>Samsung</strong> Mobile Print installed on your cellphone, go<br />
to the application store (<strong>Samsung</strong> Apps, Play Store, App Store) on your<br />
mobile device, and just search for download the app and try again.<br />
For some mobile devices, NFC tag might not be located at the back of the<br />
mobile device. Check the location of the NFC antenna on your mobile<br />
device before tagging.<br />
Select fax mode.<br />
3<br />
Select the content you want to send fax.<br />
4<br />
If necessary, enter the fax number and change the fax option by pressing<br />
the<br />
icon.<br />
6<br />
The printer starts scanning the content.<br />
The scanned data is saved on your mobile device.<br />
3. Network Setup<br />
369


